新时尚Windows8开发(20):FlipView控件
FlipView控件和我们常见到的ListView、ListBox控件很像,今天拿它来吹一吹,是因为这个控件还挺新鲜的。
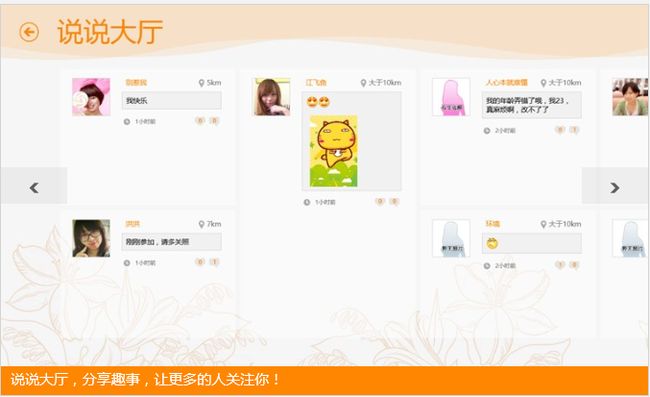
要说用文字来介绍这个控件,还真不够生动也欠缺活泼,不过,其实这个控件咱们还是见得不少的,如果你经常到应用商店下载应用的话,你肯定见过。就是这个:
就是这玩意儿,左右各有一个按钮用来导航视图,每次只能查看一个视图,比较适合用于图片浏览。
废话少说,我们来做两个实例,第一个是手动添加项,第二个是数据绑定的。
好的,先做第一个,很简单,我们在FlipView中放三个项,每个项的内容就是一个Image,看看下面的XAML就会明白了。
    <Grid Background="{StaticResource ApplicationPageBackgroundThemeBrush}">
        <FlipView Margin="300,150">
            <FlipViewItem>
                <Image
                    Stretch="Uniform"
                    Source="http://pica.nipic.com/2008-01-17/2008117205617816_2.jpg"/>
            </FlipViewItem>
            <FlipViewItem>
                <Image
                    Stretch="Uniform"
                    Source="http://pic4.nipic.com/20090914/1593169_000535237178_2.jpg"/>
            </FlipViewItem>
            <FlipViewItem>
                <Image
                    Stretch="Uniform"
                    Source="http://www.zwtuu.com.cn/upload/2008_10/08102721166304.jpg"/>
            </FlipViewItem>
        </FlipView>
    </Grid>
然后,我们运行一下。
好的,现在来看看第二个例子,数据绑定的。
既然要数据绑定了,肯定要数据源的了。因此,我们先伪造一些数据,注意,这数据是伪造的,如有雷同,纯属自然造化。
    public class Student
    {
        public string Name { get; set; }
        public int Age { get; set; }
        public string Sex { get; set; }
        public string Email { get; set; }
        public string Remark { get; set; }
    }

    public class TestDataSource : System.Collections.ObjectModel.ObservableCollection<Student>
    {
        public TestDataSource()
        {

            this.Add(new Student
            {
                Name = "小赵",
                Age = 20,
                Sex = "男",
                Email = "[email protected]",
                Remark = "此人人品低下,经常在公共场所撒尿。"
            });

            this.Add(new Student
            {
                Name = "小王",
                Age = 18,
                Email = "[email protected]",
                Sex = "女",
                Remark = "胆大心细脸皮厚。"
            });

            this.Add(new Student
            {
                Name = "小刘",
                Age = 21,
                Email = "[email protected]",
                Sex = "男",
                Remark = "这厮是牛人啊。"
            });
        }
    }
然后,在XAML中进行绑定UI。
<Page
    x:Class="FlipViewExample2.MainPage"
    xmlns="http://schemas.microsoft.com/winfx/2006/xaml/presentation"
    xmlns:x="http://schemas.microsoft.com/winfx/2006/xaml"
    xmlns:local="using:FlipViewExample2"
    xmlns:d="http://schemas.microsoft.com/expression/blend/2008"
    xmlns:mc="http://schemas.openxmlformats.org/markup-compatibility/2006"
    mc:Ignorable="d">

    <Page.Resources>
        <Style x:Key="t1" TargetType="TextBlock">
            <Setter Property="FontSize" Value="20"/>
            <Setter Property="FontWeight" Value="Bold"/>
            <Setter Property="VerticalAlignment" Value="Top"/>
            <Setter Property="Margin" Value="3,2,6,2"/>
        </Style>
        <Style x:Key="t2" TargetType="TextBlock">
            <Setter Property="FontSize" Value="19"/>
            <Setter Property="Margin" Value="3.2,2,3,2"/>
            <Setter Property="TextWrapping" Value="Wrap"/>
        </Style>
        <Style x:Key="jlipviewItemStyle" TargetType="FlipViewItem">
            <Setter Property="HorizontalContentAlignment" Value="Center"/>
            <Setter Property="VerticalContentAlignment" Value="Center"/>
        </Style>
    </Page.Resources>

    <Grid Background="{StaticResource ApplicationPageBackgroundThemeBrush}">
        <FlipView x:Name="fv" Width="500" Height="150" VerticalAlignment="Center" HorizontalAlignment="Center" ItemContainerStyle="{StaticResource jlipviewItemStyle}">
            <FlipView.ItemTemplate>
                <DataTemplate>
                    <Grid>
                        <Grid.ColumnDefinitions>
                            <ColumnDefinition Width="auto"/>
                            <ColumnDefinition Width="*"/>
                        </Grid.ColumnDefinitions>
                        <Grid.RowDefinitions>
                            <RowDefinition Height="auto"/>
                            <RowDefinition Height="auto"/>
                            <RowDefinition Height="auto"/>
                            <RowDefinition Height="auto"/>
                            <RowDefinition Height="auto"/>
                        </Grid.RowDefinitions>
                        <TextBlock Style="{StaticResource t1}" Grid.Column="0" Grid.Row="0" Text="姓名:"/>
                        <TextBlock Style="{StaticResource t2}" Grid.Column="1" Grid.Row="0" Text="{Binding Name}"/>
                        <TextBlock Style="{StaticResource t1}" Grid.Column="0" Grid.Row="1" Text="年龄:"/>
                        <TextBlock Style="{StaticResource t2}" Grid.Column="1" Grid.Row="1" Text="{Binding Age}"/>
                        <TextBlock Style="{StaticResource t1}" Grid.Column="0" Grid.Row="2" Text="性别:"/>
                        <TextBlock Style="{StaticResource t2}" Grid.Column="1" Grid.Row="2" Text="{Binding Sex}"/>
                        <TextBlock Style="{StaticResource t1}" Grid.Column="0" Grid.Row="3" Text="电邮:"/>
                        <TextBlock Style="{StaticResource t2}" Grid.Column="1" Grid.Row="3" Text="{Binding Email}"/>
                        <TextBlock Style="{StaticResource t1}" Grid.Column="0" Grid.Row="4" Text="备注:"/>
                        <TextBlock Style="{StaticResource t2}" Grid.Column="1" Grid.Row="4" Text="{Binding Remark}"/>
                    </Grid>
                </DataTemplate>
            </FlipView.ItemTemplate>
        </FlipView>
    </Grid>
</Page>
切换到代码视图,在MainPage类的构造函数中加入以下代码,设置FlipView的数据源。
        public MainPage()
        {
            this.InitializeComponent();
            TestDataSource source = new TestDataSource();
            this.fv.ItemsSource = source;
        }
如果一切正常,运行后,你应该能看到以下效果。


