iOS开发笔记--UITableView入门
TableView在iOS开发中使用频率很高
TableView就相当于Android中的ListView
今天简单分享一下如何实现简单的TableView
ok废话不多说
开打Xcode
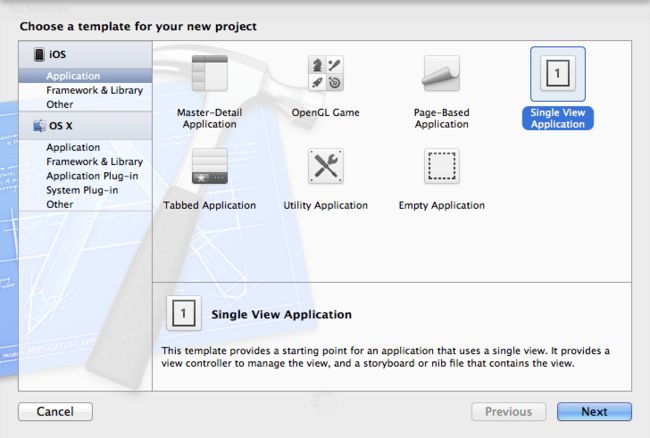
用Single View Application模版创建一个新项目
点击Next
输入一个项目名字 比如Table
接着Next 然后Create创建好项目
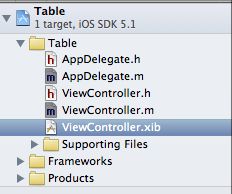
现在项目应该是这个样子
首先添加一个UITableView
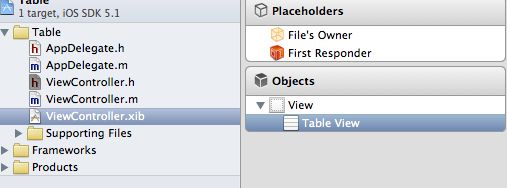
点击ViewController.xib文件
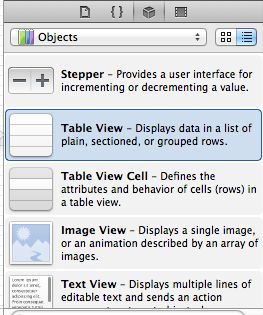
在右下角的控件列表里找到Table View
按住鼠标将其拖拽到View里头
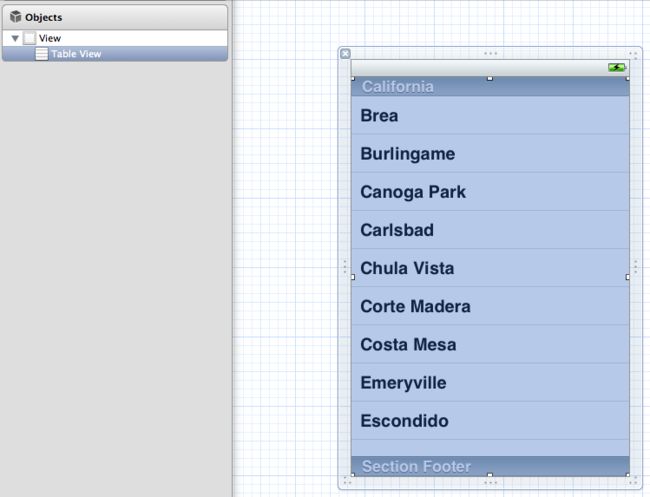
结果应该是这个样子
好 这个时候可以运行一下程序看看效果
按Command+R运行
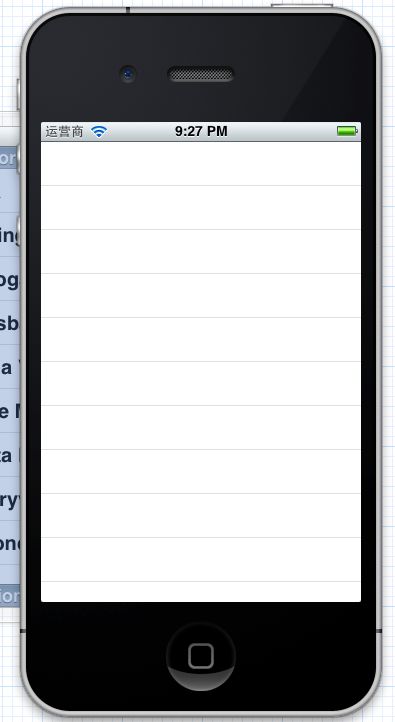
可以看到TableView了 但是是空白的
在Android中 要在Listview中显示数据就需要给Listview添加一个Adapter 可以理解为数据源
现在就给TableView添加数据源
在左边的项目面板中选择ViewController.h文件
修改代码 如图
在父类UIViewController后面加上TableView的两个委托
可以理解为Java中的借口 就是实现了两个接口
下一步
在左边的项目面板中选择ViewController.xib文件
并在右边确保选住了Table View
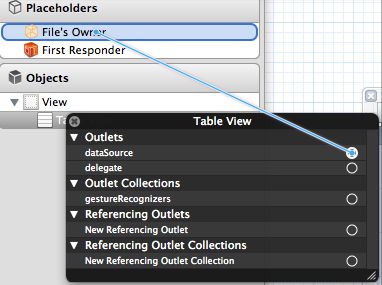
这个时候按住键盘上的control键 鼠标点击一下Table View
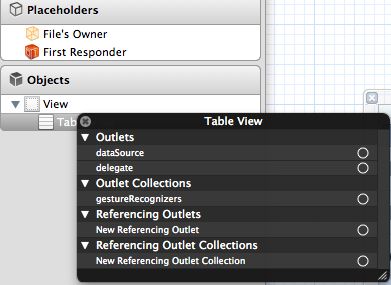
之后会弹出这个框
之后的操作很简单
如图
鼠标选到Outlets下的dataSource右边的圆圈里
圆圈里会出现一个加号
然后按住鼠标拖拽到上方的File's Owner 放开鼠标
这样就完成了 控件跟代码的绑定
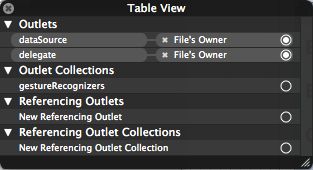
类似的 同样的操作把Outlets下的delegate也绑定上
最后效果应该是这个样子
接下来需要写代码了
在左边的项目面板中选择ViewController.m文件
修改代码 如下
//
//  ViewController.m
//  Table
//
//  Created by Green on 12-9-4.
//  Copyright (c) 2012年 Green. All rights reserved.
//

#import "ViewController.h"

#define IDENTIFIER @"identifier"

@interface ViewController ()

@property (nonatomic) NSArray *dataList;

@end

@implementation ViewController

@synthesize dataList;

- (id)initWithNibName:(NSString *)nibNameOrNil bundle:(NSBundle *)nibBundleOrNil {
    self = [super initWithNibName:nibNameOrNil bundle:nibBundleOrNil];

    return self;
}

#pragma mark - View Life Circle

- (void)viewDidLoad {
    [super viewDidLoad];

    [self setDataList:[[NSArray alloc] initWithObjects:@"line1", @"line2", @"line3", nil]];
}

- (void)viewDidUnload {
    [super viewDidUnload];
}

- (BOOL)shouldAutorotateToInterfaceOrientation:(UIInterfaceOrientation)interfaceOrientation {
    return (interfaceOrientation != UIInterfaceOrientationPortraitUpsideDown);
}

#pragma mark - Table View

- (NSInteger)numberOfSectionsInTableView:(UITableView *)tableView {
    return 1;
}

- (NSInteger)tableView:(UITableView *)tableView numberOfRowsInSection:(NSInteger)section {
    if (dataList) {
        return dataList.count;
    }

    return 0;
}

- (UITableViewCell *)tableView:(UITableView *)tableView cellForRowAtIndexPath:(NSIndexPath *)indexPath {
    UITableViewCell *cell = [tableView dequeueReusableCellWithIdentifier:IDENTIFIER];

    if (!cell) {
        cell = [[UITableViewCell alloc] initWithStyle:UITableViewCellStyleDefault reuseIdentifier:IDENTIFIER];
    }

    [cell.textLabel setText:[dataList objectAtIndex:indexPath.row]];

    return cell;
}

@end
现在解释一下 TableView的委托方法
- (NSInteger)numberOfSectionsInTableView:(UITableView *)tableView {
    return 1;
}
这个方法返回的就是TableView中数据的组数
只有1组 所以返回1
- (NSInteger)tableView:(UITableView *)tableView numberOfRowsInSection:(NSInteger)section {
    if (dataList) {
        return dataList.count;
    }

    return 0;
}
这个方法返回的是特定组中数据的条数 因为只有1组 可以不用考虑组数
这里用了一个dataList来储存数据
所以返回dataList的count
- (UITableViewCell *)tableView:(UITableView *)tableView cellForRowAtIndexPath:(NSIndexPath *)indexPath {
    UITableViewCell *cell = [tableView dequeueReusableCellWithIdentifier:IDENTIFIER];

    if (!cell) {
        cell = [[UITableViewCell alloc] initWithStyle:UITableViewCellStyleDefault reuseIdentifier:IDENTIFIER];
    }

    [cell.textLabel setText:[dataList objectAtIndex:indexPath.row]];

    return cell;
}
这个方法 就类似Android中BaseAdapter的getView方法
返回的是TableView中给个条目的View
也就是UITableViewCell
UITableViewCell *cell = [tableView dequeueReusableCellWithIdentifier:IDENTIFIER];
为了节省内存开销
TableView有个TableViewCell复用的机制
根据IDENTIFIER来取回一个复用的TableViewCell
if (!cell) {
        cell = [[UITableViewCell alloc] initWithStyle:UITableViewCellStyleDefault reuseIdentifier:IDENTIFIER];
    }
如果没有就new一个
[cell.textLabel setText:[dataList objectAtIndex:indexPath.row]];然后把cell的文字设置成dataList中的数据
好
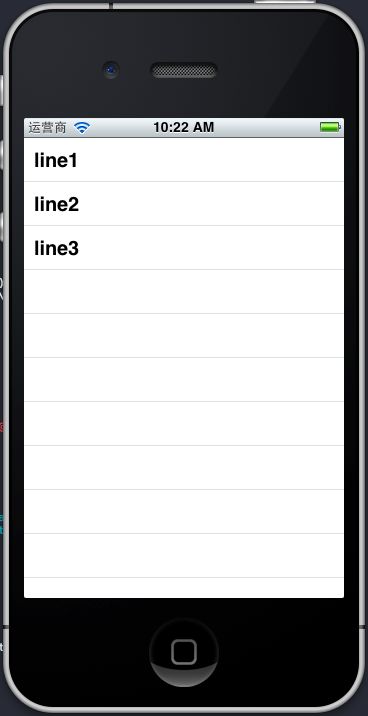
运行程序就可以看到效果了
这个时候TableView里有数据了
今天的分享就到这里
