Cocos2d中CCScrollView和CCTableView使用
在游戏和应用中经常要实现左右滑动展示游戏帮助、以列表显示内容的UI效果,就像android中的Gallery和ListView。本文通过CCScrollView和CCTableView分别来实现这两个效果,基于cocos2d-x 2.0.4版本。
首先来简单了解一下这两个东东,CCScrollView本身是一个CCLayer,而CCTableView是CCScrollView的子类,这是引擎已经帮我们封装好了的,CCTableView可以设置成横向和纵向,用它可以实现类似于Gallery和ListView的效果。
1. 首先实现游戏帮助界面
(1) 创建头文件GalleryLayer.h
|
1
2
3
4
5
6
7
8
9
10
11
12
13
14
15
16
17
18
19
20
21
22
23
24
25
26
27
28
29
30
31
32
33
34
35
36
37
38
39
40
41
42
|
#ifndef GALLERY_LAYER_H
#define GALLERY_LAYER_H
#include "cocos2d.h"
#include "SimpleAudioEngine.h"
#include "cocos-ext.h"
USING_NS_CC;
USING_NS_CC_EXT;
class
GalleryLayer :
public
cocos2d::CCLayer ,
public
CCScrollViewDelegate
{
public
:
virtual
bool
init();
void
menuCloseCallback(CCObject* pSender);
CREATE_FUNC(GalleryLayer);
public
:
//scrollview滚动的时候会调用
void
scrollViewDidScroll(CCScrollView* view);
//scrollview缩放的时候会调用
void
scrollViewDidZoom(CCScrollView* view);
virtual
void
onEnter();
virtual
void
onExit();
virtual
bool
ccTouchBegan(CCTouch *pTouch, CCEvent *pEvent);
virtual
void
ccTouchMoved(CCTouch *pTouch, CCEvent *pEvent);
virtual
void
ccTouchEnded(CCTouch *pTouch, CCEvent *pEvent);
virtual
void
ccTouchCancelled(CCTouch *pTouch, CCEvent *pEvent);
private
:
//根据手势滑动的距离和方向滚动图层
void
adjustScrollView(
float
offset);
CCScrollView *m_pScrollView;
CCPoint m_touchPoint;
int
m_nCurPage;
};
#endif
|
类GalleryLayer继承了CCScrollViewDelegate,实现了它的两个纯虚函数,主要是为了当scrollview滚动和缩放时回调这两函数,这样我们就可以在这两函数中做相关操作了。
(2) 看源文件GalleryLayer.cpp
|
1
2
3
4
5
6
7
8
9
10
11
12
13
14
15
16
17
18
19
20
21
22
23
24
25
26
27
28
29
30
31
32
33
34
35
36
37
38
39
40
41
42
43
44
45
46
47
48
49
50
51
52
53
54
55
56
57
58
59
60
61
62
63
64
65
66
67
68
69
70
71
72
73
74
75
76
77
78
79
80
81
82
83
84
85
86
87
88
89
90
91
92
93
94
95
96
97
98
99
100
101
102
103
104
105
106
107
108
109
110
111
112
113
114
115
116
117
118
119
120
121
122
123
124
125
126
127
128
129
130
131
132
133
134
135
136
137
138
139
140
141
142
143
144
145
146
147
148
149
150
151
152
|
#include "GalleryLayer.h"
#include "ListViewLayer.h"
using
namespace
cocos2d;
using
namespace
cocos2d::extension;
bool
GalleryLayer::init()
{
bool
bRet =
false
;
do
{
CC_BREAK_IF( !CCLayer::init() );
m_nCurPage = 1;
CCSize visibleSize = CCDirector::sharedDirector()->getVisibleSize();
CCPoint origin = CCDirector::sharedDirector()->getVisibleOrigin();
CCLayer *pLayer = CCLayer::create();
char
helpstr[30] = {0};
for
(
int
i = 1; i <= 3; ++ i)
{
memset
(helpstr, 0,
sizeof
(helpstr));
sprintf
(helpstr,
"bg_%02d.png"
,i);
CCSprite *pSprite = CCSprite::create(helpstr);
pSprite->setPosition(ccp(visibleSize.width * (i-0.5f), visibleSize.height / 2));
pLayer->addChild(pSprite);
}
m_pScrollView = CCScrollView::create(CCSizeMake(960, 640), pLayer);
m_pScrollView->setContentOffset(CCPointZero);
m_pScrollView->setTouchEnabled(
false
);
m_pScrollView->setDelegate(
this
);
m_pScrollView->setDirection(kCCScrollViewDirectionHorizontal);
pLayer->setContentSize(CCSizeMake(960*3, 640));
this
->addChild(m_pScrollView);
CCSpriteFrameCache *pCache = CCSpriteFrameCache::sharedSpriteFrameCache();
pCache->addSpriteFrame(CCSpriteFrame::create(
"button_normal.png"
,CCRectMake(0, 0, 64, 64)),
"button_normal.png"
);
pCache->addSpriteFrame(CCSpriteFrame::create(
"button_selected.png"
,CCRectMake(0, 0, 64, 64)),
"button_selected.png"
);
for
(
int
i = 1; i <= 3; ++ i)
{
CCSprite *pPoint = CCSprite::createWithSpriteFrameName(
"button_normal.png"
);
pPoint->setTag(i);
pPoint->setPosition(ccp( origin.x + (visibleSize.width - 3 * pPoint->getContentSize().width)/2 + pPoint->getContentSize().width * (i-1), origin.y + 30));
this
->addChild(pPoint);
}
CCSprite *pPoint = (CCSprite *)
this
->getChildByTag(1);
pPoint->setDisplayFrame(pCache->spriteFrameByName(
"button_selected.png"
));
bRet =
true
;
}
while
(0);
return
bRet;
}
void
GalleryLayer::menuCloseCallback(CCObject* pSender)
{
}
void
GalleryLayer::scrollViewDidScroll(cocos2d::extension::CCScrollView *view)
{
CCLOG(
"scroll"
);
}
void
GalleryLayer::scrollViewDidZoom(cocos2d::extension::CCScrollView *view)
{
CCLOG(
"zoom"
);
}
void
GalleryLayer::onEnter()
{
CCLayer::onEnter();
CCDirector::sharedDirector()->getTouchDispatcher()->addTargetedDelegate(
this
, 1,
false
);
}
void
GalleryLayer::onExit()
{
CCDirector::sharedDirector()->getTouchDispatcher()->removeDelegate(
this
);
CCLayer::onExit();
CCSpriteFrameCache::sharedSpriteFrameCache()->removeUnusedSpriteFrames();
}
bool
GalleryLayer::ccTouchBegan(CCTouch *pTouch, CCEvent *pEvent)
{
m_touchPoint = CCDirector::sharedDirector()->convertToGL(pTouch->getLocationInView());
return
true
;
}
void
GalleryLayer::ccTouchMoved(CCTouch *pTouch, CCEvent *pEvent)
{
}
void
GalleryLayer::ccTouchEnded(CCTouch *pTouch, CCEvent *pEvent)
{
CCPoint endPoint = CCDirector::sharedDirector()->convertToGL(pTouch->getLocationInView());
float
distance = endPoint.x - m_touchPoint.x;
if
(
fabs
(distance) > 50)
{
adjustScrollView(distance);
}
}
void
GalleryLayer::ccTouchCancelled(cocos2d::CCTouch *pTouch, cocos2d::CCEvent *pEvent)
{
CCPoint endPoint = CCDirector::sharedDirector()->convertToGL(pTouch->getLocationInView());
float
distance = endPoint.x - m_touchPoint.x;
if
(
fabs
(distance) > 50)
{
adjustScrollView(distance);
}
}
void
GalleryLayer::adjustScrollView(
float
offset)
{
CCSize visibleSize = CCDirector::sharedDirector()->getVisibleSize();
CCPoint origin = CCDirector::sharedDirector()->getVisibleOrigin();
CCSpriteFrameCache *pCache = CCSpriteFrameCache::sharedSpriteFrameCache();
CCSprite *pPoint = (CCSprite *)
this
->getChildByTag(m_nCurPage);
pPoint->setDisplayFrame(pCache->spriteFrameByName(
"button_normal.png"
));
if
(offset<0)
{
m_nCurPage ++;
}
else
{
m_nCurPage --;
}
if
(m_nCurPage <1)
{
m_nCurPage = 1;
}
if
(m_nCurPage > 3)
{
CCLayer *pLayer = ListViewLayer::create();
CCScene *pScene = CCScene::create();
pScene->addChild(pLayer);
CCDirector::sharedDirector()->replaceScene(pScene);
}
else
{
pPoint = (CCSprite *)
this
->getChildByTag(m_nCurPage);
pPoint->setDisplayFrame(pCache->spriteFrameByName(
"button_selected.png"
));
CCPoint adjustPos = ccp(origin.x - visibleSize.width * (m_nCurPage-1), 0);
m_pScrollView->setContentOffset(adjustPos,
true
);
}
}
|
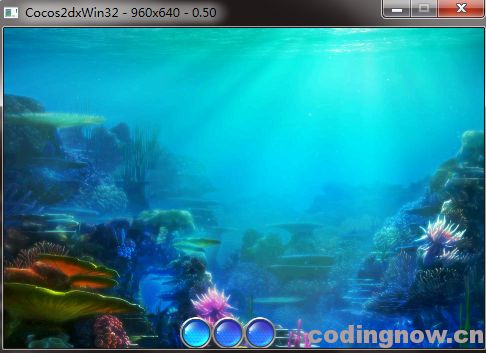
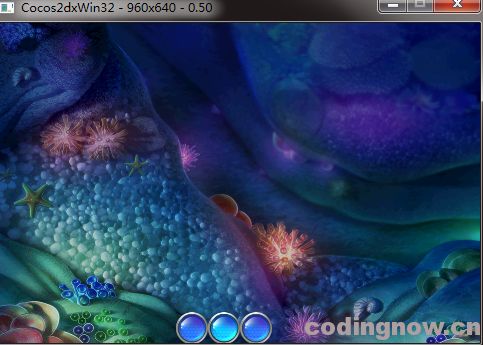
这里一共有三张图,是从捕鱼达人中拿出来的背景图,当滚完三张图时就跳转到ListViewLayer场景去,上面的代码比较容易懂。
首先创建一个CCLayer,包含三张背景图,设置CCLayer的ContentSize,并设置三张图片的位置
然后设置CCLayer为CCScrollview的内容,并设置CCScrollView的显示区域。
最后根据用户滑动的方向和距离,通过设置scrollview的setContentOffset,滚动视图。
CCScrollview.h文件中封装了一个枚举类型,一共有四个方向,常用横向和纵向,这里使用了横向。
|
1
2
3
4
5
6
|
typedef
enum
{
kCCScrollViewDirectionNone = -1,
kCCScrollViewDirectionHorizontal = 0,
kCCScrollViewDirectionVertical,
kCCScrollViewDirectionBoth
} CCScrollViewDirection;
|
2. 现在来实现列表展示(ListView)的效果
(1)创建ListViewLayer.h
|
1
2
3
4
5
6
7
8
9
10
11
12
13
14
15
16
17
18
19
20
21
22
23
24
25
26
27
28
|
#ifndef LISTVIEW_LAYER_H
#define LISTVIEW_LAYER_H
#include "cocos2d.h"
#include "cocos-ext.h"
class
ListViewLayer :
public
cocos2d::CCLayer,
public
cocos2d::extension::CCTableViewDataSource,
public
cocos2d::extension::CCTableViewDelegate
{
public
:
virtual
bool
init();
virtual
void
scrollViewDidScroll(cocos2d::extension::CCScrollView* view);
virtual
void
scrollViewDidZoom(cocos2d::extension::CCScrollView* view);
//处理触摸事件,可以计算点击的是哪一个子项
virtual
void
tableCellTouched(cocos2d::extension::CCTableView* table, cocos2d::extension::CCTableViewCell* cell);
//每一项的宽度和高度
virtual
cocos2d::CCSize cellSizeForTable(cocos2d::extension::CCTableView *table);
//生成列表每一项的内容
virtual
cocos2d::extension::CCTableViewCell* tableCellAtIndex(cocos2d::extension::CCTableView *table, unsigned
int
idx);
//一共多少项
virtual
unsigned
int
numberOfCellsInTableView(cocos2d::extension::CCTableView *table);
CREATE_FUNC(ListViewLayer);
};
#endif
|
ListViewLayer继承了CCTableViewDataSource和CCTableViewDelegate。这两个抽象类封装了几个有用的函数,我们在下面的源码中将实现它们。
(2)源文件 ListViewLayer.cpp
|
1
2
3
4
5
6
7
8
9
10
11
12
13
14
15
16
17
18
19
20
21
22
23
24
25
26
27
28
29
30
31
32
33
34
35
36
37
38
39
40
41
42
43
44
45
46
47
48
49
50
51
52
53
54
55
56
57
58
59
60
61
62
63
64
65
66
67
68
69
70
71
72
73
74
75
|
#include "ListViewLayer.h"
USING_NS_CC;
USING_NS_CC_EXT;
bool
ListViewLayer::init()
{
bool
bRet =
false
;
do
{
CC_BREAK_IF( !CCLayer::init() );
CCTableView* pTableView = CCTableView::create(
this
, CCSizeMake(960, 640));
pTableView->setDirection(kCCScrollViewDirectionVertical);
pTableView->setPosition(CCPointZero);
pTableView->setDelegate(
this
);
pTableView->setVerticalFillOrder(kCCTableViewFillTopDown);
this
->addChild(pTableView);
pTableView->reloadData();
bRet =
true
;
}
while
(0);
return
bRet;
}
void
ListViewLayer::tableCellTouched(CCTableView* table, CCTableViewCell* cell)
{
CCLog(
"cell touched at index: %i"
, cell->getIdx());
}
CCSize ListViewLayer::cellSizeForTable(CCTableView *table)
{
return
CCSizeMake(960, 120);
}
CCTableViewCell* ListViewLayer::tableCellAtIndex(CCTableView *table, unsigned
int
idx)
{
CCString *pString = CCString::createWithFormat(
"%d"
, idx);
CCTableViewCell *pCell = table->dequeueCell();
if
(!pCell) {
pCell =
new
CCTableViewCell();
pCell->autorelease();
CCSprite *pSprite = CCSprite::create(
"listitem.png"
);
pSprite->setAnchorPoint(CCPointZero);
pSprite->setPosition(CCPointZero);
pCell->addChild(pSprite);
CCLabelTTF *pLabel = CCLabelTTF::create(pString->getCString(),
"Arial"
, 20.0);
pLabel->setPosition(CCPointZero);
pLabel->setAnchorPoint(CCPointZero);
pLabel->setTag(123);
pCell->addChild(pLabel);
}
else
{
CCLabelTTF *pLabel = (CCLabelTTF*)pCell->getChildByTag(123);
pLabel->setString(pString->getCString());
}
return
pCell;
}
unsigned
int
ListViewLayer::numberOfCellsInTableView(CCTableView *table)
{
return
20;
}
void
ListViewLayer::scrollViewDidScroll(CCScrollView *view)
{
}
void
ListViewLayer::scrollViewDidZoom(CCScrollView *view)
{
}
|
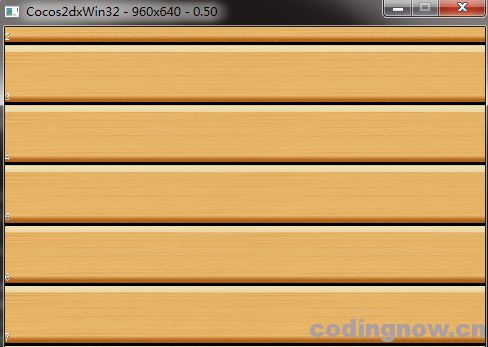
首先需要创建CCTableView,设置它的显示区域和显示方向,这里使用了纵向。设置每个子项的宽度和高度,子项的数量以及每个子项对应的内容。每个子项是一个CCTableViewCell,这里进行了优化,复用了子项对象。
下面是效果图:


