在做登录和注册页面的时候,经常会遇到诸如软键盘挡住输入框的情况,android为此提供了一系列的的配置参数供选择,你可以在androidmanufist.xml的对应Activity的windowSoftInputMode属性中选择如下4者之一进行配置(紫色字):
| int |
SOFT_INPUT_ADJUST_NOTHING |
Adjustment option for softInputMode: set to have a window not adjust for a shown input method. |
| int |
SOFT_INPUT_ADJUST_PAN |
Adjustment option for softInputMode: set to have a window pan when an input method is shown, so it doesn't need to deal with resizing but just panned by the framework to ensure the current input focus is visible. |
| int |
SOFT_INPUT_ADJUST_RESIZE |
Adjustment option for softInputMode: set to allow the window to be resized when an input method is shown, so that its contents are not covered by the input method. |
| int |
SOFT_INPUT_ADJUST_UNSPECIFIED |
Adjustment option for softInputMode: nothing specified. |
<activity android:name=".LoginAc"
android:label="@string/app_name"
android:windowSoftInputMode="stateHidden|adjustResize">
<intent-filter>
<action android:name="android.intent.action.MAIN" />
<category android:name="android.intent.category.LAUNCHER" />
</intent-filter>
</activity>
四个参数意思如下:
SOFT_INPUT_ADJUST_NOTHING: 不调整(输入法完全直接覆盖住,未开放此参数)
SOFT_INPUT_ADJUST_PAN: 把整个Layout顶上去露出获得焦点的EditText,不压缩多余空间,见图1
SOFT_INPUT_ADJUST_RESIZE: 整个Layout重新编排,重新分配多余空间,见图2
SOFT_INPUT_ADJUST_UNSPECIFIED: 系统自己根据内容自行选择上两种方式的一种执行(默认配置)
这里的多余空间指的是控件们通过weight分配机制得到的额外空间。
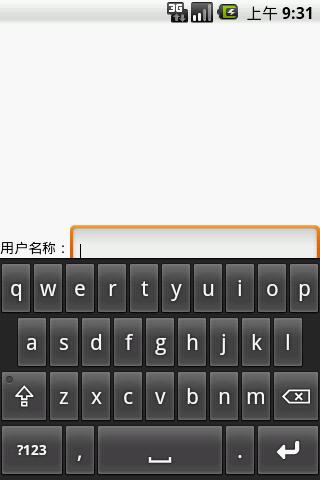
图1
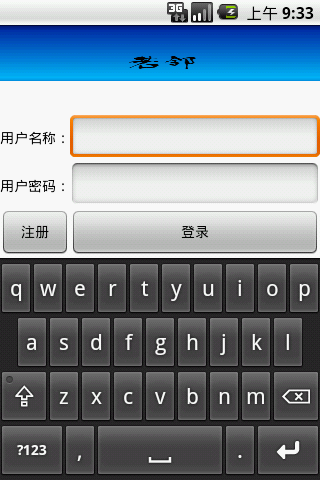
图2
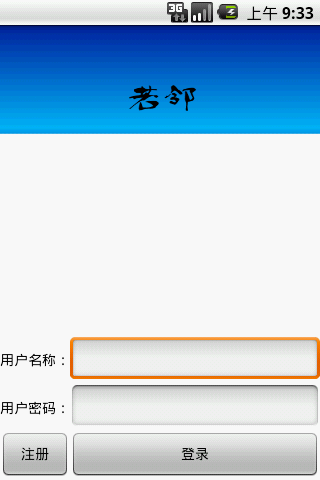
图3
代码实现方式为:
- getWindow().setSoftInputMode(WindowManager.LayoutParams.SOFT_INPUT_ADJUST_RESIZE);
但是,这样的配置方法一般都很难完全满足需要,有得应用会做得比较好,让顶上去的Layout能够通过scrollbar滚动。这种解决方法网上有各种介绍,本人也是第一时间从网上找解决方法参考,但最终发现都并未把原理说清,而且大多数有错误,或者有多余配置,于是,我从android系统中源码中找参考案例,在Email应用中,找到了我想要的。效果如图4,5。
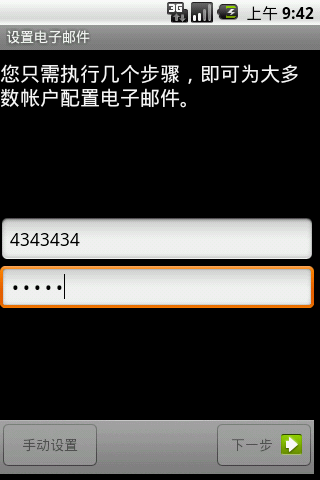
图4
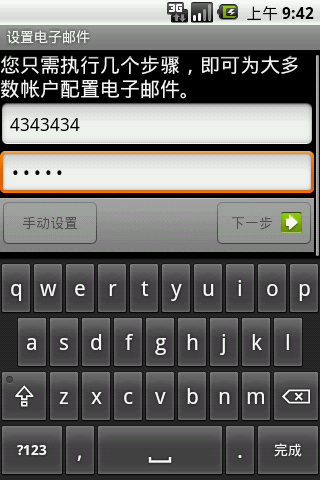
图5
其对应的Activity是AccountSetupBasics.java,对应的xml文件为account_setup_basics.xml。
来学习下它的xml写法:
- <?xml version="1.0" encoding="utf-8"?>
- <ScrollView xmlns:android="http://schemas.android.com/apk/res/android"
- android:layout_width="fill_parent"
- android:layout_height="fill_parent"
- android:fillViewport="true"
- android:scrollbarStyle="outsideInset" >
-
- <LinearLayout
- android:layout_width="fill_parent"
- android:layout_height="fill_parent"
- android:orientation="vertical" >
-
- <LinearLayout
- android:layout_width="fill_parent"
- android:layout_height="wrap_content"
- android:layout_weight="1"
- android:orientation="vertical" >
- <TextView
- android:id="@+id/instructions"
- android:layout_width="fill_parent"
- android:layout_height="wrap_content"
- android:layout_marginTop="10dip"
- android:textSize="20sp"
- android:text="@string/accounts_welcome"
- android:textColor="?android:attr/textColorPrimary" />
- <View
- android:layout_width="fill_parent"
- android:layout_height="0dip"
- android:layout_weight="1" />
- <EditText
- android:id="@+id/account_email"
- android:hint="@string/account_setup_basics_email_hint"
- android:inputType="textEmailAddress"
- android:imeOptions="actionNext"
- android:layout_height="wrap_content"
- android:layout_width="fill_parent" />
- <EditText
- android:id="@+id/account_password"
- android:hint="@string/account_setup_basics_password_hint"
- android:inputType="textPassword"
- android:imeOptions="actionDone"
- android:layout_height="wrap_content"
- android:layout_width="fill_parent"
- android:nextFocusDown="@+id/next" />
- <CheckBox
- android:id="@+id/account_default"
- android:layout_height="wrap_content"
- android:layout_width="fill_parent"
- android:text="@string/account_setup_basics_default_label"
- android:visibility="gone" />
- <View
- android:layout_width="fill_parent"
- android:layout_height="0dip"
- android:layout_weight="1" />
- </LinearLayout>
-
- <RelativeLayout
- android:layout_width="fill_parent"
- android:layout_height="54dip"
- android:background="@android:drawable/bottom_bar" >
- <Button
- android:id="@+id/manual_setup"
- android:text="@string/account_setup_basics_manual_setup_action"
- android:layout_height="wrap_content"
- android:layout_width="wrap_content"
- android:minWidth="@dimen/button_minWidth"
- android:layout_alignParentLeft="true"
- android:layout_centerVertical="true" />
- <Button
- android:id="@+id/next"
- android:text="@string/next_action"
- android:layout_height="wrap_content"
- android:layout_width="wrap_content"
- android:minWidth="@dimen/button_minWidth"
- android:drawableRight="@drawable/button_indicator_next"
- android:layout_alignParentRight="true"
- android:layout_centerVertical="true" />
- </RelativeLayout>
- </LinearLayout>
- </ScrollView>
1 它完全把ScrollView作为了一个根Layout,而不是网上好多文章写的在一个Linearlayout里面嵌入一个ScrollView(貌似这种是行不通的)。
然后把我们原来的根Layout搬入ScrollView(ScrollView只能有一个子控件),我查了下androidmanifist.xml和代码,未做任何以上2种方法的配置。
2 它定义了2个0dip的View帮助分配空间(设置其weight吃掉剩余空间,保证输入框处于界面中心位置),可以猜测出这里系统调用的是SOFT_INPUT_ADJUST_RESIZE参数,当所有有实际内容的控件空间总和超出特定范围时,ScrollView开始发挥作用。
如此,完美的解决我们遇到的问题。
另外,网上有人说想用SOFT_INPUT_ADJUST_RESIZE ,但又不希望背景图片被压缩,只要按如上方法把Linearlayout的背景图片设置好即可。


