Godaddy的asp空间可通过DPW发布MS SQL数据库
之前关注的焦点一直是Godaddy的空间、流量、国内访问速度、售后问题,这几个看起来都还不错,而忽略了MS SQL数据库导入问题。我通过后台建立了一个MS SQL数据库,但发现不能通过远程控制进行发布,也不能通过备份bak的方式直接恢复。必须转成csv才能导入数据库。非常麻烦,而且操作起来成功的几率 也小。最后考虑是不是可以通过在其他服务商那里购买MS SQL数据库然后,网页存放在Godaddy空间,进行远程连接。答案是否定的。Godaddy不允许去连接外部的MS SQL数据库。这下可头大了。
网上搜寻了很多信息,最后得到了比较好的解决方案。Publishing a Database Using the Database Publishing Wizard ,通过微软的Database Publishing Wizard进行MS SQL数据库发布。
想到成功发布数据库,请先准备好以下工具:
1、Microsoft .NET Framework Version 2.0
2、Microsoft Core XML Services (MSXML) 6.0
3、Microsoft SQL Server Native Client
4、Microsoft SQL Server 2005 Management Objects Collection
5、Microsoft SQL Server Database Publishing Wizard 1.1
别犹豫了,这些软件少了一个都不行,全装上。注意顺序,最好按照上面1、2、3、4、5顺序来安装。
再接下来就在DPW进行数据库发布了,您可以看这里的英文原版操作步骤,也可以按照以下中文步骤进行操作。
用DPW发布您的数据库
- 打开DPW客户端. 如果出现欢迎界面, 勾选“下次进入不再显示”框.
- 点击 下一步.
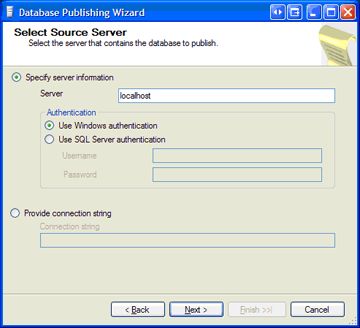
- 在选择源服务器界面中, 输入您的本地SQL server的连接信息.
- 完成连接信息, 点 下一步. 进入选择数据库, 这里会显示你本地的数据库文件。
注意: 如果你没有看到你要发布的数据库,就返回到选择源服务器页面,然后不要更改连接信息再回到这页面。如果这一步不行,请联系服务器所有者寻求帮助.
- 选择你要发布的数据库.如果你的数据库包含禁止的对象,例如 full text catalogs 和 assemblies, 或者你不想发布所有对象, 就不要勾选Script all objects in the selected database.
- 点 下一步.
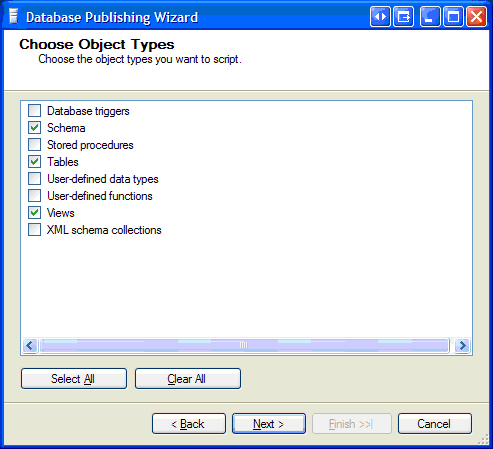
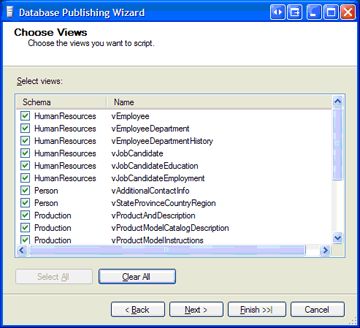
- 如果你没有发布所有对象, 就会出现请选择对象类型.
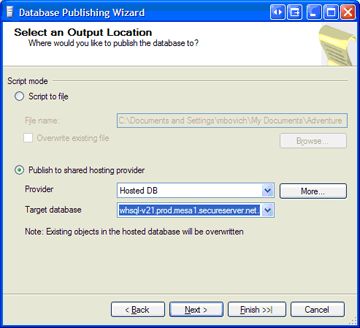
- 显示 选择输出位置 页面 (翻译太费劲,下面的大家就自己摸索着翻译下吧)
- Select the Publish to Shared hosting provider option. Select the appropriate Provider and Target Database from the drop down lists.
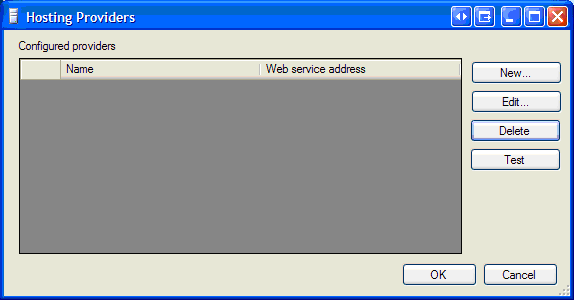
- If you have not yet configured a connection or need to make a new connection, press More. The Hosting Providers dialog displays.
If You Have Not Configured a Connection
- Press New. The Provider Configuration dialog displays.
- Enter the following values:
- Name:
- Enter any name to represent the connection to the hosted service. You will enter names for specific databases later.
- Web Service Address:
-
Enter the URL for the publishing service. The URL can be found in the database information section of your hosting control panel.
Note: The service requires a secure (HTTPS) connection to protect data. If you attempt to connect using a non-secure connection, the connection will fail and you will be prompted to use a secure connection.
- User name:
- Enter your FTP account user name.
- Password:
-
Enter your FTP account password.
Note: Checking “Save Password” causes the application to store your password locally. If this is a public or shared machine, this may not be a secure choice.
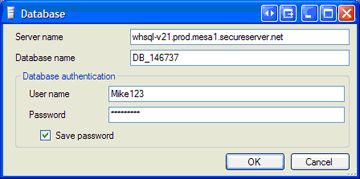
- To enter a database, press New. This displays the Database dialog.
- Enter the appropriate configuration values. The configuration values can be found in the database information section of your hosting control panel.
- Server Name:
- Enter the full path to the database server.
- Database Name:
-
Enter the name of your hosted database.
Note: The database must be owned by the FTP account entered in the provider configuration. If you have multiple hosting accounts, be sure to use the correct credentials when configuring the Publishing Wizard.
- User Name:
- Enter your database user name. This is the same user name used to access the SQL Web Manager.
- Password:
-
Enter your database password. This is the same password used to access your SQL Web Manager.
Note: Checking Save Password causes the application to store your password locally. If this is a public or shared machine, this may not be a secure choice.
- Click OK to complete the database set-up. Repeat this step for each database you want to configure. If you have multiple databases owned by a single hosting account, they can all be entered under a single hosting provider entry.
- When you have completed entering databases, click OK on the Provider Configuration dialog to return to the Hosting Providers list. You can test your connection settings by pressing Test. This feature validates the connection to the web service but does not test connectivity to the database itself.
- Click OK to return to the Select an Output Location dialog. If the appropriate provider and database are not selected, select them in the drop down lists.
- Click Next to advance to the Select Publishing Options screen. Before this page is displayed, the service validates the configuration settings by connecting to the publishing service and the target database. If a connection cannot be established, an error message displays and the application remains on the Select an Output Location screen.
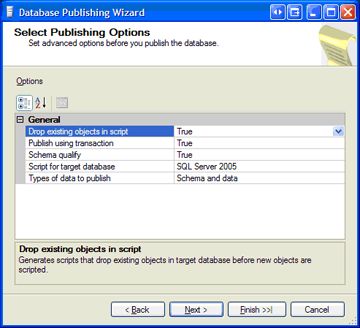
- The Select Publishing Options page is pre-populated with the appropriate default values. In most cases, these do not need to be modified.
- Drop existing objects in script:
-
If
True, the wizard checks if a published object exists in the database and, if found, drops the existing version before publishing.
Note: Any data contained within dropped objects will be lost.
-
If
False, the wizard does not drop existing objects before inserting or modifying their structure. If an object of the type and name specified already exists, the wizard proceeds directly to data insertion. If the object does not exist, it will be created.
Note: If the target database contains an object of the same name and type but with a different structure (for example, a table with a different number of columns), a publishing error may occur. Certain conditions may not report an error (for example, the database being published contains a table with fewer columns than the existing table). In such cases, the published database will not exactly match the local database.
- Publish using transaction:
- If True, the database is published as a single transaction. If an error occurs, all changes are rolled back.
- If False, published changes are committed as they are published. If an error occurs, the database may be left in a partially published state.
- Schema qualify:
- If True, objects are fully schema qualified in the script.
- If False, only the object name is used. It is recommended this option be True.
- Script for target database:
- Specifies the version of the target database. This must match the server version or publish will fail. The wizard sets this value to the correct version.
- Types of data to publish:
-
This section specifies what type of information to publish.
- Schema only publishes the structure of objects.
- Data only populates tables.
- Schema and data publishes the structure of objects and populates tables.
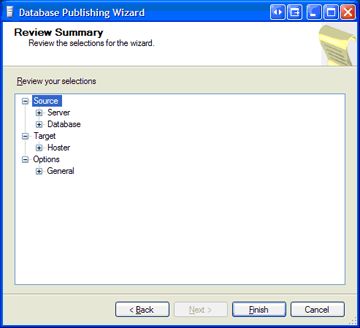
- Click Next to advance. This step brings up the Review Summary page, which displays the selected options and configuration. This is the last chance to review before publishing begins.
- Click Finish to begin publishing.
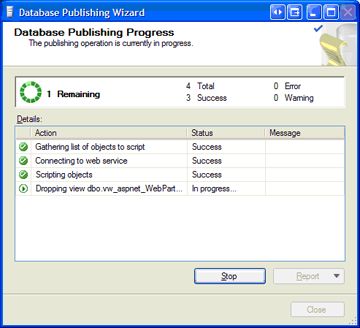
The Database Publishing Progress screen tracks the progress of the publish. Based on the options selected, the wizard displays some combination of the following steps:
- Gathering List of Objects to script:
- The wizard is communicating with your local SQL Server and determining what objects must be scripted, including any objects you selected and their dependencies.
- Connecting to web service:
- The Wizard is connecting to the web service and establishing a publishing session.
- Scripting objects:
- The Wizard is performing preliminary scripting of the objects to be published.
- Processing:
- The wizard is completing local scripting of an object and transmitting it to the Web service. The Web service is executing the script against your hosted database server. The status message updates based on the specific object being published at a given instance.
The amount of time to publish a database varies based on complexity of the database, number of objects, and the amount of data in tables. Most databases complete publishing in under 30 minutes.
It is possible to abort processing at any point by pressing Stop. If an error occurs, a red link to more details is provided in the Message column. If publishing is aborted or an error occurs, you can use Back to move back through the screens and modify settings.
If publishing succeeds, press Close to close the application. Your database is now transferred to the hosting server and ready for use.

