Android UI控件之Gallery --拖动、覆盖、循环、3D图片浏览 效果之一
Android中的Gallery控件是十分灵活的,使用它可以做出许多很炫的效果.接下来要实现的一
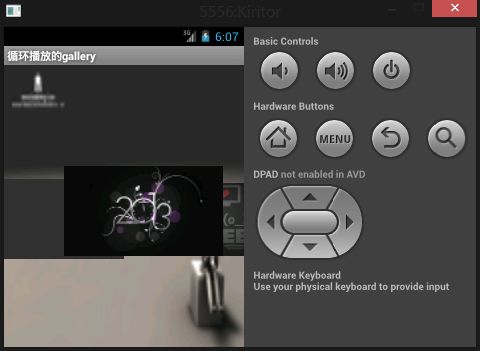
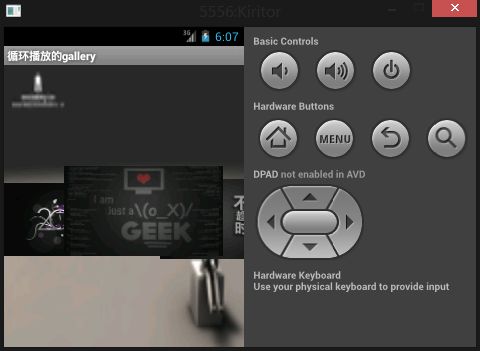
中效果在上一篇文章的基础上,实现了循环、覆盖、3D的效果。具体的情况如何?
老规矩先上效果图:
第一张
第二张
第三张
要实现该效果,首先需要自己重新继承一下Gallery
package com.kiritor;

import android.content.Context;
import android.graphics.Camera;
import android.graphics.Matrix;
import android.util.AttributeSet;
import android.util.Log;
import android.view.View;
import android.view.animation.Transformation;
import android.widget.Gallery;


public class CoverFlow extends Gallery {

	// mCamera是用来做�?D效果处理,比如Z轴方向上的平移,绕Y轴的旋转�?
	private Camera mCamera = new Camera();
	// mMaxRotationAngle是图片绕Y轴最大旋转角度,也就是屏幕最边上那两张图片的旋转角度
	private int mMaxRotationAngle = 50;
	// mMaxZoom是图片在Z轴平移的距离,z轴是面向桌面�?平移-200也就形成
	//在视觉上形成了放大缩小的效果�?
	private int mMaxZoom = -200;
	private int mCoveflowCenter;//保存视图的中�?
	private boolean mAlphaMode = true;//声明两种模式
	private boolean mCircleMode = true;

	public CoverFlow(Context context) {
		super(context);
		this.setStaticTransformationsEnabled(true);
	}

	public CoverFlow(Context context, AttributeSet attrs) {
		super(context, attrs);
		this.setStaticTransformationsEnabled(true);
	}

	public CoverFlow(Context context, AttributeSet attrs, int defStyle) {
		super(context, attrs, defStyle);
		this.setStaticTransformationsEnabled(true);
	}

	public int getMaxRotationAngle() {
		return mMaxRotationAngle;
	}

	public void setMaxRotationAngle(int maxRotationAngle) {
		mMaxRotationAngle = maxRotationAngle;
	}

	public boolean getCircleMode() {
		return mCircleMode;
	}

	public void setCircleMode(boolean isCircle) {
		mCircleMode = isCircle;
	}

	public boolean getAlphaMode() {
		return mAlphaMode;
	}

	public void setAlphaMode(boolean isAlpha) {
		mAlphaMode = isAlpha;
	}

	public int getMaxZoom() {
		return mMaxZoom;
	}

	public void setMaxZoom(int maxZoom) {
		mMaxZoom = maxZoom;
	}

	private int getCenterOfCoverflow() {
		return (getWidth() - getPaddingLeft() - getPaddingRight()) / 2
				+ getPaddingLeft();
	}

	// 获取视图中心
	private static int getCenterOfView(View view) {
		return view.getLeft() + view.getWidth() / 2;
	}

	// 重写Garray方法 ,产生层叠和放大效果
	//这里是实现的关键

	@Override
	protected boolean getChildStaticTransformation(View child, Transformation t) {
		// TODO Auto-generated method stub
		final int childCenter = getCenterOfView(child);//得到中心
		final int childWidth = child.getWidth();
		int rotationAngle = 0;
		t.clear();
		t.setTransformationType(Transformation.TYPE_BOTH);//

		if (childCenter == mCoveflowCenter) {
			transformImageBitmap(child, t, 0, 0);//如果是中心则不需要重设z�?
		} else {
			rotationAngle = (int) (((float) (mCoveflowCenter - childCenter) / childWidth) * mMaxRotationAngle);
			transformImageBitmap(
					child,
					t,
					rotationAngle,
					(int) Math.floor((mCoveflowCenter - childCenter)
							/ (childWidth == 0 ? 1 : childWidth)));
		}
		return true;
	}

	/**
	 * This is called during layout when the size of this view has changed. If
	 * you were just added to the view hierarchy, you're called with the old
	 * values of 0.
	 * 这就是所谓的布局过程中,当这个View的大小发生了变化。如果你刚刚添加到视图层次,你所谓的旧�?0�?
	 * @param w  这个View的当前宽度�?
	 * @param h  这个View的当前高度�?
	 * @param oldw  这个View的原先宽度�?
	 * @param oldh  这个View的原先高度�?
	 */
	protected void onSizeChanged(int w, int h, int oldw, int oldh) {
		mCoveflowCenter = getCenterOfCoverflow();
		super.onSizeChanged(w, h, oldw, oldh);
	}

	/**
	 * Transform the Image Bitmap by the Angle passed
	 * 通过角度改变Image Bitmap
	 * @param imageView
	 *            ImageView the ImageView whose bitmap we want to rotate
	 * @param t
	 *            transformation
	 * @param rotationAngle
	 *            the Angle by which to rotate the Bitmap
	 */
	private void transformImageBitmap(View child, Transformation t,
			int rotationAngle, int d) {
		mCamera.save();
		final Matrix imageMatrix = t.getMatrix();
		final int imageHeight = child.getLayoutParams().height;
		final int imageWidth = child.getLayoutParams().width;
		final int rotation = Math.abs(rotationAngle);
		// mCamera.translate(0.0f, 0.0f, 100.0f);
		// As the angle of the view gets less, zoom in
		// if (rotation <= mMaxRotationAngle) {
		float zoomAmount = (float) (-140 + (rotation * 2));
		if (rotationAngle < 0) {
			mCamera.translate((float) (-rotation * 0.5),
					(float) (-rotation * 0.3) + 5, zoomAmount);
		} else {
			mCamera.translate((float) rotation, (float) (-rotation * 0.3) + 5,
					zoomAmount);

		}
//		Log.i("info", "---------------------->" + rotationAngle);
//		if (mCircleMode) {
//			if (rotation < 40) {
//				mCamera.translate(0.0f, 155, 0.0f);
//			} else {
//				mCamera.translate(0.0f, (255 - rotation * 2.5f), 0.0f);
//			}
//		}
//		if (mAlphaMode) {
//			// child.setBackgroundDrawable(getResources().getDrawable(R.drawable.app_bg));
//			// child.setBackgroundColor(255);
//		}
		// }
		// mCamera.rotateY(rotationAngle);
		mCamera.getMatrix(imageMatrix);
		imageMatrix.preTranslate(-(imageWidth / 2), -(imageHeight / 2));
		imageMatrix.postTranslate((imageWidth / 2), (imageHeight / 2));
		mCamera.restore();
	}

	// 重载视图显示顺序让左到中间显示,再到右到中间显示
	protected int getChildDrawingOrder(int childCount, int i) {
		long t = getSelectedItemId();
		int h = getSelectedItemPosition();
		if (i < childCount / 2) {
			return i;
		}
		return childCount - i - 1 + childCount / 2;
	}
}
之后是xml文件:
<?xml version="1.0" encoding="utf-8"?>
<LinearLayout xmlns:android="http://schemas.android.com/apk/res/android"
    android:layout_width="fill_parent"
    android:layout_height="fill_parent"
    android:background="#ada2a2"
    android:orientation="vertical" >

    <com.kiritor.CoverFlow
        android:id="@+id/gallery"
        android:layout_width="fill_parent"
        android:layout_height="fill_parent"
        android:layout_alignParentLeft="true"
        android:background="@drawable/bg"
        android:layout_gravity="center_vertical"
        android:spacing="5dp" />

</LinearLayout>
activity文件:
package com.kiritor;

import android.app.Activity;
import android.content.Context;
import android.os.Bundle;
import android.view.View;
import android.view.ViewGroup;
import android.widget.BaseAdapter;
import android.widget.Gallery;
import android.widget.ImageView;
import android.widget.Gallery.LayoutParams;

public class Gallery_Repeat_Act extends Activity {
	/** Called when the activity is first created. */
	Gallery gallery;

	private Integer[] mThumbIds = { R.drawable.first, R.drawable.second,
			R.drawable.third, R.drawable.forth, R.drawable.fifth,
			R.drawable.first, R.drawable.forth };

	@Override
	public void onCreate(Bundle savedInstanceState) {
		super.onCreate(savedInstanceState);
		setContentView(R.layout.main);
		gallery = (Gallery) findViewById(R.id.gallery);
		gallery.setAdapter(new ImageAdapter(this));
	}

	public class ImageAdapter extends BaseAdapter {

		private Context myContext;

		private ImageAdapter(Context context) {
			myContext = context;
		}

		@Override
		public int getCount() {
			// TODO Auto-generated method stub
			return Integer.MAX_VALUE;
			// return mThumbIds.length;
		}

		@Override
		public Object getItem(int position) {
			// TODO Auto-generated method stub
			return position;
		}

		@Override
		public long getItemId(int position) {
			// TODO Auto-generated method stub
			return position;
		}

		@Override
		public View getView(int position, View convertView, ViewGroup parent) {
			// TODO Auto-generated method stub
			ImageView i = new ImageView(myContext);
			i.setImageResource(mThumbIds[position % mThumbIds.length]);
			// i.setImageResource(mThumbIds[position]);
			i.setScaleType(ImageView.ScaleType.FIT_XY);
			i.setLayoutParams(new Gallery.LayoutParams(
					LayoutParams.WRAP_CONTENT, LayoutParams.WRAP_CONTENT));
			return i;
		}

	}
}
ok!完整源码部分:


