struts2.1.8+spring3.0.2+hibernate3.3
IT的技术日新月异.我还真怕有点跟不上潮流,其实每个项目都用最新的技术,对于学习成本来说是很大的,而且也间接影响到开发效率.这里我配置只是个人爱好.如果是IT管理者,个人建议不要老用新技术.稳定熟悉最好.
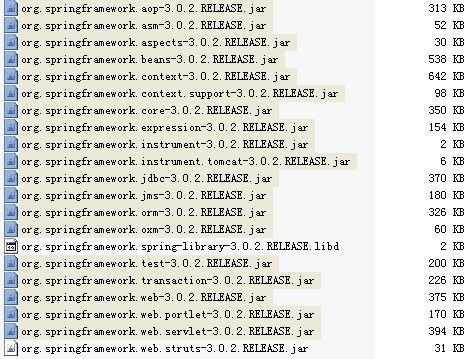
1.首先配置struts2.1.8
1.1 这东西大家熟烂了.我个手工添加的.jar包如下:
原因:报这个错是因为在/sandh/web-inf/classes下面没有ehcache.xml这个文件!这个文件是hibernate缓存配置文件。
解决方法:从ehcache-1.1.jar 中把文件ehcache-failsafe.xml 解压出来改名 ehcache.xml 复制到classes下面就行了!
然后再运行看看?! 很好,一切正常!
3.3.2 配置DAO运行
既然可以普通运行通过,那就继续咯.
myeclipse8.5自动生成的DAO都是继承与BaseHibernateDao的.所以我在这里改了 一下.由于spring3通过sessionFacroty来管理事务的.因此,DAO中需要注入受管的sessionFacroty(虽然我们暂时没配置事务管理器).
稍微改一下BaseHibernateDao.继承于HibernateDaoSupport.
public class BaseHibernateDAO extends HibernateDaoSupport{ }
本来的getSession()可以去掉了.因为HibernateDaoSupport就是这样的一个接口,并且是final.
然后,在spring里配置一个DAObean,再注入到Action里面试下.
成功了吧? : )
3.4 配置事务
这里就比较麻烦了.希望我的表达能力能够使除我之外的其他朋友们都能理解吧.
3.4.1 首先配置还是配置spring3.0.2的applicationContext.xml,以下会是我完整的配置文件:
<?xml version="1.0" encoding="UTF-8"?> <!-- - Middle tier application context definition for the image database. --> <beans xmlns="http://www.springframework.org/schema/beans" xmlns:xsi="http://www.w3.org/2001/XMLSchema-instance" xmlns:context="http://www.springframework.org/schema/context" xmlns:aop="http://www.springframework.org/schema/aop" xmlns:tx="http://www.springframework.org/schema/tx" xsi:schemaLocation="http://www.springframework.org/schema/beans http://www.springframework.org/schema/beans/spring-beans-2.5.xsd http://www.springframework.org/schema/context http://www.springframework.org/schema/context/spring-context-2.5.xsd http://www.springframework.org/schema/tx http://www.springframework.org/schema/tx/spring-tx-2.5.xsd http://www.springframework.org/schema/aop http://www.springframework.org/schema/aop/spring-aop.xsd"> <!-- 配置hibernate DataSource --> <bean id="DataSource" class="org.apache.commons.dbcp.BasicDataSource" destroy-method="close"> <property name="driverClassName" value="com.mysql.jdbc.Driver"/> <property name="url" value="jdbc:mysql://localhost:3306/test"/> <property name="username" value="root"/> <property name="password" value="oookkk"/> <!-- 连接池启动时的初始值 --> <property name="initialSize" value="1"/> <!-- 连接池的最大值 --> <property name="maxActive" value="500"/> <!-- 最大空闲值.当经过一个高峰时间后,连接池可以慢慢将已经用不到的连接慢慢释放一部分,一直减少到maxIdle为止 --> <property name="maxIdle" value="3"/> <!-- 最小空闲值.当空闲的连接数少于阀值时,连接池就会预申请去一些连接,以免洪峰来时来不及申请 --> <property name="minIdle" value="2"/> </bean> <!-- 配置hibernate的sessionFactory --> <bean id="mySessionFactory" class="org.springframework.orm.hibernate3.LocalSessionFactoryBean"> <property name="dataSource" ref="DataSource"/> <property name="mappingResources"> <list> <value>test/hibernate/User.hbm.xml</value> <value>test/hibernate/Address.hbm.xml</value> </list> </property> <property name="hibernateProperties"> <value> hibernate.dialect=org.hibernate.dialect.MySQL5Dialect hibernate.hbm2ddl.auto=update hibernate.show_sql=false hibernate.format_sql=false hibernate.cache.use_second_level_cache=true hibernate.cache.use_query_cache=false hibernate.cache.provider_class=org.hibernate.cache.EhCacheProvider </value> </property> </bean> <!-- hibernate.dialect=org.hibernate.dialect.HSQLDialect --> <!-- 配置事务管理器 --> <bean id="myTxManager" class="org.springframework.orm.hibernate3.HibernateTransactionManager" > <property name="sessionFactory" ref="mySessionFactory"/> </bean> <!-- 配置事务的属性 --> <tx:advice id="txAdvice" transaction-manager="myTxManager"> <tx:attributes> <tx:method name="find*" propagation="REQUIRED"/> <tx:method name="save*" propagation="REQUIRED"/> <tx:method name="someOtherBusinessMethod" propagation="REQUIRES_NEW"/> <tx:method name="*" propagation="SUPPORTS" read-only="true"/> </tx:attributes> </tx:advice> <!-- 切面配置, --> <aop:config> <aop:pointcut id="userServiceMethods" expression="execution(* test.service.UserService.*(..))"/> <aop:advisor advice-ref="txAdvice" pointcut-ref="userServiceMethods"/> </aop:config> <!-- 配置userService的bean --> <bean id="userService" class="test.service.UserServiceImpl"> <property name="userDAO" ref="userDAO" /> </bean> <bean id="userDAO" class="test.hibernate.UserDAO"> <property name="sessionFactory" ref="mySessionFactory"/> </bean> <!-- struts2的TestAction托管给spring3.在spring的配置文件也有对应的配置bean --> <bean name="testActionBean" class="test.action.TestAction" > <property name="userService" ref="userService" /> </bean> </beans>
其中里面需要额外增加的配置标签有:myTxManager;txAdvice;aop:config.
这3个是spring3.0.2中配置事务的重要标签(当然,不包括你说的注解方式等等等等).这里只演示声明式的一般的用法.
我这里偷懒了.其实在你慢慢一步一步配置的时候,应该会遇到3个错误:
第一个:少了com.springsource.org.aopalliance-1.0.0.jar这个包.其实不用太注重名字,认得aopalliance就好了
第二个:少了com.springsource.org.aspectj.weaver-1.6.8.RELEASE.jar这个包.
第三个:就是你写<aop:config>可能会提示错误.这是由于你的<beans>的声明处少了aop的一些规则.在我的以上的文件都配置好了.可以对照自己出错时的来看.
当然咯,你们没出错就更好了.由于包是我手动的,所以肯定会有漏的时候.
3.4.2 就是要写你的service类咯
我这里就不详细贴出我的代码了.免得太臃肿.其实你看我以上的配置,可以完全确定我的包路径的了.跟spring2.5的基本一样.
这里需要注意的是,配置事务的时候.service的class以及spring3中对于aop的切面的表达式,这里容易犯的错误是大小写以及写错了impl还是interface.
3.4.3 接着我就随便弄了几个方法来玩,一个是有事务,一个没有事务.都用相同的代码,都会抛出异常.实验证明配置正确.有事务的回滚了.没事务的没有回滚.
**注意:最后配置完,需要谨慎的检查自己的代码,不要全按着我写哦.这样很容易跟自己的混乱难以找出错误.就像我上面配置完了spring+hibernate后,其实action bean那我将userDAO换成了userService注入了.所以大家还是得谨慎再谨慎.其他细节我就没说咯.
希望大家能够成功!
4. 配置proxool
4.1 添加proxool包
我用的是写着文章时的最新版本
proxool-0.9.1.jar
proxool-cglib.jar
4.2 配置applicationContext.xml
<!-- 配置hibernate DataSource Proxool的连接池 --> <bean id="DataSource" class="org.logicalcobwebs.proxool.ProxoolDataSource"> <property name="driver" value="com.mysql.jdbc.Driver" /> <property name="driverUrl" value="jdbc:mysql://localhost:3306/test?useUnicode=true&characterEncoding=utf-8" /> <property name="user" value="root" /> <property name="password" value="oookkk" /> <property name="alias"> <value>DB</value> </property> <!--<property name="delegateProperties"> <value>user=bestvsns,password=bestvwin</value> </property> --><!-- 自动检查连接是否断掉开关 --> <property name="testBeforeUse"> <value>true</value> </property> <!-- 自动检查连接是否断的测试sql语句 --> <property name="houseKeepingTestSql"> <value>select sysdate() from dual</value> </property> <!-- 一个活动连接的最长时间15分钟,单位毫秒 --> <property name="maximumActiveTime"> <value>900000</value> </property> <!-- 一个连接的最长活动时间4小时,单位毫秒 <property name="maximum-connection-count"> <value>14400000</value> </property> <property name="houseKeepingSleepTime"> <value>90000</value> </property> <property name="prototypeCount"> <value>5</value> </property>--> <property name="maximumConnectionCount"> <value>100</value> </property> <property name="minimumConnectionCount"> <value>10</value> </property> <property name="trace"> <value>true</value> </property> <property name="verbose"> <value>true</value> </property> </bean>
很多人其实会很奇怪为什么我会用这样的配置.(可以写proxool.xml等很多引入的配置方式)
但是我可以非常清晰的告诉你们,在SSH+PROXOOL这样的配置中.如果用引入的方式,会导致查找不到proxool的别名数据库错误.
这是由于在proxool还没生成链接池的时候,spring3就先它一步引用了它,所以出现异常.
网上有其他的解决办法,例如延迟spring3的加载,可是这样又会致使struts2跟spring3的结合异常.所以我才使用以上的配置方式.
就这样.没其他事了.当然,如果你喜欢可以加上proxool的检查连接池的APP.不过....我没加,因为我懒.