android 自定义ScrollView实现背景图片伸缩(仿多米,PaPa个人页面特效也称为阻尼效果)
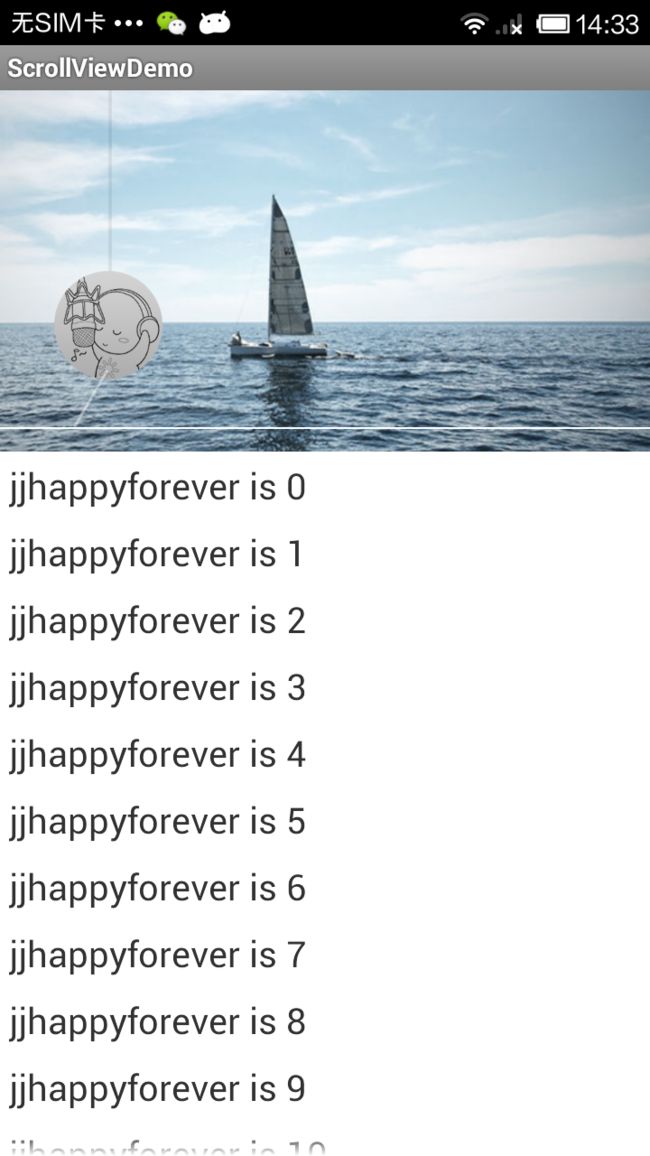
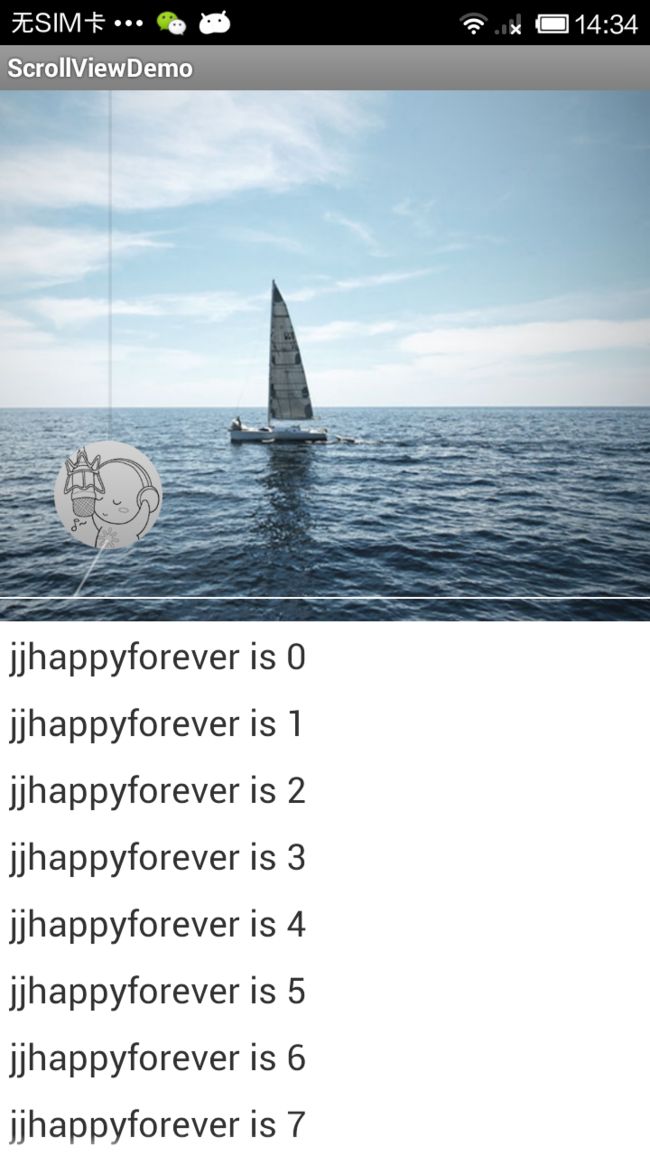
首先还是按照惯例给大家看下示例.
用过多米音乐的都会知道, 这个UI可以上下滑动,作用嘛---无聊中可以划划解解闷,这被锤子公司老罗称呼为“情怀”,其实叫“情趣”更合适。嘿嘿.如今移动互联网发展这么迅速,市场上已不再是那初期随便敲个APP放上架就能拥有几十万用户的阶段了.最近苹果公司,为了怕android下载量赶超苹果商店,大势声称:(第 500 亿个下载应用的用户就可以获得 10,000 美元的 iTunes 礼品卡,除此之外,紧随第 500 亿之后的前 50 名用户也可以获得 500 美元的礼品卡.至于移动发展趋势,我想搞移动IT的人心里都比较清楚,扯远了).其实应用UI特效是应用中很大的一部分,如果同样功能的两款软件,一个功能好点如“网易新闻”,另外一个稍微差点如“新浪新闻”,用户的你毫无疑问肯定会选择网易客户端.总结就是“操作性”对于产品起着至关重要的因素.
接下来我们看下如何实现,首先声明,这个实现的方式不是很好,我这里只是提出一个解决方案,大家可以根据自己的想法进行创新.
原理:RelativeLayout+自定义ScrollView.
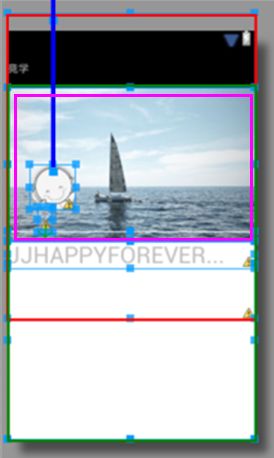
我们大致看下布局结构如图:
其实也没什么技术含量,我简单介绍下:红色代表的是背景照片,绿色的代表自定义ScrollView,粉色是代表你要编辑的透明区域.也不过多解释,想必大家都明白,我们还是来看代码吧。
由于属于情怀特效(没有具体的回调事件要求),那么就没有必要自定义监听,回调处理,我直接把要处理的UI注入到自定义控件中,这样她方便我也方便.
在此说明一下,前面部分实现中有误,但是也希望您仔细品读,相信您一定可以学到一些知识的。
首先我们将背景图片和顶部线条注入到该控件中。接着我们看onTouchEvent事件,因为至始至终都是她在起作用.
/***
	 * 触摸事件
	 *
	 * @param ev
	 */
	public void commOnTouchEvent(MotionEvent ev) {
		int action = ev.getAction();
		switch (action) {
		case MotionEvent.ACTION_DOWN:
			initTouchY = ev.getY();

			current_Top = initTop = imageView.getTop();
			current_Bottom = initBottom = imageView.getBottom();
			lineUp_current_Top = line_up_top = line_up.getTop();
			lineUp_current_Bottom = line_up_bottom = line_up.getBottom();
			break;
		case MotionEvent.ACTION_UP:
			/** 回缩动画 **/
			if (isNeedAnimation()) {
				animation();
			}

			isMoveing = false;
			touchY = 0;// 手指松开要归0.

			break;

		/***
		 * 排除出第一次移动计算,因为第一次无法得知deltaY的高度, 然而我们也要进行初始化,就是第一次移动的时候让滑动距离归0.
		 * 之后记录准确了就正常执行.
		 */
		case MotionEvent.ACTION_MOVE:

			Log.e(TAG, "isMoveing=" + isMoveing);

			touchY = ev.getY();

			float deltaY = touchY - initTouchY;// 滑动距离

			Log.e(TAG, "deltaY=" + deltaY);

			/** 过滤: **/
			if (deltaY < 0 && inner.getTop() <= 0) {
				return;
			}

			// 当滚动到最上或者最下时就不会再滚动,这时移动布局
			isNeedMove();

			if (isMoveing) {
				// 初始化头部矩形
				if (normal.isEmpty()) {
					// 保存正常的布局位置
					normal.set(inner.getLeft(), inner.getTop(),
							inner.getRight(), inner.getBottom());
				}
				// 移动布局(手势移动的1/3)
				float inner_move_H = deltaY / 5;
				inner.layout(normal.left, (int) (normal.top + inner_move_H),
						normal.right, (int) (normal.bottom + inner_move_H));

				/** image_bg **/
				float image_move_H = deltaY / 10;
				current_Top = (int) (initTop + image_move_H);
				current_Bottom = (int) (initBottom + image_move_H);
				imageView.layout(imageView.getLeft(), current_Top,
						imageView.getRight(), current_Bottom);

				/** line_up **/
				float line_up_H = inner_move_H;
				lineUp_current_Top = (int) (line_up_top + inner_move_H);
				lineUp_current_Bottom = (int) (line_up_bottom + inner_move_H);
				line_up.layout(line_up.getLeft(), lineUp_current_Top,
						line_up.getRight(), lineUp_current_Bottom);
			}
			break;

		default:
			break;

		}
	}
简单说明:
MotionEvent.ACTION_DOWN:触摸摁下获取相应的坐标.
MotionEvent.ACTION_MOVE:
里面有个方法isNeedMove。作用:我们滑动的是ScrollView自身呢,还是我们自己模拟的那种滑动.
/***
	 * 是否需要移动布局 inner.getMeasuredHeight():获取的是控件的总高度
	 *
	 * getHeight():获取的是屏幕的高度
	 *
	 * @return
	 */
	public void isNeedMove() {
		int offset = inner.getMeasuredHeight() - getHeight();
		int scrollY = getScrollY();
		// 如果ScrollView的子View们没有超过一屏幕则scrollY == 0,直接返回true,
		//如果ScrollView的子View们超过了一屏幕则 getScrollY()==offset说明滑到了ScrollView的低端.这时候才返回true.
		if (scrollY == 0 || scrollY == offset) {
			isMoveing = true;
		}
	}
这里面用到最多的就是:view.layout(l, t, r, b);作用很简单不解释。详情请参看源码.
MotionEvent.ACTION_UP:就是做些善后操作,主要看animation方法.
/***
	 * 回缩动画
	 */
	public void animation() {

		TranslateAnimation image_Anim = new TranslateAnimation(0, 0,
				Math.abs(initTop - current_Top), 0);
		image_Anim.setDuration(200);
		imageView.startAnimation(image_Anim);

		imageView.layout(imageView.getLeft(), (int) initTop,
				imageView.getRight(), (int) initBottom);

		// 开启移动动画
		TranslateAnimation inner_Anim = new TranslateAnimation(0, 0,
				inner.getTop(), normal.top);
		inner_Anim.setDuration(200);
		inner.startAnimation(inner_Anim);
		inner.layout(normal.left, normal.top, normal.right, normal.bottom);

		/** line_up **/
		TranslateAnimation line_up_Anim = new TranslateAnimation(0, 0,
				Math.abs(line_up_top - lineUp_current_Top), 0);
		line_up_Anim.setDuration(200);
		line_up.startAnimation(line_up_Anim);
		line_up.layout(line_up.getLeft(), line_up_top, line_up.getRight(),
				line_up_bottom);

		normal.setEmpty();

		/** 动画执行 **/
		if (current_Top > initTop + 50 && turnListener != null)
			turnListener.onTurn();

	}
这里我要简单说明一下,因为我在这里栽了有些时间.
比如:我们的背景图片原先坐标为:(0,-190,800,300),随着手势移动到(0,-100,800,390)移动了90像素,那么我们的TranslateAnimation应该如何写呢?我之前总认为不就是末尾坐标指向初始坐标不就完了,结果你会发现,动画根本不起作用而是一闪而过。原因呢,动画参数不可以为负数.或许因为动画是以(0,0)为参照物吧.因此要把动画写成TranslateAnimation line_up_Anim = new TranslateAnimation(0, 0,Math.abs(-190- (-100)), 0);这样我们所需要的动画效果就实现了.
但是新的问题又出现了:
当你下拉到一定状态后然后慢慢向上移动,会发现移动的很快(没有回缩的反应),而移动到最顶部的时候突然又出现反弹效果。这个效果固然不是我们所需要的那种。我们所需要的效果是:下拉到一定程度,然后反过来上拉的时候要慢慢的移动回到原点(中心位置)停止。如果是上拉的话,不要出现反弹效果,如果是下拉松开的话,出现反弹效果。
描述的有点乱,如果想知道具体效果的话,我建议你使用下papa,其实国内这些比较优秀的应用UI都是抄袭国外的,如果你用facebook的话,就会发现,怎么啪啪的个人页面长的也忒像facebook了。请看下图:
嘿嘿,不好意思,跑题了,针对上面出现的问题,我简单说明一下.
首先,比如我们手势下拉了50像素,其实是使得自定义ScrollView的孩子也就是LinearLayout这个控件的top为50,而这个时候的getScrollY()的值仍为0,但是如果此时你停止下拉反而向上拉取的话,那么此时的getScrollY()会从0开始逐渐增大,当我们移动到顶部也就是将ScrollView移动到最底部,此时的isMoveing为true,所以你继续上拉的话会出现反弹效果。
这个问题要如何解决呢,其实也不难,但是我纠结了好长时间,也走了好多弯路。在这里说明一下我的瞎跑路段以及疑问:当时我就想,getScrollY()这么不听话,我何必非要对ScrollView的孩子进行操作呢,为何直接不对本控件执行layout(l,t,r,b)呢,后来就照着这个逻辑进行update,终于更改了差不多了,纠结了问题再次出现,在你下拉的时候对ScrollView本身执行layout(l,t,r,b)这个方法可以实现反弹效果,但是此时你确无法进行滑动了,就是ScrollView本身的滑动无缘无故的被禁止掉了.我怀疑是layout的时候参数弄错了。,后来仔细修改了下发现还是不可以滑动,然后google了半天也杳无音讯,最后固然放弃,又回到了原点。接着琢磨。。。算是功夫不负有心人吧,最终想到了解决方案,希望对您有帮助。
还拿上面说到的那短话,比如我们手势下拉了50像素,那么此时touch的距离也就是50像素,如果此时我们反向上拉的话,同样是需要50像素回到最初的位置。说到这里我想大家都明白了。(首先我们要将操作分开,分为UP,DOWN,如果是DOWN的话,那么在下拉后执行上拉的时候我们禁用掉自定义控件的滑动,而是通过手势执行layout执行这50像素.)
下面我们看部分代码:
/**对于首次Touch操作要判断方位:UP OR DOWN**/
			if (deltaY < 0 && state == state.NOMAL) {
				state = State.UP;
			} else if (deltaY > 0 && state == state.NOMAL) {
				state = State.DOWN;
			}


			if (state == State.UP) {
				deltaY = deltaY < 0 ? deltaY : 0;
				isMoveing = false;
				shutTouch = false;
			} else if (state == state.DOWN) {
				if (getScrollY() <= deltaY) {
					shutTouch = true;
					isMoveing = true;
				}
				deltaY = deltaY < 0 ? 0 : deltaY;
			}
代码很简单,不过多解释了,不明白的话,仔细看下源码肯定就明白了。
touch 事件处理:
/** touch 事件处理 **/
	@Override
	public boolean onTouchEvent(MotionEvent ev) {
		if (inner != null) {
			commOnTouchEvent(ev);
		}
		// ture:禁止控件本身的滑动.
		if (shutTouch)
			return true;
		else
			return super.onTouchEvent(ev);

	}
说明:如果返回值为true,作用:禁止ScrollView的滑动,此时的Touch事件还存哦!!!如果对Touch事件比较熟悉的同学,相信觉得我有点废话了,哈哈,我也是个小菜鸟,也卡在这里过。
最后呢,还有个小BUG,也就是那个顶部拉线,如果你让ScrollView惯性滑动的话,那么你会发现,顶部线条没有跟随移动,其实就是因为惯性滑动的时候我们是获取不到getScrollY()的值得造成的,查了半天也没有找到相关资料,这个问题就暂时就留在这里,有时间了在续。
这里我将源码贴出来:
package com.example.scrollviewdemo;

import android.content.Context;
import android.graphics.Rect;
import android.util.AttributeSet;
import android.util.Log;
import android.view.MotionEvent;
import android.view.View;
import android.view.animation.TranslateAnimation;
import android.widget.ImageView;
import android.widget.ScrollView;

/**
 * 自定义ScrollView
 *
 * @author jia
 *
 */
public class PersonalScrollView extends ScrollView {

	private final String TAG = PersonalScrollView.class.getSimpleName();

	private View inner;// 孩子View

	private float touchY;// 点击时Y坐标

	private float deltaY;// Y轴滑动的距离

	private float initTouchY;// 首次点击的Y坐标

	private boolean shutTouch = false;// 是否关闭ScrollView的滑动.

	private Rect normal = new Rect();// 矩形(这里只是个形式,只是用于判断是否需要动画.)

	private boolean isMoveing = false;// 是否开始移动.

	private ImageView imageView;// 背景图控件.
	private View line_up;// 上线
	private int line_up_top;// 上线的top
	private int line_up_bottom;// 上线的bottom

	private int initTop, initBottom;// 初始高度

	private int current_Top, current_Bottom;// 拖动时时高度。

	private int lineUp_current_Top, lineUp_current_Bottom;// 上线

	private onTurnListener turnListener;

	private ImageView imageHeader;

	public void setImageHeader(ImageView imageHeader) {
		this.imageHeader = imageHeader;
	}

	// 状态:上部,下部,默认
	private enum State {
		UP, DOWN, NOMAL
	};

	// 默认状态
	private State state = State.NOMAL;

	public void setTurnListener(onTurnListener turnListener) {
		this.turnListener = turnListener;
	}

	public void setLine_up(View line_up) {
		this.line_up = line_up;
	}

	// 注入背景图
	public void setImageView(ImageView imageView) {
		this.imageView = imageView;
	}

	/***
	 * 构造方法
	 *
	 * @param context
	 * @param attrs
	 */
	public PersonalScrollView(Context context, AttributeSet attrs) {
		super(context, attrs);
	}

	/***
	 * 根据 XML 生成视图工作完成.该函数在生成视图的最后调用,在所有子视图添加完之后. 即使子类覆盖了 onFinishInflate
	 * 方法,也应该调用父类的方法,使该方法得以执行.
	 */
	@Override
	protected void onFinishInflate() {
		if (getChildCount() > 0) {
			inner = getChildAt(0);
		}
	}

	/** touch 事件处理 **/
	@Override
	public boolean onTouchEvent(MotionEvent ev) {
		if (inner != null) {
			commOnTouchEvent(ev);
		}
		// ture:禁止控件本身的滑动.
		if (shutTouch)
			return true;
		else
			return super.onTouchEvent(ev);

	}

	/***
	 * 触摸事件
	 *
	 * @param ev
	 */
	public void commOnTouchEvent(MotionEvent ev) {
		int action = ev.getAction();
		switch (action) {
		case MotionEvent.ACTION_DOWN:
			initTouchY = ev.getY();
			current_Top = initTop = imageView.getTop();
			current_Bottom = initBottom = imageView.getBottom();
			if (line_up_top == 0) {
				lineUp_current_Top = line_up_top = line_up.getTop();
				lineUp_current_Bottom = line_up_bottom = line_up.getBottom();
			}
			break;
		case MotionEvent.ACTION_UP:
			/** 回缩动画 **/
			if (isNeedAnimation()) {
				animation();
			}

			if (getScrollY() == 0) {
				state = State.NOMAL;
			}

			isMoveing = false;
			touchY = 0;
			shutTouch = false;
			break;

		/***
		 * 排除出第一次移动计算,因为第一次无法得知deltaY的高度, 然而我们也要进行初始化,就是第一次移动的时候让滑动距离归0.
		 * 之后记录准确了就正常执行.
		 */
		case MotionEvent.ACTION_MOVE:

			touchY = ev.getY();
			deltaY = touchY - initTouchY;// 滑动距离

			/** 对于首次Touch操作要判断方位:UP OR DOWN **/
			if (deltaY < 0 && state == state.NOMAL) {
				state = State.UP;
			} else if (deltaY > 0 && state == state.NOMAL) {
				state = State.DOWN;
			}

			if (state == State.UP) {
				deltaY = deltaY < 0 ? deltaY : 0;
				isMoveing = false;
				shutTouch = false;

				/** line_up **/
				lineUp_current_Top = (int) (line_up_top - getScrollY());
				lineUp_current_Bottom = (int) (line_up_bottom - getScrollY());

				Log.e(TAG, "top=" + getScrollY());

				line_up.layout(line_up.getLeft(), lineUp_current_Top,
						line_up.getRight(), lineUp_current_Bottom);

			} else if (state == state.DOWN) {
				if (getScrollY() <= deltaY) {
					shutTouch = true;
					isMoveing = true;
				}
				deltaY = deltaY < 0 ? 0 : deltaY;
			}

			if (isMoveing) {
				// 初始化头部矩形
				if (normal.isEmpty()) {
					// 保存正常的布局位置
					normal.set(inner.getLeft(), inner.getTop(),
							inner.getRight(), inner.getBottom());
				}
				// 移动布局(手势移动的1/3)
				float inner_move_H = deltaY / 5;

				inner.layout(normal.left, (int) (normal.top + inner_move_H),
						normal.right, (int) (normal.bottom + inner_move_H));

				/** image_bg **/
				float image_move_H = deltaY / 10;
				current_Top = (int) (initTop + image_move_H);
				current_Bottom = (int) (initBottom + image_move_H);
				imageView.layout(imageView.getLeft(), current_Top,
						imageView.getRight(), current_Bottom);

				/** line_up **/
				lineUp_current_Top = (int) (line_up_top + inner_move_H);
				lineUp_current_Bottom = (int) (line_up_bottom + inner_move_H);
				line_up.layout(line_up.getLeft(), lineUp_current_Top,
						line_up.getRight(), lineUp_current_Bottom);
			}
			break;

		default:
			break;

		}
	}

	/***
	 * 回缩动画
	 */
	public void animation() {

		TranslateAnimation image_Anim = new TranslateAnimation(0, 0,
				Math.abs(initTop - current_Top), 0);
		image_Anim.setDuration(200);
		imageView.startAnimation(image_Anim);

		imageView.layout(imageView.getLeft(), (int) initTop,
				imageView.getRight(), (int) initBottom);

		// 开启移动动画
		TranslateAnimation inner_Anim = new TranslateAnimation(0, 0,
				inner.getTop(), normal.top);
		inner_Anim.setDuration(200);
		inner.startAnimation(inner_Anim);
		inner.layout(normal.left, normal.top, normal.right, normal.bottom);

		/** line_up **/
		TranslateAnimation line_up_Anim = new TranslateAnimation(0, 0,
				Math.abs(line_up_top - lineUp_current_Top), 0);
		line_up_Anim.setDuration(200);
		line_up.startAnimation(line_up_Anim);
		line_up.layout(line_up.getLeft(), line_up_top, line_up.getRight(),
				line_up_bottom);

		normal.setEmpty();

		/** 动画执行 **/
		if (current_Top > initTop + 50 && turnListener != null)
			turnListener.onTurn();

	}

	/** 是否需要开启动画 **/
	public boolean isNeedAnimation() {
		return !normal.isEmpty();
	}

	/***
	 * 执行翻转
	 *
	 * @author jia
	 *
	 */
	public interface onTurnListener {

		/** 必须达到一定程度才执行 **/
		void onTurn();
	}

}
界面有点丑陋,不过UI可以自己根据需求进行调整.
最后我在多侃一点,这里我用的是TableLayout布局,不是ListView,因为ListView和ScrollView本身就有冲突,虽说有解决方案,但是我还是喜欢用TableLayout。代码里面模拟了3D旋转效果,这里就不解释了,网上相关文章也有好多。就说到这里,将源码供出,如果有问题请留言。
源码下载
很抱歉,上面上传的源码是错误的,不过也是最初的思路,代码比较凌乱,你们可以直接下载下面这个版本.
源码下载
