Unity5 Assetbundle简单使用 及 打包Material文件超大的问题
因为项目中要用到ULUA,而ULUA的Demo 中用到的是 Unity5的Assetbundle 打包方式,所以还是学习下 5.0 版本的Assetbundle 打包方式。
简单的来说,Unity5中新添加的 AB 打包,和我们平时使用的方式一样,原理就是 为每个文件创建一个依赖文件,然后汇总到一个总的依赖文件中,在游戏最开始运行的时候需要加载这个 总的依赖文件,然后加载 Assetbundle的时候,从中获取到依赖关系来加载依赖。
Unity5的打包Assetbundle API使用起来很方便
1、为每个需要被打包的资源设置一个 Assetbundle 名字。
2、使用代码打包,如下是例子中使用的打包代码:
using UnityEngine;
using UnityEditor;
using System.Collections;

public class BuildAssetbundle : Editor
{
	[MenuItem("BuildAssetbundle/BuildAll")]
	static void Build()
	{
		BuildPipeline.BuildAssetBundles(Application.dataPath+"/../Assetbundle",BuildAssetBundleOptions.UncompressedAssetBundle);
	}
}
打包后就可以收获一堆 Assetbundle 文件以及同样数量的 Manifest文件。
很简单很方便哦,是不是。
但是仔细看却发现一个坑,项目中的两个 材质 Material 文件 Mat1、Mat2 打包出来怎么这么大,坑啊……
心理想着Unity 还是一堆Bug,然后去下载了官方的Demo。发现Demo却没有这个问题,对比了 Material发现。
图片默认拖到Assets 中,然后生成的 Material ,Shader 默认选得是 Stander。
而Unity官方Demo却选择了具体的一个Shader。
我猜测 选择 Stander后,打包Assetbundle 的时候把所有 Shader都打包进去了。
所以这个一定要注意。
然后来看加载的代码:
using UnityEngine;
using System.Collections;

public class LoadAssetbundle : MonoBehaviour {

	void OnGUI()
	{
		if(GUILayout.Button("LoadAssetbundle"))
		{
			//首先加载Manifest文件;
			AssetBundle manifestBundle=AssetBundle.CreateFromFile(Application.dataPath+"/../Assetbundle/Assetbundle");
			if(manifestBundle!=null)
			{
				AssetBundleManifest manifest=(AssetBundleManifest)manifestBundle.LoadAsset("AssetBundleManifest");

				//获取依赖文件列表;
				string[] cubedepends=manifest.GetAllDependencies("myresources_cube");
				AssetBundle[] dependsAssetbundle=new AssetBundle[cubedepends.Length];

				for(int index=0;index<cubedepends.Length;index++)
				{
					//加载所有的依赖文件;
					dependsAssetbundle[index]=AssetBundle.CreateFromFile(Application.dataPath+"/../Assetbundle/"
					                                                     +cubedepends[index]);


				}

				//加载我们需要的文件;
				AssetBundle cubeBundle=AssetBundle.CreateFromFile(Application.dataPath
				                                                  +"/../Assetbundle/myresources_cube" );
				GameObject cube=cubeBundle.LoadAsset("Cube0") as GameObject;
				if(cube!=null)
				{
					Instantiate(cube);
				}
			}


		}
	}


}
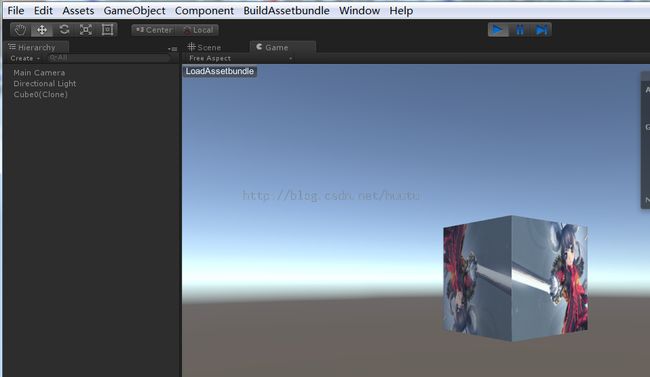
很简单的使用方法。有图有真相。
当然,要让我们手动去设置每一个资源的 Assetbundle 名字太麻烦了,所以我们还是使用脚本自动生成名字吧。
/**************************
     * 文件名:AutoSetTextureUISprite.cs;
     * 文件描述:自动设置Assetbundle名字为文件夹名_文件名.unity3d;
     * 创建日期:2015/05/04;
     * Author:陈鹏;
     ***************************/

using UnityEngine;
using System.Collections;
using UnityEditor;

public class AutoSetTextureUISprite :AssetPostprocessor
{

	static void OnPostprocessAllAssets (string[] importedAssets, string[] deletedAssets, string[] movedAssets, string[] movedFromAssetPaths)
	{
		foreach (var str in importedAssets)
		{
			//Debug.Log("Reimported Asset: " + str);

			if(!str.EndsWith(".cs"))
			{
				AssetImporter importer=AssetImporter.GetAtPath(str);
				importer.assetBundleName=str;

            }

		}
		foreach (var str in deletedAssets)
		{
			//Debug.Log("Deleted Asset: " + str);
			if(!str.EndsWith(".cs"))
			{
				AssetImporter importer=AssetImporter.GetAtPath(str);
				importer.assetBundleName=str;
            }
        }

		for (var i=0; i<movedAssets.Length; i++)
		{
			//Debug.Log("Moved Asset: " + movedAssets[i] + " from: " + movedFromAssetPaths[i]);
		}
	}
}
当文件拖入到工程或者 Reimport 就会自动设置 AssetbundleName 为文件路径名,然后打包的时候就会打包到对应的目录中。
工程下载:
http://download.csdn.net/detail/cp790621656/8801445

