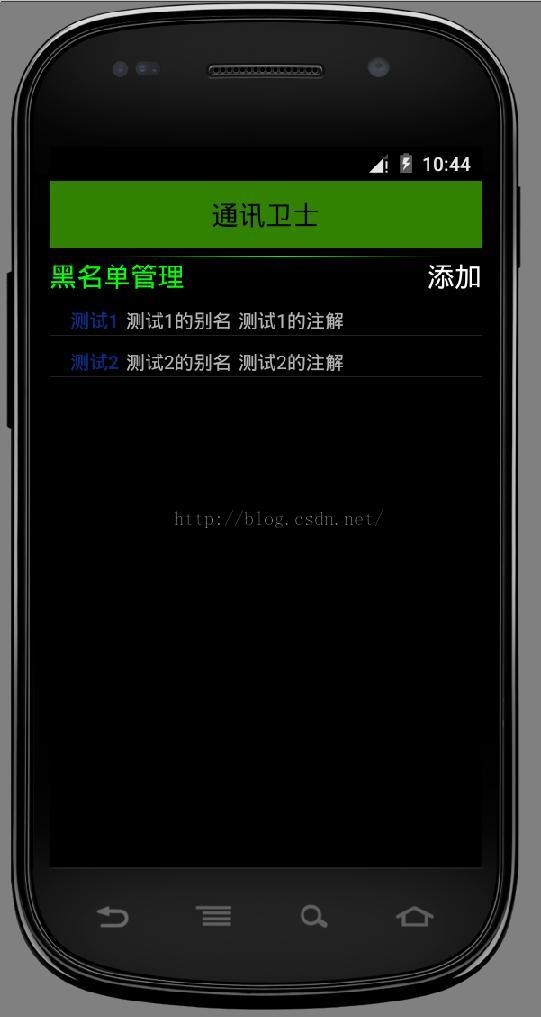
Android APP: BlackContact 显示黑名单联络人信息
有别于前面利用 fragment 实现,这次利用单纯的 activity 来实现:
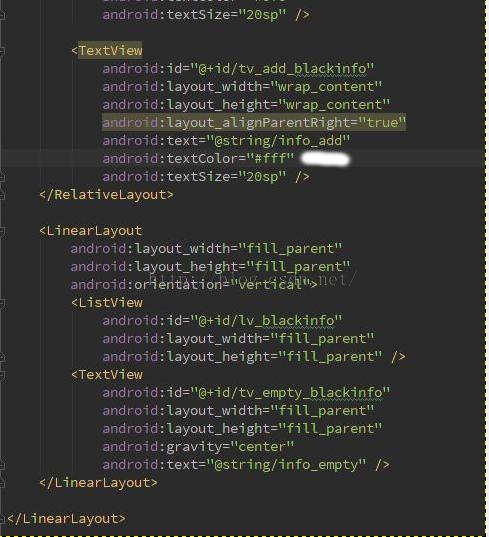
首先定义主画面LAYOUT, 有Title,分隔线 activity_main.xml
<?xml version="1.0" encoding="utf-8"?>
<LinearLayout xmlns:android="http://schemas.android.com/apk/res/android"
    android:layout_width="match_parent"
    android:layout_height="match_parent"
    android:orientation="vertical" >

    <TextView
        style="@style/text_title_style"
        android:text="@string/title_name" />

    <View style="@style/view_divide_line_style" />

    <RelativeLayout
        android:layout_width="match_parent"
        android:layout_height="wrap_content" >

        <TextView
            android:layout_width="wrap_content"
            android:layout_height="wrap_content"
            android:text="@string/frame_title"
            android:textColor="#0f0"
            android:textSize="20sp" />

        <TextView
            android:id="@+id/tv_add_blackinfo"
            android:layout_width="wrap_content"
            android:layout_height="wrap_content"
            android:layout_alignParentRight="true"
            android:text="@string/info_add"
            android:textColor="#fff"
            android:textSize="20sp" />
    </RelativeLayout>

    <LinearLayout
        android:layout_width="fill_parent"
        android:layout_height="fill_parent"
        android:orientation="vertical">
        <ListView
            android:id="@+id/lv_blackinfo"
            android:layout_width="fill_parent"
            android:layout_height="fill_parent" />
        <TextView
            android:id="@+id/tv_empty_blackinfo"
            android:layout_width="fill_parent"
            android:layout_height="fill_parent"
            android:gravity="center"
            android:text="@string/info_empty" />
    </LinearLayout>

</LinearLayout>
由于分割线有特别的 Stytle 所以另外再定义 stytles.xml
<resources>

    <!-- Base application theme. -->
    <style name="AppTheme" parent="android:Theme.Holo.Light.DarkActionBar">
        <!-- Customize your theme here. -->
    </style>

    <style name="text_title_style">
        <item name="android:layout_width">fill_parent</item>
        <item name="android:layout_height">50dp</item>
        <item name="android:gravity">center</item>
        <item name="android:background">#8066ff00</item>
        <item name="android:textColor">#000000</item>
        <item name="android:textSize">20sp</item>
    </style>

    <style name="view_divide_line_style">
        <item name="android:layout_width">fill_parent</item>
        <item name="android:layout_height">1dip</item>
        <item name="android:layout_marginTop">5dip</item>
        <item name="android:background">@drawable/devide_line</item>
    </style>
</resources>
而养成良好的习惯将用到的字串定义在 strings.xml
<resources>
    <string name="app_name">BlackContact</string>
    <string name="title_name">通讯卫士</string>
    <string name="hello_world">Hello world!</string>
    <string name="action_settings">Settings</string>
    <string name="frame_title">黑名单管理</string>
    <string name="info_add">添加</string>
    <string name="info_empty">黑名单记录为空</string>
</resources>
<?xml version="1.0" encoding="utf-8"?>
<manifest xmlns:android="http://schemas.android.com/apk/res/android"
    package="com.elvis.android.blackcontacts" >

    <application
        android:allowBackup="true"
        android:icon="@mipmap/ic_launcher"
        android:label="@string/app_name"
        android:theme="@android:style/Theme.Black.NoTitleBar" >
        <activity
            android:name=".MainActivity"
            android:label="@string/app_name" >
            <intent-filter>
                <action android:name="android.intent.action.MAIN" />

                <category android:name="android.intent.category.LAUNCHER" />
            </intent-filter>
        </activity>
    </application>

</manifest>
在画面处理好之后,处理 activity_main.xml 中 listview, 每一列的显示 LAYOUT, 用另外一个 custom.xml 来定义:
<?xml version="1.0" encoding="utf-8"?>
<LinearLayout xmlns:android="http://schemas.android.com/apk/res/android"
    android:layout_width="fill_parent"
    android:layout_height="fill_parent"
    android:orientation="horizontal"
    android:paddingBottom="1dip"
    android:paddingLeft="10dip"
    android:paddingTop="4dip" >

    <TextView
        android:id="@+id/tv_name"
        android:layout_width="wrap_content"
        android:layout_height="wrap_content"
        android:textColor="#ff112b7d"
        android:layout_marginLeft="5dp"
        android:layout_marginTop="5dp"
        android:textStyle="bold" />


    <TextView
        android:id="@+id/tv_alias"
        android:layout_marginLeft="5dp"
        android:layout_marginTop="5dp"
        android:layout_width="wrap_content"
        android:layout_height="wrap_content" />

    <TextView
        android:id="@+id/tv_phone1"
        android:layout_marginLeft="5dp"
        android:layout_marginTop="5dp"
        android:layout_width="wrap_content"
        android:layout_height="wrap_content" />

    <TextView
        android:id="@+id/tv_phone2"
        android:layout_marginLeft="5dp"
        android:layout_marginTop="5dp"
        android:layout_width="wrap_content"
        android:layout_height="wrap_content" />

    <TextView
        android:id="@+id/tv_remark"
        android:layout_marginLeft="5dp"
        android:layout_marginTop="5dp"
        android:layout_width="wrap_content"
        android:layout_height="wrap_content" />

</LinearLayout>
接着开始编写数据库的读取 - BlackInfoDBHelper.java
/**
 * Created by elvis on 10/14/15.
 */
package com.elvis.android.blackcontacts;

import android.content.Context;
import android.database.Cursor;
import android.database.SQLException;
import android.database.sqlite.SQLiteDatabase;
import android.database.sqlite.SQLiteDatabase.CursorFactory;
import android.database.sqlite.SQLiteOpenHelper;
import android.util.Log;

import java.io.File;
import java.io.FileOutputStream;
import java.io.IOException;
import java.io.InputStream;
import java.io.OutputStream;
import java.util.ArrayList;

public class BlackInfoDBHelper extends SQLiteOpenHelper {

    private final static String DATABASE_NAME = "econtacts.db";

    private final static int DATABASE_VERSION = 1;
    private static final String DATABASE_PATH = "/data/data/com.elvis.android.blackcontacts" +
            "/databases/";
    private static final String TABLE_CONTACT = "contact_info";
    private static SQLiteDatabase mDataBase;


    private static final String KEY_ID = "serialno";
    private static final String KEY_NAME = "name";
    private static final String KEY_ALIAS = "alias";
    private static final String KEY_PH1 = "phone1";
    private static final String KEY_PH2 = "phone2";
    private static final String KEY_REMARK = "remark";

    private static String TAG = "BlackInfoDBHelper";

    private static Context context = null;

    public BlackInfoDBHelper(Context context) {
        super(context, DATABASE_NAME, null, DATABASE_VERSION);

        try {
            //Log.i(TAG, "OK");
            this.context = context;
            createDataBase();
            openDataBase();
        } catch (IOException e) {
            e.printStackTrace();
        }

    }

    @Override
    public void onCreate(SQLiteDatabase db) {
        // TODO Auto-generated method stub

    }

    @Override
    public void onUpgrade(SQLiteDatabase db, int oldVersion, int newVersion) {
        /* TODO Auto-generated method stub */

    }

    private boolean checkDataBase() {
        File dbFile;
        dbFile = context.getDatabasePath(DATABASE_NAME);
        return dbFile.exists();

    }

    private void createDataBase() throws IOException {

        boolean dbExist = checkDataBase();

        if (dbExist) {

        } else {

            // By calling this method an empty database will be created into
            // the default system path
            // of your application so we are gonna be able to overwrite that
            // database with our database.
            this.getReadableDatabase();
            this.close();

            try {

                copyDataBase();
                Log.i(TAG, "Database was created");
            } catch (IOException e) {
                throw new Error("Error copying database");
            }
        }

    }

    private void openDataBase() throws SQLException {

        // Open the database
        String myPath = DATABASE_PATH + DATABASE_NAME;
        Log.i(TAG, "DB_PATH = "+ myPath);
        mDataBase = SQLiteDatabase.openDatabase(myPath, null,
                SQLiteDatabase.OPEN_READWRITE);
    }

    @Override
    public synchronized void close() {

        if (mDataBase != null)
            mDataBase.close();

        super.close();

    }

    public void copyDataBase() throws IOException {

        // Open your local db as the input stream
        //InputStream myInput = ApplicationContextProvider.getContext().getAssets().open(DATABASE_NAME);
        InputStream myInput = context.getAssets().open(DATABASE_NAME);

        // Path to the just created empty db
        String outFileName = DATABASE_PATH + DATABASE_NAME;

        // Open the empty db as the output stream
        OutputStream myOutput = new FileOutputStream(outFileName);

        // transfer bytes from the inputfile to the outputfile
        byte[] buffer = new byte[1024];
        int length;
        while ((length = myInput.read(buffer)) > 0) {
            myOutput.write(buffer, 0, length);
        }

        // Close the streams
        myOutput.flush();
        myOutput.close();
        myInput.close();
    }

    public ArrayList<Contacts> select(String query) throws SQLException {

        //Cursor c=null;

        ArrayList<Contacts> objects = new ArrayList<Contacts>();
        Log.i(TAG, "SQL Command = " + query);


        Cursor c=null;
        try {
            c = mDataBase.rawQuery(query, null);
            int id[]=new int[c.getCount()];
            int i=0;
            if (c.getCount() > 0)
            {
                c.moveToFirst();
                do {
                    id[i]=c.getInt(c.getColumnIndex("name"));
                    Log.i(TAG, "Name: "  + c.getString(1));
                    i++;
                    Contacts cons = new Contacts(c.getString(1), c.getString(2),
                            c.getString(3), c.getString(4), c.getString(5));
                    objects.add(cons);
                    //cursor = c;
                } while (c.moveToNext());
                c.close();
            }
        } catch (Exception e) {
            c.close();
        } finally {
            if(c!=null) {
                c.close();
            }

        }
        c.close();

        return objects;

    }
}
1. 检查 app databases 下有没有 econtacts.db 存在, 若无则复制 econtacts.db 到 app databases 下
2. 实现 contact_info 所有的查询结果, 并返回到一个叫 Contacts 的阵列.
所以我们需要定义 Contacts.java
package com.elvis.android.blackcontacts;

/**
 * Created by elvis on 10/15/15.
 */
public class Contacts {
    private String name="";
    private String alias="";
    private String phone1="";
    private String phone2="";
    private String remark="";

    public void setName(String name) {
        this.name = name;
    }

    public String getName() {
        return this.name;
    }

    public String getAlias() {
        return  this.alias;
    }

    public void setAlias(String alias) {
        this.alias = alias;
    }

    public String getPhone1() {
        return  this.phone1;
    }

    public void setPhone1(String phone) {
        this.phone1 = phone;
    }

    public String getPhone2() {
        return  this.phone2;
    }

    public void setPhone2(String phone) {
        this.phone2 = phone;
    }

    public String getRemark() {
        return  this.remark;
    }

    public void setRemark(String remark) {
        this.remark = remark;
    }

    public Contacts (String name,String alias, String ph1,String ph2, String remark){
        this.name = name;
        this.alias = alias;
        this.phone1 = ph1;
        this.phone2 = ph2;
        this.remark = remark;

    }

    public Contacts (){

    }
}
之后再编写 Adapter 类用来定义 lv_blackinfo 与 Contacts 列表的关系: BlackInfoAdapter.java
package com.elvis.android.blackcontacts;

import android.widget.BaseAdapter;
import java.util.ArrayList;
import android.view.LayoutInflater;
import android.content.Context;
import android.view.View;
import android.view.ViewGroup;
import android.widget.TextView;

/**
 * Created by elvis on 10/16/15.
 */
public class BlackInfoAdapter extends BaseAdapter {
    private static ArrayList<Contacts> searchArrayList;
    private LayoutInflater mInflater;

    public BlackInfoAdapter(Context context, ArrayList<Contacts> results) {
        searchArrayList = results;
        mInflater = LayoutInflater.from(context);
    }

    public int getCount() {
        return searchArrayList.size();
    }

    public Object getItem(int position) {
        return searchArrayList.get(position);
    }

    public long getItemId(int position) {
        return position;
    }

    @Override
    public View getView(int position, View convertView, ViewGroup parent) {
        View row;
        row = mInflater.inflate(R.layout.custom, parent, false);
        TextView tv_name, tv_alias, tv_phone1, tv_phone2, tv_remark;

        tv_name = (TextView) row.findViewById(R.id.tv_name);
        tv_alias = (TextView) row.findViewById(R.id.tv_alias);
        tv_phone1 = (TextView) row.findViewById(R.id.tv_phone1);
        tv_phone2 = (TextView) row.findViewById(R.id.tv_phone2);
        tv_remark = (TextView) row.findViewById(R.id.tv_remark);

        tv_name.setText(searchArrayList.get(position).getName());
        tv_alias.setText(searchArrayList.get(position).getAlias());
        tv_phone1.setText(searchArrayList.get(position).getPhone1());
        tv_phone2.setText(searchArrayList.get(position).getPhone2());
        tv_remark.setText(searchArrayList.get(position).getRemark());

        tv_phone1.setVisibility(row.GONE);
        tv_phone2.setVisibility(row.GONE);

        return (row);
    }
}
由于所占的版面较大, 所以将电话的部分先隐藏.
最后可以开始完成主程式 MainActivity.java 的编写
package com.elvis.android.blackcontacts;

import android.app.Activity;
import android.os.Bundle;
import android.view.Menu;
import android.view.MenuItem;
import android.view.View.OnClickListener;
import android.view.View;
import android.widget.TextView;
import android.widget.Toast;
import android.widget.ListView;
import android.content.Context;
import java.util.ArrayList;

public class MainActivity extends Activity implements OnClickListener{
//public class MainActivity extends ListActivity{
    private TextView tv_add_blackinfo;
    private ListView lv_blackinfo;
    private TextView tv_empty_blackinfo;
    private BlackInfoDBHelper dbhelper = null;
    private static final String TABLE_NAME = "contact_info";

    @Override
    protected void onCreate(Bundle savedInstanceState) {
        super.onCreate(savedInstanceState);
        setContentView(R.layout.activity_main);
        tv_add_blackinfo = (TextView) findViewById(R.id.tv_add_blackinfo);
        tv_add_blackinfo.setOnClickListener(this);
        lv_blackinfo = (ListView)findViewById(R.id.lv_blackinfo);
        tv_empty_blackinfo = (TextView) findViewById(R.id.tv_empty_blackinfo);
        lv_blackinfo.setEmptyView(tv_empty_blackinfo);

        Context context = getApplicationContext();
        dbhelper = new BlackInfoDBHelper(context);

        ArrayList<Contacts> objects = dbhelper.select("SELECT * FROM " + TABLE_NAME);
        BlackInfoAdapter customAdapter = new BlackInfoAdapter(context, objects);

        lv_blackinfo.setAdapter(customAdapter);
    }

    @Override
    public boolean onCreateOptionsMenu(Menu menu) {
        // Inflate the menu; this adds items to the action bar if it is present.
        getMenuInflater().inflate(R.menu.menu_main, menu);
        return true;
    }

    @Override
    public boolean onOptionsItemSelected(MenuItem item) {
        // Handle action bar item clicks here. The action bar will
        // automatically handle clicks on the Home/Up button, so long
        // as you specify a parent activity in AndroidManifest.xml.
        int id = item.getItemId();

        //noinspection SimplifiableIfStatement
        if (id == R.id.action_settings) {
            return true;
        }

        return super.onOptionsItemSelected(item);
    }

    public void onClick(View v) {
        int id = v.getId();
        switch(id) {
            case R.id.tv_add_blackinfo:
                Toast.makeText(this, "点击添加", Toast.LENGTH_LONG).show();
                break;


        }

    }
}
执行结果:

此时可以对 econtacts.db 中的 contact_info 内容作检查:
结果是吻合的!!
在编写 activity 的过程中, 有发生一段小插曲, 错误提示: "manifest file doesn't end with a final newline". 一直找不到原因.
语法检查也没有错误. 后来在一次偶然的操作, 这错误提示就消失了, 而这个简单的动作, 就是往上移动滑鼠游标,就解决问题.
以下图例说明, 会出现错误的情形(此时游标在图白的位置)。 红底色的地方就是提示错误的地方.
可是当游标移动到下图白色位置, 错误提示消失, 问题解决.
再添个小插曲, 模拟器有时侯执行太久记忆体错乱, 需重置模拟器做法如下:

