OpenCV partition
opencv partition
首先说下并查集,主要功能是就是将相似的元素分为一类,有点像聚类,但是聚类没有具体的相似测试.如果我们有{1,1,3,3,4,4,4,4,4,5,5,6,6},直接可以看出来这个可以分成{{1,1},{3,3},{4,4,4,4,4},{5,5},{6,6}}.当然这个前提是两个元素相似等于相等.普通的可以这样做,先排序再相连的两个元素比较,如相等,再往后移动,具体可以看http://www.haskell.org/haskellwiki/99_questions/1_to_10第9题.
这个是在一维的情况下,但是如果到了二维呢,(x1,y1)是不可以排序的的,就像实数点是可以排序,但是复数却不可以一样.这个时候可以定义`相似`,可以这样仍为如果(x1,y1),(x2,y2)的欧式距离小于某个值就认为相似.这个时候再分类就可以了.
相似是两个元素的比较操作,在代码中体现为 '_EqPredicate predicate=_EqPredicate()'可以作为参数传给它的.
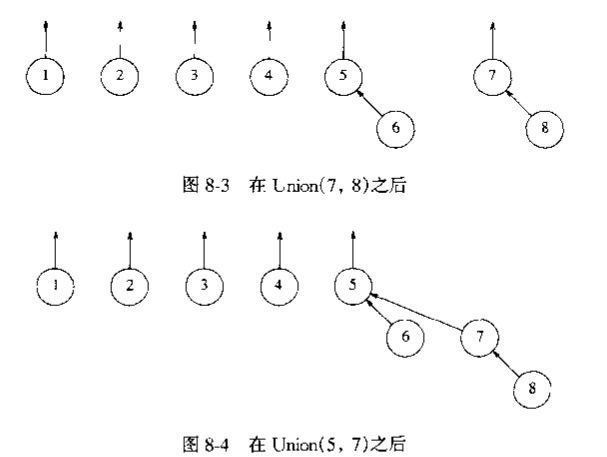
并查集的基本结构可以是这样的.
(截图来自<数据结构与算法分析-C语言版>)
每个元素有一个指向父亲指针,如果2个元素相同就可以把其中一个元素的父亲指向另一个.如下
当然由于元素的结构简单,可以直接使用数组代替,数组的位置为元素的value,数组的值为它爹的地址.如
{0,1,2,3,3,4} 可以认为0,1,2,3是单元素,第4个它爹是3,第5个元素它爹是4 可以看成{0,1,2,3<-4<-5}.所以上面的图可以写成
当然图中指向0认为是单个元素.
在OpenCV代码中表现为
for(i = 0; i < N; i++)
    {
        nodes[i][PARENT]=-1;
        nodes[i][RANK] = 0;
    }
OpenCV中使用的指向-1.其中的RANK等会儿再说.
如何合并两个值呢,简单的情况是两个元素都没有爹,但是如果这两个元素都有爹呢,如果爹一样,pass,已经在同一个类别里了,如果不一样呢,还要继续判断.其实这里可以联想到<编程之美>上的一道题目'3.6 编程判断两个链表是否相交',其实解法很简单,先分别找爹的爹的爹....的爹..如果它们的老祖宗相等就可以认为是相等的,pass.如果不等,对它们的祖宗合并.
找祖宗的代码如下..
// find root
        while( nodes[root][PARENT] >= 0 )
            root = nodes[root][PARENT];
while( nodes[root2][PARENT] >= 0 )
                root2 = nodes[root2][PARENT];
合并祖宗可以简单的如合并单个元素一样的,单个的点指向另一个点,但是这种情况下,最坏的情况如下,{1<-2<-3<-4<-5...<-n-1<n}.如果比较n-1,和n元素.这时的情况就是.需要遍历2n-1次元素,如果在合并是有一种情况.
  1
/ | \
2 3  ..n   这种情况就是特好的了,反正都是同一类,谁当爹都一样(这话有问题的),这种情况下只需要2次就可以找到了.
当然这个术语叫路径压缩,代码如下.
// compress the path from node2 to root
                while( (parent = nodes[k][PARENT]) >= 0 )
                {
                    nodes[k][PARENT] = root;
                    k = parent;
                }

                // compress the path from node to root
                k = i;
                while( (parent = nodes[k][PARENT]) >= 0 )
                {
                    nodes[k][PARENT] = root;
                    k = parent;
                }
优化查找的另一种方法就是合并的时候,不直接简单的将一个元素认为是爹,当爹的条件首选是资历老{Rank}必须要大,最后的效果就是树尽量平衡.避免单链表的情况,当然术语叫Rank合并代码如下:
// unite both trees
                int rank = nodes[root][RANK], rank2 = nodes[root2][RANK];
                if( rank > rank2 )
                    nodes[root2][PARENT] = root;
                else
                {
                    nodes[root][PARENT] = root2;
                    nodes[root2][RANK] += rank == rank2;
                    root = root2;
                }
最后就是标出每个元素所在的类别了.从第一个元素开始,直接访问它的祖宗,设置类别.此时OpenCV作者有一次体现了功力深厚的时候,直接在RANK上填写类别,反正树已经建好了,RANK没用了,RANK上的值都是非负的,就用~来区分,设置元素时在用~改回去,使用~而不用-的原因估计是位操作比较快吧.

最后说下应用.
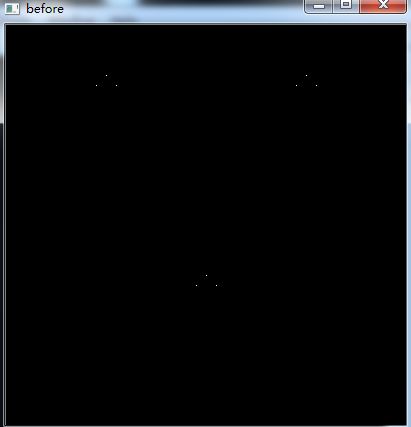
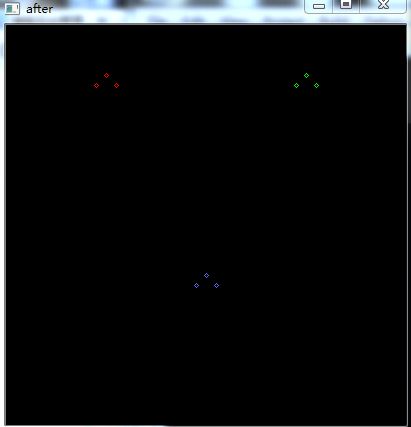
1.聚集顶点. 相似条件欧式距离<10.
before.
after.
部分代码如下.
 1 struct PointLike{
 2         PointLike(int thresh){
 3                 this->thresh = thresh;
 4         }
 5         bool operator()(cv::Point p1,cv::Point p2){
 6                 int x = p1.x - p2.x;
 7                 int y = p1.y - p2.y;
 8                 return x*x+y*y <=thresh*thresh;
 9         }
10         int thresh;
11 };
12
13  PointLike plike(20);
14         std::vector<int> labels;
15         int count;
16         count = cv::partition(pts_v,labels,plike);
17
18         for(size_t i = 0;i<pts_v.size();i++)
19         {
20                 cv::circle(after,pts_v[i],2,colorTab[labels[i]]);
21         }
2.合并重叠的矩形.(人脸识别里用的)
相似条件(重叠面积占小矩形面基的75%)
before:
after:
部分代码如下:
 1 struct RectLike{
 2         RectLike(double p){
 3                 this->p = p;
 4         }
 5         bool operator()(cv::Rect r1,cv::Rect r2){
 6                 int area1 = r1.area();
 7                 int area2 = r2.area();
 8                 //相交Rect面积
 9                 int area = overlap_rect_area(r1,r2);
10                 return area1<area2?area>=p*area1:area>=p*area2;
11         }
12         double p;
13 };
14
15 RectLike rLike(0.75);
16 std::vector<int> labels;
17 int count;
18 count = cv::partition(rects_v,labels,rLike);
19
20 for(size_t i = 0;i<rects_v.size();i++)
21         {
22                 cv::rectangle(after,rects_v[i],colorTab[labels[i]]);
23         }


