UITabBarController使用
-(id)init { if ([super init] != nil) { UITabBarItem *item = [[UITabBarItem alloc] initWithTitle:@"asdfsadf" image:[UIImage imageNamed:@"WWAN5.png"] tag:1]; self.tabBarItem = item; [item release]; } return self; } 我很少写关于IOS的文章,写这篇完全是因为网络上copy,paste的文章太多,将我误导,搞的我花了半天时间才会用这控件,最后还是看了外国一个英文贴子,才会用。因此写了这篇供后学之人学习加快吧,也希望大家在写文章时,不要千篇一律的复制、粘贴。我们是软件工程师,而不是复制、粘贴工程师。
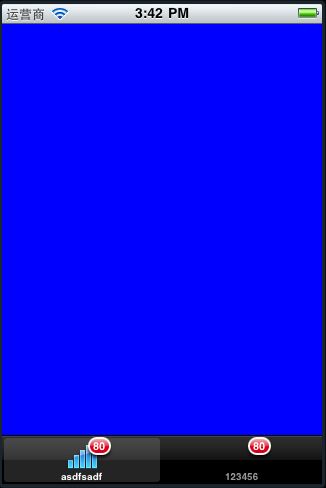
该文章内容展示效果如下图:
接下来,你将看到完全用代码实现的tab bar选项卡切换效果。下面开始。
准备工作,创建一个项目名为ViewSwitcher(你可以选择基于View-based Application或Window-based Application,只不过选择后者的话,要自己创建一个view controller罢了,我是选择了第一个)。
在此,我不会教大家只在ViewSwitcherAppDelegate中去创建UITabBarController的实例(这种方式网上到处都是),我要教大家如何在自己的view controller中创建UITabBarController实例。
下一步,创建两个view controller类,我这里命名为BlueViewController和YellowViewController,当然,它们都是UIViewController的子类。
接着,在ViewSwitcherViewController的viewDidLoad方法中,代码如下: tabBar = [[UITabBarController alloc] init]; tabBar.delegate = self; blueViewController = [[BlueViewController alloc] init]; yellowViewController = [[YellowViewController alloc] init]; NSArray *viewControllerArray = [NSArray arrayWithObjects:blueViewController,yellowViewController,nil]; tabBar.viewControllers = viewControllerArray; tabBar.view.frame = CGRectMake(0, 0, self.view.frame.size.width, self.view.frame.size.height); [self.view addSubview:tabBar.view]; [viewControllerArray release];
其中tabBar是在.h文件中声明的UITabBarController对象实例。这样运行看看吧。
你会看到为什么两个按钮是黑色的呢,没有字呢?没错,因为我们还没有写这部分代码。设置tab bar标签的图片或文字,可以在它的子view controller中做(这么说或许不是很恰当,因为官方可不这么叫),在这里,我是写在blueViewController和yellowViewController中的,重写它们的init方法,将它们的tabBarItem成员赋值,代码如下:
-(id)init { if ([super init] != nil) { UITabBarItem *item = [[UITabBarItem alloc] initWithTitle:@"asdfsadf" image:[UIImage imageNamed:@"WWAN5.png"] tag:1]; self.tabBarItem = item; [item release]; } return self; }
运行进来 ,你将看到新的效果。
那么,那个在item上的小红圈提示是怎么来的呢??我们实现UITabBarDelegate中的- (void)tabBarController:(UITabBarController *)tabBarController didSelectViewController:(UIViewController *)viewController方法,代码如下:
- (void)tabBarController:(UITabBarController *)tabBarController didSelectViewController:(UIViewController *)viewController{ // [self.view addSubview:viewController.view]; // tabBarController.selectedViewController = viewController; viewController.tabBarItem.badgeValue = [NSString stringWithFormat:@"%d",80]; // viewController.tabBarItem.title = @"aaa"; }
聪明的人,应该不需要我一行行的去讲解代码吧!
最后,转载请注明出处,谢谢!
