Android—— 三步实现自定义ViewGroup
在学习过了 Android 绘图基础:Path(绘制三角形、贝塞尔曲线、正余弦) 和 Android 绘图进阶:仿360水纹进度球(可动正余弦曲线+xfermode) 这两部分之后,学会了怎样实现一个自定义的View,现在我们还可以更进一步的实现自定义ViewGroup了。
一、自定义ViewGroup
刚开始听说自定义ViewGroup的时候我还不理解什么叫做自定义ViewGroup,我们知道自定义View是我们可以自己绘制一些图形作为我们的布局中的子View,那么容纳这些子View的容器,也就是我们所说的布局(像LinearLayout之类的)就是ViewGroup了。其实自定义ViewGroup就是自定义我们的布局,将我们的子View具体放置在哪个位置,这就是我们想要做到的效果。
二、实现步骤
我们想要实现自定义ViewGroup步骤跟自定义Vie差不多,首先更需要一个继承他的class,实现两个构造器,覆写里面的onMeasure与onLayout方法(自定义View中覆写的是onMeasure与onDraw方法),最后在布局引用就OK了。
步骤
1、写一个继承ViewGroup的class,实现两个构造器
2、覆写onMeasure与onLayout方法。
3、布局中引用
1、创建class,实现构造器
public class MyViewGroup extends ViewGroup{

    public MyViewGroup(Context context) {
        super(context);
        // TODO Auto-generated constructor stub
    }
    public MyViewGroup(Context context, AttributeSet attrs) {
        super(context, attrs);
        // TODO Auto-generated constructor stub
    }
}
2、覆写两个方法
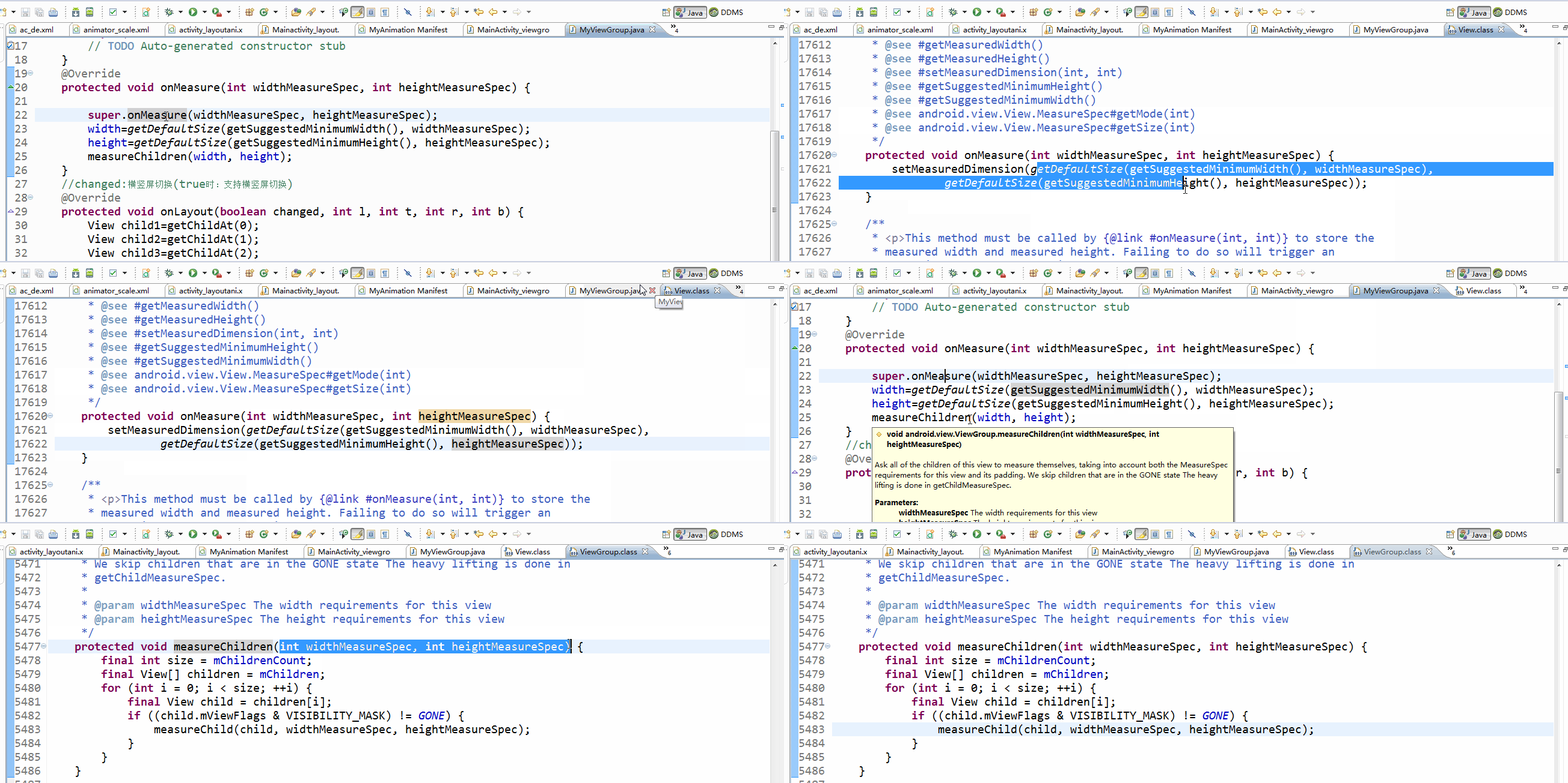
覆写onMeasure获得ViewGroup的高度与宽度,高度与宽度的获得我们通过进入super.onMeasure()的onMeasure(ctrl+左键)中将原本的测量方法复制出来获得。在onMeasure方法中我们还需要测量子View需要调用measureChildren(),传递的参数,我们也可以通过进入它,看看他传递的是什么参数。

我们具体的子View的布局实际上是通过onLayout()方法中进行布局的,调用getChildAt(i)就可以获得第i个子View,部署它的位置。
public class MyViewGroup extends ViewGroup{
        //用于记录ViewGroup的高度与宽度
    private int width;
    private int height;
    public MyViewGroup(Context context) {
        super(context);

    }
    public MyViewGroup(Context context, AttributeSet attrs) {
        super(context, attrs);

    }
    @Override
    protected void onMeasure(int widthMeasureSpec, int heightMeasureSpec) {

        super.onMeasure(widthMeasureSpec, heightMeasureSpec);
        width=getDefaultSize(getSuggestedMinimumWidth(), widthMeasureSpec);
        height=getDefaultSize(getSuggestedMinimumHeight(), heightMeasureSpec);
        //该方法是系统自带的
        measureChildren(width, height);
    }
    //changed:横竖屏切换(true时:支持横竖屏切换)
    //参数为左上右下的坐标 注:onLayout与layout没有任何关系
    @Override
    protected void onLayout(boolean changed, int l, int t, int r, int b) {
             //获得子View
        View child1=getChildAt(0);
        View child2=getChildAt(1);
        View child3=getChildAt(2);
        View child4=getChildAt(3);
        View child5=getChildAt(4);
        if(child1!=null){
        //对子View进行布局,布局于左上角
    //注:获得子View的宽度与高度的方法是getMeasuredWidth()不要写成getWidth()
            child1.layout(0, 0, child1.getMeasuredWidth(), child1.getMeasuredHeight());
        }
        //布局于右上角
        if(child2!=null){
            child2.layout(r-child2.getMeasuredWidth(), 0, r, child2.getMeasuredHeight());
        }
        //将子View布局在左下角位置
        if(child3!=null){
            child3.layout(0, b-child3.getMeasuredHeight(), child3.getMeasuredWidth(), b);
        }
        //将子View布局在右下角位置
        if(child4!=null){
            child4.layout(r-child4.getMeasuredWidth(), b-child4.getMeasuredHeight(), r, b);
        }
    //通过计算将子View布局在中心位置
        if(child5!=null){
            child5.layout((r-child5.getMeasuredWidth())/2,(b-child5.getMeasuredHeight())/2 ,r/2+child5.getMeasuredWidth()/2 , b/2+child5.getMeasuredHeight()/2);
        }
    }
}
3、布局中引用
注:引用时要写全包名加类名:com.example.myview.MyViewGroup
<?xml version="1.0" encoding="utf-8"?>
<LinearLayout xmlns:android="http://schemas.android.com/apk/res/android" android:layout_width="match_parent" android:layout_height="match_parent" android:orientation="vertical" >

    <com.example.myview.MyViewGroup  android:layout_width="match_parent" android:layout_height="match_parent" >

        <Button  android:layout_width="100dp" android:layout_height="100dp" android:text="Button1" />

        <Button  android:layout_width="100dp" android:layout_height="100dp" android:text="Button2"/>

        <Button  android:layout_width="100dp" android:layout_height="100dp" android:text="Button3"/>

        <Button  android:layout_width="100dp" android:layout_height="100dp" android:text="Button4" />

        <Button  android:layout_width="100dp" android:layout_height="100dp" android:text="Button5" />
    </com.example.myview.MyViewGroup>

</LinearLayout>
这样就实现了我们开篇的ViewGroup的布局了。