cobbler安装centos系统
整个安装系统的流程与pxe还是一样的,只不过由手动变成了自动,各个版本之间也更好管理。
这里还是centos系统的。cobbler的大致基础使用。
环境:
平台:VirtualBox 虚拟机
服务机:CentOS7
所安装的系统:CentOS7, CentOS6
cobbler里面有几个概念要首先了解一下:
distro: 用来标识一个发行版。因为安装不同版本的系统起码要用不同的内核与initrd来启动安装程序。这个就是用来区分它们的。注意distro主要是来标识不同的内核与initrd,与整个光盘的软件没有关系,这些软件是在ks文件里配置的。
profile: 用来区分不同的配置信息, 最主要的就是区分不同的ks文件。如有的ks文件是最小化安装,有的是桌面版安装。
system: 估计是用来以MAC地址来区分不同主机,来完成定制安装的吧。没有尝试过,不敢肯定。
一定要区分一下,cobbler做的只是第一二阶段的引导,在客户机加载完内核与initrd文件以后就与cobbler没有关系了。之后在哪里下载软件还有系统配置和分区就是ks文件的关系了。
目录:
一、 配置cobbler
二、使用
三、导入软件库
四、创建profile
五、创建distro
六、cobbler-web
在yum info cobbler里面可以看到:
Cobbler supports PXE, ISO virtualized installs, and re-installing existing Linux machines.
这里的PXE就是我们这里要说的。 其实就是pxe安装,所需要的软件与pxe安装的也都一样。唯一的区别就是自动配置和管理了。
cobbler在pxe安装centos系统主要就是封装了bootloader第一二阶段。 而之后的安装还是要依靠ks文件来完成。
安装上所依赖的程序dhcpd,tftp,httpd,rsync还有提供bootloader的syslinux。
yum install dhcp tftp httpd rsync syslinux -y
dhcpd.tftp.httpd是干嘛用的不用多说了吧,dhcpd用来分配IP地址,并给序客户端要下载的文件和tftp服务器。 tftp用来下载基础启动文件,第一二引导文件与菜单文件,还有内核与initrd。httpd用来下载ks文件与所有软件。至于rsync,在做import导入光盘的时候会用到,其它的时候就不清楚了。
dns服务可装可不装。
一、 配置cobbler:
直接yum安装即可。要有epel源。
[root@localhost yum.repos.d]# yum install cobbler -y
[root@localhost yum.repos.d]# rpm -ql cobbler | less
/etc/cobbler
/etc/cobbler/auth.conf
/etc/cobbler/cheetah_macros
/etc/cobbler/cobbler_bash
/etc/cobbler/completions
/etc/cobbler/dhcp.template                    #dhcp 配置模板。
/etc/cobbler/distro_signatures.json
/etc/cobbler/dnsmasq.template            #dnsmasq的配置模板。 dnsmasq一个轻量的dhcp与dns转发功能的程序。
/etc/cobbler/import_rsync_whitelist
/etc/cobbler/iso/buildiso.template        #生成iso文件的模板。cobbler可以以distro来制作iso文件。
/etc/cobbler/modules.conf                    #cobbler用来管理其它程序的模块或者是引擎。
/etc/cobbler/named.template                #named的配置模板, dns我们这里压根就不用安装。
/etc/cobbler/settings                                #主配置文件。
/etc/cobbler/tftpd.template                    #tftp配置模板。
/etc/httpd/conf.d/cobbler.conf                 #httpd的配置文件,用来把/var/www/cobbler目录由httpd输出,也就是可以通过httpd下载这个目录里的内容了。
好吧,大部分都不知道干嘛用的。
直接启动服务,再cobbler check 。 来解决一些必须的项。
[root@localhost cobbler]# systemctl start cobblerd
[root@localhost cobbler]# cobbler check
httpd does not appear to be running and proxying cobbler, or SELinux is in the way. Original traceback:
Traceback (most recent call last):
  File "/usr/lib/python2.7/site-packages/cobbler/cli.py", line 252, in check_setup
    s.ping()
  File "/usr/lib64/python2.7/xmlrpclib.py", line 1224, in __call__
    return self.__send(self.__name, args)
  File "/usr/lib64/python2.7/xmlrpclib.py", line 1578, in __request
    verbose=self.__verbose
  File "/usr/lib64/python2.7/xmlrpclib.py", line 1264, in request
    return self.single_request(host, handler, request_body, verbose)
  File "/usr/lib64/python2.7/xmlrpclib.py", line 1292, in single_request
    self.send_content(h, request_body)
  File "/usr/lib64/python2.7/xmlrpclib.py", line 1439, in send_content
    connection.endheaders(request_body)
  File "/usr/lib64/python2.7/httplib.py", line 969, in endheaders
    self._send_output(message_body)
  File "/usr/lib64/python2.7/httplib.py", line 829, in _send_output
    self.send(msg)
  File "/usr/lib64/python2.7/httplib.py", line 791, in send
    self.connect()
  File "/usr/lib64/python2.7/httplib.py", line 772, in connect
    self.timeout, self.source_address)
  File "/usr/lib64/python2.7/socket.py", line 571, in create_connection
    raise err
error: [Errno 111] Connection refused
启动httpd再来试一下:
[root@localhost cobbler]# systemctl start httpd
[root@localhost cobbler]# cobbler check
The following are potential configuration items that you may want to fix:

1 : The 'server' field in /etc/cobbler/settings must be set to something other than localhost, or kickstarting features will not work.  This should be a resolvable hostname or IP for the boot server as reachable by all machines that will use it.
2 : For PXE to be functional, the 'next_server' field in /etc/cobbler/settings must be set to something other than 127.0.0.1, and should match the IP of the boot server on the PXE network.
3 : change 'disable' to 'no' in /etc/xinetd.d/tftp
4 : some network boot-loaders are missing from /var/lib/cobbler/loaders, you may run 'cobbler get-loaders' to download them, or, if you only want to handle x86/x86_64 netbooting, you may ensure that you have installed a *recent* version of the syslinux package installed and can ignore this message entirely.  Files in this directory, should you want to support all architectures, should include pxelinux.0, menu.c32, elilo.efi, and yaboot. The 'cobbler get-loaders' command is the easiest way to resolve these requirements.
5 : file /etc/xinetd.d/rsync does not exist
6 : debmirror package is not installed, it will be required to manage debian deployments and repositories
7 : ksvalidator was not found, install pykickstart
8 : The default password used by the sample templates for newly installed machines (default_password_crypted in /etc/cobbler/settings) is still set to 'cobbler' and should be changed, try: "openssl passwd -1 -salt 'random-phrase-here' 'your-password-here'" to generate new one
9 : fencing tools were not found, and are required to use the (optional) power management features. install cman or fence-agents to use them

Restart cobblerd and then run 'cobbler sync' to apply changes.
修改setting配置文件中的server地址为提供cobbler与httpd服务的主机名或ip。
修改setting配置文件中的next_server为提供pxe服务的主机名或ip。
这个如果在centos6系统上按上面说的作就可以, 但在centos7上面tftp由systemd管理,所以只要能够启动tftp就可以忽略这个了。
没有bootloader文件,如果可以连网,执行cobbler get-loaders可以自动下载。也可以用syslinux起供的bootloader文件。(第二阶段的引导文件也可以用光盘里的vesamenu.c32,不过要改名为menu.c32。
cp /usr/share/syslinux/{pxelinux.0,menu.c32} /var/lib/cobbler/loaders/
同样的只要确定安装了rsync就可以。
这个软件在只安装centos系统的情况下也可以不安装,只在部署debian系的系统时要用到。
还要安装pykickstart软件,yum安装即可。
给default_password_crypted配置一个密码,用openssl生成或是新建一个用户,在shadow文件中复制出来都可以。
这个可以忽略或是安装cman 和 fence-agents。
/var/lib/cobbler/loaders/ 这个目录可以理解为cobbler的工作目录,一些要用到的引导文件或ks都要放到这里,cobbler会自动从这里复制。如:会把pxelinux.0复制到tftp根目录。
启动tftp与rsync
[root@localhost cobbler]# systemctl start tftp.socket
[root@localhost cobbler]# systemctl start rsyncd.socket
密码那个用openssl的话只能是md5加密的,如果要用其它的,可以创建个临用户,给用户设好密码以后中,再把/etc/shadow文件中的密码复制出来。
都完成以后就可以执行cobbler sync然后再重启cobbler。
[root@localhost cobbler]# cobbler sync
[root@localhost cobbler]# systemctl restart cobblerd
[root@localhost cobbler]# cobbler check
The following are potential configuration items that you may want to fix:

1 : some network boot-loaders are missing from /var/lib/cobbler/loaders, you may run 'cobbler get-loaders' to download them, or, if you only want to handle x86/x86_64 netbooting, you may ensure that you have installed a *recent* version of the syslinux package installed and can ignore this message entirely.  Files in this directory, should you want to support all architectures, should include pxelinux.0, menu.c32, elilo.efi, and yaboot. The 'cobbler get-loaders' command is the easiest way to resolve these requirements.
2 : file /etc/xinetd.d/rsync does not exist
3 : debmirror package is not installed, it will be required to manage debian deployments and repositories
4 : fencing tools were not found, and are required to use the (optional) power management features. install cman or fence-agents to use them

Restart cobblerd and then run 'cobbler sync' to apply changes.
因为bootloader我们只复制了一部分,不全,所以还会报故障。也可以试试把/etc/share/syslinux/目录里的所有文件都复制过去再试试。 不过对于我们这里已经够用了。
cobbler sync 是用来同步配置和文件的,如根据配置生成菜单文件,如为内核和initrd文件做硬链接到tftp目录里,如复制ks文件,复制引导文件。总之就是准备好远程系统安装的一切所需。
在主配置文件中:
manage_dhcp: 0
manage_dns: 0
manage_tftpd: 1
manage_rsync: 0
这几项表示是否由cobbler管理这些程序。tftpd不用怎么配置,让cobbler来管理也可以。不过dhcp之类的如果让它自动管理和配置的话,可能会很麻烦。 如果想让cobbler来管理的话可以改为1。然后再修改一下那几个模板文件,还有modules里面的管理模块。
二、使用:
[root@localhost cobbler]# cobbler --help
usage
=====
cobbler <distro|profile|system|repo|image|mgmtclass|package|file> ...          #主选项
        [add|edit|copy|getks*|list|remove|rename|report] [options|--help]         #次选项
cobbler <aclsetup|buildiso|import|list|replicate|report|reposync|sync|validateks|version|signature|get-loaders|hardlink> [options|--help]        #辅助选项
[root@localhost cobbler]#
如查看当前distro与profile。
[root@localhost cobbler]# cobbler distro list
[root@localhost cobbler]# cobbler profile list
当然我们什么也没有添加呢。 也可以像下面这样查看profile有什么次选项。 distro当然也一样。
[root@localhost cobbler]# cobbler profile help
usage
=====
cobbler profile add
cobbler profile copy
cobbler profile dumpvars
cobbler profile edit
cobbler profile find
cobbler profile getks
cobbler profile list
cobbler profile remove
cobbler profile rename
cobbler profile report
[root@localhost cobbler]#
而次选项都有哪些选项可以再加上--help
[root@localhost cobbler]# cobbler profile add --help
会有很多。 或许这个里面才是选项吧,上面那些应该叫子命令。
distro表示一个发行版,而同一个发行版可以有多个profile。profile就是配置,如ks。 同一个系统按不同的安装方式可以有多个ks文件。
三、导入软件库
最简单的添加distro的方式,就是cobbler import。 cobbler会复制所有系统文件到自己所管理的目录中,并抽取内核与initrd文件来创建distro。 并根据ks文件来创建profile。
[root@localhost cobbler]# cobbler import --help
Usage: cobbler [options]

Options:
  -h, --help            show this help message and exit
  --arch=ARCH           OS architecture being imported        #手动指定系统架构。
  --breed=BREED         the breed being imported
  --os-version=OS_VERSION
                        the version being imported
  --path=PATH           local path or rsync location         #安装仓库的位置,可以用光盘。
  --name=NAME           name, ex 'RHEL-5'                    #distro名称,必选项。
  --available-as=AVAILABLE_AS
                        tree is here, don't mirror
  --kickstart=KICKSTART_FILE                                    #指定要使用的ks文件,如果不指定,cobbler会使用一个自带的最小安装的ks文件。
                        assign this kickstart file
  --rsync-flags=RSYNC_FLAGS
                        pass additional flags to rsync
如:导入centos6的。
注意: 显示出来的只是python打印出来的信息,后面是在用rsync来同步光盘数据,所以想要停止的话要kill掉rsync才行,在这里ctrl+c是没有用的。可以用lsof 来查看有哪些程序在使用某个文件。
[root@localhost cobbler]# cobbler import --name="CentOS6" --path=/mnt/cdrom1
task started: 2016-02-25_183411_import
task started (id=Media import, time=Thu Feb 25 18:34:11 2016)
Found a candidate signature: breed=redhat, version=rhel6
Found a matching signature: breed=redhat, version=rhel6
Adding distros from path /var/www/cobbler/ks_mirror/CentOS6:
creating new distro: CentOS6-x86_64
trying symlink: /var/www/cobbler/ks_mirror/CentOS6 -> /var/www/cobbler/links/CentOS6-x86_64
creating new profile: CentOS6-x86_64
associating repos
checking for rsync repo(s)
checking for rhn repo(s)
checking for yum repo(s)
starting descent into /var/www/cobbler/ks_mirror/CentOS6 for CentOS6-x86_64
processing repo at : /var/www/cobbler/ks_mirror/CentOS6
need to process repo/comps: /var/www/cobbler/ks_mirror/CentOS6
looking for /var/www/cobbler/ks_mirror/CentOS6/repodata/*comps*.xml
Keeping repodata as-is :/var/www/cobbler/ks_mirror/CentOS6/repodata
*** TASK COMPLETE ***
[root@localhost cobbler]#
ok了, COMPLETE。
[root@localhost cobbler]# cobbler distro list
   CentOS6-x86_64
[root@localhost cobbler]# cobbler profile list
   CentOS6-x86_64
可以看到distro和profile了。我们还可以以这个distro创建多个profile。
现在也可以再看下tftp的根目录有哪些文件了,一般在/var/lib/tftpboot里面。还有httpd的/var/www/cobbler/目录。
一会儿还要创建profile, 我们先把这个profile重命名一下:
[root@localhost cobbler]# cobbler profile rename --name=CentOS6-x86_64 --newname=CentOS6-x86_64_mini
[root@localhost cobbler]# cobbler profile list
   CentOS6-x86_64_mini
应用部署环境:
[root@localhost cobbler]# cobbler sync
DHCP,把dhcp配置一下就可以测试一下会不会自动安装了。简单配置一下。
default-lease-time 3600;                                    # 默认租约
max-lease-time 7200;                                         #最长租约
log-facility local5;                                                 #我这里把日志设施改了,还要在/etc/rsyslog.conf里面添加这个日志的存储路径。 如:local5.*            /var/log/dhcp.log


subnet 192.168.40.0 netmask 255.255.255.0 {        #添加作用域。
        range 192.168.40.10 192.168.40.20;                #地址池
        filename "pxelinux.0";                                        #客户端要去找的文件。
        next-server 192.168.40.100;                              #客户端去哪里找filename的文件。
}
dhcp的示例配置文件在/usr/share/doc/dhcp-4.2.5/dhcpd.conf.example。可以把这个文件复制到/etc/dhcp/dhcpd.conf,原来的那个里面是空的配置。然后根据这个文件来自定义配置。
启动dhcp和tftpd.
[root@localhost cobbler]# systemctl start dhcpd.service tftp.socket
测试:
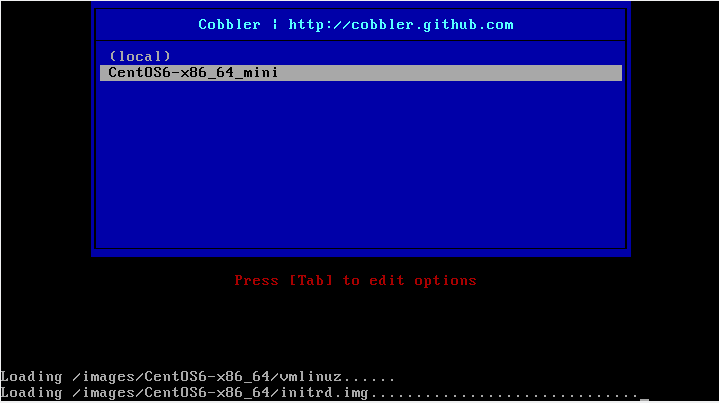
看起来工作正常, 我这里选择CentOS6那项了, 能看到在加载内核与initrd文件。 我这里自动安装完成。
四、创建profile。
[root@localhost cobbler]# cp /root/centos6.cfg /var/lib/cobbler/kickstarts/
[root@localhost cobbler]# cobbler profile add --name=CentOS6-server --distro=CentOS6-x86_64 --kickstart=/var/lib/cobbler/kickstarts//centos6.cfg
[root@localhost cobbler]# cobbler profile list
   CentOS6-server
   CentOS6-x86_64_mini
需要把ks文件复制到cobbler所管理的目录中, 也就是/var/lib/cobbler/kickstarts/目录下。不然会报错:
exception on server: 'Invalid kickstart template file location /root/centos6.cfg, it is not inside /var/lib/cobbler/kickstarts/'
ks文件:
firewall --disabled
install
url --url="/var/www/cobbler/ks_mirror/CentOS6/"        #注意这个路径
rootpw --iscrypted $6$3hHx9zVZ$ShB3kPo0UeHpetxNXEJr2GynXg2rcg2lgCflfTbuxN1yfUbrUmBJu3P/ncD/X467M1jN2yxiNWnBExozzjafg1
text
firstboot --disable
keyboard us
lang en_US
selinux --disabled
reboot
timezone  Asia/Shanghai
bootloader --append="rhgb crashkernel=auto quiet" --location=mbr --driveorder="sda"
zerombr
clearpart --all
part /boot --fstype="ext4" --size=200
part pv.008 --size=61440
volgroup vg0 --pesize=8192 pv.008
logvol / --fstype=ext4 --name=root --vgname=vg0 --size=20480
logvol swap --name=swap --vgname=vg0 --size=2048
logvol /usr --fstype=ext4 --name=usr --vgname=vg0 --size=10240
logvol /var --fstype=ext4 --name=var --vgname=vg0 --size=20480
%packages
@base
@core
%end
应用部署,cobbler sync。
可以看一下/var/lib/tftpboot/pxelinux.cfg/default。 这个是显示的那个菜单的文件。
再来测试机上试一下:
可以看到还是同一个内核与initrd文件,相同的distro。 不过因为ks文件的不同,所安装的软件和所做的配置肯定是不同的。
五、创建distro
向上面那种直接导入就是让cobbler完全管理了,比这种创建的要好。不过既然有,我们就来试一下。
我们知道distro中最主要的就是内核与initrd。所以指定这两个就可以了。
[root@localhost cobbler]# cobbler distro add --name=centos7 --kernel=/mnt/cdrom/images/pxeboot/vmlinuz --initrd=/mnt/cdrom/images/pxeboot/initrd.img
[root@localhost cobbler]# cobbler distro list
   CentOS6-x86_64
   centos7
[root@localhost cobbler]# cobbler profile list
   CentOS6-server
   CentOS6-x86_64_mini
[root@localhost cobbler]#
只添加了一个distro,profile不会添加。我们再来添加一个profile。因为ks文件要定义在哪里下载软件包,我们先把光盘目录绑定到http的下载目录。
[root@localhost cobbler]# mount --bind /mnt/cdrom /var/www/html/centos7
再来定义ks文件:
install
xconfig  --startxonboot
keyboard --vckeymap=cn --xlayouts='cn'
reboot
rootpw --iscrypted $1$HDHf2v4i$LMo.xGHfxQDOf8e043C.g/
timezone Asia/Shanghai
url --url="http://192.168.40.100/centos7/"            #注意下载路径
user --groups=wheel --name=mageedu --password=$6$1eWrOetY$DfLZgquGiOaNkwpEF4ItMipz.1kpn7Q.s6oXyoW2bALkWesRWHCCACICkJ.2zBXDbwEw0ibR.wxStLI41ZhfF1 --iscrypted --gecos="MageEdu"
firewall --disabled
network  --bootproto=dhcp --device=eth0
auth  --useshadow  --passalgo=sha512
text
firstboot --disable
selinux --permissive
ignoredisk --only-use=sda
bootloader --location=mbr --boot-drive=sda
zerombr
clearpart --all --initlabel
part /boot --asprimary --fstype="xfs" --size=512
part swap --fstype="swap" --size=2048
part /usr --fstype="xfs" --size=20480
part / --fstype="xfs" --size=20480
%packages
@base
@core
@fonts
创建profile:
[root@localhost cobbler]# cp /root/centos7.cfg /var/lib/cobbler/kickstarts/
[root@localhost cobbler]# cobbler profile add --name=centos7-server --distro=centos7 --kickstart=/var/lib/cobbler/kickstarts/centos7.cfg
[root@localhost cobbler]# cobbler profile list
   CentOS6-server
   CentOS6-x86_64_mini
   centos7-server
[root@localhost cobbler]#
应用部署:
[root@localhost cobbler]# cobbler sync
测试:
加载的centos7目录下的内核与initrd文件。这个centos7好像就是我们的distro名称啊。
这里的错误没有影响。
安装完成了。
六、cobbler-web
用网页来管理cobbler
安装cobbler-web
[root@localhost cobbler]# yum install cobbler-web -y
设置认证方式。
cobbler_web支持多种认证方式,如authn_configfile、authn_ldap或authn_pam等,默认为authn_denyall,即拒绝所有用户登录。
1、使用authn_pam模块认证cobbler_web用户。就是以系统用户来认证。
修改modules.conf中[authentication]段的module参数的值为authn_pam。
然后创建系统用户就可以了。
而后将创建的用户添加至cobbler_web的admin组中。修改/etc/cobbler/users.conf文件,将用户名添加为admin参数的值即可。
最后重启cobblerd和httpd服务,通过http://host/cobbler_web/ 访问即可。
出现这个问题可以查看/etc/httpd/conf.d/cobbler_web.conf。 由cobbler-web生成的。
现在的cobbler版本默认使用ssl。并且会自动安装上mod-ssl模块。这里可以用https来访问,不过ssl证书是由mod-ssl模块自带的,可以在/etc/httpd/conf.d/ssl.conf里面改一下。 这里就是httpd的配置了。
也可以在cobbler_web.conf里面注释使用ssl,就可以用http访问了。
不过如果不使用https的话,最简单的方法就是删除/etc/httpd/conf.modules.d/00-ssl.conf和ssl.conf文件。重启httpd服务。
2、使用authn_configfile模块认证cobbler_web用户
首先修改modules.conf中[authentication]段的module参数的值为authn_configfile。
接着创建其认证文件/etc/cobbler/users.digest,并添加所需的用户即可。
添加第一个用户时,需要为htdigest命令使用“-c”选项来创建文件,后续添加其他用户时不能再使用。
另外,cobbler_web的realm只能为Cobbler。
[root@localhost ~]# htdigest --help
Usage: htdigest [-c] passwordfile realm username
The -c flag creates a new file.
[root@localhost ~]# htdigest -c /etc/cobbler/users.digest Cobbler cobb
Adding password for cobb in realm Cobbler.
New password:
Re-type new password:
realm就是在弹出窗口式的登录中的提示信息。
最后重启cobblerd服务,通过http://host/cobbler_web/访问即可。
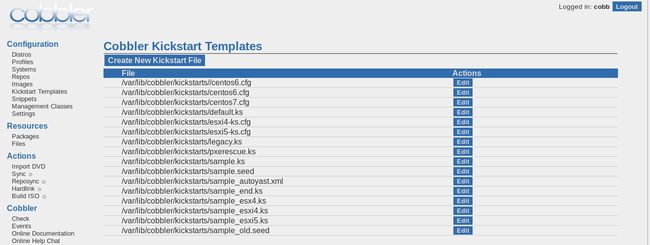
ks文件,有cobbler自带的也有我们刚才复制进去的。
哦对了,我们这里试一下把centos7的vesamenu.c32当成bootloader试试。 syslinux带的menu.c32是字符界面的窗口,而vesamenu.c32是图形的。
[root@localhost ~]# cp /mnt/cdrom/isolinux/vesamenu.c32 /var/lib/cobbler/loaders/menu.c32
cp: overwrite ‘/var/lib/cobbler/loaders/menu.c32’? y
[root@localhost ~]# cobbler sync
另外这个菜单也可以自定义,如添加个什么信息,修改个什么信息。朋友们就自己尝试吧。


