安装Cocoapods,以及其中出现的问题
更新升级10.11 cocoapods安装出问题最简单的解决方法
这是因为10.11把cocoapods直接干掉了
sudo gem install -n /usr/local/bin cocoapods
再加一句,完美解决
sudo xcode-select --switch /Applications/Xcode.app
使用CocoaPods做依赖管理,使我们的工程更加自动化的、集中的、简单直观的管理第三方开源库。你不用下载开源库的源代码引入工程,不用向工 程中添加Framework,不用解决开源库和开源库以及开源库和工程之间的依赖、重复问题,也不用管开源库更新等一系列问题。有了CocoaPods, 你只管任性,CocoaPods会为你做好一切。
更新Ruby
你需要会简单的使用命令行工具
CocoaPods唯一的限制就是在Ruby下运行,现在OS X都预装了Ruby,所以你只需要更新RubyGems到最新版本。
打开终端(control + space 真的很好用),然后输入如下的命令:
sudo gem update --system
会要你输入密码:
注意在终端中密码不显示字符,只要输完后按回车即可
用淘宝替换Ruby的默认源,替换命令如下:
gem sources --remove https://rubygems.org///等有反应之后再敲入以下命令gem sources -a http://ruby.taobao.org///验证是否替换成功可以执行gem sources -l

如图所示则证明替换成功
安装CocoaPods
在终端中输入如下命令:
sudo gem install cocoapods
安装过程是这样的:
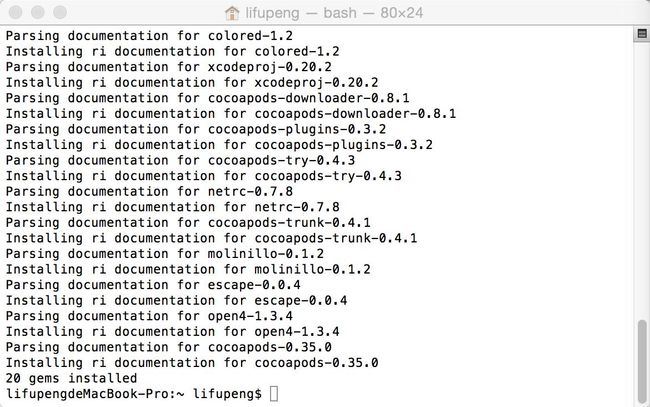
安装完成如上图所示
在终端中输入如下命令来完成安装:
//将 CocoaPods Specs repository复制到你电脑上~/.cocoapods目录下pod setup
它需要一点时间来完成,你等就是了
如果安装失败 ~/.cocoapods 里面是空的,就需要重新setup
命令如下:
pod repo remove master
pod setup
完毕之后这个文件夹大概有 100多M,需要花费比较多时间,请耐心等待。
到这里你已经成功安装了CocoaPods!
创建配置Podfile
Xcode新建一个HelloWorld工程
打开终端,进入HelloWord工程目录下:
//工程的路径也可以直接拖进来 cd /Users/lifupeng/Desktop/HelloWorld
在HelloWorld工程下创建一个默认的Podfile
执行命令:
pod init
用Xcode打开Podfile命令:
open -a Xcode Podfile
Podfile是这样的:
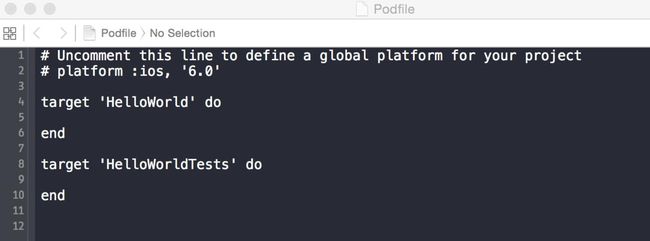
Xcode打开Podfile
修改类库支持的最低iOS版本
将# platform:ios, "6.0"修改成 #platform :ios, "7.0"告诉CocoaPods你的工程是运行在iOS7下
为了让CocoaPods的引入不显示警告,在Podfile最上方加上:
inhibit_all_warnings!// 也可以单独设置打开编译警告就好了pod 'Alamofire', '~> 3.0.0-beta.3', :inhibit_warnings => true
最后Podfile配置是这样的:

Podfile配置
搜索第三方开源库
以搜索AFNetworking为例,搜索命令如下:
pod search AFNetworking
搜索结果如下:
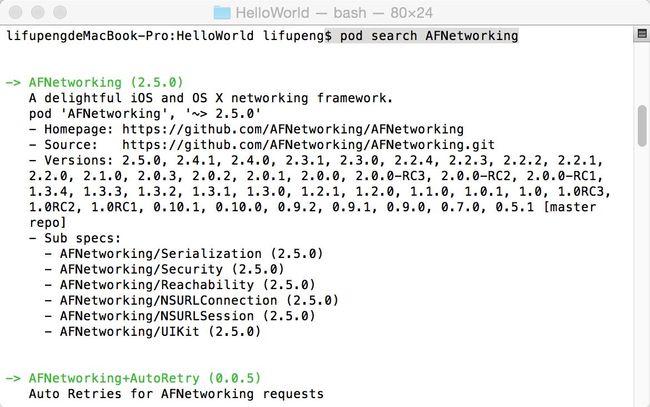
pod search AFNetworking结果
把下面内容:
pod 'AFNetworking', '~> 2.5.0'
添加到Podfile中
target 'HelloWorld' dopod 'AFNetworking', '~> 2.5.0'end
然后保存关闭
安装开源库到你的工程中。
在终端中输入下面命令:(确保在终端的路径在项目目录下):
pod install
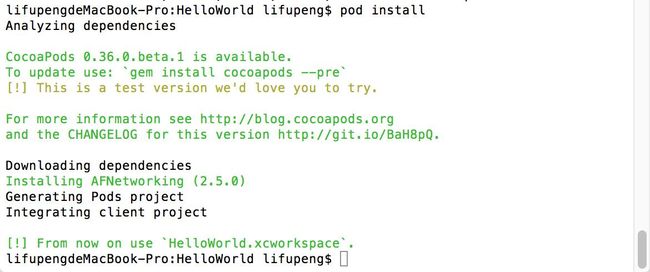
至此 你已经成功的把AFNetworking添加到工程中了
[!] From now on use `ShowTracker.xcworkspace`
正如上面的警告提醒,从现在开始,你必须使用HelloWorld.xcworkspace来打开该项目。
为了让CocoaPods的引入不显示警告,在Podfile最上方加上:
inhibit_all_warnings!
重新运行pod install,编译项目,此时你应该看到警告已经不显示了。
PS: 对Podfile修改安装之后编译项目,可能会出现如下警告 :
The sandbox is not in sync with the Podfile.lock. Run 'pod install' or update your CocoaPods installation.
此时,正确的做法是:
1.Project Cleanup2.Remove all libPods*.a in Linked Frameworks and Libraries3.Update CocoaPods using the command pod install
测试:
添加 #import <AFNetworking.h>头文件
从此引用第三方库如此简单,希望各位用的爽
CocoaPods常用命令
1、pod install
根据Podfile文件指定的内容,安装依赖库,如果有Podfile.lock文件而且对应的Podfile文件未被修改,则会根据Podfile.lock文件指定的版本安装。
每次更新了Podfile文件时,都需要重新执行该命令,以便重新安装Pods依赖库。
2、pod update
若果Podfile中指定的依赖库版本不是写死的,当对应的依赖库有了更新,无论有没有Podfile.lock文件都会去获取Podfile文件描述的允许获取到的最新依赖库版本。
3、pod search
命令格式为:
$ pod search AFNetworking AFNetworking为参数
4、查看版本
pod --version
5、卸载 cocoapods
sudo gem uninstall cocoapods
今天比较闲,就把CocoaPods升级到0.36.0正式版(以前写Swift的时候用的预览版)。然后就郁闷了,不管安装什么第三方都会出现类似于:
[!] Unable to satisfy the following requirements: - `AFNetworking (~> 2.5.1)
 一通的搜索后找到原因,因为GFW的缘故。解决方法:
pod repo remove master
pod repo add master https://gitcafe.com/akuandev/Specs.gitpod repo update
常见问题
1.
[!] Invalid Podfile file: undefined local variable or method `en_US' for #<Pod::Podfile:0x00000102a5d8b0>. Updating CocoaPods might fix the issue.
原因:单引号格式,可能是手动输入导致
解决办法:系统偏好设置-键盘-文本-将“使用智能引号和破折号”一项取消勾选-再将podfile里面的单(双)引号修改一下
2.ArgumentError - invalid byte sequence in US-ASCII
原因:字符集错误
解决办法:
使用locale命令查看当前的字符集,如果都是zh,需要执行以下命令:
export LC_ALL=en_US.UTF-8
export.UTF-8
然后再使用locale命令查看,已经改过来了
[!] The
YMTea [Debug]target overrides theOTHER_LDFLAGSbuild setting defined in `Pods/Target Support Files/Pods/Pods.debug.xcconfig'. This can lead to problems with the CocoaPods installationUse the
$(inherited)flag, orRemove the build settings from the target.
[!] The YMTea [Release] target overrides the OTHER_LDFLAGS build setting defined in `Pods/Target Support Files/Pods/Pods.release.xcconfig'. This can lead to problems with the CocoaPods installation
- Use the `$(inherited)` flag, or - Remove the build settings from the target.
原因:我是在已有项目中集成Cocoapods的时候遇到这个问题,原因是项目 Target 中做了一些设置,CocoaPods 也做了默认的设置,如果两个设置结果不一致,就会造成问题。
解决方法:我想要使用 CocoaPods 中的设置,分别在我的项目中定义PODS_ROOT 和 Other Linker Flags的地方(build settings),把他们的值用$(inherited)替换掉,进入终端,执行 pod update
警告没了,回到 Xcode,build通过。
网上还流行另外一种简单粗暴的方法:点击项目文件 project.xcodeproj,右键显示包内容,用文本编辑器打开project.pbxproj,删除OTHER_LDFLAGS的地方,保存(这种我没试过)
4.
[!] Oh no, an error occurred.
It appears to have originated from your Podfile at line 2.
Search for existing GitHub issues similar to yours:
https://github.com/CocoaPods/CocoaPods/search?q=%2FUsers%2Fxiao6%2FMusic%2FGI06%E5%AE%9E%E8%AE%AD%E8%8A%B8%E8%8C%97%E8%8C%B6%E5%8F%B6%2FYMTea%2FPodfile%3A2%3A+syntax+error%2C+unexpected+%27%3A%27%2C+expecting+end-of-input%0Aplatform+%3A+ios%2C+%277.0%27%0A++++++++++%5E&type=Issues
If none exists, create a ticket, with the template displayed above, on:
https://github.com/CocoaPods/CocoaPods/issues/new
Be sure to first read the contributing guide for details on how to properly submit a ticket:
https://github.com/CocoaPods/CocoaPods/blob/master/CONTRIBUTING.md
Don't forget to anonymize any private data!
原因:这个问题比较蛋疼,弄了好久,仔细看发现就是因为Podfile文件里面 platform 那一行 冒号和ios之间多了一个空格。。。。其实这个错误在报错的时候ruby已经给出了,只是一开始没有好好看:
03.png
6.安装出现问题
我现在需要安装Cocoapods 。gem的镜像一景更换为淘宝的了。
执行sudo gem install cocoapods出现错误:
ERROR: While executing gem ... (Errno::EPERM) Operation not permitted - /usr/bin/xcodeproj
我估计是gem版本没有更新。执行sudo gem update --system,又出现了错误
ERROR: While executing gem ... (Errno::EPERM) Operation not permitted - /usr/bin/update_rubygems
解决:
sudo gem install -n /usr/local/bin cocoapods --pre
sudo gem install -n /usr/local/bin cocoapods
7.updata时候没反应,需要等很久
解决:
使用pod install --verbose --no-repo-update
或者等一段时间页可以成功
附:如何使用CocoaPods的镜像索引:
所有项目的Podspec文件都托管在https://github.com/CocoaPods/Specs,
第一次执行pod setup时,CocoaPods会将这些podspec索引文件更新到本地的~/.cocoapods目录下,
这个索引文件比较大,所以第一次更新时非常慢.
友好人士在国内的服务器建立了Cocoapods索引库的镜像,
所以执行索引跟新操作时候会快很多.具体操作方法如下:
$ pod repo remove master
$ pod repo add master https://gitcafe.com/akuandev/Specs.git
$ pod repo update
这是使用gitcafe上的镜像,将以上代码中的 https://gitcafe.com/akuandev/Specs.git
替换成 http://git.oschina.net/akuandev/Specs.git 即可使用oschina上的镜像。
参考:
http://www.jianshu.com/p/5fc15906c53a#
https://segmentfault.com/q/1010000003877063
http://www.cocoachina.com/bbs/read.php?tid-314045.html