将Library上传到Jcenter
将Library上传到Jcenter
前言
习惯了compile 'com.android.support:appcompat-v7:22.2.0'这样一句话帅气的引用某个库.
这次自己尝试一下如何上传到'JCenter'~
这里我以我自己的CrashCatcher为例来讲解一下.
PS:工具: AndroidStudio,Gradle
申请Bintray账号
Bintray可以用Github账号登陆,很方便.
注册完,拿到昵称和ApiKey
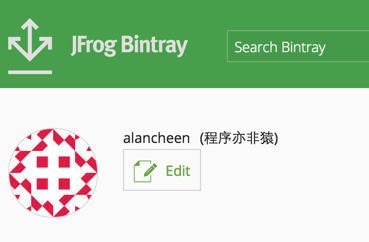
获取方式,点击Edit:
然后点击API Key:
做过第三方授权登录的同学应该都知道apikey吧,上传到JCenter我们同样需要.
配置
在上传之前,我们需要做一些配置
配置项目
修改项目里的build.gradle(注意是项目不是库)
增加这两个dependencies:
classpath 'com.jfrog.bintray.gradle:gradle-bintray-plugin:1.0'
classpath 'com.github.dcendents:android-maven-gradle-plugin:1.3'
增加后如下:
dependencies {
        classpath 'com.android.tools.build:gradle:1.3.0'
        classpath 'com.jfrog.bintray.gradle:gradle-bintray-plugin:1.0'
        classpath 'com.github.dcendents:android-maven-gradle-plugin:1.3'
}
配置Library
library的配置比较麻烦,我把所有的配置都贴出来好了,虽然比较粗糙,但是还能看懂.
我就不一步一步写了,相信你可以的!~
注意看清楚需要配置的地方就行!
apply plugin: 'com.android.library'
apply plugin: 'com.github.dcendents.android-maven'
apply plugin: 'com.jfrog.bintray'
//apply plugin: 'bintray-release'


// 这个version是区分library版本的,因此当我们需要更新library时记得修改这个version
// 这个version影响后面的引用
version = "0.0.2"

android {

    resourcePrefix "cc_" //随意填写

    compileSdkVersion 22
    buildToolsVersion "22.0.1"

    defaultConfig {
        minSdkVersion 9
        targetSdkVersion 22
        versionCode 2
        versionName "1.1"
    }
    buildTypes {
        release {
            minifyEnabled false
            proguardFiles getDefaultProguardFile('proguard-android.txt'), 'proguard-rules.pro'
        }
    }
}

dependencies {
    compile fileTree(dir: 'libs', include: ['*.jar'])
    testCompile 'junit:junit:4.12'
    compile 'com.android.support:appcompat-v7:22.2.0'
    compile 'com.android.support:recyclerview-v7:22.2.0'

}


def siteUrl = 'https://github.com/AlanCheen/CrashCatcher' // 项目的主页
def gitUrl = 'git@github.com:AlanCheen/CrashCatcher.git'   // Git仓库的url
group = "yifeiyuan.library.crashcatcher"            // Maven Group ID for the artifact,一般填你唯一的包名
install {
    repositories.mavenInstaller {
        // This generates POM.xml with proper parameters
        pom {
            project {
                packaging 'aar'
                // Add your description here
                name 'Android CrashCatcher'     //项目的描述 你可以多写一点
                url siteUrl
                // Set your license
                licenses {
                    license {
                        name 'The Apache Software License, Version 2.0'
                        url 'http://www.apache.org/licenses/LICENSE-2.0.txt'
                    }
                }
                developers {
                    developer {
                        id 'alancheen'        //填写的一些基本信息
                        name '程序亦非猿'
                        email 'alancheen06@gmail.com'
                    }
                }
                scm {
                    connection gitUrl
                    developerConnection gitUrl
                    url siteUrl
                }
            }
        }
    }
}
task sourcesJar(type: Jar) {
    from android.sourceSets.main.java.srcDirs
    classifier = 'sources'
}
task javadoc(type: Javadoc) {
    source = android.sourceSets.main.java.srcDirs
    classpath += project.files(android.getBootClasspath().join(File.pathSeparator))
}
task javadocJar(type: Jar, dependsOn: javadoc) {
    classifier = 'javadoc'
    from javadoc.destinationDir
}
artifacts {
    archives javadocJar
    archives sourcesJar
}
Properties properties = new Properties()
properties.load(project.rootProject.file('local.properties').newDataInputStream())
bintray {
    user = properties.getProperty("bintray.user")
    key = properties.getProperty("bintray.apikey")
    configurations = ['archives']
    pkg {
        repo = "maven"
        name = "CrashCatcher"    //发布到JCenter上的项目名字
        websiteUrl = siteUrl
        vcsUrl = gitUrl
        licenses = ["Apache-2.0"]
        publish = true
    }
}
配置apikey和昵称
打开项目的local.properties,加入以下两句:
bintray.user=your_user_name
bintray.apikey=your_apikey
PS: 这个文件必须忽略掉,不能上传到github上去哦~~
执行命令
好了,万事俱备,我们开始执行命令:
./gradlew install ./gradlew bintrayUpload等待上传完毕,然后去自己的仓库首页找到该库,点击Add TO JCenter,然后发送,接下来就是等待!~
等到管理回复,我的大概是6个多小时(可能是我晚上发的原因吧),第一次会比较长,如果是更新的话很快的!
如图
使用
按照语法规则来拼写路径:
group:库的名字:版本号 (就是我们配置library的时候填写的)
所得:yifeiyuan.library.crashcatcher:crashcatcher:0.0.2
接下来添加依赖一句话即可:compile 'yifeiyuan.library.crashcatcher:crashcatcher:0.0.2'
转自:http://www.jianshu.com/p/0ba8960f80a9


