Android学习系列之(八)Fragment之间的数据传递与导航抽屉的实现
前言:前面已经介绍了一些Fragment的知识,那么这次我们以抽屉导航这个例子,来讲解Fragment之间的数据传递以及导航抽屉的实现
一、Fragment 之间的数据传递:
关于Fragment之间的数据传递,有两种情况:
1). 同一个container间的参数传递,即一个 Activity 中仅有一个 ContentView, 在该内容视图上进行 Fragment 的切换以及数据传递
2). 同一个Activity,不同container间的参数传递
那么针对这两种情况,我们以两个小案例来讲解这两种情况。
二、案例讲解:
1. 同一个container间的参数传递:
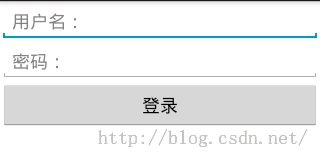
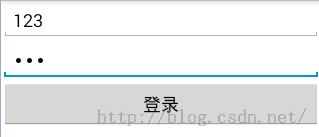
- 需求:依旧是模拟登录,首先显示登录界面,然后登陆成功后进入欢迎界面。并且欢迎界面上将显示登录时的用户名。效果如下:

- 代码实现:
- activity_main.xml:
<?xml version="1.0" encoding="utf-8"?>
<LinearLayout xmlns:android="http://schemas.android.com/apk/res/android"
    android:id="@+id/content"
    android:layout_width="match_parent"
    android:layout_height="match_parent"
    android:orientation="vertical" >

</LinearLayout>
- MainActivity.java:
/**
 * Fragment间参数传递: 同一个container间的参数传递,即一个 Activity 中仅有一个 ContentView, 在
 * 该内容视图上进行 Fragment 的切换以及数据传递
 * @author johnnie
 *
 */
public class MainActivity extends Activity{

	private FragmentManager fm;
	private FragmentTransaction ft;

	@Override
	protected void onCreate(Bundle savedInstanceState) {
		super.onCreate(savedInstanceState);
		setContentView(R.layout.activity_main);

		fm = getFragmentManager();
		ft = fm.beginTransaction();
		ft.replace(R.id.content, new LoginFragment());
		ft.commit();

	}

}
- LoginFragment.java:
public class LoginFragment extends Fragment{

	// 控件的声明
	private EditText et_username;
	private EditText et_userpass;
	private Button btn_login;
	private View view;


	@Override
	public View onCreateView(LayoutInflater inflater, ViewGroup container,
			Bundle savedInstanceState) {

		view = inflater.inflate(R.layout.fragment_login, container, false);
		return view;
	}

	@Override
	public void onActivityCreated(Bundle savedInstanceState) {
		super.onActivityCreated(savedInstanceState);

		et_username = (EditText) view.findViewById(R.id.et_username);
		et_userpass = (EditText) view.findViewById(R.id.et_userpass);
		btn_login = (Button) view.findViewById(R.id.btn_login);
		btn_login.setOnClickListener(new OnClickListener() {

			@Override
			public void onClick(View v) {
				login();
			}
		});

	}

	/**
	 * 用户登录
	 */
	private void login() {
		System.out.println("登录...");
		// 获取用户输入
		String username = et_username.getText().toString().trim();
		String userpass = et_userpass.getText().toString().trim();

		// 输入校验
		boolean flag = false;
		String msg = "登录失败!";
		if (!TextUtils.isEmpty(userpass) && !TextUtils.isEmpty(username)) {
			msg = "登录成功!";
			flag = true;
		}
		// 弹出提示
		Toast.makeText(getActivity(), msg, Toast.LENGTH_SHORT).show();

		if (flag) {
			// 通过调用 newInstance 函数来获取实例并传递参数
			WelcomeFragment fragment = WelcomeFragment.newInstance(username);
			FragmentManager fm = getFragmentManager();
			FragmentTransaction ft = fm.beginTransaction();
			ft.replace(R.id.content, fragment);
			ft.commit();
		}
	}

}
- fragment_login.xml:
<LinearLayout xmlns:android="http://schemas.android.com/apk/res/android"
    xmlns:tools="http://schemas.android.com/tools"
    android:layout_width="match_parent"
    android:layout_height="match_parent"
    android:orientation="vertical"
    tools:context="com.johnnie.login.MainActivity" >

    <EditText
        android:id="@+id/et_username"
        android:layout_width="fill_parent"
        android:layout_height="wrap_content"
        android:singleLine="true"
        android:hint="@string/et_username"
        />

    <EditText
        android:id="@+id/et_userpass"
        android:layout_width="fill_parent"
        android:layout_height="wrap_content"
        android:singleLine="true"
        android:inputType="textPassword"
        android:hint="@string/et_userpass"
        />

    <Button
        android:id="@+id/btn_login"
        android:layout_width="fill_parent"
        android:layout_height="wrap_content"
        android:text="@string/btn_login"
        />

</LinearLayout>
- WelcomeFragment.java:
/**
 * 登陆后的欢迎界面
 * @author johnnie
 *
 */
public class WelcomeFragment extends Fragment{

	public WelcomeFragment() {}

	/**
	 * 接收其他 Fragment 传过来的参数
	 * @param name
	 * @return
	 */
	public static WelcomeFragment newInstance(String name){
		WelcomeFragment fragment = new WelcomeFragment();

		// 通过 Bundle 传递参数
		// why?为什么不使用 Bundle 传递,而不通过构造函数传递呢?
		// Reason: Activity重新创建时,会重新构建它所管理的Fragment,原来的Fragment实例,原先的Fragment的字段值将全部丢失,但是通过
		// Fragment.setArguments(Bundle bundle)方法设置的bundle会保留下来.所以尽量使用Bundle来传递参数
		Bundle args = new Bundle();
		args.putString("name", name);
		fragment.setArguments(args);		// 将参数通过SetArguments设置到 Fragment 中

		return fragment;
	}

	@Override
	public View onCreateView(LayoutInflater inflater, ViewGroup container,
			Bundle savedInstanceState) {
		View view = inflater.inflate(R.layout.fragment_welcom, container, false);

		// 在 onCreateView 中从 arguments 中获取参数
		Bundle args = getArguments();
		if (args != null) {
			String name = args.getString("name");
			TextView tv_welcome = (TextView) view.findViewById(R.id.tv_welcome);
			tv_welcome.setText("欢迎 " + name + " 到访!");
		}

		return view;
	}

}
- fragment_welcome.xml:
<?xml version="1.0" encoding="utf-8"?>
<LinearLayout xmlns:android="http://schemas.android.com/apk/res/android"
    android:layout_width="match_parent"
    android:layout_height="match_parent"
    android:orientation="vertical" >

    <TextView
        android:id="@+id/tv_welcome"
        android:layout_width="fill_parent"
        android:layout_height="fill_parent"
        android:text="@string/tv_welcome"
        android:gravity="center"
        android:textSize="25sp"
        />

</LinearLayout>
- 小结:
- 同一个container之间(即两个Fragment都是被部署在同一个Activity的同一个组件上)的数据传递时,我们需要编写一个静态的方法,如此处 public static WelcomeFragment newInstance(String name){...},然后通过Bundle来进行数据的传递。至于为什么使用 Bundle,在代码中已进行了说明。
- 基本步骤:
- 准备好Activity、Fragment及其xml布局文件
- 在接受数据的Fragment中,编辑 newInstance 静态方法,输入参数即为需要接受的数据[注:方法体内使用Bundle进行数据传递]
- 在主动传递数据的Fragment中,调用接受数据的Fragment的newInstance方法来获取接受数据的Fragment的实例。如WelcomeFragment fragment = WelcomeFragment.newInstance(username);
- 在接受数据的Fragment中需要使用传递过来的数据的地方,使用 Bundle args = getArguments(); 来获取到保存数据的 Bundle,然后进行数据处理
2. 同一个Activity,不同container间的参数传递:
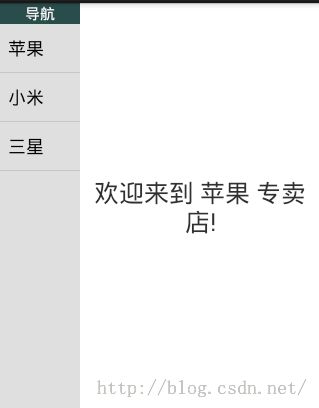
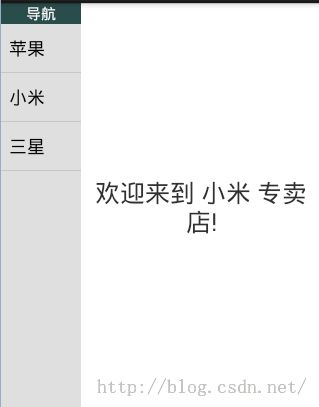
- 需求:同一个Activity上部署有2个不同的Fragment,左侧的Fragment用于充当左侧导航,右侧的Fragment用于充当主内容区域,用作内容显示。效果如下:
- 代码实现:
- MainActivity.java:
/**
 * Fragment间参数传递: 同一个Activity,不同container间的参数传递
 * 实例:
 *   当前 Activity 中有两个Fragment, Fragment1中有一个listView,当我们点击ListView的Item的时候,
 *   把Item上的内容更新到Fragment2上
 * @author johnnie
 */
public class MainActivity extends Activity implements NavSelectedInterface{

	@Override
	protected void onCreate(Bundle savedInstanceState) {
		super.onCreate(savedInstanceState);
		setContentView(R.layout.activity_main);

		//	method1();
	}

	private String[] nav_items;
	private TextView tv_content;

	/**
	 * 实现抽屉导航的方法 1:直接在 Activity 中实现
	 * 缺点:违背了单一职责的原则,应该每个 Fragment 负责自己的控件操作
	 */
	private void method1() {
		tv_content = (TextView) findViewById(R.id.tv_content);

		nav_items = getResources().getStringArray(R.array.nav_items);
		ArrayAdapter<String> adapter = new ArrayAdapter<>(this, android.R.layout.simple_list_item_1, nav_items);
		ListView lv_nav = (ListView) findViewById(R.id.lv_nav);
		lv_nav.setAdapter(adapter);
		lv_nav.setOnItemClickListener(new OnItemClickListener() {

			@Override
			public void onItemClick(AdapterView<?> parent, View view,
					int position, long id) {
				String content = nav_items[position];
				tv_content.setText("欢迎来到 " + content + " 专卖店!");
			}
		});
	}

	/**
	 * 回调函数:该函数中的 item 就保存从 NavFragment 中传递的值
	 */
	@Override
	public void onNavSelected(String item) {
		System.out.println("item:" + item);

		FragmentManager fm = getFragmentManager();
		FragmentTransaction ft = fm.beginTransaction();
		ContentFragment fragment = (ContentFragment) fm.findFragmentById(R.id.fragment_content);
		System.out.println("fragment: " + fragment);
		fragment.setText(item);
		ft.replace(R.id.fragment_content, fragment);
		ft.commit();
	}

}
- activity_main.xml:
<?xml version="1.0" encoding="utf-8"?>
<LinearLayout xmlns:android="http://schemas.android.com/apk/res/android"
    android:id="@+id/content"
    android:layout_width="match_parent"
    android:layout_height="match_parent"
    android:baselineAligned="false"
    android:orientation="horizontal" >

    <!-- 静态的添加 Fragment -->
    <fragment
        android:id="@+id/fragment_nav"
        android:name="com.johnnie.fragment.NavFragment"
        android:layout_width="0dp"
        android:layout_height="match_parent"
        android:layout_weight="1" />

    <fragment
        android:id="@+id/fragment_content"
        android:name="com.johnnie.fragment.ContentFragment"
        android:layout_width="0dp"
        android:layout_height="match_parent"
        android:layout_weight="3" />

</LinearLayout>
- NavSelectedInterface.java:
/**
 * 实现导航抽屉需要使用的回调接口
 * @author johnnie
 *
 */
public interface NavSelectedInterface {

	/**
	 * 当导航项被点击时
	 * @param item
	 */
	public void onNavSelected(String item);

}
- NavFragment.java:
/**
 * 导航条视图:2个难点
 * Q1:在Fragment中如何获得自己控件的引用,比如NavFragment的ListView控件
 * Q2:在Fragment中如何获得其它Fragment页面控件的引用,比如ContentFragment的TextView控件
 *
 * @author johnnie
 *
 */
public class NavFragment extends Fragment{

	private ListView lv_nav;
	private String[] nav_items;
	private TextView tv_content;				// ContentFragment 的 TextView 控件

	// 定义一个回调接口的变量
	private NavSelectedInterface navSelectedInterface;

	@Override
	public View onCreateView(LayoutInflater inflater, ViewGroup container,
			Bundle savedInstanceState) {
		View view = inflater.inflate(R.layout.fragment_nav, container, false);

		// 获取数据
		nav_items = getActivity().getResources().getStringArray(R.array.nav_items);

		// Q1:在 Fragment 中获取自己控件的引用
		lv_nav = (ListView) view.findViewById(R.id.lv_nav);
		return view;
	}

	@Override
	public void onActivityCreated(Bundle savedInstanceState) {
		super.onActivityCreated(savedInstanceState);
		// Q2:获得其它Fragment页面中控件的引用
		// -->要获取Activity中的资源,就必须等Activity创建完成以后,所以必须放在onActivityCreated()函数中
		// -->即:先通过 getActivity() 获取当前 Activity 的资源,然后 findViewById() 获取引用
//		method2();
		method3();
	}

	/**
	 * 实现导航抽屉的方法3:使用回调接口的回调方法
	 */
	private void method3() {
		ArrayAdapter<String> adapter = new ArrayAdapter<>(getActivity(), android.R.layout.simple_list_item_1, nav_items);
		lv_nav.setAdapter(adapter);
		lv_nav.setOnItemClickListener(new OnItemClickListener() {

			@Override
			public void onItemClick(AdapterView<?> parent, View view,
					int position, long id) {
				String content = nav_items[position];
				// 用户点击listView的item的时候,将结果回传给Activity
				navSelectedInterface.onNavSelected(content);
			}
		});
	}

	/**
	 * 实现抽屉导航的方法 2: 直接在NavFragment中操作
	 * 缺点:直接在NavFragment中操作了ContentFragment 的控件,违背了模块分离的思想,
	 * 		  应该让他们各自处理各自的代码
	 *
	 */
	private void method2() {
		tv_content = (TextView) getActivity().findViewById(R.id.tv_content);

		ArrayAdapter<String> adapter = new ArrayAdapter<>(getActivity(), android.R.layout.simple_list_item_1, nav_items);
		lv_nav.setAdapter(adapter);
		lv_nav.setOnItemClickListener(new OnItemClickListener() {

			@Override
			public void onItemClick(AdapterView<?> parent, View view,
					int position, long id) {
				String content = nav_items[position];
				tv_content.setText("欢迎来到 " + content + " 专卖店!");
			}
		});
	}

	@Override
	public void onAttach(Activity activity) {
		super.onAttach(activity);
		try {
			// 接口是给activity用的,要在activity中给这里的接口变量赋值,所以在fragment与activity相关联时,进行强转赋值,
			navSelectedInterface = (NavSelectedInterface) activity;
		} catch (Exception e) {
			// 若用户的activity没有implements NavSelectedInterface 则抛出错误
			throw new ClassCastException(activity.toString() + "must implement NavSelectedInterface");
		}
	}

}
- fragment_nav.xml:
<?xml version="1.0" encoding="utf-8"?>
<LinearLayout xmlns:android="http://schemas.android.com/apk/res/android"
    android:layout_width="match_parent"
    android:layout_height="match_parent"
    android:orientation="vertical" >

    <TextView
        android:layout_width="fill_parent"
        android:layout_height="wrap_content"
        android:gravity="center_horizontal"
        android:text="@string/tv_nav_msg"
        android:background="#2F4F4F"
        android:textColor="#FFFFFF"
        android:textSize="15sp" />

    <ListView
        android:id="@+id/lv_nav"
        android:layout_width="fill_parent"
        android:layout_height="fill_parent"
        android:background="#DCDCDC" >
    </ListView>

</LinearLayout>
- ContentFragment.java:
/**
 * 导航抽屉对应的内容视图
 * @author johnnie
 *
 */
public class ContentFragment extends Fragment{

	private TextView tv_content;

	public void setText(String content){
		tv_content.setText("欢迎来到 " + content + " 专卖店!");
	}

	@Override
	public View onCreateView(LayoutInflater inflater, ViewGroup container,
			Bundle savedInstanceState) {
		View view = inflater.inflate(R.layout.fragment_content, container, false);
		tv_content = (TextView) view.findViewById(R.id.tv_content);
		return view;
	}

}
- fragment_content.xml:
<?xml version="1.0" encoding="utf-8"?>
<LinearLayout xmlns:android="http://schemas.android.com/apk/res/android"
    android:layout_width="match_parent"
    android:layout_height="match_parent"
    android:orientation="vertical" >

    <TextView
        android:id="@+id/tv_content"
        android:layout_width="fill_parent"
        android:layout_height="fill_parent"
        android:gravity="center"
        android:textSize="25sp" />

</LinearLayout>
- 小结:
- 同一个Activity,不同container间的参数传递:即不同的Fragment部署在同一个Activity的布局文件上,但是该两个Fragment被划分为不同的区域,这时该两个Fragment之间的数据传递,我们就得使用回调接口,如此处的 NavSelectedInterface 接口
- 基本步骤:
- 准备好Activity、Fragment的Java文件及其相应的xml布局文件
- 编辑回调接口
- 回调接口主要是给Activity使用的,因此Activity得实现该接口
- 充当导航的Fragment中声明回调接口的变量,并在onAttach方法中初始化该变量。然后给导航菜单添加 setOnItemClickListener方法,在onItemClick中通过回调接口的回调方法将数据传递给调用者 Activity
- 在调用者 Activity 中,通过获取 Fragment 的实例,然后调用其方法来实现内容的变更
- 同一个Activity,不同container间的参数传递:即不同的Fragment部署在同一个Activity的布局文件上,但是该两个Fragment被划分为不同的区域,这时该两个Fragment之间的数据传递,我们就得使用回调接口,如此处的 NavSelectedInterface 接口