有几种类型的场景可能会要求你把应用程序中发生的事件通知给用户,这些事件有的需要用户响应,有的则不需要。
在Android中提供了三种不同的技术来通知用户事件的发生:
Toast、Dialog、Notification
第一节 Toast
土司是在屏幕上弹出一个消息,它在显示1~3秒后会消失,而且不接受交互事件,如下图所示:
Toast仅填充了消息要求的空间大小,并且依然保留当前Activity的可见性和交互性。
应用场景:
由于它拥有自动消失的特点,所以通常用来显示一些对用户不重要的信息。
基础应用
最简单的Toast通知是仅显示一行文本消息,我们可以使用Toast.makeText()方法实例化一个Toast对象。
范例1:创建Toast对象。
       1


       2


       3


       4


       5


       6


       7
|
Toast toast = Toast.makeText(getApplicationContext(),
"Hello toast!", Toast.LENGTH_SHORT);
toast.show();
|
语句解释:
- Activity、Application都是Context的子类,因此可以使用它们的对象,初始化第一个参数。 - 在Toast类中提供了两个常量,makeText方法的第三个参数的取值可以为二者之一:    - LENGTH_SHORT :对话框显示的时间稍短。    - LENGTH_LONG :对话框显示的时间稍长。
Toast定位
默认情况下,Toast会显示在屏幕底部且水平居中,但是可以通过setGravity(int, int, int)方法来重新设置显示位置。这个方法有三个参数:
1. Gravity常量(详细参照Gravity类)。
2. X轴偏移量。
3. Y轴偏移量。
例如:如果你想让Toast通知显示在屏幕的左上角,可以这样设置:
       1


       2
|
toast.setGravity(Gravity.TOP|Gravity.LEFT,
0,
0);
|
如果想让Toast从当前位置向右偏移,可以增加第二个参数的值,第三个参数同理。
自定义Toast
如果一个简单的文本消息不能满足显示的需要,你可以给Toast通知创建一个自定义的布局(layout),然后把布局传递给setView(View)方法。
范例1:显示一个按钮。
       1


       2


       3


       4


       5


       6


       7


       8


       9


       10


       11


       12


       13


       14
|
public
class AndroidTestActivity extends Activity {
public
void
onCreate(Bundle savedInstanceState) {
super.onCreate(savedInstanceState);
setContentView(R.layout.main);
Button btn =
new Button(
this);
btn.setText(
"我是一个按钮");
Toast toast =
new Toast(
this);
toast.setView(btn);
toast.show();
}
}
|
第二节 Dialogs
对话框通常是一个显示在当前Activity之前的小窗口,当对话框显示出来时,它下面的Activity会失去输入焦点,并且对话框会接受所有的用户交互。
应用场景:
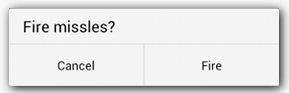
它通常用来显示一个需要用户确认的短消息(例如带有“确定”按钮的提醒),除非用户响应,否则对话框不会自动消失。
常见的对话框如下图所示:

Dialog类是所有对话框的基类,但你应该避免直接实例化Dialog。相反,应该使用以下子类:
- AlertDialog:可以显示0~3个按钮的对话框,并且能够包含一个单选或多选按钮列表。 - ProgressDialog:显示一个进度滚轮或进度条的对话框,它是AlertDialog的子类。 - DatePickerDialog和TimePickerDialog:一个有预定义用户界面的对话框,允许用户选择一个日期或时间。
范例1:下面是Dialog类的常用方法:
       1


       2


       3


       4


       5


       6


       7


       8


       9


       10


       11


       12


       13


       14
|
public
void
dismiss();
public
void
setCancelable(
boolean flag);
public
void
setCanceledOnTouchOutside (
boolean cancel)
// 设置对话框窗口的标题。
public
void
setTitle(CharSequence title);
public
void
show();
|
注意:
- 在实例化各种Dialog时,需要为其构造方法传递一个Context对象,这个Context对象只能是Activity。 - Toast对象则没有这个要求,它可以接收任何Context对象,因为它不依赖于某个Activity。 - 在非main线程中是不可以Toast和显示Dialog的。
AlertDialog
警告对话框AlertDialog是Dialog最常用的一个子类。一个警告对话框有三个地区,如下图所示:

1. 标题
这是可选的。如果你需要显示一个简单的信息(如下图),则就不需要使用标题。
2. 内容区域。
对话框的正文部分。这里可以显示一个文本消息,一个列表,或其他自定义布局。
3. 动作按钮。
用户可点击的按钮,在AlertDialog对话框中最多只支持三个按钮。
范例1:创建一个AlertDialog,需要使用它的静态内部类AlertDialog.Builder,创建的过程为:
       1


       2


       3


       4


       5


       6


       7


       8
|
AlertDialog.Builder builder =
new AlertDialog.Builder(context);
builder.setMessage(R.string.dialog_message).setTitle(R.string.dialog_title);
AlertDialog dialog = builder.create();
|
范例2:添加按钮。
       1


       2


       3


       4


       5


       6


       7


       8


       9


       10


       11


       12


       13


       14


       15


       16


       17


       18


       19


       20


       21


       22


       23


       24


       25


       26
|
public
void
onClick(View view) {
OnClickListener listener =
new OnClickListener() {
public
void
onClick(DialogInterface dialog,
int which) {
switch (which) {
case AlertDialog.BUTTON_POSITIVE:
Toast.makeText(getApplicationContext(),
"POSITIVE",
0).show();
break;
}
}
};
AlertDialog.Builder dialog =
new AlertDialog.Builder(
this);
dialog.setIcon(R.drawable.icon);
dialog.setTitle(R.
string.title);
dialog.setMessage(R.
string.content);
dialog.setPositiveButton(
"哈哈,知道了!", listener);
dialog.setNegativeButton(
"...", listener);
dialog.setNeutralButton(
"哦,是吗!", listener);
dialog.show();
}
|
语句解释:
- 我们最多可以在对话框中设置三个动作按钮:    - Positive:对应最左边的按钮,通常使用这个按钮来表示“接受”或“继续”动作。    - Neutral:对应中间的按钮,通常使用它表示“拒绝”动作。    - Negative:对应最右边的按钮,通常使用这个按钮来表示“取消”动作。 - 这三种类型的按钮每个类型在AlertDialog只能设置一个,也就是说无法在对话框中设置两个Positive按钮。 - 当对话框中的某个按钮被点击后,对话框会自动被关闭。
范例3:添加列表。
使用AlertDialog提供的API可以添加三种类型的列表:
- 传统的单一选择列表。 - 单选列表(包含多个单选按钮)。 - 多选列表(包含多个多选按钮)。
创建一个像下图所示的传统的单一选择列表需要调用setItems()方法:

由于这个列表显示在对话框的内容区域中,所以你不可以同时显示文本消息和列表,也就是说AlertDialog.Builder类的setItems()方法和setMessage()方法不可以同时使用。
       1


       2


       3


       4


       5


       6


       7


       8


       9


       10


       11


       12


       13


       14


       15


       16


       17


       18


       19


       20


       21


       22
|
public
void
onClick(View view) {
final String[] array = {
"A",
"B",
"C",
"D" };
OnClickListener listener =
new OnClickListener() {
public
void
onClick(DialogInterface dialog,
int which) {
if (AlertDialog.BUTTON_POSITIVE == which) {
Toast.makeText(getApplicationContext(),
"POSITIVE ",
0).show();
return;
}
Toast.makeText(getApplicationContext(),
"您点击的 " + array[which],
0).show();
}
};
int i = AlertDialog.BUTTON_NEGATIVE;
AlertDialog.Builder dialog =
new AlertDialog.Builder(
this);
dialog.setIcon(R.drawable.icon);
dialog.setTitle(R.
string.title);
dialog.setCancelable(
false);
dialog.setPositiveButton(
"哈哈,知道了!", listener);
dialog.setItems(array, listener);
dialog.show();
}
|
语句解释:
- 对话框中的按钮和各个Item项可以共用一个事件监听器。 - 当某个Item被点击时,当前对话框同样会自动被关闭,参数which的值就是该Item的下标,下标从0开始计算。
范例4:单选对话框。
       1


       2


       3


       4


       5


       6


       7


       8


       9


       10


       11


       12


       13


       14


       15


       16


       17


       18


       19


       20


       21


       22


       23
|
private String choose =
null;
private String[] array = {
"男",
"女"};
public
void
onClick(View view){
OnClickListener listener =
new OnClickListener(){
public
void
onClick(DialogInterface dialog,
int which) {
if(AlertDialog.BUTTON_POSITIVE == which){
Toast.makeText(getApplicationContext(),
"您点击的"+choose,
0).show();
return;
}
choose = array[which];
}
};
int i = AlertDialog.BUTTON_NEGATIVE;
AlertDialog.Builder dialog =
new AlertDialog.Builder(
this);
dialog.setIcon(R.drawable.icon);
dialog.setTitle(R.
string.title);
dialog.setCancelable(
false);
dialog.setPositiveButton(
"哈哈,知道了!", listener);
dialog.setSingleChoiceItems(array, -
1, listener);
dialog.show();
}
|
语句解释:
- 使用setSingleChoiceItems方法可以显示一个单选按钮列表。 - 参数which是用户点击的单选按钮的下标,下标从0开始。
范例5:多选对话框。
       1


       2


       3


       4


       5


       6


       7


       8


       9


       10


       11


       12


       13


       14


       15


       16


       17


       18


       19


       20


       21


       22


       23


       24


       25


       26


       27


       28


       29


       30


       31


       32


       33


       34


       35
|
private
boolean[] choose =
new
boolean[
2];
private String[] array = {
"A",
"B" };
public
void
onClick(View view) {
OnClickListener btnlistener =
new OnClickListener() {
public
void
onClick(DialogInterface dialog,
int which) {
StringBuilder sb =
new StringBuilder();
for (
int i =
0; i < choose.length; i++) {
if (choose[i]) {
sb.append(array[i]).append(
",");
}
}
Toast.makeText(getApplicationContext(), sb.toString(),
0).show();
}
};
int i = AlertDialog.BUTTON_NEGATIVE;
AlertDialog.Builder dialog =
new AlertDialog.Builder(
this);
dialog.setIcon(R.drawable.icon);
dialog.setTitle(R.string.title);
dialog.setCancelable(
false);
dialog.setPositiveButton(
"哈哈,知道了!", btnlistener);
dialog.setMultiChoiceItems(array, choose,
new OnMultiChoiceClickListener() {
public
void
onClick(DialogInterface dialog,
int which,
boolean isChecked) {
choose[which] = isChecked;
}
});
dialog.show();
}
|
语句解释:
- 使用setMultiChoiceItems方法可以显示一个多选按钮对话框。 - 可以在调用setMultiChoiceItems方法时,指定一个DialogInterface.OnMultiChoiceClickListener类型的监听器,用于监听每一选项。
ProgressDialog
进度条对话框ProgressDialog和进度条控件ProgressBar的用法十分相似,都是通过线程来不断的更新进度条。
范例1:创建进度条对话框。
       1


       2


       3


       4


       5


       6


       7


       8


       9


       10


       11


       12


       13


       14


       15


       16


       17


       18


       19


       20


       21


       22


       23


       24


       25


       26


       27


       28


       29


       30


       31
|
public
class ViewTextActivity extends Activity {
private ProgressDialog dialog;
public
void
onCreate(Bundle savedInstanceState) {
super.onCreate(savedInstanceState);
setContentView(R.layout.main);
this.dialog =
new ProgressDialog(
this);
this.dialog.setMax(
100);
this.dialog.setProgressStyle(ProgressDialog.STYLE_HORIZONTAL);
}
public
void
onClick(View view) {
dialog.show();
new Thread(){
int i =
0;
public
void
run(){
while(dialog.getProgress()<dialog.getMax()){
dialog.setProgress(i++);
try {
Thread.sleep(
30);
}
catch (InterruptedException e) {}
}
dialog.dismiss();
}
}.start();
}
}
|
语句解释:
- 可以直接在子线程中调用ProgressDialog的setProgress方法,因为其内部是通过Handler来更新的。 - 在后面的章节中会对Handler进行详细介绍。
LayoutInflater
因为在下一节自定义对话框时会用到LayoutInflater类,所以此处先来学习一下这个类。
通常我们会使用XML文件来创建界面,但是在一些特殊的情况下,可能需要在程序运行的时动态的修改界面中的内容(比如增删控件)。
范例1:main.xml文件。
       1


       2


       3


       4


       5


       6
|
       <LinearLayout xmlns:android="http://schemas.android.com/apk/res/android"


       android:orientation=


       "vertical"


       android:layout_width=


       "fill_parent"


       android:layout_height=


       "fill_parent"


       android:id=


       "@+id/rootLayout" >


       </LinearLayout>
|
范例2:通过编码的方式添加TextView。
       1


       2


       3


       4


       5


       6


       7


       8


       9


       10


       11


       12


       13


       14


       15


       16
|
public
class MainActivity extends Activity {
private LinearLayout rootLayout;
private TextView textView;
public
void
onCreate(Bundle savedInstanceState) {
super.onCreate(savedInstanceState);
setContentView(R.layout.main);
this.rootLayout = (LinearLayout)
this.findViewById(R.id.rootLayout);
this.textView =
new TextView(MainActivity.
this);
this.textView.setText(
"Hi TextView!");
this.rootLayout.addView(
this.textView);
}
}
|
语句解释:
- 首先,通过资源ID,从当前Activity的xml布局文件中获取LinearLayout的引用。 - 然后,创建一个TextView控件,创建TextView对象时需要为其指出一个Context对象。 - 接着,调用LinearLayout继承自ViewGroup类的addView方法,将新控件添加到布局中。 - 最后,一个控件只可以有一个父控件,即textView被放入到rootLayout后就不可以再被放入其他布局对象中,否则程序将抛异常。
范例3:对象重用。
       1


       2


       3
|
TextView text1 = (TextView)
this.findViewById(R.id.text);
TextView text2 = (TextView)
this.findViewById(R.id.text);
System.
out.println(text1 == text2);
|
语句解释:
- findViewById方法只是从布局中查找指定的子View,因此使用相同的id连续调用两次,它们返回的结果是一样的。
假设有一个需求,需要将其它XML布局中的控件添加到当前Activity中,此时就需要使用LayoutInflater类了。
范例4:LayoutInflater类。
       1


       2


       3


       4


       5


       6


       7


       8
|
public View
inflate(
int resource, ViewGroup root);
public
static LayoutInflater
from (Context context)
|
范例5:招募小弟。
       1


       2


       3


       4


       5


       6


       7


       8


       9
|
LayoutInflater inflater = (LayoutInflater)
this.getSystemService(Activity.LAYOUT_INFLATER_SERVICE);
LinearLayout layout =(LinearLayout)
this.findViewById(R.id.rootLayout);
LinearLayout text1 = (LinearLayout) inflater.inflate(R.layout.other, layout);
LinearLayout text2 = (LinearLayout) inflater.inflate(R.layout.other, layout);
System.out.println(text1 == text2);
|
语句解释:
- 虽然通过inflate方法向layout中添加了两遍,但是在当前Activity中只会显示添加一个。
范例6:招募小弟2.0。
       1


       2


       3


       4


       5


       6


       7


       8
|
LayoutInflater inflater = (LayoutInflater)
this.getSystemService(Activity.LAYOUT_INFLATER_SERVICE);
LinearLayout layout =(LinearLayout)
this.findViewById(R.id.rootLayout);
LinearLayout text1 = (LinearLayout) inflater.inflate(R.layout.other,
null);
LinearLayout text2 = (LinearLayout) inflater.inflate(R.layout.other,
null);
System.out.println(text1 == text2);
layout.addView(text1);
layout.addView(text2);
|
语句解释:
- 由于调用inflate方法时并没有将布局文件放入到任何控件中,因此每次inflate时都会返回一个新对象,所以调用ViewGroup的addView方法可以重复添加元素。
范例7:父与子。
       1


       2


       3


       4


       5


       6


       7


       8


       9


       10


       11
|
       <LinearLayout xmlns:android="http://schemas.android.com/apk/res/android"


       android:orientation=


       "vertical"


       android:layout_width=


       "fill_parent"


       android:layout_height=


       "fill_parent"


       android:id=


       "@+id/rootLayout">


       <TextView


       android:layout_width=


       "fill_parent"


       android:layout_height=


       "wrap_content"


       android:text=


       "@string/hello"


       android:id=


       "@+id/text" />


       </LinearLayout>
|
       1


       2


       3


       4


       5


       6


       7


       8


       9


       10
|
public
class MainActivity extends Activity {
public
void
onCreate(Bundle savedInstanceState) {
super.onCreate(savedInstanceState);
setContentView(R.layout.main);
LinearLayout layout = (LinearLayout)
this.findViewById(R.id.rootLayout);
TextView text = (TextView) layout.getChildAt(
0);
System.out.println(text.getParent() == layout);
}
}
|
语句解释:
- View类的getParent()方法返回值是一个ViewParnet对象,通常可以将ViewParnet进行向下转型为View。 - ViewGroup的getChildAt(int index)方法指定一个下标,获取当前View内部所包含的子View,下标从0开始,若下标越界则返回null。
ViewGroup.LayoutParams
前面已经成功的实现动态向Activity中添加控件了。但是还是有一个缺点:上面的代码在创建完毕控件后,并没有为控件指定宽、高等属性。
范例1:动态添加组件。
       1


       2


       3


       4


       5


       6


       7


       8


       9


       10


       11


       12


       13


       14


       15


       16


       17
|
public
class WebViewActivity extends Activity {
public
void
onCreate(Bundle savedInstanceState) {
super.onCreate(savedInstanceState);
LinearLayout linear =
new LinearLayout(
this);
TextView username =
new TextView(
this);
Button validate =
new Button(
this);
username.setText(
"用户名:");
validate.setText(
"验证");
linear.addView(username);
linear.addView(validate);
setContentView(linear);
}
}
|
语句解释:
- 本范例就是在程序中动态的添加控件。 - 本范例中控件的宽、高、padding、margin等属性的值都没有设置。 这些属性被称为:布局参数。使用ViewGroup.LayoutParams类来表示。
范例2:指定宽、高。
       1


       2


       3


       4


       5


       6
|
linear.setOrientation(LinearLayout.VERTICAL);
linear.addView(username,
new ViewGroup.LayoutParams(ViewGroup.LayoutParams.MATCH_PARENT, ViewGroup.LayoutParams.WRAP_CONTENT));
linear.addView(validate,
new ViewGroup.LayoutParams(ViewGroup.LayoutParams.WRAP_CONTENT, ViewGroup.LayoutParams.WRAP_CONTENT));
setContentView(linear);
|
语句解释:
- 在ViewGroup.LayoutParams的构造方法中除了可以使用常量外,也可以指定具体数值。 - 在Android中的布局控件(如:LinearLayout、RadioGroup等)都具有一个名为LayoutParams的内部类。 - 各个LayoutParams各自提供了不同的布局参数,用于描述该控件不同的属性。它们都派生自ViewGroup.LayoutParams。
范例3:Margin属性。
       1


       2


       3


       4


       5


       6


       7


       8


       9


       10


       11


       12


       13


       14


       15


       16


       17
|
public
class AndroidTestActivity extends Activity {
public
void
onCreate(Bundle savedInstanceState) {
super.onCreate(savedInstanceState);
LinearLayout linearLayout =
new LinearLayout(
this);
TextView textView =
new TextView(
this);
textView.setText(
"Hi Androdi");
LinearLayout.LayoutParams params =
new LinearLayout.LayoutParams(
100,
50);
params.topMargin =
100;
params.leftMargin =
100;
linearLayout.addView(textView,params);
setContentView(linearLayout);
}
}
|
语句解释:
- 使用布局参数的topMargin等属性可以设置当前View与其相邻控件或父控件间的间距。 - 本范例中addView()方法将控件textView按照params所指定的参数,将其放置到父控件linearLayout中。
Custom Dialog
在实际中,内置的各种对话框并不能满足应用的需求,因此往往需要自定义对话框。
自定义对话框的步骤:
- 首先,实例化出一个Dialog对象,并设置对话框的初始参数,如标题、图标等。 - 然后,自定义一个xml布局文件。 - 接着,将xml布局文件导入到程序中。 - 最后,调用Dialog对象的setContentView方法,将xml布局文件中所有的控件设置到Dialog对象中去。
范例1:自定义布局文件(layout.xml)。
       1


       2


       3


       4


       5


       6


       7


       8


       9


       10


       11


       12


       13


       14
|
       <LinearLayout xmlns:android="http://schemas.android.com/apk/res/android"


       android:orientation=


       "vertical"


       android:layout_width=


       "fill_parent"


       android:layout_height=


       "fill_parent" >


       <EditText


       android:layout_width=


       "match_parent"


       android:layout_height=


       "wrap_content"


       android:id=


       "@+id/text"/>


       <Button


       android:layout_width=


       "wrap_content"


       android:layout_height=


       "wrap_content"


       android:text=


       "点击"


       android:id=


       "@+id/btn"/>


       </LinearLayout>
|
范例2:自定义对话框的内容。
       1


       2


       3


       4


       5


       6


       7


       8


       9


       10


       11


       12


       13


       14


       15


       16
|
Dialog dialog =
new Dialog(
this);
dialog.setTitle(
"对话框的标题");
dialog.setCancelable(
false);
LayoutInflater inflater = LayoutInflater.from(getApplicationContext());;
LinearLayout layout = (LinearLayout) inflater.inflate(R.layout.layout,
null);
Button okBtn = (Button) layout.findViewById(R.id.btn);
EditText input_psw = (EditText) layout.findViewById(R.id.text);
dialog.addContentView(layout,
new LinearLayout.LayoutParams(
220,
150));
dialog.show();
|
Pickers
Android给用户提供了选择时间(小时,分钟,上午/下午)或日期(月,日,年)的控件,使用这些选择器有助于确保用户可以选择一个有效的、格式正确的时间或日期,并自动调整到用户的所在区域。

范例1:创建一个时间选择器。
       1


       2


       3


       4


       5


       6


       7


       8


       9


       10


       11


       12


       13


       14


       15


       16


       17


       18


       19


       20
|
public
class MainActivity extends Activity implements OnTimeSetListener {
public
void
onCreate(Bundle savedInstanceState) {
super.onCreate(savedInstanceState);
setContentView(R.layout.activity_main);
final Calendar c = Calendar.getInstance();
int hour = c.get(Calendar.HOUR_OF_DAY);
int minute = c.get(Calendar.MINUTE);
Dialog d =
new TimePickerDialog(
this,
this, hour, minute, DateFormat.is24HourFormat(
this));
d.show();
}
public
void
onTimeSet(TimePicker view,
int hourOfDay,
int minute) {
}
}
|
范例2:创建一个日期选择器。
       1


       2


       3


       4


       5


       6


       7


       8


       9


       10


       11


       12


       13
|
       public


       class MainActivity extends Activity {


       public


       void


       onCreate(Bundle savedInstanceState) {


       super.onCreate(savedInstanceState);


               setContentView(R.layout.activity_main);


               Dialog d =


       new DatePickerDialog(


       this,


       new OnDateSetListener() {


       public


       void


       onDateSet(DatePicker view,


       int year,


       int monthOfYear,


       int dayOfMonth) {


                       Toast.makeText(getApplicationContext(), year +


       "年" + monthOfYear +


       "月" + dayOfMonth +


       "日",


       1).show();


                   }


               },


       2011,


       10,


       28);


               d.show();


           }


       }
|
开发中往往不会直接写死具体日期常量,而是使用Calendar工具类。
范例3:Calendar抽象类。
       1


       2


       3


       4


       5


       6


       7


       8
|
       Calendar calendar =


       new GregorianCalendar();


       System.


       out.println(


       "年: " + calendar.


       get(Calendar.YEAR));


       System.


       out.println(


       "月: " + (calendar.


       get(Calendar.MONTH)+


       1));


       System.


       out.println(


       "日: " + calendar.


       get(Calendar.DAY_OF_MONTH));


       System.


       out.println(


       "时: " + calendar.


       get(Calendar.HOUR_OF_DAY));


       System.


       out.println(


       "分: " + calendar.


       get(Calendar.MINUTE));


       System.


       out.println(


       "秒: " + calendar.


       get(Calendar.SECOND));


       System.


       out.println(


       "毫秒: " +calendar.


       get(Calendar.MILLISECOND));
|
语句解释:
- 使用java.util包中的Calendar类可以截取出当前Date对象的各个部分。
提示:系统自带的Pickers会依据系统的版本不同而拥有不同的外观,我们可以使用开源项目: Android-Holo-DateTimePicker 来统一风格。
第三节 Notification
Notification(通知)是一个被放到系统状态栏中的消息:


它与对话框一样都是用来告诉用户有事件发生了,不同的是,对话框需要用户立刻处理事件,而通知由于被放到了状态栏中,所以用户可以自己选择在适当的时候处理此事件。
应用场景:
当用户的应用程序正在一个后台服务中工作,并且需要把一个内部事件通知给用户时,这种类型的通知是非常合适的。
Notification类
当你向系统发出一个通知时,系统就会将一个图标放在状态栏的通知区域(如下图所示),然后当用户下拉状态栏时,就可以看到详细的通知。状态栏是系统控制的区域,它们不隶属于任何用户程序,用户可以随时查看。
 状态栏的通知区域
为了创建通知,你必须用到两个类:Notification和NotificationManager。
- Notification类的一个实例代表一个通知,通知有很多属性:如图标,播放的声音等。 - NotificationManager是系统服务,用于执行和管理系统中所有通知(Notification)对象。诸如发送、移除通知等操作都由此类来完成,你不需要直接初始化NotificationManager。
在正式创建通知之前,需要先了解下面列出的一些概念。
1. 虽然Android发展的很快,但发展的途中也导致了一些兼容性的问题
对于Notification而言Android3.0是一个分水岭:
- 在Android3.0之前,构建Notification推荐使用NotificationCompat.Builder,它位于android.support.v4.app包中,是一个Android向下版本的兼容包。 - 在Android3.0之后,一般推荐使用Notification.Builder构建。
本节将使用NotificationCompat.Builder进行讲解演示。
2. NotificationManager
由于状态栏不隶属于任何应用程序,因此向状态栏发送、更新、删除通知需要使用系统对外提供的接口,也就是通过NotificationManager类来完成。
NotificationManager是通知管理器类,通过下面的代码可以获取该类的对象:
       1


       2
|
NotificationManager mgr = (NotificationManager)
this.getSystemService(Context.NOTIFICATION_SERVICE);
|
3. Notification视觉风格
Notification有两种视觉风格,一种是标准视图(Normal view)、一种是大视图(Big view)。标准视图在Android中各版本是通用的,但是对于大视图而言,仅在Android4.1+的版本上可用。
4. PendingIntent
对于一个通知而言,它能显示的消息是有限的(仅显示一些概要信息),所以我们需要给它设置一个事件回调,当用户点击它的时候,就打开一个Activity(或其它组件)来显示详细的内容。
这个点击回调就用PendingIntent类表示:
PendingIntent是对Intent的包装,通过名称可以看出PendingIntent可以译为“延期意图”,它用于表示即将发生的意图,而Intent用来表示马上发生的意图,对于通知来说,它是系统级的全局通知,并不确定这个意图被执行的时间。
标准视图
从官方文档了解到,一个标准视图显示的大小要保持在64dp高,宽度为屏幕标准。标准视图的通知主体内容有一下几个:

1. 通知标题(contentTitle)。
2. 大图标(largeIcon)。
3. 通知内容(contentText)。
4. 通知消息(number)。
5. 小图标(smallIcon)。
6. 通知的时间,一般为系统时间,也可以使用setWhen()设置。
下面通过一个示例,模仿上面效果的通知。
       1


       2


       3


       4


       5


       6


       7


       8


       9


       10


       11


       12


       13


       14


       15


       16


       17


       18


       19


       20


       21


       22


       23


       24


       25


       26


       27


       28


       29


       30


       31
|
public
class MainActivity extends Activity {
public
void
onCreate(Bundle savedInstanceState) {
super.onCreate(savedInstanceState);
setContentView(R.layout.activity_main);
NotificationCompat.Builder mBuilder =
new NotificationCompat.Builder(MainActivity.
this);
mBuilder.setSmallIcon(R.drawable.ic_launcher);
mBuilder.setContentTitle(
"5 new message");
mBuilder.setTicker(
"New message");
mBuilder.setNumber(
12);
Bitmap btm = BitmapFactory.decodeResource(getResources(),R.drawable.ic_action_download);
mBuilder.setLargeIcon(btm);
mBuilder.setAutoCancel(
true);
Intent resultIntent =
new Intent(MainActivity.
this, MainActivity.class);
PendingIntent resultPendingIntent = PendingIntent.getActivity(
MainActivity.
this,
0, resultIntent,
PendingIntent.FLAG_UPDATE_CURRENT);
mBuilder.setContentIntent(resultPendingIntent);
NotificationManager mNotificationManager = (NotificationManager) getSystemService(Context.NOTIFICATION_SERVICE);
mNotificationManager.notify(
0, mBuilder.build());
}
}
|
显示效果:
更新与移除通知
在使用NotificationManager.notify()发送通知的时候,需要同时传递一个标识符,用于唯一标识这个通知。
对于一个通知,当展示在状态栏之后,如何取消呢?Android为我们提供两种方式移除通知:
第一种是Notification自己维护,使用setAutoCancel()方法设置是否维护。
第二种是使用NotificationManager通知管理器对象来维护,它通过notify()发送通知的时候,指定的通知标识id来操作通知,可以使用cancel(int)来移除一个指定的通知,也可以使用cancelAll()移除所有的通知。
       1


       2


       3


       4
|
NotificationManager mNotificationManager = (NotificationManager)
getSystemService(Context.NOTIFICATION_SERVICE);
mNotificationManager.cancel(
0);
|
大视图
而对于大视图(Big View)而言,它的细节区域只能显示256dp高度的内容,并且只对Android4.1+之后(但在之前的版本中也不会报错)的设备才支持,它比标准视图不一样的地方,均需要使用setStyle()方法设定,它大致的效果如下:
setStyle()传递一个NotificationCompat.Style对象,它是一个抽象类,Android为我们提供了三个实现类,用于显示不同的场景。分别是:
- NotificationCompat.BigPictureStyle,在细节部分显示一个256dp高度的位图。 - NotificationCompat.BigTextStyle,在细节部分显示一个大的文本块。 - NotificationCompat.InboxStyle,在细节部分显示多行文本。
下面会以一个示例来展示InboxStyle的使用,模仿上面图片的显示。
       1


       2


       3


       4


       5


       6


       7


       8


       9


       10


       11


       12


       13


       14


       15


       16


       17


       18


       19


       20


       21


       22


       23


       24


       25


       26


       27


       28


       29


       30


       31


       32
|
public
class MainActivity extends Activity {
public
void
onCreate(Bundle savedInstanceState) {
super.onCreate(savedInstanceState);
setContentView(R.layout.activity_main);
Bitmap btm = BitmapFactory.decodeResource(getResources(), R.drawable.ic_launcher);
Intent intent =
new Intent(
this, MainActivity.class);
PendingIntent pendingIntent = PendingIntent.getActivity(
this,
0, intent,PendingIntent.FLAG_CANCEL_CURRENT);
Notification noti =
new NotificationCompat.Builder(
this)
.setSmallIcon(R.drawable.ic_launcher)
.setLargeIcon(btm)
.setNumber(
13)
.setContentText(
"ContentText")
.setContentTitle(
"ContentTitle")
.setContentIntent(pendingIntent)
.setStyle(
new NotificationCompat.InboxStyle()
.addLine(
"M.Twain (Google+) Haiku is more than a cert...")
.addLine(
"M.Twain Reminder")
.addLine(
"M.Twain Lunch?")
.addLine(
"M.Twain Revised Specs")
.addLine(
"M.Twain ")
.addLine(
"Google Play Celebrate 25 billion apps with Goo..")
.addLine(
"Stack Exchange StackOverflow weekly Newsl...")
.setBigContentTitle(
"6 new message")
.build();
NotificationManager mNotificationManager = (NotificationManager) getSystemService(Context.NOTIFICATION_SERVICE);
mNotificationManager.notify(
0, noti);
}
}
|
显示效果:

值得注意的是,不同厂家的手机对大视图风格的通知有不同的展现形式,比如:
- 在三星S5手机上,当程序向状态栏中添加大视图风格的通知时,默认情况该通知会被折叠起来(即和正常通知的大小一样),用户可以通过滑动来展开通知,通知一旦被展开则无法重新折叠回去。 - 在Android4.1的模拟器上,默认直接将大视图的通知给展开,因而用户无法查看到通知的contentTitle、contentText属性的值,同时也无法将通知折叠回去,所以通常情况下我们应该为setContentText和setBigContentTitle传递相似的值。
还有一点就是,Android4.1之前的设备上是无法显示大视图的通知的,因此为了兼容性考虑,请务必设置通知的contentTitle、contentText属性的值。
进度条样式的通知
对于一个标准通知,有时候显示的消息并不一定是静态的,还可以设定一个进度条用于显示事务完成的进度。
Notification.Builder类中提供一个setProgress(int max, int progress, boolean indeterminate)方法用于设置进度条:
- max用于设定进度的最大数。 - progress用于设定当前的进度 - indeterminate用于设定是否是一个不确定进度的进度条。
通过indeterminate的设置,可以实现两种不同样式的进度条,一种是有进度刻度的(true),一种是循环流动的(false)。
范例1:有进度刻度。
       1


       2


       3


       4


       5


       6


       7


       8


       9


       10


       11


       12


       13


       14


       15


       16


       17


       18


       19


       20


       21


       22


       23


       24


       25


       26


       27


       28


       29


       30


       31
|
public
class MainActivity extends Activity {
public
void
onCreate(Bundle savedInstanceState) {
super.onCreate(savedInstanceState);
setContentView(R.layout.activity_main);
final NotificationCompat.Builder builder =
new NotificationCompat.Builder(MainActivity.
this);
builder.setSmallIcon(R.drawable.ic_launcher);
builder.setContentTitle(
"Picture Download");
builder.setContentText(
"Download in progress");
builder.setAutoCancel(
true);
final PendingIntent pendingintent = PendingIntent.getActivity(
this,
0,
new Intent(), PendingIntent.FLAG_CANCEL_CURRENT);
builder.setContentIntent(pendingintent);
final NotificationManager manager = (NotificationManager) getSystemService(Context.NOTIFICATION_SERVICE);
new Thread(
new Runnable() {
public
void
run() {
int incr;
for (incr =
0; incr <=
100; incr +=
5) {
builder.setProgress(
100, incr,
false);
manager.notify(
0, builder.build());
try {
Thread.sleep(
300);
}
catch (InterruptedException e) { }
}
builder.setContentText(
"Download complete");
builder.setProgress(
0,
0,
false);
manager.notify(
0, builder.build());
}
}).start();
}
}
|
语句解释:
- 只有在Android4.0+以后的版本中通知才支持进度条,在更低的版本中通知里是不会包含进度条的。 - 只要把setProgress方法的第三个参数改为true,就可以显示一个不确定的进度条。
设定提示响应
对于有些通知,需要调用一些设备的资源,使用户能更快的发现有新通知,一般可设定的响应有:铃声、闪光灯、震动。对于这三个属性,NotificationCompat.Builder提供了三个方法设定:
-  setSound(Uri sound):设定一个铃声,用于在通知的时候响应,传递一个Uri的参数。
-  setLights(int argb, int onMs, int offMs):设定前置LED灯的闪烁速率,持续毫秒数,停顿毫秒数。
-  setVibrate(long[] pattern):设定震动的模式,以一个long数组保存毫秒级间隔的震动。
大多数时候,我们并不需要设定一个特定的响应效果,只需要遵照用户设备上系统通知的效果即可,那么可以使用setDefaults(int)方法设定默认响应参数,在Notification中,对它的参数使用常量定义了,我们只需使用即可:
- DEFAULT_ALL:铃声、闪光、震动均系统默认。 - DEFAULT_SOUND:系统默认铃声。 - DEFAULT_VIBRATE:系统默认震动。 - DEFAULT_LIGHTS:系统默认闪光。
而在Android中,如果需要访问硬件设备的话,是需要用户对其进行授权的,所以需要在清单文件AndroidManifest.xml中增加两个授权,分别授予访问振动器与闪光灯的权限:
       1


       2


       3


       4
|
<uses-permission android:name="android.permission.FLASHLIGHT"/>
<uses-permission android:name="android.permission.VIBRATE"/>
|
添加声音
       1


       2


       3


       4


       5


       6


       7


       8
|
mBuilder.setSound(Uri.parse(
"android.resource://"+getPackageName()+
"/"+R.raw.
system));
mBuilder.setSound(Uri.parse(
"file://"+Environment.getExternalStorageDirectory()+
"/notification/ringer.mp3"));
mBuilder.setDefaults(Notification.DEFAULT_SOUND);
|
添加震动
       1


       2


       3


       4


       5
|
mBuilder.setDefaults(Notification.DEFAULT_VIBRATE);
mBuilder.setVibrate(
new
long[] {
100,
200,
300 });
|
语句解释:
- long型的数组定义了交替振动的方式和振动的时间(毫秒)。 - 第一个值是指振动前的准备(间歇)时间,第二个值是第一次振动的时间,第三个值又是间歇的时间,以此类推。
添加闪灯
       1


       2
|
mBuilder.setDefaults(Notification.DEFAULT_LIGHTS);
|
本节参考阅读:
- Android—通知之Notification
- Notifications in Android 4.4 and Lower
第四节 RemoteViews
如果你想把你的布局文件放到其它进程中显示,那么就需要用到RemoteViews类。
在Android开发中,有两个地方会用到RemoteViews:一个是AppWidget,另外一个是Notification:
- Notification:若想自定义Notification的布局,那么就必须通过RemoteViews,因为定义Nofication的地方和显示Notification的地方处在两个不同的进程中。 - AppWidget:通过RemoteViews告诉Launcher我们的AppWidget长什么样。
简单地说,RemoteViews是用来描述一个垮进程显示的view。
自定义通知
和Toast一样,通知也可以自定义布局,但是由于通知会显示在另一个进程中,所以只能使用RemoteViews类来操作。
范例1:创建XML文件。
       1


       2


       3


       4


       5


       6


       7


       8


       9


       10


       11


       12


       13


       14


       15


       16


       17


       18


       19


       20


       21


       22
|
       <RelativeLayout xmlns:android="http://schemas.android.com/apk/res/android"


       android:id=


       "@+id/layout"


       android:layout_width=


       "fill_parent"


       android:layout_height=


       "fill_parent"


       android:padding=


       "10dp" >


       <ImageView android:id="@+id/image"


       android:layout_width=


       "wrap_content"


       android:layout_height=


       "fill_parent"


       android:layout_alignParentLeft=


       "true"


       android:layout_marginRight=


       "10dp" />


       <TextView android:id="@+id/title"


       android:layout_width=


       "wrap_content"


       android:layout_height=


       "wrap_content"


       android:layout_toRightOf=


       "@id/image"


       style=


       "@style/NotificationTitle" />


       <TextView android:id="@+id/text"


       android:layout_width=


       "wrap_content"


       android:layout_height=


       "wrap_content"


       android:layout_toRightOf=


       "@id/image"


       android:layout_below=


       "@id/title"


       style=


       "@style/NotificationText" />


       </RelativeLayout>
|
注意那两个TextView的style属性。在自定义通知界面时,为文本使用style文件进行定义是很重要的,因为通知界面的背景色会因为不同的硬件,不同的os版本而改变。从Android2.3(API 9)开始,系统为默认的通知界面定义了文本的style属性。
因此,你应该使用style属性,以便于在Android2.3或更高的版本上可以清晰地显示你的文本,而不被背景色干扰。
例如,在低于Android2.3的版本中使用标准文本颜色,res/values/styles.xml:
       1


       2


       3


       4


       5


       6


       7


       8


       9
|
       <resources>


       <style name="NotificationText">


             <


       item


       name="


       android


       :textColor">?


       android


       :attr/


       textColorPrimary</


       item>


       </style>


       <style name="NotificationTitle">


             <


       item


       name="


       android


       :textColor">?


       android


       :attr/


       textColorPrimary</


       item>


             <


       item


       name="


       android


       :textStyle">


       bold</


       item>


       </style>


       </resources>
|
然后,在高于Android2.3的系统中使用系统默认的颜色。如res/values-v9/styles.xml:
       1


       2


       3


       4
|
       <resources>


       <style name="NotificationText" parent="android:TextAppearance.StatusBar.EventContent" />


          <


       style


       name="


       NotificationTitle"


       parent="


       android


       :TextAppearance


       .StatusBar


       .EventContent


       .Title" />


       </


       resources>
|
范例2:代码实现
       1


       2


       3


       4


       5


       6


       7


       8


       9


       10


       11


       12


       13


       14


       15


       16


       17


       18


       19


       20


       21


       22


       23


       24


       25
|
public
class MainActivity extends Activity {
public
void
onCreate(Bundle savedInstanceState) {
super.onCreate(savedInstanceState);
setContentView(R.layout.activity_main);
RemoteViews contentViews =
new RemoteViews(getPackageName(), R.layout.custom_notification);
contentViews.setImageViewResource(R.id.image, R.drawable.ic_launcher);
contentViews.setTextViewText(R.id.title,
"Custom notification");
contentViews.setTextViewText(R.id.text,
"This is a custom layout");
Intent intent =
new Intent(
this, MainActivity.class);
PendingIntent pendingIntent = PendingIntent.getActivity(
this,
0, intent,PendingIntent.FLAG_CANCEL_CURRENT);
NotificationCompat.Builder mBuilder =
new NotificationCompat.Builder(
this)
.setSmallIcon(R.drawable.ic_launcher)
.setContentTitle(
"My notification")
.setTicker(
"new message");
mBuilder.setAutoCancel(
true);
mBuilder.setContentIntent(pendingIntent);
mBuilder.setContent(contentViews);
NotificationManager mNotificationManager = (NotificationManager) getSystemService(Context.NOTIFICATION_SERVICE);
mNotificationManager.notify(
10, mBuilder.build());
}
}
|
显示效果:

如果想在Android4.0以下使用带有进度条的通知,则就需要自定义通知了:
       1


       2


       3


       4


       5
|
contentViews.setProgressBar(R.id.progressbar,
100, curProgress,
false);
contentViews.setTextViewText(R.id.percent,
"已下载:"+curProgress);
mNotificationManager.notify(notifyId, mBuilder.build());
|
笔者建议您,在继续向下学习之前,请先阅读 Binder机制 一文。
内部机制
RemoteViews的作用是在其他进程中显示并更新View界面,但是它目前并不能支持所有的View类型,它所支持的类型有:
- FrameLayout、LinearLayout、RelativeLayout、GridLayout - Button、ImageButton、ImageView、ProgressBar、TextView、ListView、GridView等
如果强行使用RemoteViews不支持的类(如EditText),那么程序运行的时候轻则不会显示,重则直接抛异常。
从文档上可以看出,RemoteViews的父类是Object,且它没有提供findViewById方法,因此如果想修改其内部的控件,则只能通过RemoteViews提供的一系列set方法来完成。
下面列出了它提供的部分方法:
       1


       2


       3


       4


       5


       6


       7


       8


       9


       10


       11
|
setTextViewText(
int viewId, CharSequence text)
setTextViewTextSize(
int viewId,
int units,
float size)
setTextColor(
int viewId,
@ColorInt
int color)
setImageViewResource(
int viewId,
int srcId)
setInt(
int viewId, String methodName,
int value)
setBoolean(
int viewId, String methodName,
boolean value)
setOnClickPendingIntent(
int viewId, PendingIntent pendingIntent)
|
事实上,在上述这些方法的内部是通过反射的方式调用目标View的对应的方法的。
基于反射
我们知道RemoteViews主要用于通知和桌面小部件之中,它们分别涉及到:
- NotificationManager和NotificationManagerService类。 - AppWidgetManager和AppWidgetService类。
其中这两个Manger类都是通过Binder机制分别和SystemServer进程中的两个Service类进行通信的。这意味着通知和小部件中的布局文件实际上是由运行在SystemServer中的服务加载的,这就和我们的进程构成了跨进程通信的场景。
从理论上来说:
- 系统完全可以通过Binder去支持所有的View,但是这样做的代价太大,因为View的方法太多(有各种情况需要特殊处理),而且大量的IPC操作会影响效率。
反射的过程
我们在应用中每调用一次set方法,RemoteViews中就会添加一个对应的Action对象,比如setTextViewText方法:
       1


       2


       3


       4


       5


       6


       7


       8


       9


       10


       11


       12


       13


       14


       15


       16


       17


       18


       19


       20
|
public
void
setTextViewText(
int viewId, CharSequence text) {
setCharSequence(viewId,
"setText", text);
}
public
void
setCharSequence(
int viewId, String methodName, CharSequence value) {
addAction(
new ReflectionAction(viewId, methodName, ReflectionAction.CHAR_SEQUENCE, value));
}
private
void
addAction(Action a) {
if (hasLandscapeAndPortraitLayouts()) {
throw
new RuntimeException(
"RemoteViews specifying separate landscape and portrait" +
" layouts cannot be modified. Instead, fully configure the landscape and" +
" portrait layouts individually before constructing the combined layout.");
}
if (mActions ==
null) {
mActions =
new ArrayList<Action>();
}
mActions.add(a);
a.updateMemoryUsageEstimate(mMemoryUsageCounter);
}
|
语句解释:
- 从上面的代码可以看出来,RemoteViews会将操作封装成一个ReflectionAction对象,并保存起来等待交给系统进程。
我们调用setTextViewText等方法后,实际上并没有立刻更新界面,只有把通知发送出去后才会更新:
       1


       2


       3


       4


       5


       6


       7


       8


       9


       10


       11


       12


       13


       14


       15


       16


       17


       18


       19


       20


       21


       22


       23
|
public
void
notify(String tag,
int id, Notification notification) {
int[] idOut =
new
int[
1];
INotificationManager service = getService();
String pkg = mContext.getPackageName();
if (notification.sound !=
null) {
notification.sound = notification.sound.getCanonicalUri();
if (StrictMode.vmFileUriExposureEnabled()) {
notification.sound.checkFileUriExposed(
"Notification.sound");
}
}
if (localLOGV) Log.v(TAG, pkg +
": notify(" + id +
", " + notification +
")");
Notification stripped = notification.clone();
Builder.stripForDelivery(stripped);
try {
service.enqueueNotificationWithTag(pkg, mContext.getOpPackageName(), tag, id,
stripped, idOut, UserHandle.myUserId());
if (id != idOut[
0]) {
Log.w(TAG,
"notify: id corrupted: sent " + id +
", got back " + idOut[
0]);
}
}
catch (RemoteException e) {
}
}
|
语句解释:
- 第16行代码通过Binder来调用NotificationManagerService类的enqueueNotificationWithTag方法。
当程序执行到NotificationManagerService类时会经历一系列的操作,我们就不再一一介绍了。
最终系统会调用RemoteViews的apply方法更新界面:
       1


       2


       3


       4


       5


       6


       7


       8


       9


       10


       11


       12


       13


       14


       15


       16


       17


       18


       19


       20


       21


       22


       23


       24


       25


       26


       27


       28


       29


       30


       31


       32


       33
|
public View
apply(Context context, ViewGroup parent) {
return apply(context, parent,
null);
}
/** @hide */
public View
apply(Context context, ViewGroup parent, OnClickHandler handler) {
RemoteViews rvToApply = getRemoteViewsToApply(context);
inflater = inflater.cloneInContext(inflationContext);
inflater.setFilter(
this);
result = inflater.inflate(rvToApply.getLayoutId(), parent,
false);
rvToApply.performApply(result, parent, handler);
return result;
}
private
void
performApply(View v, ViewGroup parent, OnClickHandler handler) {
if (mActions !=
null) {
handler = handler ==
null ? DEFAULT_ON_CLICK_HANDLER : handler;
final
int count = mActions.size();
for (
int i =
0; i < count; i++) {
Action a = mActions.get(i);
a.apply(v, parent, handler);
}
}
}
|
语句解释:
- 从上面可以看出Action类的apply方法才是真正操作View的地方。
那么接着看一下ReflectionAction的apply方法:
       1


       2


       3


       4


       5


       6


       7


       8


       9


       10


       11


       12


       13


       14


       15


       16


       17
|
       public


       void


       apply(View root, ViewGroup rootParent, OnClickHandler handler) {


       final View view = root.findViewById(viewId);


       if (view ==


       null)


       return;


           Class<?> param = getParameterType();


       if (param ==


       null) {


       throw


       new ActionException(


       "bad type: " +


       this.type);


           }


       try {


               getMethod(view,


       this.methodName, param).invoke(view, wrapArg(


       this.value));


           }


       catch (ActionException e) {


       throw e;


           }


       catch (Exception ex) {


       throw


       new ActionException(ex);


           }


       }
|
语句解释:
- 到这里一切都明了,ReflectionAction会通过反射来调用目标View对应的方法来更新数据。 - 除了ReflectionAction,还有其他Action,比如TextViewSizeAction、ViewPaddingAction等。
另外,RemoteViews还有一个reapply方法,它和apply方法的区别在于,它省略了布局加载的那一步。
应用场景
比如现在有两个应用,应用A需要将自己的界面放到另一个应用B中,并在随后的某个时间上操作那个界面。
这个时候我们当然可以选择 Binder机制 中说的各种IPC方式来实现这个功能,但是不论是AIDL还是Messenger都需要通信的两个进程协商接口,如果界面更新的比较频繁的话就会有效率问题,而且接口的复杂度也会增加。
此时我们就可以使用RemoteViews了,大体的流程是:
- 首先,在进程A中创建RemoteViews对象,并通过广播、Binder等渠道将它发送给进程B。 - 然后,进程B接到RemoteViews时,调用它的apply方法来初始化布局,并将该方法的返回值放入到界面中。 - 接着,进程A就可以尽情的调用RemoteViews的各种方法来更新被放到进程B中的View了。
RemoteViews的缺点是它所支持的View有限,如果需要复杂的View,那么可以让RemoteViews配合其他IPC方式一起用。
在使用RemoteViews时有一个问题需要注意,假设有如下代码:
       1


       2
|
       View view = remoteViews.apply(


       this, mRemoteViewsContent);


       mRemoteViewsContent.addView(view);
|
这种写法在同一个应用的多进程情形下是适用的,但是如果A和B属于不同的应用,那么A中的布局文件的资源id传到A中以后可能就是无效的。
遇到这种情况时,我们就通过资源的名称来加载布局文件:
       1


       2


       3


       4


       5
|
int resId = getResources().getIdentifier(
"layout_name",
"layout",
"package.name");
View view = getLayoutInflater().inflate(resId, mRemoteViewsContent,
false);
remoteViews.reapply(
this, view);
|