maven使用
一、maven配置仓库地址
在setting.xml里面配置
<span style="font-family:SimSun;font-size:14px;"><profile>
		<id>nexus</id>
		<repositories>
		         <repository>
		                   <id>nexus</id>
		                   <name>local private nexus</name>
		                   <url>http://maven.test.com/nexus/content/groups/public</url>
		         </repository>
		</repositories>
		<pluginRepositories>
		         <pluginRepository>
		                   <id>nexus-plug</id>
		                   <name>local private nexus-plug</name>
		                   <url>http://maven.test.com/nexus/content/groups/public</url>
		         </pluginRepository>
		</pluginRepositories>
	</profile></span>
二、maven中央仓库包查询地址
http://search.maven.org/
可以查询需要引入的包的版本仓库中有什么
三、maven版本会默认使用JDK比如1.5
法一:项目建立后修改JDK依赖版本。项目右键--Properties--Libraries选项卡选项修改成本地的JDK版本
法二:修改Maven默认JDK版本,也在setting.xml里:http://blog.csdn.net/hehexiaoyou/article/details/27229881
四、maven编译
1)Eclipse配置maven编译 菜单栏Run--Run Configurations--Maven Build--右键New--Main选项卡
见下图
2)常用命令说明:http://www.cnblogs.com/xing901022/p/4170248.html
五、maven进行单元测试
Maven可以使用Junit进行单元测试
1)Junit4开始支持@Test
因此maven的pom.xml需要添加
<span style="font-family:SimSun;font-size:14px;"><dependency>
			<groupId>junit</groupId>
			<artifactId>junit</artifactId>
			<version>4.10</version>
		</dependency></span>
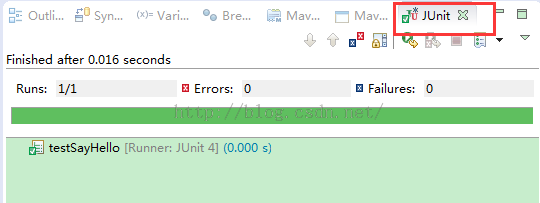
运行结果

2)在src/test目录新建test类,一般test类的命名以被测试类后面加上Test命名
被测试类代码
<span style="font-family:SimSun;font-size:14px;">public class MavenEG {
	public String sayHello() {
		return "Hello Maven!";
	}
}</span>
测试类代码
<span style="font-family:SimSun;font-size:14px;">public class MavenTest {
	@Test
	public void testSayHello() {
		MavenEG mavenEG=new MavenEG();
		String result=mavenEG.sayHello();
		assertEquals("Hello Maven!",result);
	}
}</span>
3)开始测试
法一:使用Junit测试,在方法上右键--Run As--Junit Test
在Junit窗口可以看见测试结果,绿色条是通过(Junit窗口 windows--ShowView--Java--junit)
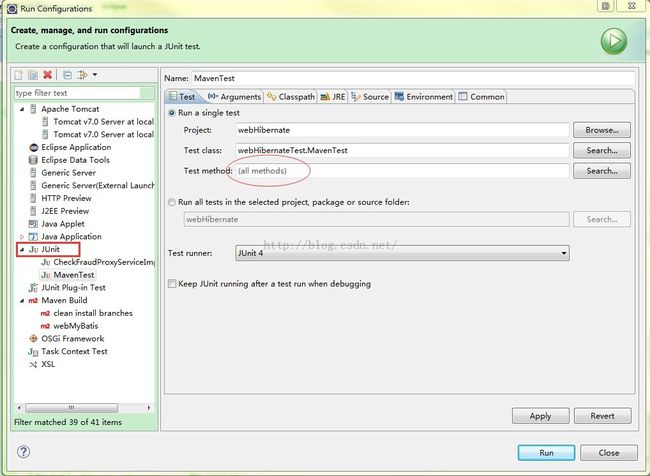
法二:菜单栏Run--Run Configurations--Junit--右键New--Main选项卡
六、创建和导入maven项目
1)新建项目:http://www.cnblogs.com/leiOOlei/p/3361633.html
2)导入项目: 菜单File--Import--Maven下面--Existing Maven Project
不断更新中……

