Bitmap的相关方法汇总
Bitmap是Android系统中的图像处理的最重要类之一。用它可以获取图像文件信息,进行图像剪切、旋转、缩放等操作,并可以指定格式保存图像文件。
1.Bitmap的创建
通过BitmapFactory创建
  //第一种方式:从资源文件中得到图片
  Bitmap rawBitmap1 = BitmapFactory.decodeResource(getResources(), R.drawable.haha);
  //第二种方式:从SD卡中得到图片(方法1)
  String SDCarePath = Environment.getExternalStorageDirectory().getAbsolutePath();
  String filePath = SDCarePath + "/" + "haha.jpg";
  Bitmap rawBitmap2 = BitmapFactory.decodeFile(filePath, null);
  //第二种方式:从SD卡中得到图片(方法2)
  InputStream inputStream = getBitmapInputStreamFromSDCard("haha.jpg");
  Bitmap rawBitmap3 = BitmapFactory.decodeStream(inputStream);
   /**
     * 读取SD卡下的图片
     *
     * @param fileName
     * @return
     */
    private InputStream getBitmapInputStreamFromSDCard(String fileName) {
        if (Environment.getExternalStorageState().equals(Environment.MEDIA_MOUNTED)) {
            String SDCarePath = Environment.getExternalStorageDirectory().getAbsolutePath();
            String filePath = SDCarePath + File.separator + fileName;
            File file = new File(filePath);
            try {
                FileInputStream fileInputStream = new FileInputStream(file);
                return fileInputStream;
            } catch (Exception e) {
                e.printStackTrace();
            }

        }
        return null;
    }
通过Bitmap的相关方法创建
 Bitmap roundCornerBitmap = toRoundCorner(rawBitmap, 40);
 imageView.setImageBitmap(roundCornerBitmap);
   /**
     * @param bitmap 需要修改的图片
     * @param pixels 圆角的弧度
     * @return 圆角图片
     */
    //参考资料:
    //http://blog.csdn.net/c8822882/article/details/6906768
    public Bitmap toRoundCorner(Bitmap bitmap, int pixels) {
        Bitmap roundCornerBitmap = Bitmap.createBitmap(bitmap.getWidth(), bitmap.getHeight(), Bitmap.Config.ARGB_8888);
        Canvas canvas = new Canvas(roundCornerBitmap);//生成画布
        int color = 0xff424242;//int color = 0xff424242;
        Paint paint = new Paint();
        paint.setColor(color);
        //防止锯齿
        paint.setAntiAlias(true);
        //定义一个矩形区域用于绘制bitmap
        Rect rect = new Rect(0, 0, bitmap.getWidth(), bitmap.getHeight());
        //再定义一个矩形用于绘制圆角矩形
        RectF rectF = new RectF(rect);
        //获取圆角的半径
        float roundPx = pixels;
        //相当于清屏
        canvas.drawARGB(0, 0, 0, 0);
        //先画了一个带圆角的矩形
        canvas.drawRoundRect(rectF, roundPx, roundPx, paint);
        //取两层绘制交集。显示上层。
        paint.setXfermode(new PorterDuffXfermode(PorterDuff.Mode.SRC_IN));
        //再把原来的bitmap画到现在的bitmap!!!注意这个理解
        canvas.drawBitmap(bitmap, rect, rect, paint);
        return roundCornerBitmap;
    }
3.通过Matrix的postScale方法对Bitmap进行缩放
   // 得到图片原始的高宽
   int rawHeight = rawBitmap.getHeight();
   int rawWidth = rawBitmap.getWidth();
   // 设定图片新的高宽
   int newHeight = 500;
   int newWidth = 500;
   // 计算缩放因子
   float heightScale = ((float) newHeight) / rawHeight;
   float widthScale = ((float) newWidth) / rawWidth;
   // 新建立矩阵
   Matrix matrix = new Matrix();
   matrix.postScale(heightScale, widthScale);
   // 设置图片的旋转角度
   //matrix.postRotate(-30);
   // 设置图片的倾斜
   //matrix.postSkew(0.1f, 0.1f);
   // 将图片大小压缩
   // 压缩后图片的宽和高以及kB大小均会变化
   Bitmap newBitmap = Bitmap.createBitmap(rawBitmap, 0, 0, rawWidth, rawWidth, matrix, true);
   // 将Bitmap转换为Drawable
   Drawable newBitmapDrawable = new BitmapDrawable(newBitmap);
   imageView.setImageDrawable(newBitmapDrawable);
   // 或者直接设置bitmap
   //imageView.setImageBitmap(newBitmap);
4.通过 BitmapFactory.Options创建Bitmap的缩略图
   /**
     * 获取图片的缩略图
     *
     * @param filePath
     * @return
     */
    private Bitmap getBitmapThumbnail(String filePath) {
        //位图参数类
        BitmapFactory.Options options = new BitmapFactory.Options();
        //if true则不返回实际的bitmap对象,不给其分配内存空间但是可以得到一些解码边界信息即图片大小等信息
        options.inJustDecodeBounds = true;
        //此时rawBitmap为null
        Bitmap rawBitmap = BitmapFactory.decodeFile(filePath, options);
        //inSampleSize表示缩略图大小为原始图片大小的几分之一,若该值为3
        //则取出的缩略图的宽和高都是原始图片的1/3,图片大小就为原始大小的1/9
        //计算sampleSize
        int sampleSize = computeSampleSize(options, 150, 200 * 200);
        //为了读到图片到内存,必须把options.inJustDecodeBounds设回false
        options.inJustDecodeBounds = false;
        //原图大小为625x690
        //得到sampleSize=8
        //得到宽和高位79和87
        //79*8=632 87*8=696
        options.inSampleSize = sampleSize;
        return BitmapFactory.decodeFile(filePath, options);
    }
    //参考资料:
    //http://my.csdn.net/zljk000/code/detail/18212
    //第一个参数:原本Bitmap的options
    //第二个参数:希望生成的缩略图的宽高中的较小的值
    //第三个参数:希望生成的缩量图的总像素
    public static int computeSampleSize(BitmapFactory.Options options, int minSideLength, int maxNumOfPixels) {
        int initialSize = computeInitialSampleSize(options, minSideLength, maxNumOfPixels);
        int roundedSize;
        if (initialSize <= 8) {
            roundedSize = 1;
            while (roundedSize < initialSize) {
                roundedSize <<= 1;
            }
        } else {
            roundedSize = (initialSize + 7) / 8 * 8;
        }
        return roundedSize;
    }
   /**
     * 计算sampleSize
     * @param options 原本Bitmap的options
     * @param minSideLength 希望生成的缩略图的宽高中的较小的值
     * @param maxNumOfPixels 希望生成的缩量图的总像素
     * @return
     */
    private static int computeInitialSampleSize(BitmapFactory.Options options, int minSideLength, int maxNumOfPixels) {
        //原始图片的宽
        double w = options.outWidth;
        //原始图片的高
        double h = options.outHeight;
        int lowerBound = (maxNumOfPixels == -1) ? 1 : (int) Math.ceil(Math
                .sqrt(w * h / maxNumOfPixels));
        int upperBound = (minSideLength == -1) ? 128 : (int) Math.min(
                Math.floor(w / minSideLength), Math.floor(h / minSideLength));
        if (upperBound < lowerBound) {
            // return the larger one when there is no overlapping zone.
            return lowerBound;
        }
        if ((maxNumOfPixels == -1) && (minSideLength == -1)) {
            return 1;
        } else if (minSideLength == -1) {
            return lowerBound;
        } else {
            return upperBound;
        }
    }
5.通过Android提供的ThumbnailUtils类创建缩略图
    String SDCarePath = Environment.getExternalStorageDirectory().toString();
    String filePath = SDCarePath + "/" + "haha.jpg";
    Bitmap tempBitmap = BitmapFactory.decodeFile(filePath);
    Bitmap bitmapThumbnail = ThumbnailUtils.extractThumbnail(tempBitmap, 100, 100);
    imageView.setImageBitmap(bitmapThumbnail);
6.通过Bitmap的compress方法将图片进行压缩
   /**
     * 压缩图片到输出流中且保存图片到SDCard
     *
     * @param rawBitmap :要压缩的图片
     * @param fileName  :文件名
     * @param quality   :压缩质量0-100,通常为80
     *                  问题:
     *                  原图大小为625x690 90.2kB
     *                  如果设置图片500x500 压缩后大小为171kB.即压缩后kB反而变大了.
     *                  原因是将:compress(Bitmap.CompressFormat.JPEG, quality, fileOutputStream);
     *                  第二个参数quality设置得有些大了(比如100).
     *                  常用的是80,刚设100太大了造成的.
     */
    private void compressAndSaveBitmapToSDCard(Bitmap rawBitmap, String fileName, int quality) {
        String saveFilePaht = this.getSDCardPath() + File.separator + fileName;
        File saveFile = new File(saveFilePaht);
        if (!saveFile.exists()) {
            try {
                saveFile.createNewFile();
                FileOutputStream fileOutputStream = new FileOutputStream(saveFile);
                if (fileOutputStream != null) {
                    //imageBitmap.compress(format, quality, stream);
                    //把位图的压缩信息写入到一个指定的输出流中
                    //第一个参数format为压缩的格式
                    //第二个参数quality为图像压缩比的值,0-100.0 意味着小尺寸压缩,100意味着高质量压缩
                    //第三个参数stream为输出流
                    rawBitmap.compress(Bitmap.CompressFormat.JPEG, quality, fileOutputStream);
                }
                fileOutputStream.flush();
                fileOutputStream.close();
            } catch (IOException e) {
                e.printStackTrace();

            }
        }
    }
7.通过BitmapFactory.Options将大图片缩放到手机全屏显示
        //相当消耗内存资源 根据图片的分辨率而定
        // Bitmap bitmap = BitmapFactory.decodeFile("/mnt/sdcard/photo.jpg");
	// iv.setImageBitmap(bitmap);

	//1.得到屏幕的宽高信息
	WindowManager wm = getWindowManager();
	int screenWidth = wm.getDefaultDisplay().getWidth();
	int screenHeight = wm.getDefaultDisplay().getHeight();
	System.out.println("屏幕宽高:"+screenWidth+"-"+screenHeight);

	//2.得到图片的宽高。
	BitmapFactory.Options opts = new Options();//解析位图的附加条件
	opts.inJustDecodeBounds = true;//不去解析真实的位图,只是获取这个位图的头文件信息
	Bitmap bitmap = BitmapFactory.decodeFile("/mnt/sdcard/photo.jpg", opts);
	int bitmapWidth = opts.outWidth;
	int bitmapHeight = opts.outHeight;
	System.out.println("图片宽高: "+bitmapWidth+"-"+bitmapHeight);

	//3.计算缩放比例
	int dx = bitmapWidth/screenWidth;
	int dy = bitmapHeight/screenHeight;
	int scale = 1;
	if(dx>dy&&dy>1){
		System.out.println("按照水平方法缩放,缩放比例:"+dx);
		scale = dx;
	}

	if(dy>dx&&dx>1){
	<span style="white-space:pre">	</span>System.out.println("按照垂直方法缩放,缩放比例:"+dy);
		scale = dy;
	}
	//4.缩放加载图片到内存。
	opts.inSampleSize = scale;
	opts.inJustDecodeBounds = false;//真正的去解析这个位图。
	bitmap = BitmapFactory.decodeFile("/mnt/sdcard/photo.jpg", opts);
	iv.setImageBitmap(bitmap);
public class MainActivity extends Activity {
	private ImageView iv1,iv2;
	private Bitmap alterBitmap;
	private Bitmap srcBmp;
	@Override
	protected void onCreate(Bundle savedInstanceState) {
		super.onCreate(savedInstanceState);
		setContentView(R.layout.activity_main);
		iv1 = (ImageView) findViewById(R.id.iv1);
		iv2 = (ImageView) findViewById(R.id.iv2);
		//给第一个imageview默认设置一个位图
		srcBmp = BitmapFactory.decodeResource(getResources(), R.drawable.ic_launcher);
		iv1.setImageBitmap(srcBmp);
		//创建原图的一个副本。 可修改  创建的是一个空白的图形。
		alterBitmap = Bitmap.createBitmap(srcBmp.getWidth()*2, srcBmp.getHeight()*2,srcBmp.getConfig());
	}
	/**
	 * 创建原图 bm的一个拷贝。副本
	 * @param view
	 */
	public void click(View view){
		//1.准备一个画板  在上面放上准备好的 空白的位图
		Canvas canvas = new Canvas(alterBitmap);
		//2.准备一个画笔
		Paint paint = new Paint();
		paint.setColor(Color.BLACK);
		//3.画画
		Matrix m = new Matrix();
		m.setScale(2.0f, 2.0f);
		canvas.drawBitmap(srcBmp, m, paint);
		iv2.setImageBitmap(alterBitmap);//把原图的副本设置到界面上。
	}
}
9.通过Canvas结合Matrix对Bitmap进行旋转
public class MainActivity extends Activity {
	private ImageView iv1,iv2;
	private Bitmap alterBitmap;
	private Bitmap srcBmp;
	@Override
	protected void onCreate(Bundle savedInstanceState) {
		super.onCreate(savedInstanceState);
		setContentView(R.layout.activity_main);
		iv1 = (ImageView) findViewById(R.id.iv1);
		iv2 = (ImageView) findViewById(R.id.iv2);
		//给第一个imageview默认设置一个位图
		srcBmp = BitmapFactory.decodeResource(getResources(), R.drawable.tomcat);
		iv1.setImageBitmap(srcBmp);
		//创建原图的一个副本。 可修改  创建的是一个空白的图形。
		alterBitmap = Bitmap.createBitmap(srcBmp.getWidth(), srcBmp.getHeight(),srcBmp.getConfig());
	}
	/**
	 * 创建原图 bm的一个拷贝。副本
	 * @param view
	 */
	public void click(View view){
		//1.准备一个画板  在上面放上准备好的 空白的位图
		Canvas canvas = new Canvas(alterBitmap);
		//2.准备一个画笔
		Paint paint = new Paint();
		paint.setColor(Color.BLACK);
		//3.画画
		Matrix m = new Matrix();
		m.setRotate(180, srcBmp.getWidth()/2, srcBmp.getHeight()/2);//以原图的中心点旋转180度

		canvas.drawBitmap(srcBmp, m, paint);
		iv2.setImageBitmap(alterBitmap);//把原图的副本设置到界面上。
	}
}
10.通过ColorMatrix对Bitmap加上颜色蒙层
public class MainActivity extends Activity {
	private ImageView iv1,iv2;
	private Bitmap alterBitmap;
	private Bitmap srcBmp;
	@Override
	protected void onCreate(Bundle savedInstanceState) {
		super.onCreate(savedInstanceState);
		setContentView(R.layout.activity_main);
		iv1 = (ImageView) findViewById(R.id.iv1);
		iv2 = (ImageView) findViewById(R.id.iv2);
		//给第一个imageview默认设置一个位图
		srcBmp = BitmapFactory.decodeResource(getResources(), R.drawable.ic_launcher);
		iv1.setImageBitmap(srcBmp);
		//创建原图的一个副本。 可修改  创建的是一个空白的图形。
		alterBitmap = Bitmap.createBitmap(srcBmp.getWidth()*2, srcBmp.getHeight()*2,srcBmp.getConfig());
	}
	/**
	 * 创建原图 bm的一个拷贝。副本
	 * @param view
	 */
	public void click(View view){
		//1.准备一个画板  在上面放上准备好的 空白的位图
		Canvas canvas = new Canvas(alterBitmap);
		//2.准备一个画笔
		Paint paint = new Paint();
		paint.setColor(Color.BLACK);
		//3.画画
		Matrix m = new Matrix();

		ColorMatrix cm = new ColorMatrix();
		cm.set(new float[] {
		0.5f, 0, 0, 0, 0,
		0, 0.8f, 0, 0, 0,
		0, 0, 0.6f, 0, 0,
		0, 0, 0, 1, 0
		});
		paint.setColorFilter(new ColorMatrixColorFilter(cm));
		canvas.drawBitmap(srcBmp, m, paint);
		iv2.setImageBitmap(alterBitmap);//把原图的副本设置到界面上。
	}
}
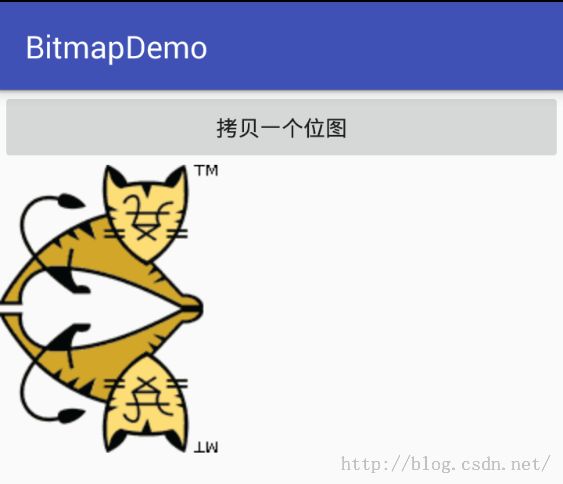
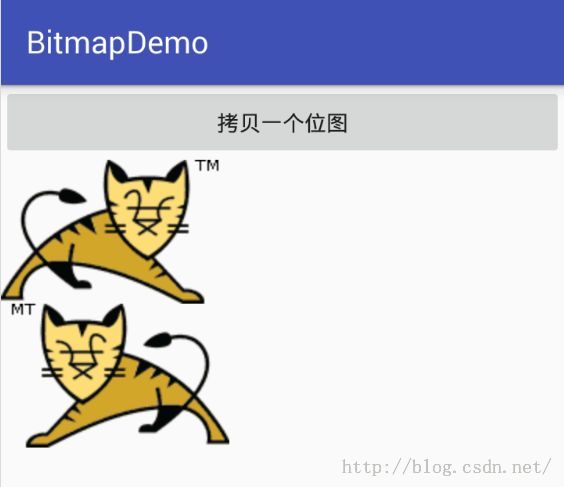
11.通过setScale和postTranslate创建Bitmap的镜像和倒影
public class MainActivity extends AppCompatActivity {

    private ImageView iv1,iv2;
    private Bitmap alterBitmap;
    private Bitmap srcBmp;
    @Override
    protected void onCreate(Bundle savedInstanceState) {
        super.onCreate(savedInstanceState);
        setContentView(R.layout.activity_main);
        iv1 = (ImageView) findViewById(R.id.iv1);
        iv2 = (ImageView) findViewById(R.id.iv2);
        //给第一个imageview默认设置一个位图
        srcBmp = BitmapFactory.decodeResource(getResources(), R.drawable.tomcat);
        iv1.setImageBitmap(srcBmp);
        //创建原图的一个副本。 可修改  创建的是一个空白的图形。
        alterBitmap = Bitmap.createBitmap(srcBmp.getWidth(), srcBmp.getHeight(),srcBmp.getConfig());
    }
    /**
     * @param view
     */
    public void click(View view){
        //以alterBitmap作为画布创建Canvas对象
        Canvas canvas = new Canvas(alterBitmap);
        //准备一个画笔
        Paint paint = new Paint();
        paint.setColor(Color.BLACK);
        Matrix m = new Matrix();
        //1.镜子效果
        //以y轴作为镜面,将原图所有的x轴的值变成相对应的负值
        //m.setScale(-1.0f, 1.0f);
        //然后将x轴的负值方向图像平移到原图位置,平移的距离就是原图离y轴镜面的距离
        //m.postTranslate(srcBmp.getWidth(), 0);

        //2.倒影效果
        //以x轴作为镜面,将原图的所有y轴的值变成相对应的负值
        m.setScale(1.0f, -1.0f);
        //将y轴负值方向的图像平移到原图的位置,平移的距离就是原图离x轴镜面的距离
        m.postTranslate(0, srcBmp.getHeight());

        //绘制新图到画布上
        canvas.drawBitmap(srcBmp, m, paint);
        iv2.setImageBitmap(alterBitmap);
    }
}
镜子效果:
倒影效果: