Learning C++ by Creating Games With UE4(15.05.11)-4(Chapter 8-3)Coding
Chapter8-3
创建一个继承自GameMode父类,其名称为GameModeGameModeMyUse
在蓝图中创建继承自GameModeMyUse的蓝图类GameModeMyUse
同时在默认的Pawn中选择 BP_Avatar这个角色,也就是我们之前所新建的角色
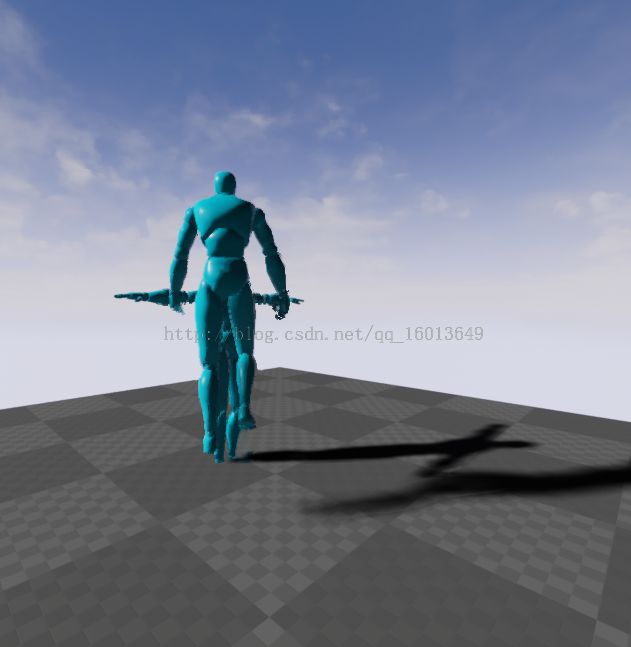
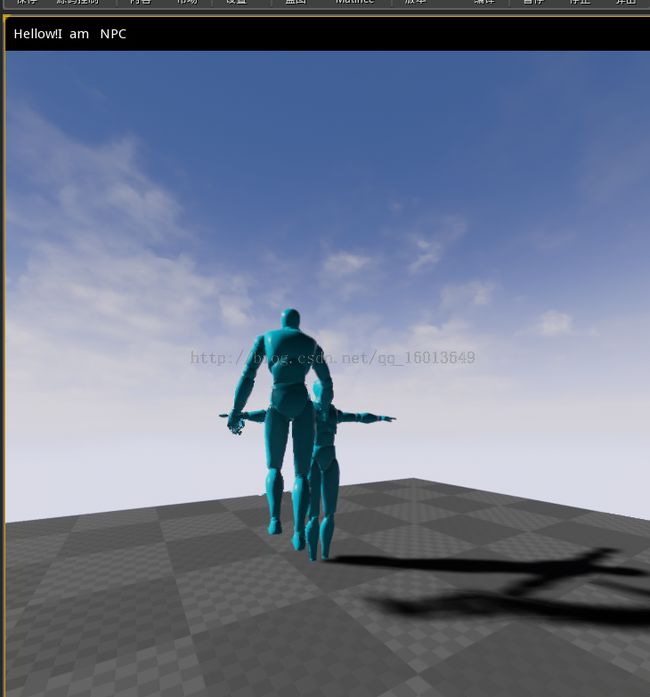
最后打开世界设置,在默认的游戏模式GameMode中选取我们自己创建的蓝图类GameModeMyUse,那么再次运行游戏时效果如下:
与此同时,我们也发现我们无法操控人物行动,那是因为我们没有绑定人物的控制按键
打开项目设置,选择input选项
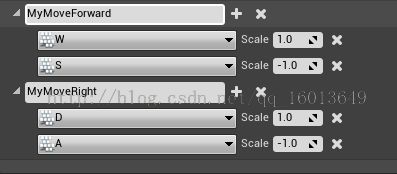
最终达到这样效果,从这些按键绑定中可以看到由于有初学者的案例加入进来,所有绑定的按键很多。那我们先不用管其他已经有的按键绑定,我们先添加自己的按键MyMoveForward和MyMoveRight用W和D的按键来操作人物前和右方向行走。但是仅仅按键绑定人物还并不能移动。我们需要添加C++代码来操控使得人物可以行走
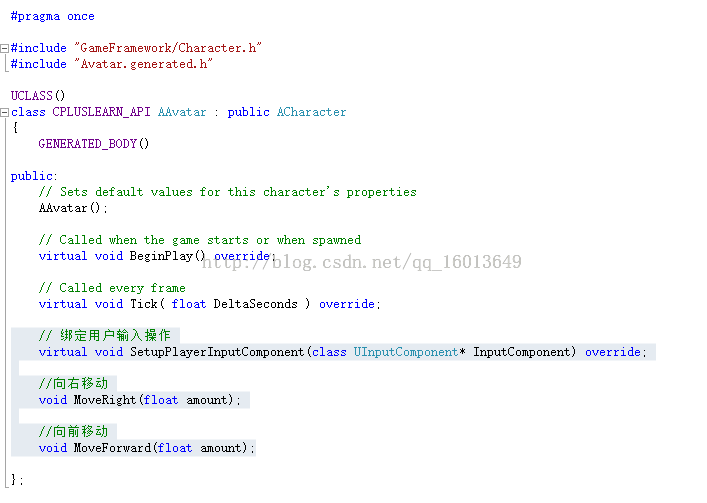
打开VS的编译器,在我们初始创建过的Avatar.h的头文件中我们修改如下
// 绑定用户输入操作
virtual void SetupPlayerInputComponent(class UInputComponent* InputComponent) override;
//向右移动
void MoveRight(float amount);
//向前移动
void MoveForward(float amount);
截图如下
头文件定义好之后,我们需要在源文件中将功能具体实现
// 绑定用户按键输入操作
void AAvatar::SetupPlayerInputComponent(class UInputComponent* InputComponent)
{
Super::SetupPlayerInputComponent(InputComponent);
//绑定项目设置中按键与头文件中函数功能
InputComponent->BindAxis("MyMoveForward", this, &AAvatar::MoveForward);
InputComponent->BindAxis("MyMoveRight", this, &AAvatar::MoveRight);
}
从这一段绑定用户按键输入操作我们可以看出来,我们将项目设置中的按键名称与我们的函数功能名称进行再一次的绑定
void AAvatar::MoveRight(float amount)
{
//若控制器和移动的数值都存在
if (Controller && amount)
{
//获取右转三维向量
FVector right = GetActorRightVector();
//将移动输入的大小添加到玩家前进向量之中
AddMovementInput(right, amount);
}
}
这两段我们通过调用虚幻内置的API使得玩家可以操控前进和右转。那么对于左转和后退来说,我们可以在项目设置中重新以上面的方式再次绑定两个按键操作,或者添加两个其他按键并将scale设置为-1
当然我们不能仅仅只控制前后左右的移动,我们还需要设置鼠标的旋转和倾斜
我们在项目设置中新添加MyYaw 和 MyPitch 两个输入按键操作
绑定用户操作内容更新如下
void AAvatar::Yaw(float amount)
{
AddControllerYawInput(200.f*amount*GetWorld()->GetDeltaSeconds());
}
void AAvatar::Pitch(float amount)
{
AddControllerPitchInput(200.f*amount*GetWorld()->GetDeltaSeconds());
}
这是新添加的对旋转效果的功能添加,本质上还是调用API,比较方便功能的实现
以上基本实现了玩家简单控制人物的效果,当然现在测试起来人行动的并不自然这和我们自带的第三人称效果还有一定的差距
创建非玩家实体 Create None-player character entity NPC
这个创建方式和创建我们自身控制的角色类型相同,同样也是从添加C++代码到项目中选择Character 作为父类进行继承
我们希望这个NPC可以告诉玩家一些信息,那么我们将会使用到FString,FString 是用来代替C++的STL函数库中string的,他有良好的跨平台的特性,所以在UE4中使用C++进行编程我们需要使用字符串类型的话就用FString好了。
//作为NPC的实体碰撞器
UPROPERTY(VisibleAnywhere,BlueprintReadOnly, Category = "Collision")
TSubobjectPtr<class USphereComponent>ProxSphere;
//NPC所需要传递的话
UPROPERTY(EditAnywhere, BlueprintReadWrite, Category = "NPCMessage")
FString NPCMessage;
添加在NPC的头文件中
在这之后在UE4编辑器中添加继承自该类的蓝图类。
注:本人在测试此部分时,如果在头文件中加入实体碰撞器会出现Crash的情况,报错说需要初始化,有可能是我使用的是4.7版本更新,而教材书籍仅仅是老版本,所以我最后将创建碰撞器这句话去掉,在创建出蓝图实体后是依然会有碰撞体的,最后我们加上mesh,给NPC的message附上信息,放入场景之中。
创建和NPC的对话窗体
我们需要创建一个继承自HUD的类
UCLASS()
class CPLUSLEARN_API AMyHUDMessage : public AHUD
{
GENERATED_BODY()
public :
UPROPERTY(EditAnywhere, BlueprintReadWrite, Category = HUDFont)
UFont *hudFont;
virtual void DrawHUD() override;
};
void AMyHUDMessage::DrawHUD()
{
Super::DrawHUD();
DrawLine(200, 300, 400, 500, FLinearColor::Blue);
DrawText("欢迎来到虚幻的世界!!", FVector2D(0, 0), hudFont, FVector2D(1, 1), FColor::White);
}
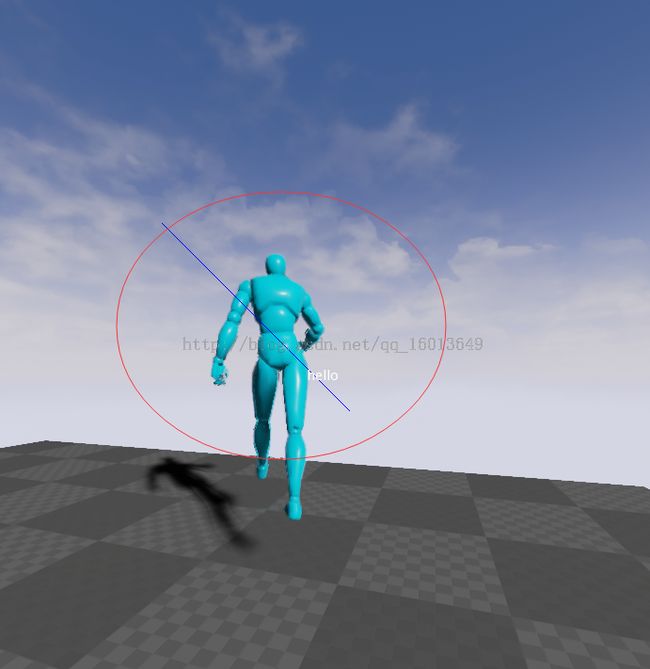
我们在自己的HUD的类中定义了一个字体,并且在界面上绘出一个线框和文字
重新编译项目,我们进入UE4中,创建一个继承自MyHUD的蓝图类,同时设置我们自己的字体信息。最后在我们的游戏模式中将默认的HUD改成我们自己创建的HUD
下面我们要用一个一个列表来存放这些对话的信息,我们打开自己创建的C++的HUD类
void AMyHUDMessage::DrawHUD()
{
Super::DrawHUD();
//DrawLine(200, 300, 400, 500, FLinearColor::Blue);
//DrawText("hello", FVector2D(0, 0), hudFont, FVector2D(1, 1), FColor::White);
for (int c = messages.Num() - 1; c >= 0; c--)
{
float outputWidth, outputHeight, pad = 10.f; //定义输出的宽度高度和间隔
//获取出信息内容大小
GetTextSize(messages[c].message, outputWidth, outputHeight, hudFont, 1.f);
float messageH = outputHeight + 2.f*pad;//信息的高度就是输出高度+2倍的间隔
float x = 0.f, y = c*messageH;
//绘制出背景
DrawRect(FLinearColor::Black, x, y, Canvas->SizeX, messageH);
//使用字体绘制出我们的信息(信息,颜色,宽度+边距,高度+边距,字体)
DrawText(messages[c].message, messages[c].color, x + pad, y + pad, hudFont);
//时间逐步缩减
messages[c].time -=GetWorld()->GetDeltaSeconds();
//当该条消息的时间小于0的时候将该条信息移除
if (messages[c].time < 0)
{
messages.RemoveAt(c);
}
}
}
void AMyHUDMessage::addMessage(Message msg)
{
messages.Add(msg);
}
下面我们必须要完成我们的NPC实体
UCLASS()
class CPLUSLEARN_API ANonePlayerEntity : public ACharacter
{
GENERATED_UCLASS_BODY()
public:
// Sets default values for this character's properties
ANonePlayerEntity();
// Called when the game starts or when spawned
virtual void BeginPlay() override;
// Called every frame
virtual void Tick( float DeltaSeconds ) override;
// Called to bind functionality to input
virtual void SetupPlayerInputComponent(class UInputComponent* InputComponent) override;
//NPC所需要传递的话
UPROPERTY(EditAnywhere, BlueprintReadWrite, Category = NPCMessage)
FString NPCMessage;
//碰撞器触发器
UPROPERTY(VisibleAnywhere, BlueprintReadOnly, Category = Collision)
TSubobjectPtr<class USphereComponent> ProxSphere;
//碰撞事件
UFUNCTION(BlueprintNativeEvent, Category = "Collision")
void Prox(AActor* otherActor, UPrimitiveComponent* OtherComp, int32 OtherBodyIndex, bool bFromSweep, const FHitResult & SweepResult);
};
这个是我们自己的NPC类的头文件,我们新添加了碰撞检测事件,里面的参数都是固定的API的参数,指定是Collision类别的碰撞器才会触发这个碰撞事件
ANonePlayerEntity::ANonePlayerEntity(const class FPostConstructInitializeProperties &PCIP) :Super(PCIP)
{
// Set this character to call Tick() every frame. You can turn this off to improve performance if you don't need it.
PrimaryActorTick.bCanEverTick = true;
ProxSphere = PCIP.CreateDefaultSubobject<USphereComponent>(this, TEXT("Proximity Sphere"));
//放置在根节点下面
ProxSphere->AttachTo(RootComponent);
//设置碰撞半径
ProxSphere->SetSphereRadius(32.f);
//当有人进去碰撞区域
ProxSphere->OnComponentBeginOverlap.AddDynamic(this, &ANonePlayerEntity::Prox);
NPCMessage = "Hi , i am Owner";//设置默认的NOC对话
}
// Called when the game starts or when spawned
void ANonePlayerEntity::BeginPlay()
{
Super::BeginPlay();
}
// Called every frame
void ANonePlayerEntity::Tick( float DeltaTime )
{
Super::Tick( DeltaTime );
}
// Called to bind functionality to input
void ANonePlayerEntity::SetupPlayerInputComponent(class UInputComponent* InputComponent)
{
Super::SetupPlayerInputComponent(InputComponent);
}
void ANonePlayerEntity::Prox_Implementation(AActor * otherActor, UPrimitiveComponent* othrComp, int32 OtherBodyIndex, bool bFromSweep, const FHitResult & SweepResult)
{
//碰撞发生事情,当有交互时
//将其他玩家进入该区域转化为avatar,如果是空物体的,那么直接返回
if (Cast<AAvatar>(otherActor) == nullptr)
{
return;
}
//获取当前控制者
APlayerController* PController = GetWorld()->GetFirstPlayerController();
//如果控制者存在
if (PController)
{
//将当前控制者的HUD转化为我们自己定义的HUD类
AMyHUDMessage *hud = Cast<AMyHUDMessage>(PController->GetHUD());
//添加NPC信息进入当前控制者的HUD对象中
hud->addMessage(Message(NPCMessage, 5.f, FColor::White));
}
}
对于源文件中的功能我上面已经写有非常详细的注释了。
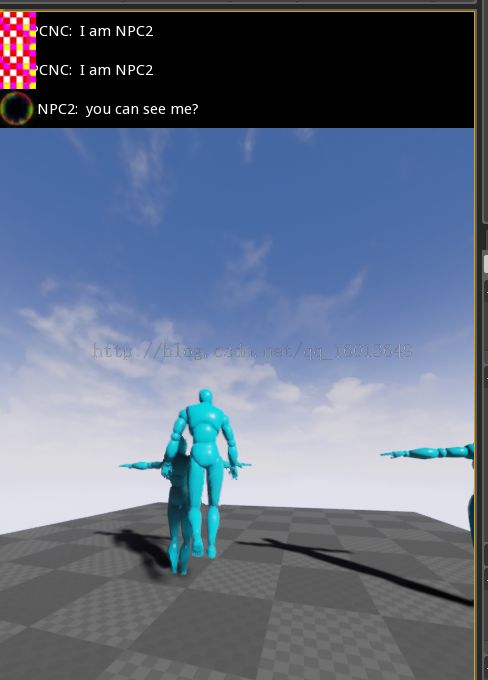
最后效果是
每当我们的人物碰撞时都会有默认的一个消息显示在我们的屏幕上方,过我们默认的时间后会自动销毁。
那么最后我们来完善一下我们的整个消息
//创建一个完整信息的结构体
struct Message
{
FString message;
float time;
FColor color;
UTexture2D *tex;
Message()
{
time = 5.f;
color = FColor::White;
}
Message(FString iMessage, float iTime, FColor iColor, UTexture2D* iTex)
{
message = iMessage;
time = iTime;
color = iColor;
tex = iTex;
}
};
修改消息结构体,我们需要给每个对话的人一个头像。
源文件中添加这句
//绘制出背景
DrawRect(FLinearColor::Black, x, y, Canvas->SizeX, messageH);
在NPC的头文件中添加
//NPC的名称
UPROPERTY(EditAnyWhere, BlueprintReadWrite, Category = NPCMessage)
FString name;
//NPC图片
UPROPERTY(EditAnywhere, BlueprintReadWrite, Category = NPCMessage)
UTexture2D* Face;
NPC的源文件中修改
void ANonePlayerEntity::Prox_Implementation(AActor * otherActor, UPrimitiveComponent* othrComp, int32 OtherBodyIndex, bool bFromSweep, const FHitResult & SweepResult)
{
//碰撞发生事情,当有交互时
//将其他玩家进入该区域转化为avatar,如果是空物体的,那么直接返回
if (Cast<AAvatar>(otherActor) == nullptr)
{
return;
}
//获取当前控制者
APlayerController* PController = GetWorld()->GetFirstPlayerController();
//如果控制者存在
if (PController)
{
//将当前控制者的HUD转化为我们自己定义的HUD类
AMyHUDMessage *hud = Cast<AMyHUDMessage>(PController->GetHUD());
//添加NPC信息进入当前控制者的HUD对象中
hud->addMessage(Message(name+FString(": ")+NPCMessage, 5.f, FColor::White,Face));
}
}
最后的效果如下图所示:
那么NPC的简单对话之所就基本完成了
最后我们希望添加给用户一个生命值的效果
首先我们需要在avatar中定义生命当前数值和最大数值
UPROPERTY(EditAnywhere, BlueprintReadWrite, Category = HPInformation)
float HP;
UPROPERTY(EditAnywhere, BlueprintReadWrite, Category = HPInformation)
float MAXHP;
接着在.cpp中初始化数据
HP = 50;
MAXHP = 150;
打开我们自己的HUD类
void Drawhealthbar(); 添加在头文件中
在源文件中实现该方法
void AMyHUDMessage::Drawhealthbar()
{
//绘制生命值
//获取当前玩家
AAvatar *avatar = Cast<AAvatar>(UGameplayStatics::GetPlayerPawn(GetWorld(), 0));
//定义生命值条基本信息
float barWidth = 200, barHeight = 50, barPad = 12, barMargin = 50;
float percHp = avatar->HP / avatar->MAXHP; //当前生命数值百分比
//绘制出外层 整个界面水平宽度-预设好的生命条宽度-内边距-外边距 。。。 宽+2倍内边距+2倍外边距 后面同理
DrawRect(FLinearColor(0, 0, 0, 1), Canvas->SizeX - barWidth - barPad - barMargin,
Canvas->SizeY - barHeight - barPad - barMargin, barWidth + 2 * barPad, barMargin + 2 * barPad);
DrawRect(FLinearColor(1 - percHp, percHp, 0, 1), Canvas->SizeX - barWidth - barMargin, Canvas->SizeY - barHeight - barMargin, barWidth*percHp, barHeight);
}
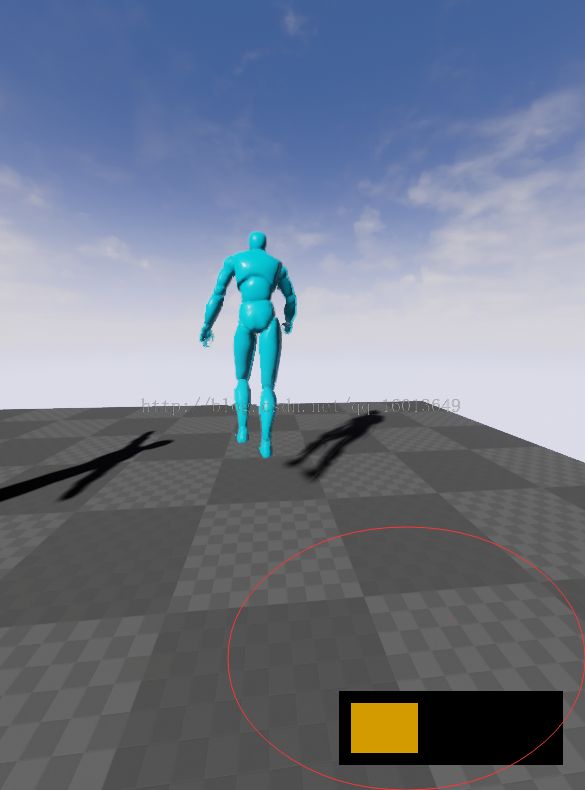
同时在DrawHUD中调用该方法,最终效果如下
那么这一章就结束了,总体来说对于有C++基础的话,比较好理解整个过程,同时我也非常喜欢这本书的内容以及功能介绍,那么下一篇我将会返回第二章开始翻译C++基础内容
