PullToRefresh使用详解
原文地址:http://blog.csdn.net/harvic880925/article/details/17680305
原文地址:http://blog.csdn.net/ueryueryuery/article/details/17440465
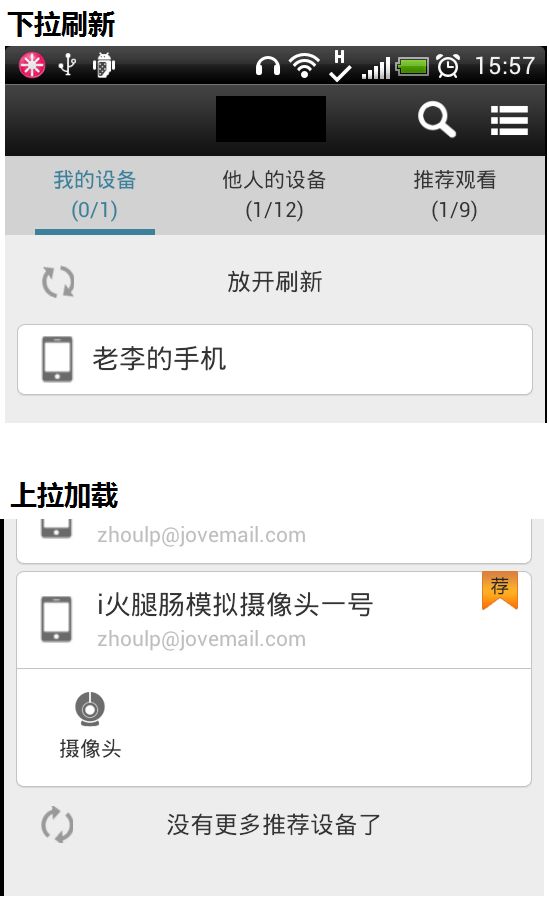
使用PullToRefresh实现下拉刷新和上拉加载
PullToRefresh是一套实现非常好的下拉刷新库,它支持:
1.ListView
2.ExpandableListView
3.GridView
4.WebView
等多种常用的需要刷新的View类型,而且使用起来也十分方便。
(下载地址:https://github.com/chrisbanes/Android-PullToRefresh)
下载完成,将它导入到eclipse中,作为一个library导入到你的工程中就好了。
一、废话少说,下拉刷新go。
1.在你的布局文件中加上你想用的View就好了,比如这儿我想用一个支持下拉 刷新的ExpandableListView
- <com.handmark.pulltorefresh.library.PullToRefreshExpandableListView
- android:id="@+id/expand_list"
- android:layout_width="match_parent"
- android:layout_height="match_parent" />
2. 在你的Activity代码中进行简单的设置:
- mExpandList = (PullToRefreshExpandableListView) rootView.findViewById(R.id.expand_list);
- mExpandList.getRefreshableView().setGroupIndicator(null);
- mExpandList.getRefreshableView().setDivider(null);
- mExpandList.getRefreshableView().setSelector(android.R.color.transparent);
- mExpandList.getRefreshableView().setOnGroupClickListener(this);
- mExpandList.setOnRefreshListener(this);
第一行是找到这个View,最后一行是为它加上刷新的监听器,中间的几行是我对ExpandableListView进行一些设置。
这样其实就已经可以下拉刷新了,但刷新时需要运行的代码写在哪呢,还有为什么下拉不会收起来呢,且往下看。
3.下拉刷新时执行的方法onRefresh()
- @Override
- public void onRefresh(PullToRefreshBase<ExpandableListView> refreshView) {
- if (!isRefreshing) {
- isRefreshing = true;
- updateList(true);
- } else {
- mExpandList.onRefreshComplete();
- }
- }
一般来说我们会开另一个线程去获取数据,所以这儿会加上一个判断,如果已经在获取数据了,就onRefreshComplete(),就是将下拉收起;否则就去开新线程取数据,取完记得也要onRefreshComplete()哦!
二、上拉加载
如果你不想再费时间去自己写一个上拉加载,不妨试一下PullToRefresh自带的上拉效果哦!
PullToRefresh本身支持下拉刷新和上拉刷新,所以我们只需要将上拉刷新改成上拉加载就行了。
1.设置Mode
- // set mode to BOTH
- mExpandList.setMode(Mode.BOTH);
- mExpandList.getLoadingLayoutProxy(false, true).setPullLabel(getString(R.string.pull_to_load));
- mExpandList.getLoadingLayoutProxy(false, true).setRefreshingLabel(getString(R.string.loading));
- mExpandList.getLoadingLayoutProxy(false, true).setReleaseLabel(getString(R.string.release_to_load));
Mode设置为Mode.BOTH后,下拉和上拉都会执行onRefresh()中的方法了。
因为界面上边,我们要显示“下拉刷新”,下边我们要显示“上拉加载”,所以后三行就是改变下边部分的文字,getLoadingLayoutProxy(false, true)方法大家可以自己感受一下。
2.怎么区分下拉/上拉
网上有的同学是用onScrollListener来判断,这样并不严谨,我依靠是header还是footer处于可见状态来区分下拉和上拉,如果是下拉,那header一定是可见的;反之,footer一定是可见的。
但是PullToRefreshExpandableListView并没有提供这样的接口,那我们就来小改一下我们引入的工程吧,很简单:
找到包“com.handmark.pulltorefresh.library”下的PullToRefreshAdapterViewBase.java这个类,加入两个新接口:
- public boolean isHeaderShown() {
- return getHeaderLayout().isShown();
- }
- public boolean isFooterShown() {
- return getFooterLayout().isShown();
- }
这样就行了哦,重新编译一下这个工程,和你自己的工程。
在onRefresh()中这样来用:
- @Override
- public void onRefresh(PullToRefreshBase<ExpandableListView> refreshView) {
- if (!isRefreshing) {
- isRefreshing = true;
- if (mExpandList.isHeaderShown()) {
- Utils.LOGD("pull-to-refresh");
- refreshOnlineStatus(true);
- } else if (mExpandList.isFooterShown()) {
- Utils.LOGD("pull-to-load-more");
- loadNextPage();
- }
- } else {
- mExpandList.onRefreshComplete();
- }
- }
很简单吧,这样我们就YD地使用PullToRefresh实现了下拉刷新和上拉加载,LOL,希望多多少少能帮到大家。
=================================================================
更新于2014-07-01
近来发现:
1.实现上拉监听,只需要实现OnRefreshListener2就可以了,同时别忘记setMode(Mode.BOTH) 哦!
2.PullToRefreshListView在使用上有一个BUG,在你的xml layout中,不能一开始将它的visiablity设置为GONE,否则,在代码中设置visiablity为VISIABLE也没有作用。
最后放上一张效果图
--------------------------------华丽丽的分割线--------------------------------------
PullToRefresh使用详解(一)--构建下拉刷新的listView
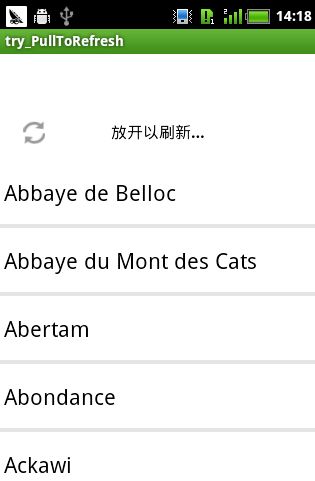
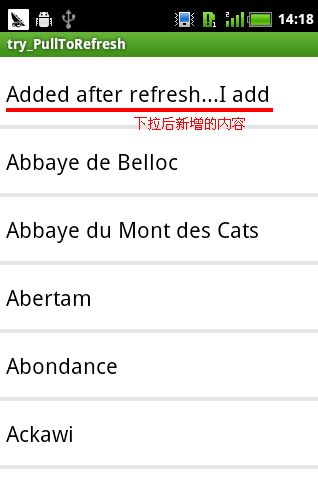
效果图:
正在刷新 刷新后
一、导入Library
下载源码后(https://github.com/chrisbanes/Android-PullToRefresh),里面有个Library工程,添加工程到Eclipse中;
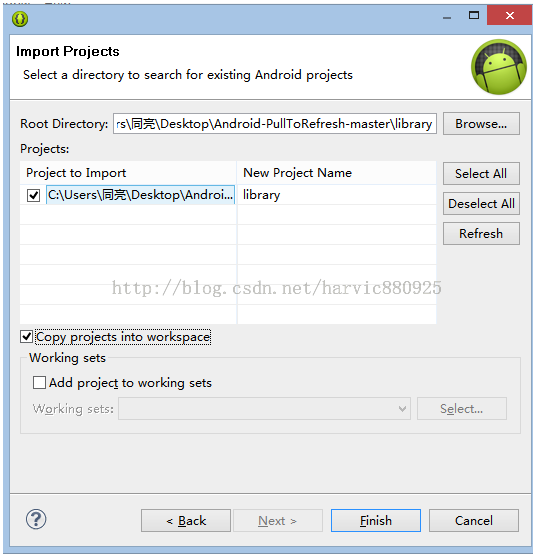
另外extras文件夹还有两个工程:PullToRefreshListFragment和PullToRefreshViewPager,由于我们的这个用不到他们的库文件,所以不必导入了;
二、实战
1、新建工程,添加Libray库到工程中
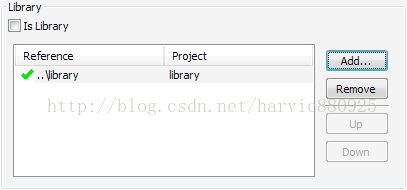
新建工程(try_PullToRefresh)后,右键-》Properties-》Android-》Add 选择上面的Library,然后就是这个样子的
2、重写activity_main.xml
XML内容为:
- <?xml version="1.0" encoding="utf-8"?>
- <LinearLayout xmlns:android="http://schemas.android.com/apk/res/android"
- android:layout_width="fill_parent"
- android:layout_height="fill_parent"
- android:orientation="vertical" >
- <!-- The PullToRefreshListView replaces a standard ListView widget. -->
- <com.handmark.pulltorefresh.library.PullToRefreshListView
- android:id="@+id/pull_refresh_list"
- android:layout_width="fill_parent"
- android:layout_height="fill_parent"
- android:cacheColorHint="#00000000"
- android:divider="#19000000"
- android:dividerHeight="4dp"
- android:fadingEdge="none"
- android:fastScrollEnabled="false"
- android:footerDividersEnabled="false"
- android:headerDividersEnabled="false"
- android:smoothScrollbar="true" />
- </LinearLayout>
其中中间那一大段<com.handmark.pull………………/>就是相当于ListView控件,用这段来代替原是ListView控件的代码
3、JAVA代码讲解
全部代码:
- package com.example.try_pulltorefresh;
- import java.util.Arrays;
- import java.util.LinkedList;
- import com.handmark.pulltorefresh.library.PullToRefreshBase;
- import com.handmark.pulltorefresh.library.PullToRefreshListView;
- import com.handmark.pulltorefresh.library.PullToRefreshBase.OnRefreshListener;
- import android.os.AsyncTask;
- import android.os.Bundle;
- import android.app.Activity;
- import android.text.format.DateUtils;
- import android.widget.ArrayAdapter;
- import android.widget.ListView;
- public class MainActivity extends Activity {
- private String[] mStrings = { "Abbaye de Belloc", "Abbaye du Mont des Cats", "Abertam", "Abondance", "Ackawi",
- "Acorn", "Adelost", "Affidelice au Chablis", "Afuega'l Pitu", "Airag", "Airedale", "Aisy Cendre",
- "Allgauer Emmentaler", "Abbaye de Belloc", "Abbaye du Mont des Cats", "Abertam", "Abondance", "Ackawi",
- "Acorn", "Adelost", "Affidelice au Chablis", "Afuega'l Pitu", "Airag", "Airedale", "Aisy Cendre",
- "Allgauer Emmentaler" };
- private LinkedList<String> mListItems;
- private PullToRefreshListView mPullRefreshListView;
- private ArrayAdapter<String> mAdapter;
- @Override
- protected void onCreate(Bundle savedInstanceState) {
- super.onCreate(savedInstanceState);
- setContentView(R.layout.activity_main);
- mPullRefreshListView = (PullToRefreshListView) findViewById(R.id.pull_refresh_list);
- // Set a listener to be invoked when the list should be refreshed.
- mPullRefreshListView.setOnRefreshListener(new OnRefreshListener<ListView>() {
- @Override
- public void onRefresh(PullToRefreshBase<ListView> refreshView) {
- String label = DateUtils.formatDateTime(getApplicationContext(), System.currentTimeMillis(),
- DateUtils.FORMAT_SHOW_TIME | DateUtils.FORMAT_SHOW_DATE | DateUtils.FORMAT_ABBREV_ALL);
- // Update the LastUpdatedLabel
- refreshView.getLoadingLayoutProxy().setLastUpdatedLabel(label);
- // Do work to refresh the list here.
- new GetDataTask().execute();
- }
- });
- mListItems = new LinkedList<String>();
- mListItems.addAll(Arrays.asList(mStrings));
- mAdapter = new ArrayAdapter<String>(this, android.R.layout.simple_list_item_1, mListItems);
- //这两个绑定方法用其一
- // 方法一
- // mPullRefreshListView.setAdapter(mAdapter);
- //方法二
- ListView actualListView = mPullRefreshListView.getRefreshableView();
- actualListView.setAdapter(mAdapter);
- }
- private class GetDataTask extends AsyncTask<Void, Void, String> {
- //后台处理部分
- @Override
- protected String doInBackground(Void... params) {
- // Simulates a background job.
- try {
- Thread.sleep(1000);
- } catch (InterruptedException e) {
- }
- String str="Added after refresh...I add";
- return str;
- }
- //这里是对刷新的响应,可以利用addFirst()和addLast()函数将新加的内容加到LISTView中
- //根据AsyncTask的原理,onPostExecute里的result的值就是doInBackground()的返回值
- @Override
- protected void onPostExecute(String result) {
- //在头部增加新添内容
- mListItems.addFirst(result);
- //通知程序数据集已经改变,如果不做通知,那么将不会刷新mListItems的集合
- mAdapter.notifyDataSetChanged();
- // Call onRefreshComplete when the list has been refreshed.
- mPullRefreshListView.onRefreshComplete();
- super.onPostExecute(result);
- }
- }
- }
代码讲解:
1、变量定义
- private LinkedList<String> mListItems; //显示的列表对应原字符串
- private PullToRefreshListView mPullRefreshListView; //PullToRefreshListView实例
- private ArrayAdapter<String> mAdapter; //ListView的适配器
2、在OnCreate()中主要分为两步
(1)初始化mPullRefreshListView并设置监听器,以执行当需要刷新时,应该怎么办,至于真正执行刷新的类GetDataTask()我们后面再细讲,对应代码为:
- mPullRefreshListView = (PullToRefreshListView) findViewById(R.id.pull_refresh_list);
- // Set a listener to be invoked when the list should be refreshed.
- mPullRefreshListView.setOnRefreshListener(new OnRefreshListener<ListView>() {
- @Override
- public void onRefresh(PullToRefreshBase<ListView> refreshView) {
- String label = DateUtils.formatDateTime(getApplicationContext(), System.currentTimeMillis(),
- DateUtils.FORMAT_SHOW_TIME | DateUtils.FORMAT_SHOW_DATE | DateUtils.FORMAT_ABBREV_ALL);
- // Update the LastUpdatedLabel
- refreshView.getLoadingLayoutProxy().setLastUpdatedLabel(label);
- // Do work to refresh the list here.
- new GetDataTask().execute();
- }
- });
(2)设置适配器列表内容,并与ListView绑定以显示出来,对应代码为:
- //设置列表内容
- mListItems = new LinkedList<String>();
- mListItems.addAll(Arrays.asList(mStrings));
- mAdapter = new ArrayAdapter<String>(this, android.R.layout.simple_list_item_1, mListItems);
- //这两个绑定方法用其一
- // 方法一
- // mPullRefreshListView.setAdapter(mAdapter);
- //方法二
- ListView actualListView = mPullRefreshListView.getRefreshableView();
- actualListView.setAdapter(mAdapter);
3、执行刷新的类GetDataTask()
先贴出这段代码来:
- private class GetDataTask extends AsyncTask<Void, Void, String> {//定义返回值的类型
- // 后台处理部分
- @Override
- protected String doInBackground(Void... params) {
- // Simulates a background job.
- try {
- Thread.sleep(1000);
- } catch (InterruptedException e) {
- }
- String str="Added after refresh...I add";
- return str;
- }
- //这里是对刷新的响应,可以利用addFirst()和addLast()函数将新加的内容加到LISTView中
- //根据AsyncTask的原理,onPostExecute里的result的值就是doInBackground()的返回值
- @Override
- protected void onPostExecute(String result) {
- //在头部增加新添内容
- mListItems.addFirst(result);
- //通知程序数据集已经改变,如果不做通知,那么将不会刷新mListItems的集合
- mAdapter.notifyDataSetChanged();
- // Call onRefreshComplete when the list has been refreshed.
- mPullRefreshListView.onRefreshComplete();
- super.onPostExecute(result);//这句是必有的,AsyncTask规定的格式
- }
- }
由于派生自AsyncTask,所以下面的那个函数doInBackground和onPostExecute就不难理解了,这两个函数是AsyncTask必须是重写的两个函数
(2)doInBackground函数
doInBackground执行要于后台执行的语句,返回的值可以是任意类型,但要提前在extends AsyncTask<Void, Void, String> 中定义,这个返回值会做为onPostExecute的参数result传到onPostExecute函数中;如果对于网络访问程序,doInBackground就执行访问网络的代码,然后讲返回值存在result中传给onPostExecute函数,以刷新列表;
(3)onPostExecute函数
onPostExecute()是对返回的值进行操作,并添加到ListView的列表中,有两种添加方式添加到头部----mListItems.addFirst(result);和添加在尾部----mListItems.addLast(result);
至于 AsyncTask,下面是几个网页,讲的还可以,大家可以参考下:
《android AsyncTask 详解》:http://www.eoeandroid.com/thread-168004-1-1.html
《android AsyncTask 详解》(同名):http://blog.csdn.net/dabizime/article/details/6695705
《android之AsyncTask》:http://blog.csdn.net/singwhatiwanna/article/details/9272195
《Android源码分析--带你认识不一样的AsyncTask》:http://blog.csdn.net/singwhatiwanna/article/details/17596225 (绝对精品)
另外:
1、设置向上拉刷新还是向下拉刷新的代码:
mPullRefreshListView.setMode(Mode.PULL_FROM_END);//向下拉刷新
mPullRefreshListView.setMode(Mode.PULL_FROM_START);//向上拉刷新
mPullRefreshListView.setMode(Mode.BOTH);//两端刷新
注意:这只是一个精简版,在源码中还有一些可借签的代码,可以在看懂这个以后,可以回过头来再看看源码,我相信肯定会有收获的。
源码来啦:http://download.csdn.net/detail/harvic880925/6788247(不要分,仅供分享)
====================华丽丽的分割线====================
PullToRefresh使用详解(二)---重写BaseAdapter实现复杂XML下拉刷新
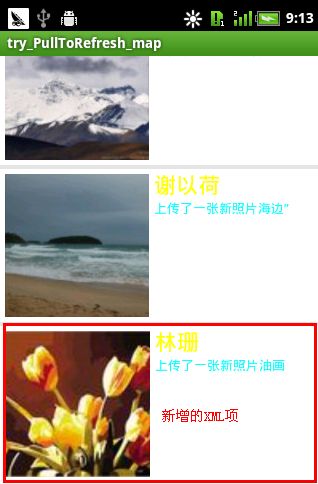
效果图:
正在刷新 刷新后
一、XML代码
1、activity_main.xml
- <?xml version="1.0" encoding="utf-8"?>
- <LinearLayout xmlns:android="http://schemas.android.com/apk/res/android"
- android:layout_width="fill_parent"
- android:layout_height="fill_parent"
- android:orientation="vertical" >
- <!-- The PullToRefreshListView replaces a standard ListView widget. -->
- <com.handmark.pulltorefresh.library.PullToRefreshListView
- android:id="@+id/pull_refresh_list"
- android:layout_width="fill_parent"
- android:layout_height="fill_parent"
- android:cacheColorHint="#00000000"
- android:divider="#19000000"
- android:dividerHeight="4dp"
- android:fadingEdge="none"
- android:fastScrollEnabled="false"
- android:footerDividersEnabled="false"
- android:headerDividersEnabled="false"
- android:smoothScrollbar="true" />
- </LinearLayout>
2、数据项XML(item.xml)
与《List控件使用--SimpleAdapter使用详解(二)》布局一样,只是将名字改成了item.xml
- <?xml version="1.0" encoding="utf-8"?>
- <LinearLayout xmlns:android="http://schemas.android.com/apk/res/android"
- android:orientation="horizontal" android:layout_width="fill_parent"
- android:layout_height="fill_parent">
- <ImageView android:id="@+id/img"
- android:layout_width="wrap_content"
- android:layout_height="wrap_content"
- android:layout_margin="5px"/>
- <LinearLayout android:orientation="vertical"
- android:layout_width="wrap_content"
- android:layout_height="wrap_content">
- <TextView android:id="@+id/name"
- android:layout_width="wrap_content"
- android:layout_height="wrap_content"
- android:textColor="#FFFFFF00"
- android:textSize="22px" />
- <TextView android:id="@+id/info"
- android:layout_width="wrap_content"
- android:layout_height="wrap_content"
- android:textColor="#FF00FFFF"
- android:textSize="13px" />
- </LinearLayout>
- </LinearLayout>
二、JAVA代码
先贴出全部代码,然后再慢慢讲。
完整代码
- package com.example.try_pulltorefresh_map;
- //try_PullToRefresh_map
- /**
- * 完成了从TXT文本中提取,并向下刷新
- * blog:http://blog.csdn.net/harvic880925/article/details/17708409
- * @author harvic
- * @date 2013-12-31
- *
- */
- import java.io.BufferedReader;
- import java.io.IOException;
- import java.io.InputStream;
- import java.io.InputStreamReader;
- import java.io.UnsupportedEncodingException;
- import java.util.ArrayList;
- import java.util.HashMap;
- import org.json.JSONArray;
- import com.handmark.pulltorefresh.library.PullToRefreshBase;
- import com.handmark.pulltorefresh.library.PullToRefreshListView;
- import com.handmark.pulltorefresh.library.PullToRefreshBase.Mode;
- import com.handmark.pulltorefresh.library.PullToRefreshBase.OnRefreshListener;
- import android.os.AsyncTask;
- import android.os.Bundle;
- import android.app.ListActivity;
- import android.content.Context;
- import android.graphics.Bitmap;
- import android.graphics.BitmapFactory;
- import android.text.format.DateUtils;
- import android.view.LayoutInflater;
- import android.view.View;
- import android.view.ViewGroup;
- import android.widget.BaseAdapter;
- import android.widget.ImageView;
- import android.widget.ListView;
- import android.widget.TextView;
- public class MainActivity extends ListActivity {
- private ArrayList<HashMap<String, Object>> listItem = new ArrayList<HashMap<String, Object>>();
- private PullToRefreshListView mPullRefreshListView;
- MyAdapter adapter=null;
- @Override
- protected void onCreate(Bundle savedInstanceState) {
- super.onCreate(savedInstanceState);
- setContentView(R.layout.activity_main);
- mPullRefreshListView = (PullToRefreshListView) findViewById(R.id.pull_refresh_list);
- //设定下拉监听函数
- mPullRefreshListView.setOnRefreshListener(new OnRefreshListener<ListView>() {
- @Override
- public void onRefresh(PullToRefreshBase<ListView> refreshView) {
- String label = DateUtils.formatDateTime(getApplicationContext(), System.currentTimeMillis(),
- DateUtils.FORMAT_SHOW_TIME | DateUtils.FORMAT_SHOW_DATE | DateUtils.FORMAT_ABBREV_ALL);
- // Update the LastUpdatedLabel
- refreshView.getLoadingLayoutProxy().setLastUpdatedLabel(label);
- // Do work to refresh the list here.
- new GetDataTask().execute();
- }
- });
- mPullRefreshListView.setMode(Mode.PULL_FROM_END);//设置底部下拉刷新模式
- listItem=getData();//获取LIST数据
- adapter = new MyAdapter(this);
- //设置适配器
- ListView actualListView = mPullRefreshListView.getRefreshableView();
- actualListView.setAdapter(adapter);
- }
- private class GetDataTask extends AsyncTask<Void, Void, HashMap<String, Object>> {
- //后台处理部分
- @Override
- protected HashMap<String, Object> doInBackground(Void... params) {
- // Simulates a background job.
- try {
- Thread.sleep(1000);
- } catch (InterruptedException e) {
- }
- HashMap<String, Object> map = new HashMap<String, Object>();
- try {
- map = new HashMap<String, Object>();
- map.put("name", "林珊");
- map.put("info", "上传了一张新照片油画");
- map.put("img","youhua");
- } catch (Exception e) {
- // TODO: handle exception
- setTitle("map出错了");
- return null;
- }
- return map;
- }
- //这里是对刷新的响应,可以利用addFirst()和addLast()函数将新加的内容加到LISTView中
- //根据AsyncTask的原理,onPostExecute里的result的值就是doInBackground()的返回值
- @Override
- protected void onPostExecute(HashMap<String, Object> result) {
- //在头部增加新添内容
- try {
- listItem.add(result);
- //通知程序数据集已经改变,如果不做通知,那么将不会刷新mListItems的集合
- adapter.notifyDataSetChanged();
- // Call onRefreshComplete when the list has been refreshed.
- mPullRefreshListView.onRefreshComplete();
- } catch (Exception e) {
- // TODO: handle exception
- setTitle(e.getMessage());
- }
- super.onPostExecute(result);
- }
- }
- private ArrayList<HashMap<String, Object>> getData() {
- ArrayList<HashMap<String, Object>> list = new ArrayList<HashMap<String, Object>>();
- HashMap<String, Object> map = new HashMap<String, Object>();
- InputStream inputStream;
- try {
- inputStream=this.getAssets().open("my_home_friends.txt");
- String json=readTextFile(inputStream);
- JSONArray array = new JSONArray(json);
- for (int i = 0; i < array.length(); i++) {
- map = new HashMap<String, Object>();
- map.put("name", array.getJSONObject(i).getString("name"));
- map.put("info", array.getJSONObject(i).getString("info"));
- map.put("img",array.getJSONObject(i).getString("photo"));
- list.add(map);
- }
- return list;
- } catch (Exception e) {
- // TODO: handle exception
- e.printStackTrace();
- }
- return list;
- }
- public final class ViewHolder{
- public ImageView img;
- public TextView name;
- public TextView info;
- }
- public class MyAdapter extends BaseAdapter{
- private LayoutInflater mInflater;
- public MyAdapter(Context context){
- this.mInflater = LayoutInflater.from(context);
- }
- @Override
- public int getCount() {
- // TODO Auto-generated method stub
- return listItem.size();
- }
- @Override
- public Object getItem(int arg0) {
- // TODO Auto-generated method stub
- return null;
- }
- @Override
- public long getItemId(int arg0) {
- // TODO Auto-generated method stub
- return 0;
- }
- @Override
- public View getView(int position, View convertView, ViewGroup parent) {
- ViewHolder holder = null;
- if (convertView == null) {
- holder=new ViewHolder();
- convertView = mInflater.inflate(R.layout.item, null);
- holder.img = (ImageView)convertView.findViewById(R.id.img);
- holder.name = (TextView)convertView.findViewById(R.id.name);
- holder.info = (TextView)convertView.findViewById(R.id.info);
- convertView.setTag(holder);
- }else {
- holder = (ViewHolder)convertView.getTag();
- }
- holder.img.setImageBitmap(getHome((String)listItem.get(position).get("img")));
- holder.name.setText((String)listItem.get(position).get("name"));
- holder.info.setText((String)listItem.get(position).get("info"));
- return convertView;
- }
- }
- /**
- * 根据图片名称获取主页图片
- */
- public Bitmap getHome(String photo){
- String homeName = photo + ".jpg";
- InputStream is=null;
- try {
- is=getAssets().open("home/"+homeName);
- Bitmap bitmap = BitmapFactory.decodeStream(is);
- is.close();
- return bitmap;
- } catch (Exception e) {
- e.printStackTrace();
- }
- return null;
- }
- ////工具类
- /**
- *
- * @param inputStream
- * @return
- */
- public String readTextFile(InputStream inputStream) {
- String readedStr = "";
- BufferedReader br;
- try {
- br = new BufferedReader(new InputStreamReader(inputStream, "UTF-8"));
- String tmp;
- while ((tmp = br.readLine()) != null) {
- readedStr += tmp;
- }
- br.close();
- inputStream.close();
- } catch (UnsupportedEncodingException e) {
- e.printStackTrace();
- } catch (IOException e) {
- e.printStackTrace();
- }
- return readedStr;
- }
- }
执行流程:
看起来代码挺长,其实只看OnCreate()函数就能知道,只是分成了几大块,先贴出OnCreate()函数
- @Override
- protected void onCreate(Bundle savedInstanceState) {
- super.onCreate(savedInstanceState);
- setContentView(R.layout.activity_main);
- mPullRefreshListView = (PullToRefreshListView) findViewById(R.id.pull_refresh_list);
- //设定下拉监听函数
- mPullRefreshListView.setOnRefreshListener(new OnRefreshListener<ListView>() {
- @Override
- public void onRefresh(PullToRefreshBase<ListView> refreshView) {
- String label = DateUtils.formatDateTime(getApplicationContext(), System.currentTimeMillis(),
- DateUtils.FORMAT_SHOW_TIME | DateUtils.FORMAT_SHOW_DATE | DateUtils.FORMAT_ABBREV_ALL);
- // Update the LastUpdatedLabel
- refreshView.getLoadingLayoutProxy().setLastUpdatedLabel(label);
- // Do work to refresh the list here.
- new GetDataTask().execute();
- }
- });
- mPullRefreshListView.setMode(Mode.PULL_FROM_END);//设置底部下拉刷新模式
- listItem=getData();//获取LIST数据
- adapter = new MyAdapter(this);
- //设置适配器
- ListView actualListView = mPullRefreshListView.getRefreshableView();
- actualListView.setAdapter(adapter);
- }
1、首先初始化mPullRefreshListView,然后设定监听函数,监听函数没变,我只是更改了GetDataTask()函数里的部分代码,我相信大家也能看懂,难度不大;
2、设定下拉模式,绑定适配器,对应代码
- mPullRefreshListView.setMode(Mode.PULL_FROM_END);//设置底部下拉刷新模式
- listItem=getData();//获取LIST数据
- adapter = new MyAdapter(this);
- //设置适配器
- ListView actualListView = mPullRefreshListView.getRefreshableView();
- actualListView.setAdapter(adapter);
====================华丽丽的分割线====================
PullToRefresh使用详解(三)--实现异步加载的下拉刷新列表
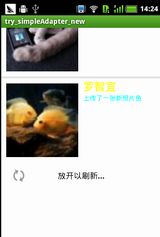
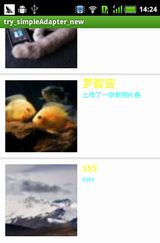
效果图:
初始化后,正在加载图片 加载出一部分
下拉刷新 新生成的ITEM 加载完成新生成ITEM的图片
一、MainActivity.java
其它的代码就不讲了,我只说说这个主页面是如何动作的,先看看整体代码。
- package com.example.try_simpleadapter_new;
- /**
- * 完成与服务器通信的下拉刷新
- * @author harvic
- */
- import java.io.BufferedReader;
- import java.io.InputStreamReader;
- import java.util.ArrayList;
- import java.util.List;
- import org.apache.http.HttpEntity;
- import org.apache.http.HttpResponse;
- import org.apache.http.NameValuePair;
- import org.apache.http.client.entity.UrlEncodedFormEntity;
- import org.apache.http.client.methods.HttpPost;
- import org.apache.http.impl.client.DefaultHttpClient;
- import org.apache.http.message.BasicNameValuePair;
- import org.apache.http.protocol.HTTP;
- import org.json.JSONArray;
- import com.handmark.pulltorefresh.library.PullToRefreshBase;
- import com.handmark.pulltorefresh.library.PullToRefreshListView;
- import com.handmark.pulltorefresh.library.PullToRefreshBase.Mode;
- import com.handmark.pulltorefresh.library.PullToRefreshBase.OnRefreshListener;
- import android.os.AsyncTask;
- import android.os.Bundle;
- import android.text.format.DateUtils;
- import android.util.Log;
- import android.widget.ListView;
- import android.app.ListActivity;
- public class MainActivity extends ListActivity{
- private String serverIP="http://222.195.151.19";
- private List<ImageAndText> mData;
- private PullToRefreshListView mPullRefreshListView;
- ImageAndTextListAdapter adapter=null;
- @Override
- public void onCreate(Bundle savedInstanceState) {
- super.onCreate(savedInstanceState);
- setContentView(R.layout.activity_main);
- mPullRefreshListView = (PullToRefreshListView) findViewById(R.id.pull_refresh_list);
- //设定下拉监听函数
- mPullRefreshListView.setOnRefreshListener(new OnRefreshListener<ListView>() {
- @Override
- public void onRefresh(PullToRefreshBase<ListView> refreshView) {
- String label = DateUtils.formatDateTime(getApplicationContext(), System.currentTimeMillis(),
- DateUtils.FORMAT_SHOW_TIME | DateUtils.FORMAT_SHOW_DATE | DateUtils.FORMAT_ABBREV_ALL);
- // Update the LastUpdatedLabel
- refreshView.getLoadingLayoutProxy().setLastUpdatedLabel(label);
- Log.d("msg","this=="+this);
- // Do work to refresh the list here.
- new GetDataTask().execute();
- }
- });
- mPullRefreshListView.setMode(Mode.PULL_FROM_END);// 设置底部下拉刷新模式
- //传参生成适配器
- mData = getData();
- ListView actualListView = mPullRefreshListView.getRefreshableView();
- adapter = new ImageAndTextListAdapter(this,mData,actualListView);
- // 设置适配器
- actualListView.setAdapter(adapter);
- }
- private List<ImageAndText> getData() {
- //创建默认的httpClient实例.
- DefaultHttpClient httpclient = new DefaultHttpClient();
- HttpResponse response = null;
- HttpEntity entity = null;
- StringBuilder builder = new StringBuilder();
- JSONArray jsonArray = null;
- List<ImageAndText> list = new ArrayList<ImageAndText>();
- try{
- // 创建httpost.访问本地服务器网址
- HttpPost httpost = new HttpPost(serverIP+"/try_an_server/index.php");
- //构造POST方法的{name:value} 参数对
- List <NameValuePair> vps = new ArrayList <NameValuePair>();
- //将参数传入post方法中
- vps.add(new BasicNameValuePair("action", "insert"));
- vps.add(new BasicNameValuePair("name", "进去了"));
- httpost.setEntity(new UrlEncodedFormEntity(vps, HTTP.UTF_8));
- response = httpclient.execute(httpost); //执行
- if (response.getEntity() != null) {
- //如果服务器端JSON没写对,这句是会出异常,是执行不过去的
- BufferedReader reader = new BufferedReader(new InputStreamReader(response.getEntity().getContent()));
- String s = reader.readLine();
- for (; s != null; s = reader.readLine()) {
- builder.append(s);
- }
- Log.i("msg","builder.toString = "+ builder.toString());
- jsonArray = new JSONArray(builder.toString());
- for (int i = 0; i < jsonArray.length(); i++) {
- if(jsonArray.getJSONObject(i).getInt("id")==1){
- String name=jsonArray.getJSONObject(i).getString("name");
- String info=jsonArray.getJSONObject(i).getString("info");
- String PicName=jsonArray.getJSONObject(i).getString("photo");
- String picURL=serverIP+"/try_an_server/"+PicName+".jpg";
- ImageAndText item=new ImageAndText(picURL,name,info);
- list.add(item);
- }
- }
- }
- } catch (Exception e) {
- e.printStackTrace();
- } finally {
- try {
- if (entity != null)
- {
- httpclient.getConnectionManager().shutdown();//关闭连接
- //这两种释放连接的方法都可以
- }
- } catch (Exception e) {
- // TODO Auto-generated catch block
- e.printStackTrace();
- }
- }
- return list;
- }
- private class GetDataTask extends AsyncTask<Void, Void, ImageAndText> {
- //后台处理部分
- @Override
- protected ImageAndText doInBackground(Void... params) {
- // Simulates a background job.
- ImageAndText item = null;
- try {
- item = new ImageAndText(serverIP+"/try_an_server/xizang.jpg", "sss", "ssss");
- } catch (Exception e) {
- // TODO: handle exception
- setTitle("map出错了");
- }
- return item;
- }
- //这里是对刷新的响应,可以利用addFirst()和addLast()函数将新加的内容加到LISTView中
- //根据AsyncTask的原理,onPostExecute里的result的值就是doInBackground()的返回值
- @Override
- protected void onPostExecute(ImageAndText result) {
- //在头部增加新添内容
- try {
- mData.add(result);
- //通知程序数据集已经改变,如果不做通知,那么将不会刷新mListItems的集合
- adapter.notifyDataSetChanged();
- adapter.loadImage();
- // Call onRefreshComplete when the list has been refreshed.
- mPullRefreshListView.onRefreshComplete();
- } catch (Exception e) {
- // TODO: handle exception
- setTitle(e.getMessage());
- }
- super.onPostExecute(result);
- }
- }
- }
分开讲解:
1、先看OnCreate()函数
- mPullRefreshListView = (PullToRefreshListView) findViewById(R.id.pull_refresh_list);
- //设定下拉监听函数
- mPullRefreshListView.setOnRefreshListener(new OnRefreshListener<ListView>() {
- @Override
- public void onRefresh(PullToRefreshBase<ListView> refreshView) {
- String label = DateUtils.formatDateTime(getApplicationContext(), System.currentTimeMillis(),
- DateUtils.FORMAT_SHOW_TIME | DateUtils.FORMAT_SHOW_DATE | DateUtils.FORMAT_ABBREV_ALL);
- // Update the LastUpdatedLabel
- refreshView.getLoadingLayoutProxy().setLastUpdatedLabel(label);
- Log.d("msg","this=="+this);
- // Do work to refresh the list here.
- new GetDataTask().execute();
- }
- });
这段代码先初始化了mPullRefreshListView,然后设置了下拉监听的函数,在下拉时执行GetDataTask()函数;
2、看看GetDataTask()函数做了那些改动
- private class GetDataTask extends AsyncTask<Void, Void, ImageAndText> {
- //后台处理部分
- @Override
- protected ImageAndText doInBackground(Void... params) {
- // Simulates a background job.
- ImageAndText item = null;
- try {
- item = new ImageAndText(serverIP+"/try_an_server/xizang.jpg", "sss", "ssss");
- } catch (Exception e) {
- // TODO: handle exception
- setTitle("map出错了");
- }
- return item;
- }
- //这里是对刷新的响应,可以利用addFirst()和addLast()函数将新加的内容加到LISTView中
- //根据AsyncTask的原理,onPostExecute里的result的值就是doInBackground()的返回值
- @Override
- protected void onPostExecute(ImageAndText result) {
- //在头部增加新添内容
- try {
- mData.add(result);
- //通知程序数据集已经改变,如果不做通知,那么将不会刷新mListItems的集合
- adapter.notifyDataSetChanged();
- adapter.loadImage();
- // Call onRefreshComplete when the list has been refreshed.
- mPullRefreshListView.onRefreshComplete();
- } catch (Exception e) {
- // TODO: handle exception
- setTitle(e.getMessage());
- }
- super.onPostExecute(result);
- }
- }
在doInBackground()中新增了一个ITEM项,然后在onPostExecute()中将这个项加入到mData数据列表中,然后利用adapter.notifyDataSetChanged();通知数据集已经改变;
3、继续OnCreate()函数的剩余部分
- mPullRefreshListView.setMode(Mode.PULL_FROM_END);// 设置底部下拉刷新模式
- //传参生成适配器
- mData = getData();
- ListView actualListView = mPullRefreshListView.getRefreshableView();
- adapter = new ImageAndTextListAdapter(this,mData,actualListView);
- // 设置适配器
- actualListView.setAdapter(adapter);
首先是设计下拉刷新模式,然后利用GetData()函数返回参数列表,再利用ImageAndTextListAdapter()类生成adapter,最后利用setAdapter()来加载适配器;
最后就只一个getData()函数没讲了,其实就是向服务器请求JSON数据,然后生成List变量,并返回;代码比较简单,不说了;
存在问题:最需要注意的是这个东东我在手机上测试是存在问题的,当缓慢滑到顶端或底端时,在onScrollStateChanged()监听函数中并不会激发AbsListView.OnScrollListener.SCROLL_STATE_IDLE:这一项,所以会出现不加载图片的情况,一直显示空白图,我上网搜了下,是手机的问题,不是代码的毛病,但这是很有问题的,最后,我看了其它的应用程序,我还是把上下划动是停止加载的这段代码去掉了,让他一上来就加载,无论用户是否在滑动。至于后面会不会遇到什么问题就后面再说吧,如果哪位大神有好的解决办法,欢迎拍砖!
====================华丽丽的分割线====================
PullToRefresh使用详解(四)--利用回调函数实现到底加载
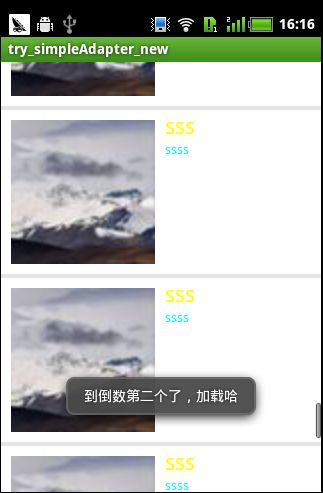
效果:
当快到底的时候,程序会自动加载后面的列表
这篇较上篇的改动:
1、去掉了线程互斥加载,直接开线程加载当前IMG,即不判断当前用户是不是在划屏了啥啥的,只要调用到getView()一概加载;
2、重写了ImageAndTextListAdapter类;
一、先看ImageAndTextListAdapter类
全部代码:
- package com.example.try_simpleadapter_new;
- import java.util.ArrayList;
- import java.util.List;
- import com.example.try_simpleadapter_new.AsyncImageLoader.ImageCallback;
- import com.handmark.pulltorefresh.library.PullToRefreshListView;
- import android.R.bool;
- import android.app.Activity;
- import android.graphics.drawable.Drawable;
- import android.graphics.drawable.Drawable.Callback;
- import android.util.Log;
- import android.view.LayoutInflater;
- import android.view.View;
- import android.view.ViewGroup;
- import android.view.ScaleGestureDetector.OnScaleGestureListener;
- import android.widget.AbsListView;
- import android.widget.BaseAdapter;
- import android.widget.ImageView;
- import android.widget.ListView;
- import android.widget.TextView;
- public class ImageAndTextListAdapter extends BaseAdapter{
- private LayoutInflater inflater;
- private ListView listView;
- private AsyncImageLoader asyncImageLoader;
- private List<ImageAndText> dataArray=new ArrayList<ImageAndText>();
- private ScrollToLastCallBack mScrollToLastCallBack=null;
- public ImageAndTextListAdapter(Activity activity, List<ImageAndText> imageAndTexts,
- ListView listView,final ScrollToLastCallBack scrollToLastCallBack) {
- this.listView = listView;
- asyncImageLoader = new AsyncImageLoader();
- inflater = activity.getLayoutInflater();
- dataArray=imageAndTexts;
- mScrollToLastCallBack=scrollToLastCallBack;
- }
- public interface ScrollToLastCallBack
- {
- public void onScrollToLast(Integer pos);
- }
- @Override
- public int getCount() {
- // TODO Auto-generated method stub
- return dataArray.size();
- }
- @Override
- public Object getItem(int position) {
- // TODO Auto-generated method stub
- if(position >= getCount()){
- return null;
- }
- return dataArray.get(position);
- }
- @Override
- public long getItemId(int position) {
- // TODO Auto-generated method stub
- return position;
- }
- @Override
- public View getView(int position, View convertView, ViewGroup parent) {
- if (convertView == null) {
- convertView = inflater.inflate(R.layout.item, null);
- }
- convertView.setTag(position);
- ImageAndText imageAndText = (ImageAndText) getItem(position);
- String imageUrl = imageAndText.getImageUrl();
- TextView nameView = (TextView) convertView.findViewById(R.id.name);
- nameView.setText(imageAndText.getName());
- TextView infoView = (TextView) convertView.findViewById(R.id.info);
- infoView.setText(imageAndText.getInfo());
- ImageView iv = (ImageView) convertView.findViewById(R.id.img);
- iv.setBackgroundResource(R.drawable.rc_item_bg);
- // 加载IMG,并设定到ImageView中
- asyncImageLoader.loadDrawable(position,imageUrl, new ImageCallback() {
- @Override
- public void onImageLoad(Integer pos, Drawable drawable) {
- Log.d("msg",pos+ "正在贴");
- View view = listView.findViewWithTag(pos);
- if(view != null){
- ImageView iv = (ImageView) view.findViewById(R.id.img);
- iv.setBackgroundDrawable(drawable);
- Log.d("msg","贴成功了");
- }
- }
- //加载不成功的图片处理
- @Override
- public void onError(Integer pos) {
- View view = listView.findViewWithTag(pos);
- if(view != null){
- ImageView iv = (ImageView) view.findViewById(R.id.img);
- iv.setBackgroundResource(R.drawable.rc_item_bg);
- }
- Log.d("msg","没贴成功");
- }
- });
- //判断当前列表所在位置,当到最后两项时就加载
- int end=listView.getLastVisiblePosition();
- if(end>getCount()-3&&end<getCount()-1&&end<=getCount())
- {
- mScrollToLastCallBack.onScrollToLast(position);
- }
- return convertView;
- }
- }
- public interface ScrollToLastCallBack
- {
- public void onScrollToLast(Integer pos);
- }
- public ImageAndTextListAdapter(Activity activity, List<ImageAndText> imageAndTexts,
- ListView listView,final ScrollToLastCallBack scrollToLastCallBack) {
- this.listView = listView;
- asyncImageLoader = new AsyncImageLoader();
- inflater = activity.getLayoutInflater();
- dataArray=imageAndTexts;
- mScrollToLastCallBack=scrollToLastCallBack;
- }
3、调用位置public View getView(……)
- //判断当前列表所在位置,当到最后两项时就加载
- int end=listView.getLastVisiblePosition();
- if(getCount()-2<=end&&end<=getCount())
- {
- mScrollToLastCallBack.onScrollToLast(position);
- }
二、MainActivity.java
这里我们只看OnCreate()函数,其它地方都没变
- public void onCreate(Bundle savedInstanceState) {
- super.onCreate(savedInstanceState);
- setContentView(R.layout.activity_main);
- mPullRefreshListView = (PullToRefreshListView) findViewById(R.id.pull_refresh_list);
- //设定下拉监听函数
- mPullRefreshListView.setOnRefreshListener(new OnRefreshListener<ListView>() {
- @Override
- public void onRefresh(PullToRefreshBase<ListView> refreshView) {
- String label = DateUtils.formatDateTime(getApplicationContext(), System.currentTimeMillis(),
- DateUtils.FORMAT_SHOW_TIME | DateUtils.FORMAT_SHOW_DATE | DateUtils.FORMAT_ABBREV_ALL);
- // Update the LastUpdatedLabel
- refreshView.getLoadingLayoutProxy().setLastUpdatedLabel(label);
- // Do work to refresh the list here.
- new GetDataTask().execute();
- }
- });
- // 当用户拉到底时调用
- mPullRefreshListView.setOnLastItemVisibleListener(new OnLastItemVisibleListener() {
- @Override
- public void onLastItemVisible() {
- Toast.makeText(MainActivity.this, "End of List!", Toast.LENGTH_SHORT).show();
- // // 到底时加载任务
- // new GetDataTask().execute();
- }
- }); //PullToRefreshBase
- mPullRefreshListView.setMode(Mode.PULL_FROM_START);// 设置底部下拉刷新模式
- //传参生成适配器
- mData = getData();
- ListView actualListView = mPullRefreshListView.getRefreshableView();
- //自己写的回调函数,监听当前列表是否到了倒数第二个列表项
- ScrollToLastCallBack scrollToLastCallBack=new ScrollToLastCallBack(){
- @Override
- public void onScrollToLast(Integer pos) {
- // TODO Auto-generated method stub
- Toast.makeText(MainActivity.this, "到倒数第二个了,加载哈", Toast.LENGTH_SHORT).show();
- // 到底时加载任务
- new GetDataTask().execute();
- }
- };
- adapter = new ImageAndTextListAdapter(this,mData,actualListView,scrollToLastCallBack);
- // 设置适配器
- actualListView.setAdapter(adapter);
- }
- //自己写的回调函数,监听当前列表是否到了倒数第二个列表项
- ScrollToLastCallBack scrollToLastCallBack=new ScrollToLastCallBack(){
- @Override
- public void onScrollToLast(Integer pos) {
- // TODO Auto-generated method stub
- Toast.makeText(MainActivity.this, "到倒数第二个了,加载哈", Toast.LENGTH_SHORT).show();
- // 到底时加载任务
- new GetDataTask().execute();
- }
- };
- adapter = new ImageAndTextListAdapter(this,mData,actualListView,scrollToLastCallBack);
OK,到这就结束了,其实就是一个回调函数的书写,难度不大,只是在涉及代码量大了的话就相对来讲有点小难度了。
更正声明:
原来这段代码:
- int end=listView.getLastVisiblePosition();
- if(getCount()-2<=end&&end<=getCount())
- {
- mScrollToLastCallBack.onScrollToLast(position);
- }
所存在的问题:我原本打算到倒数第二个ITEM出现时自动加载列表,但这里没能准确定位到倒数第二个ITEM,当倒数第一个ITEM出现时仍然符合条件,致使加载两次,有时出现列表重复的情况;下面更改
- int end=listView.getLastVisiblePosition();
- if(end>getCount()-3&&getCount()-1<end&&end<=getCount())
- {
- mScrollToLastCallBack.onScrollToLast(position);
- }
====================华丽丽的分割线====================
本篇效果图:
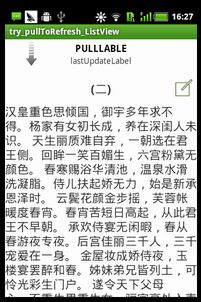
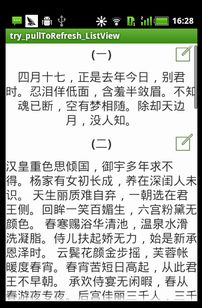
下拉前 下拉中 下拉后
效果讲解:
1、本例仅讲解上拉加载,对于其它加载内容,参考pullToRefresh源码,在PullToRefreshListActivity.java中写的很详细;
2、上拉加载前,有一个XML布局,下拉刷新后,添加一个与原有布局完全相同的动态布局,只是TextView的内容不一样了而已。
一、下拉前
1、导入Library库,至于导入Library库的过程,参考《PullToRefresh使用详解(一)--构建下拉刷新的listView》。
2、XML构建:
- <LinearLayout xmlns:android="http://schemas.android.com/apk/res/android"
- xmlns:tools="http://schemas.android.com/tools"
- android:layout_width="match_parent"
- android:layout_height="match_parent"
- android:orientation="vertical"
- tools:context=".MainActivity" >
- <!-- The PullToRefreshScrollView replaces a standard PullToRefreshScrollView widget. -->
- <com.handmark.pulltorefresh.library.PullToRefreshScrollView
- xmlns:ptr="http://schemas.android.com/apk/res-auto"
- android:id="@+id/pull_refresh_scrollview"
- android:layout_width="fill_parent"
- android:layout_height="fill_parent"
- ptr:ptrAnimationStyle="flip"
- ptr:ptrMode="both" >
- <LinearLayout
- android:id="@+id/sub_root_lin"
- android:layout_width="fill_parent"
- android:layout_height="wrap_content"
- android:orientation="vertical" >
- <!-- 动态创建布局开始 -->
- <LinearLayout
- android:layout_width="fill_parent"
- android:layout_height="wrap_content"
- android:orientation="vertical" >
- <RelativeLayout
- android:layout_width="fill_parent"
- android:layout_height="wrap_content" >
- <ImageView
- android:layout_width="50dip"
- android:layout_height="50dip"
- android:layout_alignParentRight="true"
- android:clickable="true"
- android:padding="5dip"
- android:src="@drawable/list_item_detail_part_navi_edit" />
- <TextView
- android:layout_width="fill_parent"
- android:layout_height="50dip"
- android:gravity="center_horizontal|center_vertical"
- android:text="(二)"
- android:textSize="20sp"
- android:textStyle="bold" />
- </RelativeLayout>
- <TextView
- android:layout_width="fill_parent"
- android:layout_height="match_parent"
- android:text="@string/changHenGe"
- android:textSize="20sp" />
- </LinearLayout>
- <!-- 动态创建布局结束 -->
- </LinearLayout>
- </com.handmark.pulltorefresh.library.PullToRefreshScrollView>
- </LinearLayout>
这段代码实现的效果就如“下拉前”这张图片显示的一样。
注意两点:
1、利用<com.handmark.pulltorefresh.library.PullToRefreshScrollView取代原有的ScrollView应在的位置即可,其它想怎么布局怎么布局。
2、在<!--动态创建布局-->标注起来的部分,这段代码要格外注意,因为我们在代码中,会创建一个完全相同的动态布局,插入到它上面。
2、JAVA代码
完整代码如下:
- package com.example.try_pulltorefresh_listview;
- /**
- * @author harvic
- * @date 2014-4-29
- * @address http://blog.csdn.net/harvic880925
- */
- import com.handmark.pulltorefresh.library.PullToRefreshBase;
- import com.handmark.pulltorefresh.library.PullToRefreshBase.Mode;
- import com.handmark.pulltorefresh.library.PullToRefreshScrollView;
- import com.handmark.pulltorefresh.library.PullToRefreshBase.OnRefreshListener;
- import android.os.AsyncTask;
- import android.os.Bundle;
- import android.app.Activity;
- import android.graphics.Typeface;
- import android.util.Log;
- import android.view.Gravity;
- import android.widget.ImageView;
- import android.widget.LinearLayout;
- import android.widget.RelativeLayout;
- import android.widget.ScrollView;
- import android.widget.TextView;
- public class MainActivity extends Activity {
- PullToRefreshScrollView mPullRefreshScrollView;
- ScrollView mScrollView;
- @Override
- protected void onCreate(Bundle savedInstanceState) {
- super.onCreate(savedInstanceState);
- setContentView(R.layout.activity_main);
- //这几个刷新Label的设置
- mPullRefreshScrollView = (PullToRefreshScrollView) findViewById(R.id.pull_refresh_scrollview);
- mPullRefreshScrollView.getLoadingLayoutProxy().setLastUpdatedLabel("lastUpdateLabel");
- mPullRefreshScrollView.getLoadingLayoutProxy().setPullLabel("PULLLABLE");
- mPullRefreshScrollView.getLoadingLayoutProxy().setRefreshingLabel("refreshingLabel");
- mPullRefreshScrollView.getLoadingLayoutProxy().setReleaseLabel("releaseLabel");
- //上拉、下拉设定
- mPullRefreshScrollView.setMode(Mode.PULL_FROM_START);
- //上拉监听函数
- mPullRefreshScrollView.setOnRefreshListener(new OnRefreshListener<ScrollView>() {
- @Override
- public void onRefresh(PullToRefreshBase<ScrollView> refreshView) {
- //执行刷新函数
- new GetDataTask().execute();
- }
- });
- //获取ScrollView布局,此文中用不到
- mScrollView = mPullRefreshScrollView.getRefreshableView();
- }
- private class GetDataTask extends AsyncTask<Void, Void, LinearLayout> {
- @Override
- protected LinearLayout doInBackground(Void... params) {
- // Simulates a background job.
- try {
- Thread.sleep(4000);
- LinearLayout lin=viewSingleItem();
- return lin;
- } catch (InterruptedException e) {
- Log.e("msg","GetDataTask:" + e.getMessage());
- }
- return null;
- }
- @Override
- protected void onPostExecute(LinearLayout result) {
- // Do some stuff here
- LinearLayout sub_root_lin=(LinearLayout) findViewById(R.id.sub_root_lin);
- LinearLayout.LayoutParams LP_FW = new LinearLayout.LayoutParams(
- LinearLayout.LayoutParams.FILL_PARENT, LinearLayout.LayoutParams.WRAP_CONTENT);
- sub_root_lin.addView(result, 0, LP_FW);
- mPullRefreshScrollView.setMode(Mode.DISABLED);
- // Call onRefreshComplete when the list has been refreshed.
- //在更新UI后,无需其它Refresh操作,系统会自己加载新的listView
- mPullRefreshScrollView.onRefreshComplete();
- super.onPostExecute(result);
- }
- }
- /**
- * 下拉刷新后,动态产生的一条布局
- * @return
- */
- private LinearLayout viewSingleItem()
- {
- LinearLayout layout_root_lin=new LinearLayout(this);
- layout_root_lin.setOrientation(LinearLayout.VERTICAL);
- //添加第一个子布局集
- RelativeLayout layout_sub_relative=new RelativeLayout(this);
- ImageView relative_sub_IV=new ImageView(this);
- relative_sub_IV.setPadding(5, 5, 5, 5);
- relative_sub_IV.setClickable(true);
- relative_sub_IV.setImageResource(R.drawable.list_item_detail_part_navi_edit);
- RelativeLayout.LayoutParams RL_IM = new RelativeLayout.LayoutParams(50,50);//尤其注意这个位置,用的是父容器的布局参数
- RL_IM.addRule(RelativeLayout.ALIGN_PARENT_RIGHT);//这里要注意设置方法!!!---靠父容器右侧对齐
- layout_sub_relative.addView(relative_sub_IV, RL_IM);
- TextView relative_sub_TV=new TextView(this);
- relative_sub_TV.setGravity(Gravity.CENTER_HORIZONTAL|Gravity.CENTER_VERTICAL);
- relative_sub_TV.setText("(一)");
- relative_sub_TV.setTypeface(Typeface.defaultFromStyle(Typeface.BOLD));
- relative_sub_TV.setTextSize(20);
- RelativeLayout.LayoutParams RL_TV = new RelativeLayout.LayoutParams(RelativeLayout.LayoutParams.FILL_PARENT,50);
- layout_sub_relative.addView(relative_sub_TV, RL_TV);
- LinearLayout.LayoutParams LP_FW = new LinearLayout.LayoutParams(
- LinearLayout.LayoutParams.FILL_PARENT, LinearLayout.LayoutParams.WRAP_CONTENT);
- layout_root_lin.addView(layout_sub_relative, LP_FW);
- //添加第二个子布局
- TextView lin_sub_TV=new TextView(this);
- lin_sub_TV.setGravity(Gravity.CENTER_HORIZONTAL|Gravity.CENTER_VERTICAL);
- lin_sub_TV.setText("四月十七,正是去年今日,别君时。忍泪佯低面,含羞半敛眉。" +
- "不知魂已断,空有梦相随。除却天边月,没人知。");
- lin_sub_TV.setTextSize(20);
- layout_root_lin.addView(lin_sub_TV, LP_FW);
- return layout_root_lin;
- }
- }
讲解:
1、最长的一个函数:viewSingleItem()
这个函数的功能,就是动态创建一个上面我们所讲的<!-- 动态创建布局 -->之间的布局,并返回根结点,对于动态布局的创建参考《动态添加综合布局---动态添加控件及将某XML动态加入到Activity显示(续)》和《动态添加控件及将某XML动态加入到Activity显示》。
2、然后从上往下看一:刷新标签设定
- mPullRefreshScrollView = (PullToRefreshScrollView) findViewById(R.id.pull_refresh_scrollview);
- mPullRefreshScrollView.getLoadingLayoutProxy().setLastUpdatedLabel("lastUpdateLabel");
- mPullRefreshScrollView.getLoadingLayoutProxy().setPullLabel("PULLLABLE");
- mPullRefreshScrollView.getLoadingLayoutProxy().setRefreshingLabel("refreshingLabel");
- mPullRefreshScrollView.getLoadingLayoutProxy().setReleaseLabel("releaseLabel");
3、设置下拉、上拉、上下拉刷新模式
这里是上拉刷新
- mPullRefreshScrollView.setMode(Mode.PULL_FROM_START);
- mPullRefreshScrollView.setOnRefreshListener(new OnRefreshListener<ScrollView>() {
- @Override
- public void onRefresh(PullToRefreshBase<ScrollView> refreshView) {
- //执行刷新函数
- new GetDataTask().execute();
- }
- });
- private class GetDataTask extends AsyncTask<Void, Void, LinearLayout> {
- @Override
- protected LinearLayout doInBackground(Void... params) {
- // Simulates a background job.
- try {
- Thread.sleep(4000);
- LinearLayout lin=viewSingleItem();
- return lin;
- } catch (InterruptedException e) {
- Log.e("msg","GetDataTask:" + e.getMessage());
- }
- return null;
- }
- @Override
- protected void onPostExecute(LinearLayout result) {
- // Do some stuff here
- LinearLayout sub_root_lin=(LinearLayout) findViewById(R.id.sub_root_lin);
- LinearLayout.LayoutParams LP_FW = new LinearLayout.LayoutParams(
- LinearLayout.LayoutParams.FILL_PARENT, LinearLayout.LayoutParams.WRAP_CONTENT);
- sub_root_lin.addView(result, 0, LP_FW);
- mPullRefreshScrollView.setMode(Mode.DISABLED);
- // Call onRefreshComplete when the list has been refreshed.
- //在更新UI后,无需其它Refresh操作,系统会自己加载新的listView
- mPullRefreshScrollView.onRefreshComplete();
- super.onPostExecute(result);
- }
- }
1、doInBackground()中产生一条动态布局,并作为最终结果返回;
2、onPostExecute()接收到这条动态布局结果,添加到XML中并显示,注意这里并没有更新XML view所使用的setContentView(),而是程序自动给加载了。最后利用SetMode取消下拉刷新。
使用PullToRefresh实现下拉刷新和上拉加载
PullToRefresh是一套实现非常好的下拉刷新库,它支持:
1.ListView
2.ExpandableListView
3.GridView
4.WebView
等多种常用的需要刷新的View类型,而且使用起来也十分方便。
(下载地址:https://github.com/chrisbanes/Android-PullToRefresh)
下载完成,将它导入到eclipse中,作为一个library导入到你的工程中就好了。
一、废话少说,下拉刷新go。
1.在你的布局文件中加上你想用的View就好了,比如这儿我想用一个支持下拉 刷新的ExpandableListView
- <com.handmark.pulltorefresh.library.PullToRefreshExpandableListView
- android:id="@+id/expand_list"
- android:layout_width="match_parent"
- android:layout_height="match_parent" />
2. 在你的Activity代码中进行简单的设置:
- mExpandList = (PullToRefreshExpandableListView) rootView.findViewById(R.id.expand_list);
- mExpandList.getRefreshableView().setGroupIndicator(null);
- mExpandList.getRefreshableView().setDivider(null);
- mExpandList.getRefreshableView().setSelector(android.R.color.transparent);
- mExpandList.getRefreshableView().setOnGroupClickListener(this);
- mExpandList.setOnRefreshListener(this);
第一行是找到这个View,最后一行是为它加上刷新的监听器,中间的几行是我对ExpandableListView进行一些设置。
这样其实就已经可以下拉刷新了,但刷新时需要运行的代码写在哪呢,还有为什么下拉不会收起来呢,且往下看。
3.下拉刷新时执行的方法onRefresh()
- @Override
- public void onRefresh(PullToRefreshBase<ExpandableListView> refreshView) {
- if (!isRefreshing) {
- isRefreshing = true;
- updateList(true);
- } else {
- mExpandList.onRefreshComplete();
- }
- }
一般来说我们会开另一个线程去获取数据,所以这儿会加上一个判断,如果已经在获取数据了,就onRefreshComplete(),就是将下拉收起;否则就去开新线程取数据,取完记得也要onRefreshComplete()哦!
二、上拉加载
如果你不想再费时间去自己写一个上拉加载,不妨试一下PullToRefresh自带的上拉效果哦!
PullToRefresh本身支持下拉刷新和上拉刷新,所以我们只需要将上拉刷新改成上拉
