浅谈带有复杂布局列表项的列表视图
首先看ListView。构建基于字符串数组的列表视图是Android基本教程里面的东西,这里就不说了。
这里根据个人经验说说列表项包含比较复杂的布局的列表视图。
先澄清一下术语:
1. 列表视图:指基于类ListView的展示同类内容条目的视图。列表视图负责响应用户对列表的操作。
2. 列表项:指列表中展现某一具体内容个体的视图。也可以封装一些不可见的信息。
3. 适配器:这里使用由CursorAdapter类扩展而来的子类。顾名思义,适配器在我们取得的数据与列表项视图中的各个元素之间形成一种映射,使得数据能够正确的显示在列表项中。
下面动手来做。先在Eclipse中创建一个Android应用项目。修改生成的MainActivity类对应的布局文件。我将HelloWorld去掉,代之以一个Fragment声明。这个Fragment将由ListFragment类扩展而来,充满整个屏幕。
<RelativeLayout xmlns:android="http://schemas.android.com/apk/res/android"
    xmlns:tools="http://schemas.android.com/tools"
    android:layout_width="match_parent"
    android:layout_height="match_parent"
    tools:context=".MainActivity" >
    <fragment android:name="jing.app.android.list.MyListFragment"
            android:id="@+id/list"
            android:layout_width="match_parent"
            android:layout_height="match_parent" />
</RelativeLayout>
当然这个类现在还不存在,我们这就去建立它:
public class MyListFragment extends ListFragment {

    @Override
    public View onCreateView(LayoutInflater inflater, ViewGroup container,
            Bundle savedInstanceState) {
        return super.onCreateView(inflater, container, savedInstanceState);
    }

    @Override
    public void onAttach(Activity activity) {
        super.onAttach(activity);
    }

    @Override
    public void onCreate(Bundle savedInstanceState) {
        super.onCreate(savedInstanceState);
    }

}
先建立框架代码,覆盖一些生命周期方法待用。关于Fragment生命周期,请参考官方文档或本人上一篇文章。不明白最好自己动手写来试试。下面,为MyListFragment创建布局文件my_list_fragment.xml:
<?xml version="1.0" encoding="utf-8"?>
<LinearLayout xmlns:android="http://schemas.android.com/apk/res/android"
         android:orientation="vertical"
         android:layout_width="match_parent"
         android:layout_height="match_parent"
         android:paddingLeft="8dp"
         android:paddingRight="8dp">

    <ListView android:id="@id/android:list"
        android:layout_width="match_parent"
        android:layout_height="match_parent"
        android:layout_weight="1"
        android:drawSelectorOnTop="false"/>

    <TextView android:id="@id/android:empty"
        android:layout_width="match_parent"
        android:layout_height="match_parent"
        android:gravity="center"
        android:textSize="64sp"
        android:text="No data"/>
</LinearLayout>
这是一个垂直排列的线性布局,其中包含一个ListView元素和一个TextView元素。注意,它们都使用了Android预定义的id,而非本地指定的id。注意文本视图:当列表视图没有内容的时候用它来显示提示信息。
实际上,此时程序已经可以执行了。我们来看看效果:
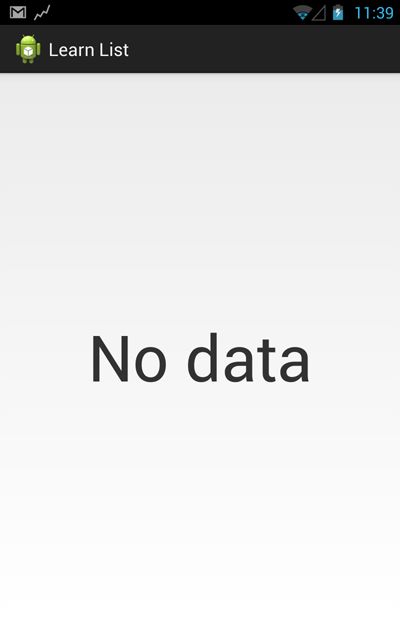
好了,现在程序告诉我们——“没有数据”。看来我们需要为它提供数据。最常见的数据组织形式就是Cursor了。而Cursor的数据来源,可能是数据库查询的结果集,也可能是别的什么地方获取来的。这个不是这里的重点。那么,我胡乱弄了一个MatrixCursor实例,其中包含_id,title,summary,time等4个字段。通过循环往里面插入10条数据:
    private static Cursor buildCursor() {
        final String[] colums = { "_id", "title", "summary", "time" };
        MatrixCursor c = new MatrixCursor(colums);
        for (int i = 1; i <= 10; i++) {
            c.newRow().add(i)
                      .add("Title " + i)
                      .add("Summary " + i)
                      .add(System.currentTimeMillis());
        }
        return c;
    }
好了,只要调用这个静态方法,我们就可以得到一个包含10条数据记录的Cursor实例。
现在ListView有了,数据也拿到了,怎么样让数据显示在列表中呢?从前面的术语相关的内容中,我们可以看到还缺两个东西——一个是对数据表现形式的声明,也就是列表项如何通过布局来限定数据显示的方式,另外一个就是数据与列表项视图的对接,也就是适配器的定义。下面,我们一一来完成这些个工作。
先创建列表项对应的布局文件:
<?xml version="1.0" encoding="utf-8"?>
<LinearLayout xmlns:android="http://schemas.android.com/apk/res/android"
    android:orientation="horizontal"
    android:layout_width="match_parent"
    android:layout_height="70dip"
    android:paddingLeft="8dp"
    android:paddingRight="8dp">
    <LinearLayout
        android:orientation="vertical"
        android:layout_weight="1"
        android:layout_width="0dip"
        android:layout_height="match_parent" >
        <TextView
            android:id="@+id/title"
            android:layout_width="match_parent"
            android:layout_height="35dip"
            android:gravity="center_vertical"
            android:text="Title" />
        <TextView
            android:id="@+id/summary"
            android:layout_width="match_parent"
            android:layout_height="35dip"
            android:gravity="center_vertical"
            android:text="Summary" />
    </LinearLayout>
    <TextView
        android:id="@+id/time"
        android:layout_width="wrap_content"
        android:layout_height="match_parent"
        android:gravity="center"
        android:text="00:00" />
</LinearLayout>
在“Graphical layout”页中预览一下:
这就是一个简单的布局了,到时候我们会通过Adapter来将它指定给列表的每一项。
那么接下来就是承担枢纽角色的适配器了。我们创建适配器实例,并指定给列表:
    private MyCursorAdapter mAdapter;

    @Override
    public void onCreate(Bundle savedInstanceState) {
        super.onCreate(savedInstanceState);
        mAdapter = new MyCursorAdapter();
        this.setListAdapter(mAdapter);
    }
哦,对了——这个MyCursorAdapter类目前压根不存在。好办,创建它:
    private class MyCursorAdapter extends CursorAdapter {
        public MyCursorAdapter() {
            super(getActivity(), null, true);
        }

        @Override
        public void bindView(View view, Context context, Cursor cursor) {
            // TODO Auto-generated method stub

        }

        @Override
        public View newView(Context context, Cursor cursor, ViewGroup parent) {
            // TODO Auto-generated method stub
            return null;
        }

    }
我们扩展了CursorAdapter类,提供了一个缺省的构造方法。有兴趣可以看看父类还有哪些构造方法。同时,我们覆盖了两个回调方法:
- newView():在这个方法中,我们将根据刚才设计的布局为列表项创建视图对象。
- bindView():在这个方法中,我们将cursor提供的数据绑定到列表项视图中的各个显示元素。
先创建列表项视图:
        @Override
        public View newView(Context context, Cursor cursor, ViewGroup parent) {
            LayoutInflater inflater = (LayoutInflater) context.getSystemService(Context.LAYOUT_INFLATER_SERVICE);
            return inflater.inflate(R.layout.my_list_item, parent, false);
        }
然后进行数据绑定:
        @Override
        public void bindView(View view, Context context, Cursor cursor) {
            if (view == null) {
                return;
            }

            // find对应的widget
            TextView titleView = (TextView) view.findViewById(R.id.title);
            TextView summaryView = (TextView) view.findViewById(R.id.summary);
            TextView timeView = (TextView) view.findViewById(R.id.time);

            // 从cursor当前位置取得数据
            String title = cursor.getString(cursor.getColumnIndexOrThrow("title"));
            String summary = cursor.getString(cursor.getColumnIndexOrThrow("summary"));
            long time = cursor.getLong(cursor.getColumnIndexOrThrow("time"));

            // 将数据指定个各个widget完成绑定
            titleView.setText(title);
            summaryView.setText(summary);
            timeView.setText(String.valueOf(time));

        }
注意,bindView()的三个参数中,view即当前处理的列表项视图,cursor对象目前指向正在处理的那一行。
现在,数据绑定就做完了。那么,现在就可以把数据交给适配器来处理了。在onCreate()方法中添加代码:
    @Override
    public void onCreate(Bundle savedInstanceState) {
        super.onCreate(savedInstanceState);
        mAdapter = new MyCursorAdapter();
        setListAdapter(mAdapter);
        Cursor cursor = buildCursor();
        mAdapter.swapCursor(cursor);
    }
通过swapCursor()方法,装载数据的cursor就设定给了适配器。适配器会自动完成绑定操作。运行一下程序看看结果:
对不起,图比较大,懒得缩了。
这样,一个简单的复杂视图列表项的列表视图就完成了。
总结一下,要针对你的数据结构来设计你的列表项视图,跟通常的视图布局设计大同小异,尽情发挥你的想象力吧。
另外,如何使列表视图滚动更加流畅——请阅读官方文档相关内容。