基于asmack的聊天
现在的聊天模块的功能基本上很多项目都会用到,关于聊天的实现有些是原生的(native)的有些是基于第三方SDK的比如融云,环信
等。原生的开发的难度和工作量会大一点但是灵活性和维护度简单点。第三方的即时通讯的优点是快速的集成和开发大大降低了开
发的难度和时间的周期。
下面是基于Openfire+asmack实现的聊天属于原生的开发即时通讯吧。下个环节我会推出关于基于融云SDK的即时通信开发。
源码的下载,聊天是其中的一个模块在wechar包中其它的代码忽略就好了。
源码 下载
github 下载
环境安装
Openfire的安装和配置包括创建房间添加用户,spark的安装这里不做详细解说百度资源一大把。
连接服务器,登录,加入聊天室
这里的代码做三件事
/** * 1、连接服务器 * 2、登录 * 3、加入群聊天 * */链接服务器<span style="font-family:Arial;font-size:14px;">ConnectionConfiguration connectionConfiguration = new ConnectionConfiguration("125.65.82.216", 5222, "125.65.82.216"); XMPPConnection xmppConnection = new XMPPConnection(connectionConfiguration); try { //链接服务器 connectionConfiguration.setReconnectionAllowed(true); xmppConnection.connect(); } catch (XMPPException e) { e.printStackTrace(); Log.i("ERROR", e + ""); }</span>这里对下面的代码进行说明一下,后面的三个单数分别表示,IP地址,端口号(一般都是5222),服务器的名称在搭建Openfire时进行命名的,注意在这里搭建openfire的时候尽量在局域网内搭建不然老是链接不了服务器<span style="font-family: Arial;font-size:14px;">ConnectionConfiguration connectionConfiguration = new ConnectionConfiguration("125.65.82.216", 5222, "125.65.82.216");</span>
登录和加入聊天室<span style="font-family:Arial;"><span style="font-size:14px;"> if (xmppConnection.isConnected()) { Log.i("LOGIN", "加入成功"); //登录 xmppConnection.login("bruse", "123"); //加入群聊 multiUserChat = new MultiUserChat(xmppConnection, "[email protected]"); //加入后的昵称 multiUserChat.join("bruse"); }</span></span>这里的表示房间的名称,注意后面加上@conference.XXX,在Spark可以看到对应的房间名称<span style="font-family:Arial;font-size:14px;">[email protected]</span>
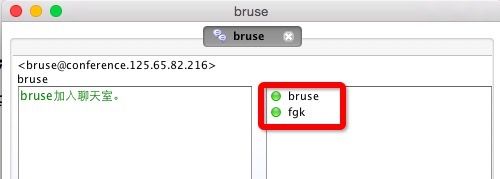
如果加入房间成功后会提示如下
发送消息使用asmack框架中的Message类进行对消息的封装,消息的发送人、接受者,消息类型(群聊、单聊),然后使用MultiUserChar进行消息的发送。网络的发送,注意新建一个工作线程:<span style="font-family:Arial;"><span style="font-size:14px;">Message message = new Message(); //设置发送给谁 message.setTo("[email protected]"); message.setFrom("[email protected]"); message.setType(Message.Type.groupchat); Log.i("asmack", message.getFrom()); //设置消息的内容 message.setBody(body); //进行发送 MyService.multiUserChat.sendMessage(message);</span></span>

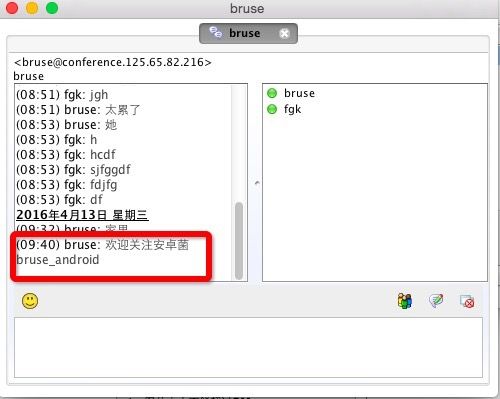
这里为什么我发送消息给房间为什么房间会再发给我,这里做一下解释因为你是在房间里面会自动接受消息,就是说房间会自动推送消息给你。如果是单聊模式就不会有这种重复的推送。比如下面的接受服务器的消息:<span style="font-family:Arial;"><span style="font-size:14px;"> /** *这里进行接收消息 * */ xmppConnection.addPacketListener(new PacketListener() { //如果服务器发消息给客户端则执行下面的方法 @Override public void processPacket(Packet packet) { if (packet instanceof Message) { //强制转换判断类型 final Message message = (Message) packet; Message.Type type = message.getType(); final MessageModel messageModel = new MessageModel(); if (type == Message.Type.groupchat) { /** * 工作线程里面是不能动UI的 * * */ if (CharActivity.instance != null) { CharActivity.instance.runOnUiThread(new Runnable() { @Override public void run() { //这样就进入到主线程 messageModel.setFrom(message.getFrom()); messageModel.setMessage(message.getBody()); //这里进行测试 Log.i("服务器", message.getFrom()); if (CharActivity.instance != null) { CharActivity.instance.data.add(messageModel); handler.sendEmptyMessage(0); } } }); } } } } }, null); </span></span>
当房间里面接受到新的消息的时候就会调用下面的方法:注意工作线程里面是不能动UI的,所以要用下面这个方法进行改动聊天界面的UI,其中用来单例模式还有一点就是在线程中是不能进行ListView的数据的更新的,所以这里用Handler+Message进行解决<span style="font-family:Arial;"> private Handler handler = new Handler() { @Override public void handleMessage(android.os.Message msg) { super.handleMessage(msg); switch (msg.what) { case 0: CharActivity.instance.messageAdapter.notifyDataSetChanged(); // CharActivity.instance.lvMessage.setAdapter(CharActivity.instance.messageAdapter); CharActivity.instance.lvMessage.setSelection(CharActivity.instance.data.size()); break; } } };</span>
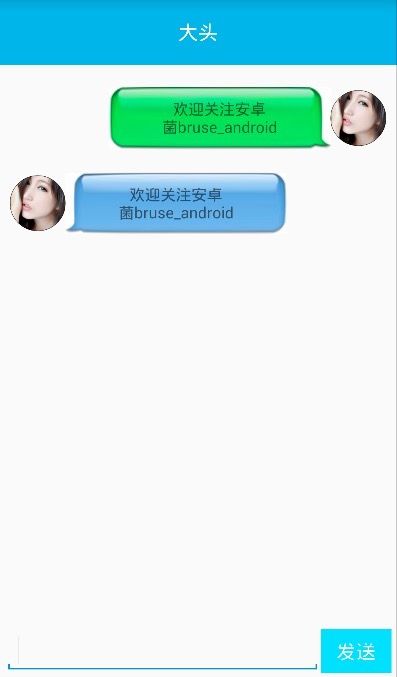
执行:效果图:关于asmack框架的聊天简单的介绍就这么多,后面会推出基于融云的SDK进行的第三方SDK的即时通讯的实现,这里的基于asmack框架是大致的简介一下具体的单聊文件发送这些共功能的实现可后期进行完善比如单聊:<span style="font-family:Arial;">/** * 发送消息 * * @param to * @param msg */ public static void sendTalkMsg(String to, String msg) { Chat chat = MyApplication.xmppConnection.getChatManager().createChat( to, null); try { chat.sendMessage(msg); ConnecMethod.postFiletoService("130560779417728750.png", text_loading); } catch (XMPPException e) { // TODO Auto-generated catch block e.printStackTrace(); } } </span>最后谢谢大家的支持,别忘记扫描头像关注公众号进行“激情裸聊”谢谢大家~~~~~~!