Android 成长之路(1)——创建第一个App
创建一个Android Project
本人使用的是Android Studio。
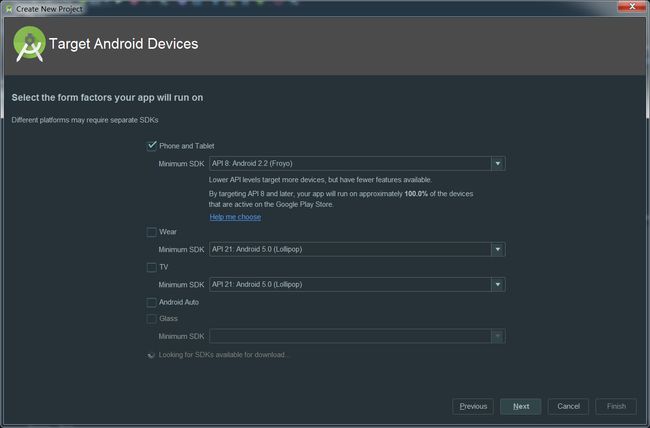
按照指示一步步,最后finish就好了。不过这过程中有一步需要选择 Minimum SDK
这里我选择了API 8: Android 2.2 (Froyo),为了支持多种版本的设备,选择可以使app提供它的核心特性的最低版本。
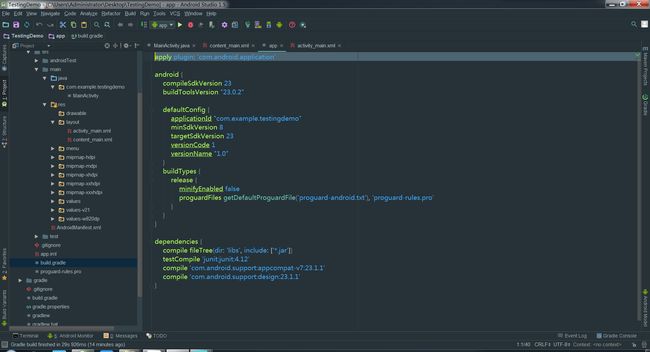
然后我们先来看看目录结构和build.gradle文件
app/src/main/res/layout/activity_main.xml
这个xml布局文件包含了一些默认的界面元素,例如app bar和一个浮动的操作按钮。它还包含了一个单独布局文件的主要内容。
app/src/main/res/layout/content_main.xml
这个放置在activity_main.xml中的文件,包含了一些设置和显示”Hello World”的Textview组件。
app/src/main/java/com.mycompany.myfirstapp/MainActivity.java
MainActivity就是我们创建的活动,加载界面和调用一些我们定义所需要的类相关方法等这一些操作
app/src/main/AndroidManifest.xml
AndroidManifest.xml描述这个app的一些基本特性,定义它的每一个组成部分
app/build.gradle
Android Studio 是用 Gradle 来编译和运行 app
compileSdkVersion 23,就是现在编译的Sdk版本
applicationId 也就是这个app项目的包名,用来作为Id
minSdkVersion 当然这就是最小Sdk版本啦
targetSDKVersion 可以测试应用的最高版本
dependencies 所依赖的库,例如com.android.support:appcompat-v7:23.1.1
在res/下面有
drawable/ 用来放置所需要的图标
layout/ 用来放布局文件
menu/ 菜单的选项
mipmap/ 默认的图标
values/ 包含一些资源,例如string字符的定义和颜色的定义等
创建一个LinearLayout
1、打开res/layout/content_my.xml,可以看到选择的BlankActivity模板中包含一个RelativeLayout布局和一个TextView的组件。
2、删除TextView组件,把RelativeLayout改成LinearLayout
3、设置android:orientation属性为“horizontal”,水平排列
4,、移除android:padding和tools:context属性
如下:
<LinearLayout xmlns:android="http://schemas.android.com/apk/res/android"
    xmlns:app="http://schemas.android.com/apk/res-auto"
    xmlns:tools="http://schemas.android.com/tools"
    android:layout_width="match_parent"
    android:layout_height="match_parent"
    android:orientation="horizontal"
    app:layout_behavior="@string/appbar_scrolling_view_behavior"
tools:showIn="@layout/activity_main">android:layout_width=”match_parent”
android:layout_height=”match_parent”
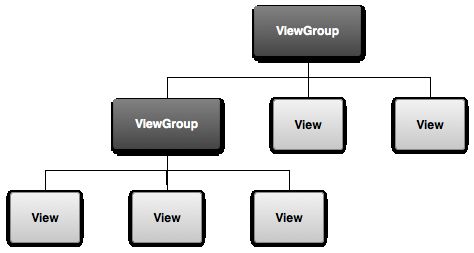
设置width和height为“match_parent”,这个布局LinearLayout就会布满它整个父类ViewGroup,ViewGroup类的视图就是我们看到的整个屏幕,也就是这个LinearLayout布满整个屏幕。
添加文本域
1、在 content_my.xml 这个文件的 布局里面 定义一个 设置它的 id 属性@+id/edit_message.
2、定义 layout_width a和 layout_height 属性为 wrap_content.
3、定义一个 hint 属性为 string.xml 文件里名为 edit_message.
代码如下:
<EditText android:id="@+id/edit_message" android:layout_width="wrap_content" android:layout_height="wrap_content" android:hint="@string/edit_message"/>`
android:hint:
当EditText上面 的text为空的时候,显示一个默认的text
添加 String 资源
Android project 包含一个a string 资源文件在 res/values/strings.xml. 这里可以添加一个 “edit_message” ,并且 设置值为 Input message.”
1、在eres/values 目录下, 打开strings.xml.
2、添加一行 命名 “edit_message” ,设置值为 “Enter a message”.
3、添加一行 命名 “button_send” ,设置值为 “Send”.
4、接下来的部分会用到“button_send”
strings.xml 如下:
<resources>
    <string name="app_name">My Application</string>
    <string name="action_settings">Settings</string>
    <string name="edit_message">Input Message</string>
    <string name="button_send">Send</string>
</resources>
添加一个 Button
在content_my.xml file 布局里面定义一个按钮 控件在上面的EditText后面
1、设置按钮的 width 和 height 属性为 “wrap_content” ,所以这个按钮跟它装的text一样大
2、定义 android:text 属性,设置值为 之前string.xml里面的button_send.
现在看到的LinearLayout布局如下:
<LinearLayout xmlns:android="http://schemas.android.com/apk/res/android" xmlns:app="http://schemas.android.com/apk/res-auto" xmlns:tools="http://schemas.android.com/tools" android:layout_width="match_parent" android:layout_height="match_parent" android:orientation="horizontal" app:layout_behavior="@string/appbar_scrolling_view_behavior" tools:showIn="@layout/activity_main">

    <EditText  android:id="@+id/edit_message" android:layout_width="wrap_content" android:layout_height="wrap_content" android:hint="@string/edit_message"/>

    <Button  android:layout_width="wrap_content" android:layout_height="wrap_content" android:text="@string/button_send"/>

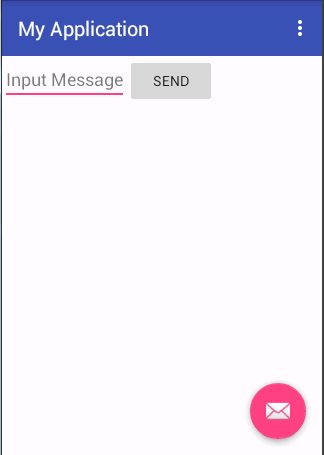
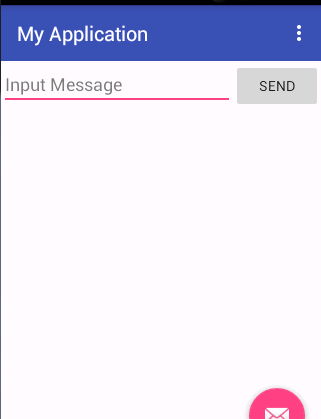
</LinearLayout>可以看到,按钮的后面还有很多空间
接下来要布满后面的空间:
添加并设置 layout_weight属性为 1,然后 设置layout_width 属性为 0dp.
EditText里面的代码改成如下:
<EditText android:id="@+id/edit_message" android:layout_weight="1" android:layout_width="0dp" android:layout_height="wrap_content" android:hint="@string/edit_message"/>这样子就完全布满了后面的空间了
这里只是在EditText里面设置weight属性
对于weight,如果设置一个控件的weight是2,然后设置另一控件的weight为1,那么总共就是3,因此第一个控件占剩下空间2/3,另一个控件 占剩下的1/3. 如果继续添加第三个控件并设置 weight为1, 那么现在第一个控件就是占剩下空间的 1/2 ,其他两个控件分别各占1/4.
系统默认所有控件的weight为0
