使用python构建httpserver,python+tornado+pika+rabbitmq
一、搭建环境
1.1安装Erlang
RabbitMQ是基于Erlang的,所以首先必须配置Erlang环境。从Erlang的官网 http://www.erlang.org/download.html 下载最新的erlang安装包,我下载的是otp_src_17.4.tar.gz

然后:
$ tar xvzf otp_src_17.4.tar.gz
$ cd otp_src_17.4
$ ./configure
编译后出现如下图
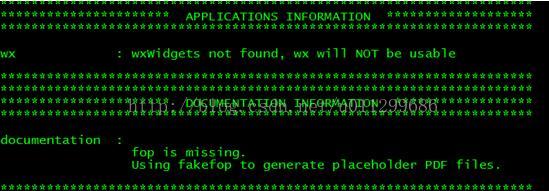
提示没有wxWidgets和fop,但是问题不大。继续:
$ make
$ sudo make install
1.2 安装python
需要安装一个比较新的Python版本。安装略。
1.3 安装simplejson
需要安装simplejson。从此处下载最新的版本: http://pypi.python.org/pypi/simplejson#downloads 。我下载的版本是 simplejson-3.6.5.tar.gz
$ tar xvzf simplejson-3.6.5.tar.gz
$ cd simplejson-3.6.5
$ sudo python setup.py install
1.4安装RabbitMQ-Server
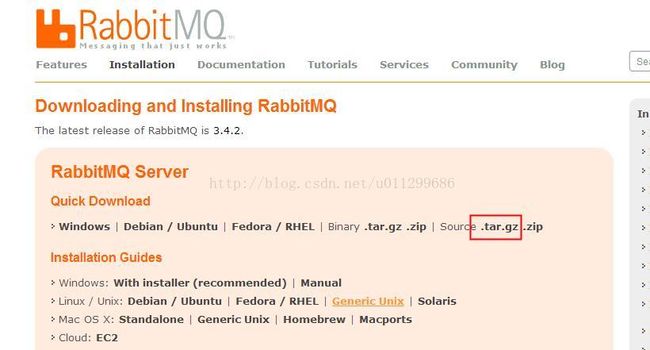
开始安装RabbitMQ-Server,从此处下载源代码版本的RabbitMQ: http://www.rabbitmq.com/server.html。我下载的版本是 rabbitmq-server-3.4.2.tar.gz
然后:
$ tar xvzf rabbitmq-server-3.4.2.tar.gz
$ cd rabbitmq-server-3.4.2
$ sudomake TARGET_DIR=/usr/local SBIN_DIR=/usr/local/sbin MAN_DIR=/usr/local/manDOC_INSTALL_DIR=/usr/local/man install
在sbin/目录下出现了三个命令:
rabbitmqctl rabbitmq-env rabbitmq-server
安装成功。
运行
找到sbin/目录,运行程序:
/usr/local/sbin/rabbitmq-server –detached

停止程序:
/usr/local/sbin/rabbitmqctl stop
1.5 安装pika
安装pika可以使用pip来进行安装,pip是python的软件管理包
sudo pip install pika1.6 安装tornado
从此处下载源代码版本的tornado,https://pypi.python.org/pypi/tornado/,我下载的版本是tornado-4.0.2.tar.gz,然后
tar xvzf tornado-4.0.2.tar.gz
cd tornado-4.0.2
python setup.py build
sudo python setup.py install
二、编写简单样例程序
发送端:helloword.py
功能:对外提供http服务,用户通过调用,往rabbitmq队列插入记录,代码如下
| import tornado.ioloop import tornado.web import pika class MainHandler(tornado.web.RequestHandler): def get(self): #self.write("Hello, world") connection = pika.BlockingConnection(pika.ConnectionParameters('127.0.0.1')) channel = connection.channel() channel.queue_declare(queue='hello') channel.basic_publish(exchange='', routing_key='hello', body='Hello World!') print " [x] Sent 'Hello World!'" connection.close() application = tornado.web.Application([ (r"/", MainHandler), ]) if __name__ == "__main__": application.listen(9999) tornado.ioloop.IOLoop.instance().start() |
接收端:receive.py
功能:从消息队列取出消息,代码如下
| import pika connection = pika.BlockingConnection(pika.ConnectionParameters( '127.0.0.1')) channel = connection.channel() channel.queue_declare(queue='hello') def callback(ch, method, properties, body): print " [x] Received %r" % (body,) channel.basic_consume(callback, queue='hello', no_ack=True) print ' [*] Waiting for messages. To exit press CTRL+C' channel.start_consuming() |
3.1开启rabbitmq,一定要开启

3.2启动tornado web服务
另开一个终端,启动web服务
![]()
3.3http访问
另开一个终端,发起http请求
![]()
3.4查看队列
发起http请求后,调用到helloword.py,往消息队列插入了一个消息,队列名字正如代码中所示为“hello”,到底是不是这样呢,我们可以看一下

3.5接收端接收消息

确实收到了发送的消息
四.远程链接rabbitmq
官网上面给的例子都是在本地使用系统默认的guest用户连接的。没有给出远程连接的例子,于是阅读文档发现:
| When the serverfirst starts running, and detects that its database is uninitialised or hasbeen deleted, it initialises a fresh database with the following resources: avirtual host named /a user named guest with a default password of guest, granted full access to the/ virtual host. |
也就是刚刚安装好rabbitmq-server,系统会自动创建一个名为“/”的virtual host,同时也会创建一个用户名和密码都是guest的用户,并且应用"/virtual host"的所有访问权限。因此在rabbitmq安装的机器上使用官网给出的例子是没有问题的,正如上面讲述的例子。如果要切换到远程机器访问的话,单纯的修改
| connection= pika.BlockingConnection(pika.ConnectionParameters('127.0.0.1')) |
"guest"user can only connect via localhostBy default, the guest user is prohibited from connecting to thebroker remotely; it can only connect over a > loopback interface (i.e.localhost). This applies both to AMQP and to any other protocols enabled viaplugins. Any > other users you create will not (by default) be restricted inthis way. This is configured via the loopback_users item in theconfiguration file. If you wish to allow the guest user to connect from a remotehost, you should set the loopback_users configuration item to []. A completerabbitmq.config which does this would look like: [{rabbit,[{loopback_users, []}]}]. |
默认情况下,使用下面的命令
| sudo rabbitmqctl environment |
会发现:
| {default_permissions,[<<".*">>,<<".*">>,<<".*">>]}, {default_user,<<"guest">>}, {default_user_tags,[administrator]}, {default_vhost,<<"/">>}, {loopback_users,[<<"guest">>]}, {tcp_listeners,[5672]}, |
远程链接不想使用guest用户,于是我创建了一个moqian.ydd用户,密码为root,然后授予所有权限,使用下面的命令
| Sudorabbitmqctl add_user rollen root Sudorabbitmqctl set_user_tags rollen administrator Sudorabbitmqctl set_permissions -p / rollen ".*"".*"".*" |
然后使用下面的代码,远程访问
| import pika creds=pika.PlainCredentials('moqian.ydd','root') parameters =pika.ConnectionParameters(host = '10.189.193.186', port = 5672 , credentials =creds) connection =pika.BlockingConnection(parameters) channel = connection.channel() channel.queue_declare(queue='hello') def callback(ch, method, properties,body): print " [x] Received %r" % (body,) channel.basic_consume(callback,queue='hello', no_ack=True) print ' [*] Waiting for messages. Toexit press CTRL+C' channel.start_consuming() |
| sudo python receive.py [x] Received 'Hello World!' [*] Waiting for messages. To exit press CTRL+C |
附录:
推荐几个不错的网站
http://www.tornadoweb.cn/documentation#overview
http://tengine.taobao.org/book/
http://demo.pythoner.com/itt2zh/index.html
http://www.rabbitmq.com/tutorials/tutorial-two-python.html
http://www.01happy.com/python-pika-rabbitmq-summary/
http://blog.csdn.net/historyasamirror/article/details/6827870
http://blog.sina.com.cn/s/blog_3f4791a60102vbpb.html