Android RecyclerView使用完全解析 体验艺术般的控件
概述
RecyclerView出现已经有一段时间了,相信大家肯定不陌生了,大家可以通过导入support-v7对其进行使用。
据官方的介绍,该控件用于在有限的窗口中展示大量数据集,其实这样功能的控件我们并不陌生,例如:ListView、GridView。
那么有了ListView、GridView为什么还需要RecyclerView这样的控件呢?整体上看RecyclerView架构,提供了一种插拔式的体验,高度的解耦,异常的灵活,通过设置它提供的不同LayoutManager,ItemDecoration , ItemAnimator实现令人瞠目的效果。
你想要控制其显示的方式,请通过布局管理器LayoutManager
你想要控制Item间的间隔(可绘制),请通过ItemDecoration
你想要控制Item增删的动画,请通过ItemAnimator
你想要控制点击、长按事件,请自己写(擦,这点尼玛。)
基本使用
鉴于我们对于ListView的使用特别的熟悉,对比下RecyclerView的使用代码:
|
1
2
|
mRecyclerView = findView(R.id.id_recyclerview);
//设置布局管理器mRecyclerView.setLayoutManager(layout);//设置adaptermRecyclerView.setAdapter(adapter)//设置Item增加、移除动画mRecyclerView.setItemAnimator(new DefaultItemAnimator());//添加分割线mRecyclerView.addItemDecoration(new DividerItemDecoration(
getActivity(), DividerItemDecoration.HORIZONTAL_LIST));
|
ok,相比较于ListView的代码,ListView可能只需要去设置一个adapter就能正常使用了。而RecyclerView基本需要上面一系列的步骤,那么为什么会添加这么多的步骤呢?
那么就必须解释下RecyclerView的这个名字了,从它类名上看,RecyclerView代表的意义是,我只管Recycler View,也就是说RecyclerView只管回收与复用View,其他的你可以自己去设置。可以看出其高度的解耦,给予你充分的定制自由(所以你才可以轻松的通过这个控件实现ListView,GirdView,瀑布流等效果)。
Just like ListView
·Activity
|
1
2
3
4
5
6
7
8
9
10
11
12
13
14
15
16
17
18
19
20
21
22
23
24
25
26
27
28
29
30
31
32
33
34
35
36
37
38
39
40
41
42
43
44
45
46
|
package
com.zhy.sample.demo_recyclerview;
import
java.util.ArrayList;
import
java.util.List;
import
android.os.Bundle;
import
android.support.v7.app.ActionBarActivity;
import
android.support.v7.widget.LinearLayoutManager;
import
android.support.v7.widget.RecyclerView;
import
android.support.v7.widget.RecyclerView.ViewHolder;
import
android.view.LayoutInflater;
import
android.view.View;
import
android.view.ViewGroup;
import
android.widget.TextView;
public
class
HomeActivity
extends
ActionBarActivity{
private
RecyclerView mRecyclerView;
private
List<String> mDatas;
private
HomeAdapter mAdapter;
@Override
protected
void
onCreate(Bundle savedInstanceState)
{
super
.onCreate(savedInstanceState);
setContentView(R.layout.activity_single_recyclerview);
initData();
mRecyclerView = (RecyclerView) findViewById(R.id.id_recyclerview);
mRecyclerView.setLayoutManager(
new
LinearLayoutManager(
this
));
mRecyclerView.setAdapter(mAdapter =
new
HomeAdapter());
}
protected
void
initData()
{
mDatas =
new
ArrayList<String>();
for
(
int
i =
'A'
; i <
'z'
; i++)
{
mDatas.add(
""
+ (
char
) i);
}
}
class
HomeAdapter
extends
RecyclerView.Adapter<HomeAdapter.MyViewHolder>
{
@Override
public
MyViewHolder onCreateViewHolder(ViewGroup parent,
int
viewType)
{
MyViewHolder holder =
new
MyViewHolder(LayoutInflater.from(
HomeActivity.
this
).inflate(R.layout.item_home, parent,
false
));
return
holder;
}
@Override
public
void
onBindViewHolder(MyViewHolder holder,
int
position)
{
holder.tv.setText(mDatas.get(position));
}
@Override
public
int
getItemCount()
{
return
mDatas.size();
}
class
MyViewHolder
extends
ViewHolder
{
TextView tv;
public
MyViewHolder(View view)
{
super
(view);
tv = (TextView) view.findViewById(R.id.id_num);
}
}
}
}
|
·Activity的布局文件
|
1
2
3
4
5
6
7
8
9
10
|
<RelativeLayout xmlns:android=
"http://schemas.android.com/apk/res/android"
xmlns:tools=
"http://schemas.android.com/tools"
android:layout_width=
"match_parent"
android:layout_height=
"match_parent"
>
<android.support.v7.widget.RecyclerView android:id=
"@+id/id_recyclerview"
android:divider=
"#ffff0000"
android:dividerHeight=
"10dp"
android:layout_width=
"match_parent"
android:layout_height=
"match_parent"
/></RelativeLayout>
|
·Item的布局文件
|
1
2
3
4
5
6
7
8
9
10
|
<?
xml
version
=
"1.0"
encoding
=
"utf-8"
?><
FrameLayout
xmlns:android
=
"http://schemas.android.com/apk/res/android"
android:layout_width
=
"match_parent"
android:background
=
"#44ff0000"
android:layout_height
=
"wrap_content"
>
<
TextView
android:id
=
"@+id/id_num"
android:layout_width
=
"match_parent"
android:layout_height
=
"50dp"
android:gravity
=
"center"
android:text
=
"1"
/></
FrameLayout
>
|
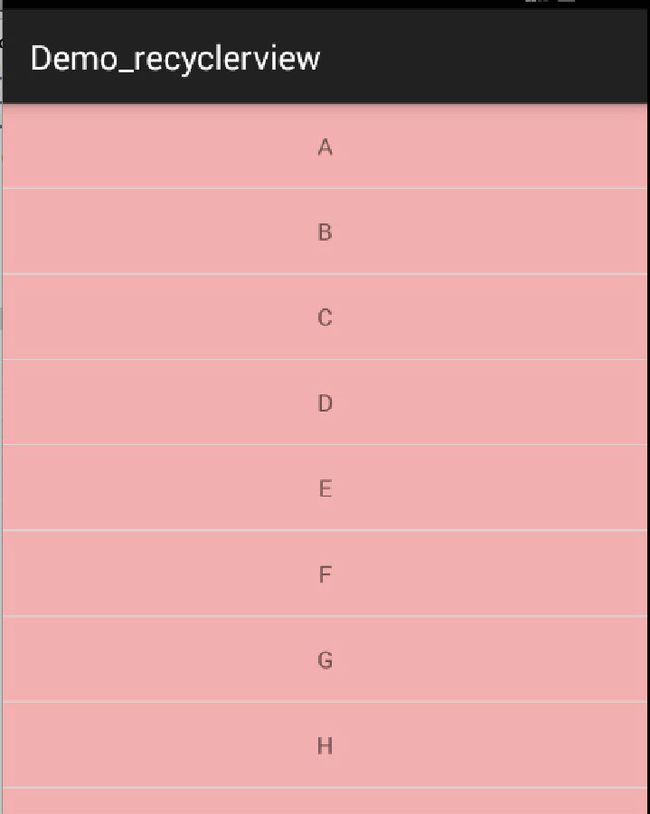
这么看起来用法与ListView的代码基本一致哈~~
看下效果图:

看起来好丑,Item间应该有个分割线,当你去找时,你会发现RecyclerView并没有支持divider这样的属性。那么怎么办,你可以给Item的布局去设置margin,当然了这种方式不够优雅,我们文章开始说了,我们可以自由的去定制它,当然我们的分割线也是可以定制的。
ItemDecoration
我们可以通过该方法添加分割线:
mRecyclerView.addItemDecoration()
该方法的参数为RecyclerView.ItemDecoration,该类为抽象类,官方目前并没有提供默认的实现类(我觉得最好能提供几个)。
该类的源码:
|
1
2
3
4
5
6
7
8
9
10
|
public
static
abstract
class
ItemDecoration {
public
void
onDraw(Canvas c, RecyclerView parent, State state) {
onDraw(c, parent);
}
public
void
onDrawOver(Canvas c, RecyclerView parent, State state) {
onDrawOver(c, parent);
}
public
void
getItemOffsets(Rect outRect, View view, RecyclerView parent, State state) {
getItemOffsets(outRect, ((LayoutParams) view.getLayoutParams()).getViewLayoutPosition(),
parent);
}
@Deprecatedpublic
void
getItemOffsets(Rect outRect,
int
itemPosition, RecyclerView parent) {
outRect.set(
0
,
0
,
0
,
0
);
}
|
当我们调用mRecyclerView.addItemDecoration()方法添加decoration的时候,RecyclerView在绘制的时候,去绘制decorator,即调用该类的onDraw和onDrawOver方法,
·onDraw方法先于drawChildren
·onDrawOver在drawChildren之后,一般我们选择复写其中一个即可。
·getItemOffsets 可以通过outRect.set()为每个Item设置一定的偏移量,主要用于绘制Decorator。
接下来我们看一个RecyclerView.ItemDecoration的实现类,该类很好的实现了RecyclerView添加分割线(当使用LayoutManager为LinearLayoutManager时)。
|
1
2
3
4
5
6
7
8
9
10
11
12
13
14
15
16
17
18
19
20
21
22
23
24
25
26
27
28
29
30
31
32
33
34
35
36
37
38
39
40
41
42
43
44
45
46
47
|
package
com.zhy.sample.demo_recyclerview;
/*
* Copyright (C) 2014 The Android Open Source Project
*
* Licensed under the Apache License, Version 2.0 (the "License");
* limitations under the License.
*/import android.content.Context;import android.content.res.TypedArray;import android.graphics.Canvas;import android.graphics.Rect;import android.graphics.drawable.Drawable;import android.support.v7.widget.LinearLayoutManager;import android.support.v7.widget.RecyclerView;import android.support.v7.widget.RecyclerView.State;import android.util.Log;import android.view.View;/**
* This class is from the v7 samples of the Android SDK. It's not by me!
* <p/>
* See the license above for details.
*/
public
class
DividerItemDecoration
extends
RecyclerView.ItemDecoration {
private
static
final
int
[] ATTRS =
new
int
[]{
android.R.attr.listDivider
};
public
static
final
int
HORIZONTAL_LIST = LinearLayoutManager.HORIZONTAL;
public
static
final
int
VERTICAL_LIST = LinearLayoutManager.VERTICAL;
private
Drawable mDivider;
private
int
mOrientation;
public
DividerItemDecoration(Context context,
int
orientation) {
final
TypedArray a = context.obtainStyledAttributes(ATTRS);
mDivider = a.getDrawable(
0
);
a.recycle();
setOrientation(orientation);
}
public
void
setOrientation(
int
orientation) {
if
(orientation != HORIZONTAL_LIST && orientation != VERTICAL_LIST) {
throw
new
IllegalArgumentException(
"invalid orientation"
);
}
mOrientation = orientation;
}
@Override
public
void
onDraw(Canvas c, RecyclerView parent) {
Log.v(
"recyclerview - itemdecoration"
,
"onDraw()"
);
if
(mOrientation == VERTICAL_LIST) {
drawVertical(c, parent);
}
else
{
drawHorizontal(c, parent);
}
}
public
void
drawVertical(Canvas c, RecyclerView parent) {
final
int
left = parent.getPaddingLeft();
final
int
right = parent.getWidth() - parent.getPaddingRight();
final
int
childCount = parent.getChildCount();
for
(
int
i =
0
; i < childCount; i++) {
final
View child = parent.getChildAt(i);
android.support.v7.widget.RecyclerView v =
new
android.support.v7.widget.RecyclerView(parent.getContext());
final
RecyclerView.LayoutParams params = (RecyclerView.LayoutParams) child
.getLayoutParams();
final
int
top = child.getBottom() + params.bottomMargin;
final
int
bottom = top + mDivider.getIntrinsicHeight();
mDivider.setBounds(left, top, right, bottom);
mDivider.draw(c);
}
}
public
void
drawHorizontal(Canvas c, RecyclerView parent) {
final
int
top = parent.getPaddingTop();
final
int
bottom = parent.getHeight() - parent.getPaddingBottom();
final
int
childCount = parent.getChildCount();
for
(
int
i =
0
; i < childCount; i++) {
final
View child = parent.getChildAt(i);
final
RecyclerView.LayoutParams params = (RecyclerView.LayoutParams) child
.getLayoutParams();
final
int
left = child.getRight() + params.rightMargin;
final
int
right = left + mDivider.getIntrinsicHeight();
mDivider.setBounds(left, top, right, bottom);
mDivider.draw(c);
}
}
@Override
public
void
getItemOffsets(Rect outRect,
int
itemPosition, RecyclerView parent) {
if
(mOrientation == VERTICAL_LIST) {
outRect.set(
0
,
0
,
0
, mDivider.getIntrinsicHeight());
}
else
{
outRect.set(
0
,
0
, mDivider.getIntrinsicWidth(),
0
);
}
}
}
|
该实现类可以看到通过读取系统主题中的 android.R.attr.listDivider作为Item间的分割线,并且支持横向和纵向。
获取到listDivider以后,该属性的值是个Drawable,在getItemOffsets中,outRect去设置了绘制的范围。onDraw中实现了真正的绘制。
我们在原来的代码中添加一句:
|
1
2
|
mRecyclerView.addItemDecoration(
new
DividerItemDecoration(
this
,
DividerItemDecoration.VERTICAL_LIST));
|
ok,现在再运行,就可以看到分割线的效果了。
该分割线是系统默认的,你可以在theme.xml中找到该属性的使用情况。那么,使用系统的listDivider有什么好处呢?就是方便我们去随意的改变,该属性我们可以直接声明在:
|
1
2
3
4
|
<!-- Application theme. -->
<
style
name
=
"AppTheme"
parent
=
"AppBaseTheme"
>
<
item
name
=
"android:listDivider"
>@drawable/divider_bg</
item
>
</
style
>
|
然后自己写个drawable即可,下面我们换一种分隔符:
|
1
2
3
4
5
6
7
8
9
10
11
12
|
<?
xml
version
=
"1.0"
encoding
=
"utf-8"
?>
<
shape
xmlns:android
=
"http://schemas.android.com/apk/res/android"
android:shape
=
"rectangle"
>
<
gradient
android:centerColor
=
"#ff00ff00"
android:endColor
=
"#ff0000ff"
android:startColor
=
"#ffff0000"
android:type
=
"linear"
/>
<
size
android:height
=
"4dp"
/>
</
shape
>
|
现在的样子是:

当然了,你可以根据自己的需求,去随意的绘制,反正是画出来的,随便玩~~
ok,看到这,你可能觉得,这玩意真尼玛麻烦,完全不能比拟的心爱的ListView。那么继续看。
LayoutManager
好了,上面实现了类似ListView样子的Demo,通过使用其默认的LinearLayoutManager。
RecyclerView.LayoutManager吧,这是一个抽象类,好在系统提供了3个实现类:
1、LinearLayoutManager 现行管理器,支持横向、纵向。
2、GridLayoutManager 网格布局管理器
3、StaggeredGridLayoutManager 瀑布就式布局管理器
上面我们已经初步体验了下LinearLayoutManager,接下来看GridLayoutManager。
·GridLayoutManager
我们尝试去实现类似GridView,秒秒钟的事情:
|
1
2
|
//mRecyclerView.setLayoutManager(new LinearLayoutManager(this));
mRecyclerView.setLayoutManager(
new
GridLayoutManager(
this
,
4
));
|
只需要修改LayoutManager即可,还是很nice的。
当然了,改为GridLayoutManager以后,对于分割线,前面的DividerItemDecoration就不适用了,主要是因为它在绘制的时候,比如水平线,针对每个child的取值为:
|
1
2
|
final
int
left = parent.getPaddingLeft();
final
int
right = parent.getWidth() - parent.getPaddingRight();
|
因为每个Item一行,这样是没问题的。而GridLayoutManager时,一行有多个childItem,这样就多次绘制了,并且GridLayoutManager时,Item如果为最后一列(则右边无间隔线)或者为最后一行(底部无分割线)。
针对上述,我们编写了DividerGridItemDecoration。
|
1
2
3
4
5
6
7
8
9
10
11
12
13
14
15
16
17
18
19
20
21
22
23
24
25
26
27
28
29
30
31
32
33
34
35
36
37
38
39
40
41
42
43
44
45
46
47
48
49
50
51
52
53
54
55
56
57
58
59
60
61
62
63
64
65
66
67
68
69
70
71
72
73
74
75
76
77
78
79
80
81
82
83
84
85
86
87
88
89
90
91
92
93
94
95
96
97
98
99
100
|
package
com.zhy.sample.demo_recyclerview;
import
android.content.Context;
import
android.content.res.TypedArray;
import
android.graphics.Canvas;
import
android.graphics.Rect;
import
android.graphics.drawable.Drawable;
import
android.support.v7.widget.GridLayoutManager;
import
android.support.v7.widget.RecyclerView;
import
android.support.v7.widget.RecyclerView.LayoutManager;
import
android.support.v7.widget.RecyclerView.State;
import
android.support.v7.widget.StaggeredGridLayoutManager;
import
android.view.View;
/**
*
* @author zhy
*
*/
public
class
DividerGridItemDecoration
extends
RecyclerView.ItemDecoration{
private
static
final
int
[] ATTRS =
new
int
[] { android.R.attr.listDivider };
private
Drawable mDivider;
public
DividerGridItemDecoration(Context context)
{
final
TypedArray a = context.obtainStyledAttributes(ATTRS);
mDivider = a.getDrawable(
0
);
a.recycle();
}
@Override
public
void
onDraw(Canvas c, RecyclerView parent, State state)
{
drawHorizontal(c, parent);
drawVertical(c, parent);
}
private
int
getSpanCount(RecyclerView parent)
{
// 列数
int
spanCount = -
1
;
LayoutManager layoutManager = parent.getLayoutManager();
if
(layoutManager
instanceof
GridLayoutManager)
{
spanCount = ((GridLayoutManager) layoutManager).getSpanCount();
}
else
if
(layoutManager
instanceof
StaggeredGridLayoutManager)
{
spanCount = ((StaggeredGridLayoutManager) layoutManager)
.getSpanCount();
}
return
spanCount;
}
public
void
drawHorizontal(Canvas c, RecyclerView parent)
{
int
childCount = parent.getChildCount();
for
(
int
i =
0
; i < childCount; i++)
{
final
View child = parent.getChildAt(i);
final
RecyclerView.LayoutParams params = (RecyclerView.LayoutParams) child
.getLayoutParams();
final
int
left = child.getLeft() - params.leftMargin;
final
int
right = child.getRight() + params.rightMargin
+ mDivider.getIntrinsicWidth();
final
int
top = child.getBottom() + params.bottomMargin;
final
int
bottom = top + mDivider.getIntrinsicHeight();
mDivider.setBounds(left, top, right, bottom);
mDivider.draw(c);
}
}
public
void
drawVertical(Canvas c, RecyclerView parent)
{
final
int
childCount = parent.getChildCount();
for
(
int
i =
0
; i < childCount; i++)
{
final
View child = parent.getChildAt(i);
final
RecyclerView.LayoutParams params = (RecyclerView.LayoutParams) child
.getLayoutParams();
final
int
top = child.getTop() - params.topMargin;
final
int
bottom = child.getBottom() + params.bottomMargin;
final
int
left = child.getRight() + params.rightMargin;
final
int
right = left + mDivider.getIntrinsicWidth();
mDivider.setBounds(left, top, right, bottom);
mDivider.draw(c);
}
}
private
boolean
isLastColum(RecyclerView parent,
int
pos,
int
spanCount,
int
childCount)
{
LayoutManager layoutManager = parent.getLayoutManager();
if
(layoutManager
instanceof
GridLayoutManager)
{
if
((pos +
1
) % spanCount ==
0
)
// 如果是最后一列,则不需要绘制右边
{
return
true
;
}
}
else
if
(layoutManager
instanceof
StaggeredGridLayoutManager)
{
int
orientation = ((StaggeredGridLayoutManager) layoutManager)
.getOrientation();
if
(orientation == StaggeredGridLayoutManager.VERTICAL)
{
if
((pos +
1
) % spanCount ==
0
)
// 如果是最后一列,则不需要绘制右边
{
return
true
;
}
}
else
{
childCount = childCount - childCount % spanCount;
if
(pos >= childCount)
// 如果是最后一列,则不需要绘制右边
return
true
;
}
}
return
false
;
}
private
boolean
isLastRaw(RecyclerView parent,
int
pos,
int
spanCount,
int
childCount)
{
LayoutManager layoutManager = parent.getLayoutManager();
if
(layoutManager
instanceof
GridLayoutManager)
{
childCount = childCount - childCount % spanCount;
if
(pos >= childCount)
// 如果是最后一行,则不需要绘制底部
return
true
;
}
else
if
(layoutManager
instanceof
StaggeredGridLayoutManager)
{
int
orientation = ((StaggeredGridLayoutManager) layoutManager)
.getOrientation();
// StaggeredGridLayoutManager 且纵向滚动
if
(orientation == StaggeredGridLayoutManager.VERTICAL)
{
childCount = childCount - childCount % spanCount;
// 如果是最后一行,则不需要绘制底部
if
(pos >= childCount)
return
true
;
}
else
// StaggeredGridLayoutManager 且横向滚动
{
// 如果是最后一行,则不需要绘制底部
if
((pos +
1
) % spanCount ==
0
)
{
return
true
;
}
}
}
return
false
;
}
@Override
public
void
getItemOffsets(Rect outRect,
int
itemPosition,
RecyclerView parent)
{
int
spanCount = getSpanCount(parent);
int
childCount = parent.getAdapter().getItemCount();
if
(isLastRaw(parent, itemPosition, spanCount, childCount))
// 如果是最后一行,则不需要绘制底部
{
outRect.set(
0
,
0
, mDivider.getIntrinsicWidth(),
0
);
}
else
if
(isLastColum(parent, itemPosition, spanCount, childCount))
|