iOS自定义UIAlertView的小tips
系统的UIAlertView(iOS9废弃变为UIAlertController)虽然简洁方便,但是有些环境不适用。
比如游戏啊,动漫类APP和恋爱类APP。都需要一些萌系的或者好看得UIAlertView。
这时候我们该怎么办呢?
这里有一个小tip教给大家。
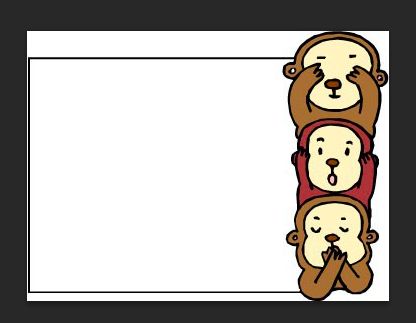
先到百度图片 搜索“背景框素材” 会出现一大堆的图片素材供你使用。
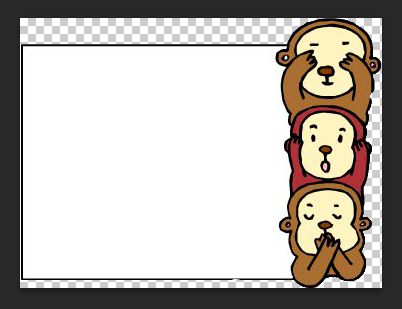
我选择了一张 经过处理之后变成后面这种样子。
找好素材之后完事具备 只欠东风了
我们的思路是 建一个UIWindow 然后再window上加UIView UIImageView UILabel UIButton等控件
上代码
#import "ViewController.h"

@interface ViewController ()
@property (nonatomic,strong) UIWindow *window;
@end

@implementation ViewController

- (void)viewDidLoad {
    [super viewDidLoad];
    UIButton *btn = [UIButton buttonWithType:(UIButtonTypeRoundedRect)];
    btn.frame = CGRectMake(100, 100, 100, 100);
    [btn setTitle:@"点我" forState:(UIControlStateNormal)];
    [self.view addSubview:btn];
    [btn addTarget:self action:@selector(TanchuAction) forControlEvents:(UIControlEventTouchUpInside)];
    // Do any additional setup after loading the view, typically from a nib.
}
- (void)TanchuAction
{
//新建一个UIWindow
    self.window = [[UIWindow alloc]initWithFrame:[UIScreen mainScreen].bounds];
    [_window makeKeyAndVisible];

    UIView *view = [[UIView alloc]initWithFrame:CGRectMake(0, 0, self.view.frame.size.width - 50, self.view.frame.size.width/2)];
    view.center = _window.center;
    view.backgroundColor = [UIColor clearColor];
    view.layer.cornerRadius = 5;
    view.layer.masksToBounds = YES;
    [_window addSubview:view];

    UIImageView *imgView = [[UIImageView alloc]initWithFrame:view.bounds];
    imgView.image = [UIImage imageNamed:@"1"];
    imgView.userInteractionEnabled = YES;
    [view addSubview:imgView];

    UILabel *label = [[UILabel alloc]initWithFrame:CGRectMake(10, 20, imgView.frame.size.width-10, 30)];
    label.text = @"温馨提示";
    label.textAlignment = NSTextAlignmentCenter;
    [imgView addSubview:label];

    UILabel *label1 = [[UILabel alloc]initWithFrame:CGRectMake(60, 50, imgView.frame.size.width-150, 90)];
    label1.text = @"  确定要退出游戏吗?(退出后游戏进度不予保存)";
    label1.numberOfLines = 0;
    [imgView addSubview:label1];

    UIButton *btn1 = [UIButton buttonWithType:(UIButtonTypeCustom)];
    btn1.frame = CGRectMake(60, 140, 60, 30);
    [btn1 setTitle:@"确定" forState:(UIControlStateNormal)];
    [imgView addSubview:btn1];
    [btn1 addTarget:self action:@selector(queding) forControlEvents:(UIControlEventTouchUpInside)];
    btn1.backgroundColor = [UIColor brownColor];
    btn1.titleLabel.tintColor = [UIColor whiteColor];


    UIButton *btn2 = [UIButton buttonWithType:(UIButtonTypeCustom)];
    btn2.frame = CGRectMake(imgView.frame.size.width-160, 140, 60, 30);
    [btn2 setTitle:@"取消" forState:(UIControlStateNormal)];
    [imgView addSubview:btn2];
    [btn2 addTarget:self action:@selector(qvxiao) forControlEvents:(UIControlEventTouchUpInside)];
    btn2.backgroundColor = [UIColor brownColor];
    btn2.titleLabel.tintColor = [UIColor whiteColor];


    [self.view addSubview:_window];
}
- (void)queding
{
    NSLog(@"确定");
    self.window.hidden = YES;
}
- (void)qvxiao
{
    NSLog(@"取消");
    self.window.hidden = YES;
}
- (void)didReceiveMemoryWarning {
    [super didReceiveMemoryWarning];
    // Dispose of any resources that can be recreated.
}

@end
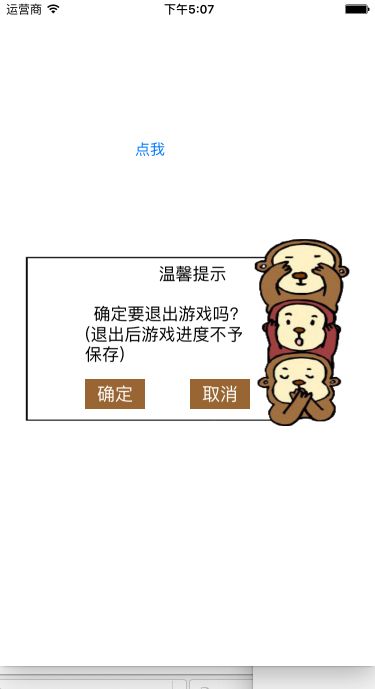
效果如下
这个不仅可以做UIAlertView 还可以做很多东西 比如说自定义的UIActivityIndicatorView
只有你想不到的,没有它做不到的~
毕竟是自己写的,可能会有错误,还请读者指正,谢谢。


