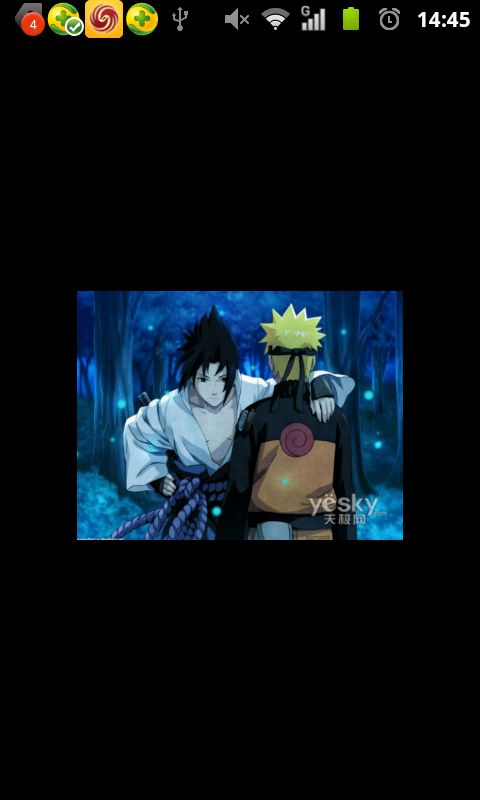
android 自定义ImageView实现图片手势滑动,多点触摸放大缩小效果
实现原理:自定义ImageView对此控件进行相应的layout(动态布局).
这里你要明白几个方法执行的流程: 首先ImageView是继承自View的子类.
onLayout方法:是一个回调方法.该方法会在在View中的layout方法中执行,在执行layout方法前面会首先执行setFrame方法.
setFrame方法:判断我们的View是否发生变化,如果发生变化,那么将最新的l,t,r,b传递给View,然后刷新进行动态更新UI. 并且返回ture.没有变化返回false.
在介绍自定义控件之前,我们先要明白我们要获取哪些数据:屏幕的宽度,屏幕的高度.(这里其实你也可以对LinerLayout进行ViewTreeObserver监听获取其宽高度.),原始图片本身的宽度及高度.以及我们缩放的最大最小值.
首先我们要重写setImageBitmap方法.作用:获取图片的宽高,求出缩放极限值.
- /***
- * 设置显示图片
- */
- @Override
- public void setImageBitmap(Bitmap bm) {
- super.setImageBitmap(bm);
- /** 获取图片宽高 **/
- bitmap_W = bm.getWidth();
- bitmap_H = bm.getHeight();
- MAX_W = bitmap_W * 3;
- MAX_H = bitmap_H * 3;
- MIN_W = bitmap_W / 2;
- MIN_H = bitmap_H / 2;
- }
接着我们在onLayout方法中我们获取最初的l,t,r,b.
- @Override
- protected void onLayout(boolean changed, int left, int top, int right,
- int bottom) {
- super.onLayout(changed, left, top, right, bottom);
- if (start_Top == -1) {
- start_Top = top;
- start_Left = left;
- start_Bottom = bottom;
- start_Right = right;
- }
- }
下面我们说下重点Touch方法.其实原来大家都明白,要说难的话估计就是逻辑实现了.
说之前大家要明白单点与多点的区别:
单手指操作:ACTION_DOWN---ACTION_MOVE----ACTION_UP
多手指操作:ACTION_DOWN---ACTION_POINTER_DOWN---ACTION_MOVE--ACTION_POINTER_UP---ACTION_UP.
上面只是简单说下流程,详细请大家自行研究,这里只是讲解如果运用.
- /***
- * touch 事件
- */
- @Override
- public boolean onTouchEvent(MotionEvent event) {
- /** 处理单点、多点触摸 **/
- switch (event.getAction() & MotionEvent.ACTION_MASK) {
- case MotionEvent.ACTION_DOWN:
- onTouchDown(event);
- break;
- // 多点触摸
- case MotionEvent.ACTION_POINTER_DOWN:
- onPointerDown(event);
- break;
- case MotionEvent.ACTION_MOVE:
- onTouchMove(event);
- break;
- case MotionEvent.ACTION_UP:
- mode = MODE.NONE;
- break;
- // 多点松开
- case MotionEvent.ACTION_POINTER_UP:
- mode = MODE.NONE;
- /** 执行缩放还原 **/
- if (isScaleAnim) {
- doScaleAnim();
- }
- break;
- }
- return true;
- }
下面我们一个一个方法的看:
onTouchDown:获取手指点击时候的起始坐标.
- /** 按下 **/
- void onTouchDown(MotionEvent event) {
- mode = MODE.DRAG;
- current_x = (int) event.getRawX();
- current_y = (int) event.getRawY();
- start_x = (int) event.getX();
- start_y = current_y - this.getTop();
- }
onPointerDown:两手指之间的距离.
- /** 两个手指 只能放大缩小 **/
- void onPointerDown(MotionEvent event) {
- if (event.getPointerCount() == 2) {
- mode = MODE.ZOOM;
- beforeLenght = getDistance(event);// 获取两点的距离
- }
- }
- /** 移动的处理 **/
- void onTouchMove(MotionEvent event) {
- int left = 0, top = 0, right = 0, bottom = 0;
- /** 处理拖动 **/
- if (mode == MODE.DRAG) {
- /** 在这里要进行判断处理,防止在drag时候越界 **/
- /** 获取相应的l,t,r ,b **/
- left = current_x - start_x;
- right = current_x + this.getWidth() - start_x;
- top = current_y - start_y;
- bottom = current_y - start_y + this.getHeight();
- /** 水平进行判断 **/
- if (isControl_H) {
- if (left >= 0) {
- left = 0;
- right = this.getWidth();
- }
- if (right <= screen_W) {
- left = screen_W - this.getWidth();
- right = screen_W;
- }
- } else {
- left = this.getLeft();
- right = this.getRight();
- }
- /** 垂直判断 **/
- if (isControl_V) {
- if (top >= 0) {
- top = 0;
- bottom = this.getHeight();
- }
- if (bottom <= screen_H) {
- top = screen_H - this.getHeight();
- bottom = screen_H;
- }
- } else {
- top = this.getTop();
- bottom = this.getBottom();
- }
- if (isControl_H || isControl_V)
- this.setPosition(left, top, right, bottom);
- current_x = (int) event.getRawX();
- current_y = (int) event.getRawY();
- }
- /** 处理缩放 **/
- else if (mode == MODE.ZOOM) {
- afterLenght = getDistance(event);// 获取两点的距离
- float gapLenght = afterLenght - beforeLenght;// 变化的长度
- if (Math.abs(gapLenght) > 5f) {
- scale_temp = afterLenght / beforeLenght;// 求的缩放的比例
- this.setScale(scale_temp);
- beforeLenght = afterLenght;
- }
- }
- }
下面我们看下缩放处理,因为考虑到越界与否.
setScale方法:
- /** 处理缩放 **/
- void setScale(float scale) {
- int disX = (int) (this.getWidth() * Math.abs(1 - scale)) / 4;// 获取缩放水平距离
- int disY = (int) (this.getHeight() * Math.abs(1 - scale)) / 4;// 获取缩放垂直距离
- // 放大
- if (scale > 1 && this.getWidth() <= MAX_W) {
- current_Left = this.getLeft() - disX;
- current_Top = this.getTop() - disY;
- current_Right = this.getRight() + disX;
- current_Bottom = this.getBottom() + disY;
- this.setFrame(current_Left, current_Top, current_Right,
- current_Bottom);
- /***
- * 此时因为考虑到对称,所以只做一遍判断就可以了。
- */
- if (current_Top <= 0 && current_Bottom >= screen_H) {
- Log.e("jj", "屏幕高度=" + this.getHeight());
- isControl_V = true;// 开启垂直监控
- } else {
- isControl_V = false;
- }
- if (current_Left <= 0 && current_Right >= screen_W) {
- isControl_H = true;// 开启水平监控
- } else {
- isControl_H = false;
- }
- }
- // 缩小
- else if (scale < 1 && this.getWidth() >= MIN_W) {
- current_Left = this.getLeft() + disX;
- current_Top = this.getTop() + disY;
- current_Right = this.getRight() - disX;
- current_Bottom = this.getBottom() - disY;
- /***
- * 在这里要进行缩放处理
- */
- // 上边越界
- if (isControl_V && current_Top > 0) {
- current_Top = 0;
- current_Bottom = this.getBottom() - 2 * disY;
- if (current_Bottom < screen_H) {
- current_Bottom = screen_H;
- isControl_V = false;// 关闭垂直监听
- }
- }
- // 下边越界
- if (isControl_V && current_Bottom < screen_H) {
- current_Bottom = screen_H;
- current_Top = this.getTop() + 2 * disY;
- if (current_Top > 0) {
- current_Top = 0;
- isControl_V = false;// 关闭垂直监听
- }
- }
- // 左边越界
- if (isControl_H && current_Left >= 0) {
- current_Left = 0;
- current_Right = this.getRight() - 2 * disX;
- if (current_Right <= screen_W) {
- current_Right = screen_W;
- isControl_H = false;// 关闭
- }
- }
- // 右边越界
- if (isControl_H && current_Right <= screen_W) {
- current_Right = screen_W;
- current_Left = this.getLeft() + 2 * disX;
- if (current_Left >= 0) {
- current_Left = 0;
- isControl_H = false;// 关闭
- }
- }
- if (isControl_H || isControl_V) {
- this.setFrame(current_Left, current_Top, current_Right,
- current_Bottom);
- } else {
- this.setFrame(current_Left, current_Top, current_Right,
- current_Bottom);
- isScaleAnim = true;// 开启缩放动画
- }
- }
- }
接下来我们看下缩小,这个相对复杂了一点。首先我们要考虑到放大后的托移,这样的话我们在进行缩小的时候肯定l,t,r,b她们不会同时缩到屏幕边界,因此此时就要进行处理,如果一方先缩到屏幕边界的话,那么你就停下来等等你的对面(记住此时你对面缩放的速率是原来的2倍,不然图片会变形的.大家自己想想看是不是),等到你对面也缩到屏幕边界的话,此时要关闭监听.然后你们两个在一起缩.原理就是这样.
不太明白的话,大家可以看上诉代码,我相信大家都看的明白.
最后我们还要实现缩放回缩效果(比较人性化.)
刚开始我想到了ScaleAnimation,可是实现一半问题出现了,我回缩动画完毕后她又自动回到最初大小,也许你会说你少加了setFillAfter(true); 可是加了后会出现诡异现象:又会重新覆盖一层,原因不明,大家可以试试看.既然API给的动画实现不了,那我就自己做吧.下面看具体实现.
MyAsyncTask异步类.
- /***
- * 回缩动画執行
- */
- class MyAsyncTask extends AsyncTask<Void, Integer, Void> {
- private int screen_W, current_Width, current_Height;
- private int left, top, right, bottom;
- private float scale_WH;// 宽高的比例
- /** 当前的位置属性 **/
- public void setLTRB(int left, int top, int right, int bottom) {
- this.left = left;
- this.top = top;
- this.right = right;
- this.bottom = bottom;
- }
- private float STEP = 5f;// 步伐
- private float step_H, step_V;// 水平步伐,垂直步伐
- public MyAsyncTask(int screen_W, int current_Width, int current_Height) {
- super();
- this.screen_W = screen_W;
- this.current_Width = current_Width;
- this.current_Height = current_Height;
- scale_WH = (float) current_Height / current_Width;
- step_H = STEP;
- step_V = scale_WH * STEP;
- }
- @Override
- protected Void doInBackground(Void... params) {
- while (current_Width <= screen_W) {
- left -= step_H;
- top -= step_V;
- right += step_H;
- bottom += step_V;
- current_Width += 2 * step_H;
- left = Math.max(left, start_Left);
- top = Math.max(top, start_Top);
- right = Math.min(right, start_Right);
- bottom = Math.min(bottom, start_Bottom);
- onProgressUpdate(new Integer[] { left, top, right, bottom });
- try {
- Thread.sleep(10);
- } catch (InterruptedException e) {
- e.printStackTrace();
- }
- }
- return null;
- }
- @Override
- protected void onProgressUpdate(final Integer... values) {
- super.onProgressUpdate(values);
- mActivity.runOnUiThread(new Runnable() {
- @Override
- public void run() {
- setFrame(values[0], values[1], values[2], values[3]);
- }
- });
- }
- }
最后我们看下布局,调用也相当简单,也有助于我们添加辅助UI,千万不要忘记写 android:scaleType="fitXY"这句话,不然有时候会出现诡异现象.
- <?xml version="1.0" encoding="utf-8"?>
- <LinearLayout xmlns:android="http://schemas.android.com/apk/res/android"
- android:layout_width="fill_parent"
- android:layout_height="fill_parent"
- android:gravity="center" >
- <com.jj.drag.DragImageView
- android:id="@+id/div_main"
- android:layout_width="wrap_content"
- android:layout_height="wrap_content"
- android:scaleType="fitXY"
- />
- </LinearLayout>
在Acitivity中调用:
- /** 测量状态栏高度 **/
- viewTreeObserver = dragImageView.getViewTreeObserver();
- viewTreeObserver
- .addOnGlobalLayoutListener(new OnGlobalLayoutListener() {
- @Override
- public void onGlobalLayout() {
- if (state_height == 0) {
- // 获取状况栏高度
- Rect frame = new Rect();
- getWindow().getDecorView()
- .getWindowVisibleDisplayFrame(frame);
- state_height = frame.top;
- dragImageView.setScreen_H(window_height-state_height);
- dragImageView.setScreen_W(window_width);
- }
- }
- });
以上就是全部实现.最后我们看下实现的效果吧.
原图大小 放大后拖拽到左上角 缩小后(松开会回缩) (长大于宽的图片)
感觉运行的效果还行,和腾讯新浪的差不多.至于辅助UI元素,大家可以自行修改添加,这里我只是把这种形式的实现献给大家.


