ON_COMMAND_RANGE 使用
在resource.h中自己编写好ID顺序
依次按顺序排列
#define ID_BTN_POLYLINE 32801
#define ID_BTN_RECTANGE 32802
#define ID_BTN_POLYGON 32803
#define ID_BTN_CIRCLE 32804
#define ID_BTN_ARC 32805
若是采用Office2007界面,也要修改 ribbon.mfcribbon-ms 文件中的ID号
如下:
#define ID_BTN_ARC 32805
<ID>
<NAME>ID_BTN_ARC</NAME>
<VALUE>32805</VALUE>
</ID>
我们在这段ID前后分别加入 ID_DRAW_RANGE_BEGIN 与 ID_DRAW_RANGE_END,用于界定ID
#define ID_DRAW_RANGE_BEGIN 32800
#define ID_BTN_POLYLINE 32801
#define ID_BTN_RECTANGE 32802
#define ID_BTN_POLYGON 32803
#define ID_BTN_CIRCLE 32804
#define ID_BTN_ARC 32805
#define ID_DRAW_RANGE_END 32806
编写消息映射
.h
afx_msg void OnCmdRangDraw(UINT nType);
.cpp
ON_COMMAND_RANGE(ID_DRAW_RANGE_BEGIN, ID_DRAW_RANGE_END, OnCmdRangDraw)
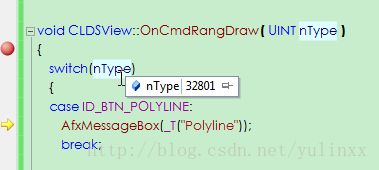
void CLDSView::OnCmdRangDraw( UINT nType )
{
}
注意: 若单个按钮本身进行了消息映射
如:
ON_COMMAND(ID_BTN_POLYLINE, OnBtnDrawPolyLine)
则此按钮只会进入上面的消息响应,OnBtnDrawPolyLine而不会进入 OnCmdRangDraw
消息实现
同理,对应的更新消息为:
afx_msg void OnUpdateRangDraw(CCmdUI *pCmdUI);
ON_UPDATE_COMMAND_UI_RANGE(ID_DRAW_RANGE_BEGIN, ID_DRAW_RANGE_END, OnUpdateRangDraw)
void CLDSView::OnUpdateRangDraw( CCmdUI *pCmdUI )
{
}
-------------
void CLDSView::OnUpdateRangDraw( CCmdUI *pCmdUI )
{
switch(pCmdUI->m_nID)
{
case ID_BTN_POLYLINE:
pCmdUI->SetCheck(eMouse==DRAW_POLYLINE?1:0);
break;
case ID_BTN_RECTANGE:
pCmdUI->SetCheck(eMouse==DRAW_RECTANGE?1:0);
break;
case ID_BTN_POLYGON:
pCmdUI->SetCheck(eMouse==DRAW_POLYGON?1:0);
break;
case ID_BTN_CIRCLE:
pCmdUI->SetCheck(eMouse==DRAW_CIRCLE?1:0);
break;
case ID_BTN_ARC:
pCmdUI->SetCheck(eMouse==DRAW_ARC?1:0);
break;
}
}
可实现某个按钮点击的按下状态...
利用 ON_COMMAND_RANGE 的好处就是:
当要实现同类的消息进行太多,用ON_COMMAND_RANGE可以将代码简化压缩
