Flex中给对象加阴影的方法
转:http://qujianfeng.iteye.com/blog/1277048
Flex中给对象加阴影的方法
1、 BorderContainer、Panel等容器自带阴影
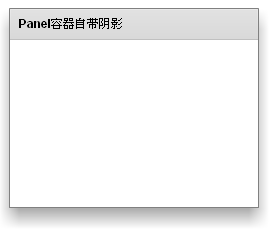
BorderContainer或者Panel等容器自带了阴影,这通过dropShadowVisible样式设定,此样式如果设为true,则显示阴影。BorderContainer的dropShadowVisible默认为false,Panel 的默认为true。
Panel的阴影效果如下:
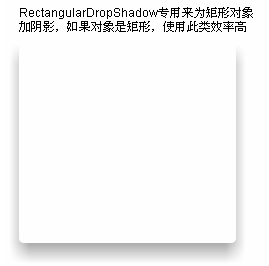
2、 RectangularDropShadow专用来为矩形对象加阴影,如果对象是矩形,使用此类效率高
可以在程序中直接使用RectangularDropShadow为对象加阴影,但仅适用于对象外形是矩形的条件下。示例如下:
<s:Group x="302" y="62" width="217" height="200">
<s:RectangularDropShadow blurX="20" blurY="20"
alpha="0.32" distance="11"
blRadius="5" brRadius="5"
angle="90" color="#000000" left="0" top="0" right="0"
bottom="0"/>
</s:Group>
效果如下:
3、 SkinnableContainer可以通过皮肤加阴影
可以为SkinnableContainer建一个皮肤类,在类中设置阴影,代码如下:
<s:SkinnableContainer x="575" y="62" width="200" height="200"
skinClass="MySkinableContainerWithShadowSkin">
</s:SkinnableContainer>
皮肤中的阴影程序为:
<!-- 通过RectangularDropShadow加阴影 -->
<s:RectangularDropShadow id="dropShadow" blurX="20" blurY="20" alpha="0.32" distance="11"
blRadius="5" brRadius="5"
angle="90" color="#000000" left="0" top="0" right="0"
bottom="0"/>
这样的好处是阴影将不响应该对象的鼠标事件。
4、 如果对象外形不是矩形,就要使用DropShadowFilter滤镜
示例:
首先是滤镜的定义:
<fx:Declarations>
<!-- 将非可视元素(例如服务、值对象)放在此处 -->
<fx:Array id="myFilters">
<s:DropShadowFilter alpha="0.32"
distance="11"
blurX="20" blurY="20"
angle="90" color="#000000"
>
</s:DropShadowFilter>
</fx:Array>
</fx:Declarations>
<s:Group x="297" y="339">
<!--下面是要显示阴影的组件:à
<s:Path data="M 195.307 95.719 C 195.307 103.702 206.101 113.422 204.132 120.785 C 202.096 128.404 204.87 141.279 201.011 147.949 C 197.097 154.715 171.372 145.538 165.881 151.029 C 160.39 156.52 158.618 163.32 151.852 167.234 C 145.182 171.093 146.125 197.982 138.507 200.019 C 131.145 201.986 118.555 196.832 110.571 196.832 C 102.588 196.832 88.935 205.962 81.572 203.993 C 73.954 201.957 63.453 192.709 56.783 188.851 C 50.017 184.936 47.379 169.893 41.888 164.401 C 36.397 158.911 56.453 135.965 52.538 129.199 C 48.679 122.529 40.694 122.617 38.658 114.999 C 36.69 107.636 0 103.702 0 95.719 C 0 87.736 10.102 76.695 12.07 69.332 C 14.106 61.714 27.476 56.64 31.334 49.97 C 35.249 43.204 53.419 49.549 58.91 44.058 C 64.401 38.567 53.156 11.925 59.923 8.01 C 66.593 4.151 77.68 3.416 85.298 1.38 C 92.661 -0.588 102.588 0.133 110.571 0.133 C 118.555 0.133 123.642 17.522 131.005 19.489 C 138.624 21.526 143.709 22.891 150.379 26.751 C 157.145 30.665 166.349 28.961 171.839 34.452 C 177.331 39.943 169.701 52.574 173.615 59.34 C 177.475 66.01 187.039 67.06 189.075 74.678 C 191.044 82.041 195.307 87.736 195.307 95.719 Z"
winding="nonZero" x="0.929" y="0.781"
filters="{myFilters}" width="175.40123" height="172.30193">
<s:stroke>
<s:SolidColorStroke caps="none" color="#5380D0" joints="miter" miterLimit="4" weight="1"/>
</s:stroke>
<s:fill>
<s:SolidColor color="#FFFFFF"/>
</s:fill>
</s:Path>
</s:Group>
此代码通过Path定义了一个不规则区域,通过DropShadowFilter滤镜添加了阴影。
效果如下:
总结:
总结起来就是两个东西,一个是RectangularDropShadow,一个是DropShadowFilter。RectangularDropShadow为矩形对象添加阴影,DropShadowFilter可以为任意形状对象添加阴影。
BorderContainer和Panel等容器使用的就是RectangularDropShadow。
Flex 为图片添加阴影
<mx:Image source="@Embed('assets/kalision.jpg')" width="445" height="329">
< mx:filters>
< mx:DropShadowFilter blurX="4.00" blurY="4.00"/>
< /mx:filters>
< /mx:Image>
怎样让图片内外侧都能显示出阴影来
<mx:Image x="45" width="50" height="50" id="logo">
< mx:filters>
< mx:DropShadowFilter blurX="11.89" blurY="12.58" angle="156.77" alpha="1.00" distance="0.00" quality="1" strength="1.32"/>
< /mx:filters>
< /mx:Image>


