用Phaser实现Flappy Bird 游戏
How to Make a Flappy Bird in HTML5 With Phaser - Part 1
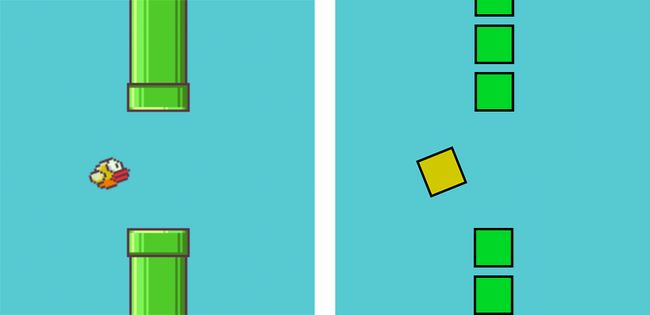
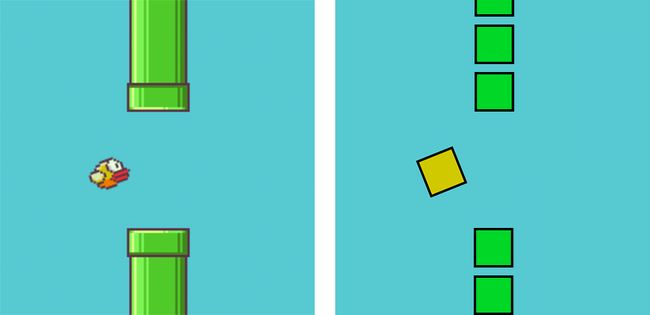
Flappy Bird is a nice little game with easy to understand mechanics, and I thought it would be a perfect fit for an HTML5 game tutorial for beginners. We are going to make a simplified version of Flappy Bird in only 65 lines of Javascript with the Phaser framework.
If you want to play the game we are going to build, click here. You need to press the spacebar or tap on the game to jump.
Set Up
To start this tutorial you should download this empty template that I made. In it you will find:
- phaser.min.js, the Phaser framework v2.4.3.
- index.html, where the game will be displayed.
- main.js, a file where we will write all our code.
- assets/, a directory with 2 images and one sound effect.
Empty Project
The first thing we are going to do is to build an empty project.
Open the index.html file and add this code.
<!DOCTYPE html> <html> <head> <meta charset="utf-8" /> <title> Flappy Bird Clone </title> <script type="text/javascript" src="phaser.min.js"></script> <script type="text/javascript" src="main.js"></script> </head> <body> </body> </html> It will simply load our 2 Javascript files.
In the main.js file we add this to create an empty Phaser game.
// Create our 'main' state that will contain the game var mainState = { preload: function() { // This function will be executed at the beginning // That's where we load the images and sounds }, create: function() { // This function is called after the preload function // Here we set up the game, display sprites, etc. }, update: function() { // This function is called 60 times per second // It contains the game's logic }, }; // Initialize Phaser, and create a 400px by 490px game var game = new Phaser.Game(400, 490); // Add and start the 'main' state to start the game game.state.add('main', mainState, true); All we have to do to make a game with Phaser is to fill the preload(),create() and update() functions.
The Bird
Let's first focus on adding a bird to the game that will jump when we press the spacebar key.
Everything is quite simple and well commented, so you should be able to understand the code below. For better readability I removed the Phaser initialization and states management code that you can see above.
First we update the preload(), create() and update() functions.
preload: function() { // Load the bird sprite game.load.image('bird', 'assets/bird.png'); }, create: function() { // Change the background color of the game to blue game.stage.backgroundColor = '#71c5cf'; // Set the physics system game.physics.startSystem(Phaser.Physics.ARCADE); // Display the bird at the position x=100 and y=245 this.bird = game.add.sprite(100, 245, 'bird'); // Add physics to the bird // Needed for: movements, gravity, collisions, etc. game.physics.arcade.enable(this.bird); // Add gravity to the bird to make it fall this.bird.body.gravity.y = 1000; // Call the 'jump' function when the spacekey is hit var spaceKey = game.input.keyboard.addKey( Phaser.Keyboard.SPACEBAR); spaceKey.onDown.add(this.jump, this); }, update: function() { // If the bird is out of the screen (too high or too low) // Call the 'restartGame' function if (this.bird.y < 0 || this.bird.y > 490) this.restartGame(); },And just below this code we add these two new functions.
// Make the bird jump jump: function() { // Add a vertical velocity to the bird this.bird.body.velocity.y = -350; }, // Restart the game restartGame: function() { // Start the 'main' state, which restarts the game game.state.start('main'); },Testing
Running a Phaser game directly in a browser doesn't work, that's because Javascript is not allowed to load files from your local file system. To solve that we will have to use a webserver to play and test our game.
There are a lot of ways to set up a local webserver on a computer and we are going to quickly cover 3 below.
- Use Brackets. Open the directory containing the game in the Brackets editor and click on the small bolt icon that is in the top right corner of the window. This will directly open your browser with a live preview from a webserver. That's probably the easiest solution.
- Use apps. You can download WAMP (Windows) or MAMP (Mac). They both have a clean user interface with simple set up guides available.
- Use the command line. If you have Python installed and you are familiar with the command line, type
python -m SimpleHTTPServerto have a webserver running in the current directory. Then use the url 127.0.0.1:8000 to play the game.
Once done, you should see this on your screen.
The Pipes
A Flappy Bird game without obstacles (the green pipes) is not really interesting, so let's change that.
First, we load the pipe sprite in the preload() function.
game.load.image('pipe', 'assets/pipe.png');Since we are going to handle a lot of pipes in the game, it's easier to use a Phaser feature called "group". The group will simply contain all of our pipes. To create the group we add this in the create() function.
// Create an empty group this.pipes = game.add.group(); Now we need a new function to add a pipe in the game. We can do that with a new function.
addOnePipe: function(x, y) { // Create a pipe at the position x and y var pipe = game.add.sprite(x, y, 'pipe'); // Add the pipe to our previously created group this.pipes.add(pipe); // Enable physics on the pipe game.physics.arcade.enable(pipe); // Add velocity to the pipe to make it move left pipe.body.velocity.x = -200; // Automatically kill the pipe when it's no longer visible pipe.checkWorldBounds = true; pipe.outOfBoundsKill = true; },The previous function creates one pipe, but we need to display 6 pipes in a row with a hole somewhere in the middle. So let's create a new function that does just that.
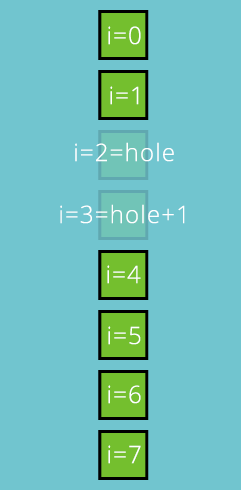
addRowOfPipes: function() { // Randomly pick a number between 1 and 5 // This will be the hole position var hole = Math.floor(Math.random() * 5) + 1; // Add the 6 pipes // With one big hole at position 'hole' and 'hole + 1' for (var i = 0; i < 8; i++) if (i != hole && i != hole + 1) this.addOnePipe(400, i * 60 + 10); },Here's an image to make things more clear, for when hole = 2.
To actually add pipes in our game we need to call the addRowOfPipes()function every 1.5 seconds. We can do this by adding a timer in thecreate() function.
this.timer = game.time.events.loop(1500, this.addRowOfPipes, this); Now you can save your file and test the code. This is slowly starting to look like a real game.
Scoring and Collisions
The last thing we need to finish the game is adding a score and handling collisions. And this is quite easy to do.
We add this in the create() function to display the score in the top left.
this.score = 0; this.labelScore = game.add.text(20, 20, "0", { font: "30px Arial", fill: "#ffffff" }); And we put this in the addRowOfPipes(), to increase the score by 1 each time new pipes are created.
this.score += 1; this.labelScore.text = this.score; Next, we add this line in the update() function to call restartGame() each time the bird collides with a pipe from the pipes group.
game.physics.arcade.overlap(
    this.bird, this.pipes, this.restartGame, null, this);
And we are done! Congratulations, you now have a Flappy Bird clone in HTML5.
How to Make a Flappy Bird in HTML5 With Phaser - Part 2
In the first part of this tutorial we did a simple Flappy Bird clone. It was nice, but quite boring to play. In this part we will see how to add animations and sounds. We won't change the game's mechanics, but the game will feel a lot more interesting.
Open the main.js file that we created in the last part, and we are good to go.
Add Fly Animation
The bird is moving up and down in a quite boring way. Let's improve that by adding some animations like in the original game.
You can see that:
- The bird slowly rotates downward, up to a certain point.
- And when the bird jumps, it rotates upward.
The first one is easy. We just need to add this in the update() function.
if (this.bird.angle < 20) this.bird.angle += 1; For the second one, we could simply add this.bird.angle = -20; in thejump() function. However, changing instantly the angle will look weird. Instead, we are going to make the bird change its angle over a short period of time. We can do so by creating an animation in the jump() function.
// Create an animation on the bird var animation = game.add.tween(this.bird); // Change the angle of the bird to -20° in 100 milliseconds animation.to({angle: -20}, 100); // And start the animation animation.start(); For your information, the preceding code can be rewritten in a single line like this.
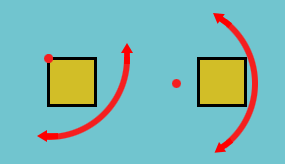
game.add.tween(this.bird).to({angle: -20}, 100).start(); If you test the game right now, you will notice that the bird is not rotating like the original Flappy Bird. It's rotating like the drawing on the left, and we want it to look like the one on the right.
What we need to do is change the center of rotation of the bird (the red dot above) called "anchor". So we add this line of code in the create()function.
// Move the anchor to the left and downward this.bird.anchor.setTo(-0.2, 0.5); If you test the game now, the animation should look a lot better.
Add Dead Animation
When the bird dies, we restart the game instantly. Instead, we are going to make the bird fall off the screen.
First, we update this line of code in the update() function to call hitPipe()instead of restartGame() when the bird hit a pipe.
game.physics.arcade.overlap(
    this.bird, this.pipes, this.hitPipe, null, this);
Now we create the new hitPipe() function.
hitPipe: function() { // If the bird has already hit a pipe, do nothing // It means the bird is already falling off the screen if (this.bird.alive == false) return; // Set the alive property of the bird to false this.bird.alive = false; // Prevent new pipes from appearing game.time.events.remove(this.timer); // Go through all the pipes, and stop their movement this.pipes.forEach(function(p){ p.body.velocity.x = 0; }, this); }, Last thing, we don't want to be able to make the bird jump when it's dead. So we edit the jump() by adding this 2 lines at the beginning of the function.
if (this.bird.alive == false) return; And we are done adding animations.
Add Sound
Adding sounds is super easy with Phaser.
We start by loading the jump sound in the preload() function.
game.load.audio('jump', 'assets/jump.wav'); Now we add the sound in the game by putting this in the create() function.
this.jumpSound = game.add.audio('jump'); Finally we add this line in the jump() function to actually play the sound effect.
this.jumpSound.play(); And that's it, we now have animations and sounds in the game!
How to Make a Flappy Bird in HTML5 With Phaser - Part 3
In Part 1 of this tutorial we created a very basic Flappy Bird clone, and inPart 2 we made it more interesting with animations and sounds. In this last part we are going to make the game mobile friendly, and you will see that this is really simple to do with Phaser.
Mobile Testing
Before making any change to our project it's important to know how to test a mobile game on desktop. Here's how you can do so in Google Chrome, though you can probably do something similar in other browsers.
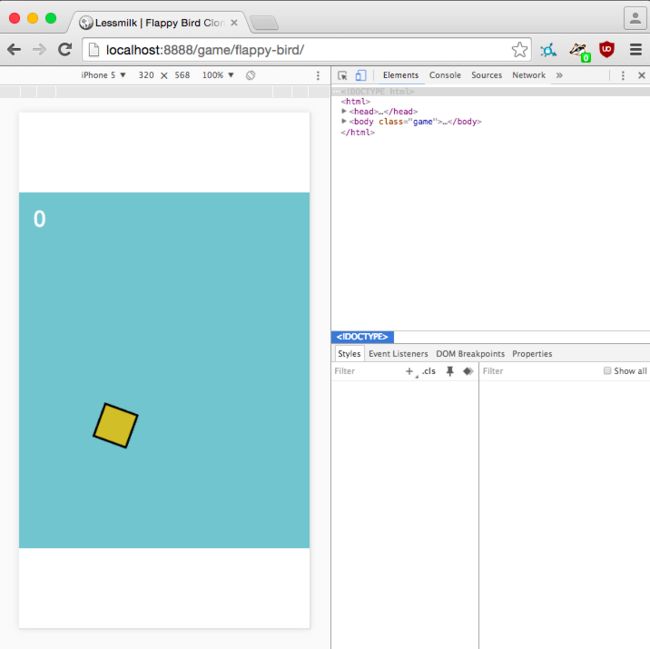
Launch Google Chrome, open the devtools (top menu > view > developer > developer tools) and click on the tiny mobile icon.
And now you can change the values at the top of the screen to emulate different mobile devices. Just make sure to reload the page every time you change the settings.
As you can see our game loads on an iPhone 5, but:
- We don't see the whole game (it's cropped on the right).
- There's a weird white border on the left.
- It's not centred on the screen vertically.
- And we can't use the spacebar to jump.
Let's fix all of this.
Scaling
Let's start by properly scaling our game on the screen.
Open the index.html file and add this between the 2 head tags.
<meta name="viewport" content="initial-scale=1.0" /> <style> * { margin: 0; padding: 0; } </style> The first line will make the page mobile friendly, and the rest will simply remove all margins and padding the HTML elements might have.
Next, open the main.js file and add this code at the beginning of thecreate() function.
// If this is not a desktop (so it's a mobile device) if (game.device.desktop == false) { // Set the scaling mode to SHOW_ALL to show all the game game.scale.scaleMode = Phaser.ScaleManager.SHOW_ALL; // Set a minimum and maximum size for the game // Here the minimum is half the game size // And the maximum is the original game size game.scale.setMinMax(game.width/2, game.height/2, game.width, game.height); // Center the game horizontally and vertically game.scale.pageAlignHorizontally = true; game.scale.pageAlignVertically = true; }The game.scale.setMinMax() is optional, but it's a good practice to use it to make sure the game is neither too small nor too big.
Note that you can put the 2 last lines of code outside of the if condition to have the game centered on desktop too.
You should now see the game taking the whole width on all mobile devices (up to the maximum game size we defined).
Jumping
The last step is to be able to make the bird jump when touching the screen. This can be done by adding a single line of code in the create() function.
// Call the 'jump' function when we tap/click on the screen game.input.onDown.add(this.jump, this);And now you can play the Flappy Bird clone on desktop and mobile devices :-)
Conclusion
In about 10 lines of code we managed to make our game mobile friendly, that's pretty cool!
