如何在Qt C++中解析JSON数据并使之被QML应用
在先前的文章"如何在QML应用中设计一个C++ Model并使用它"中,我们介绍了如何利用Qt C++创建一个QAbstractListModel,并是我们的C++数据能够在我们的QML应用中呈现.在今天的文章中,我们将继续探讨这个话题.我们将利用另外一种方法来实现同样的目的.在今天的例程中,我们将展示如何从网路得到数据,并解析数据,进而在我们的QML应用中展示得到的数据.这个例程可以作为一个标准的例程供以后我们需要使用Qt C++来作为数据的来源的时候使用.
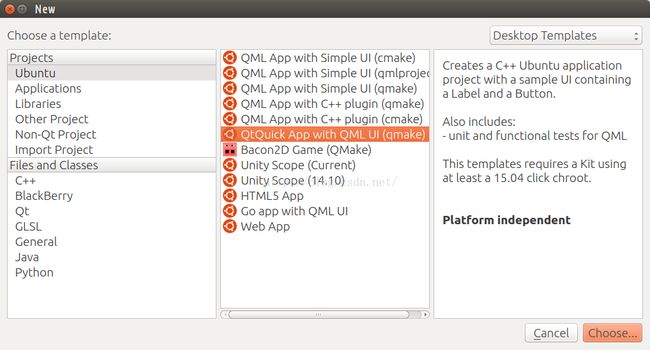
为了能够在我们的QML应用中很好地使用C++,我们采用了我们SDK提供的"QtQuick App with QML UI (qmake)".
我们创建一个叫做"baiduweather"的应用.我们想利用我们的百度提供的API接口:
http://api.map.baidu.com/telematics/v3/weather?location=%E5%8C%97%E4%BA%AC&output=json&ak=DdzwVcsGMoYpeg5xQlAFrXQt
来得到我们的数据.具体的数据结果如下:
{
  "error": 0,
  "status": "success",
  "date": "2015-09-25",
  "results": [
    {
      "currentCity": "北京",
      "pm25": "25",
      "index": [
        {
          "title": "穿衣",
          "zs": "热",
          "tipt": "穿衣指数",
          "des": "天气热,建议着短裙、短裤、短薄外套、T恤等夏季服装。"
        },
        {
          "title": "洗车",
          "zs": "较适宜",
          "tipt": "洗车指数",
          "des": "较适宜洗车,未来一天无雨,风力较小,擦洗一新的汽车至少能保持一天。"
        },
        {
          "title": "旅游",
          "zs": "适宜",
          "tipt": "旅游指数",
          "des": "天气较好,风稍大,但温度适宜,是个好天气哦。适宜旅游,您可以尽情地享受大自然的无限风光。"
        },
        {
          "title": "感冒",
          "zs": "少发",
          "tipt": "感冒指数",
          "des": "各项气象条件适宜,无明显降温过程,发生感冒机率较低。"
        },
        {
          "title": "运动",
          "zs": "较适宜",
          "tipt": "运动指数",
          "des": "天气较好,但风力较大,推荐您进行室内运动,若在户外运动请注意避风保暖。"
        },
        {
          "title": "紫外线强度",
          "zs": "强",
          "tipt": "紫外线强度指数",
          "des": "紫外线辐射强,建议涂擦SPF20左右、PA++的防晒护肤品。避免在10点至14点暴露于日光下。"
        }
      ],
      "weather_data": [
        {
          "date": "周五 09月25日 (实时:25℃)",
          "dayPictureUrl": "http://api.map.baidu.com/images/weather/day/qing.png",
          "nightPictureUrl": "http://api.map.baidu.com/images/weather/night/qing.png",
          "weather": "晴",
          "wind": "北风3-4级",
          "temperature": "27 ~ 13℃"
        },
        {
          "date": "周六",
          "dayPictureUrl": "http://api.map.baidu.com/images/weather/day/qing.png",
          "nightPictureUrl": "http://api.map.baidu.com/images/weather/night/duoyun.png",
          "weather": "晴转多云",
          "wind": "微风",
          "temperature": "26 ~ 15℃"
        },
        {
          "date": "周日",
          "dayPictureUrl": "http://api.map.baidu.com/images/weather/day/duoyun.png",
          "nightPictureUrl": "http://api.map.baidu.com/images/weather/night/yin.png",
          "weather": "多云转阴",
          "wind": "微风",
          "temperature": "26 ~ 16℃"
        },
        {
          "date": "周一",
          "dayPictureUrl": "http://api.map.baidu.com/images/weather/day/yin.png",
          "nightPictureUrl": "http://api.map.baidu.com/images/weather/night/duoyun.png",
          "weather": "阴转多云",
          "wind": "微风",
          "temperature": "22 ~ 15℃"
        }
      ]
    }
  ]
}
从上面的数据结构中,我们可以定义如下的相应的C++类:
#ifndef WEATHERDATA_H
#define WEATHERDATA_H

#include <QObject>

class WeatherData : public QObject {
    Q_OBJECT
    Q_PROPERTY(QString date
               READ date WRITE setDate
               NOTIFY dataChanged)
    Q_PROPERTY(QString dayPictureUrl
               READ dayPictureUrl WRITE setDayPictureUrl
               NOTIFY dataChanged)
    Q_PROPERTY(QString nightPictureUrl
               READ nightPictureUrl WRITE setNightPictureUrl
               NOTIFY dataChanged)
    Q_PROPERTY(QString weather
               READ weather WRITE setWeather
               NOTIFY dataChanged)
    Q_PROPERTY(QString wind
               READ wind WRITE setWind
               NOTIFY dataChanged)
    Q_PROPERTY(QString temp
               READ temp WRITE setTemp
               NOTIFY dataChanged)
public:
    explicit WeatherData(QObject *parent = 0);
    WeatherData(const WeatherData &other);

    QString date() const;
    QString dayPictureUrl() const;
    QString nightPictureUrl() const;
    QString weather() const;
    QString wind() const;
    QString temp() const;

    void setDate(const QString &value);
    void setDayPictureUrl(const QString &value);
    void setNightPictureUrl(const QString &value);
    void setWeather(const QString &value);
    void setWind(const QString &value);
    void setTemp(const QString &value);

signals:
    void dataChanged();

private:
    QString m_date;
    QString m_dayPictureUrl;
    QString m_nightPictureUrl;
    QString m_weather;
    QString m_wind;
    QString m_temp;
};

Q_DECLARE_METATYPE(WeatherData)

#endif // WEATHERDATA_H
这个数据结构相应于我们JSON数据中"weather_data"数据结果.我们把每个数据都设为property,这样可以在QML中进行直接的读写.
这里的每个property的写法,就像如下的:
QString WeatherData::date() const
{
    return m_date;
}

void WeatherData::setDate(const QString &value)
{
    if ( m_date == value )
        return;

    m_date = value;
    emit dataChanged();
}
这也是最标准的property的写法.
下面我们来看看appmodel.h的写法.
appmodel.h
#ifndef APPMODEL_H
#define APPMODEL_H

#include <QObject>
#include <QGeoPositionInfo>
#include <QGeoPositionInfoSource>
#include <QQmlListProperty>

class AppModelPrivate;
class WeatherData;

class AppModel : public QObject
{
    Q_OBJECT

    Q_PROPERTY(bool ready
               READ ready
               NOTIFY readyChanged)
    Q_PROPERTY(QQmlListProperty<WeatherData> forecast
               READ forecast
               NOTIFY weatherChanged)
    Q_PROPERTY(QString city
               READ city WRITE setCity
               NOTIFY cityChanged)
    Q_PROPERTY(QString pm25
               READ pm25 WRITE setCity
               NOTIFY pm25Changed)

public:
    explicit AppModel(QObject *parent = 0);

    bool ready() const;
    QQmlListProperty<WeatherData> forecast() const;
    QString city() const;
    void setCity(const QString &value);
    QString pm25() const;
    void setPm25(const QString &value);

private slots:
    void handleWeatherNetworkData(QObject *replyObj);
    void handleGeoNetworkData(QObject *replyObj);
    void networkSessionOpened();
    void positionUpdated(QGeoPositionInfo gpsPos);
    void positionError(QGeoPositionInfoSource::Error e);
    void queryCity();

public slots:
    Q_INVOKABLE void refreshWeather();

signals:
    void readyChanged();
    void cityChanged();
    void pm25Changed();
    void weatherChanged();

private:
    void hadError(bool tryAgain);

private:
    AppModelPrivate *d;
};

#endif // APPMODEL_H
这里沿袭了上面WeatherData中对property的写法,但是有一点不同的是,我们这里有一个比较特殊的property:
 Q_PROPERTY(QQmlListProperty<WeatherData> forecast
               READ forecast
               NOTIFY weatherChanged)
在上面的AppModel定义中,我们也看见了一个叫做AppModelPrivate的类的使用.它的定义如下:
class AppModelPrivate
{
public:
    static const int baseMsBeforeNewRequest = 5 * 1000; // 5 s, increased after each missing answer up to 10x
    QGeoPositionInfoSource *src;
    QGeoCoordinate coord;
    QString longitude, latitude;
    QString city;
    QNetworkAccessManager *nam;
    QNetworkSession *ns;
    WeatherData now;
    QList<WeatherData*> forecast;
    QQmlListProperty<WeatherData> *fcProp;
    QSignalMapper *geoReplyMapper;
    QSignalMapper *weatherReplyMapper;
    bool ready;
    bool useGps;
    bool hasValidCity;
    QElapsedTimer throttle;
    int nErrors;
    int minMsBeforeNewRequest;
    QTimer delayedCityRequestTimer;
    QString pm25;

    AppModelPrivate() :
            src(NULL),
            nam(NULL),
            ns(NULL),
            fcProp(NULL),
            ready(false),
            useGps(true),
            hasValidCity(false),
            nErrors(0),
            minMsBeforeNewRequest(baseMsBeforeNewRequest),
            pm25("")
    {
        delayedCityRequestTimer.setSingleShot(true);
        delayedCityRequestTimer.setInterval(1000); // 1 s
        throttle.invalidate();
    }
};
这在移植Qt时,是一个标准的写法.通常这个类不是继承于QObject的.在这个标准的写法,其实也是需要把AppModel这个类的q(继承于QObject)指针传人到我们的Private类中.这样做的目的是为了能够利用我们的q指针来发送我们的信号,从而使得我们的UI或其它的QObject类能够收到Private类中的数据.有关于这个话题的更进一步资料,可以详细参阅Qt porting之类的文章.这里不一一描述了.这个类可以使用已有的平台的API来获取我们所需要的服务中的数据.
在AppModel类的实现中,我们把我们从网路中得到的数据,进行组装.有些我们可以直接通过AppModel的property进行访问.对于我们关心的天气预报的数据(是一个数组)我们通过上面讲到的QQmlListProperty提供给QML来访问:
void AppModel::handleWeatherNetworkData(QObject *replyObj)
{
    qDebug() << "handleWeatherNetworkData";
    qDebug() << "got weather network data";

    QNetworkReply *networkReply = qobject_cast<QNetworkReply*>(replyObj);
    if (!networkReply)
        return;

    if (!networkReply->error()) {
        // We need to clear the previously stored data

        QJsonDocument document = QJsonDocument::fromJson(networkReply->readAll());

        qDebug() << "document: " << document;

        QVariantMap root = document.toVariant().toMap();
        QString date = root["date"].toString();
        qDebug() << "date: " << date;

        QList<QVariant> list = root["results"].toList();
        int count = list.count();

        for (int i = 0; i < count; i++ ) {
            QVariantMap item = list.at(i).toMap() ;

            QString city = item["currentCity"].toString();
            qDebug() << "city: " << city;

            QString pm25 = item["pm25"].toString();
            qDebug() << "PM25: " << pm25;

            QList<QVariant> index = item["index"].toList();
            int size = index.count();
            qDebug() << "size: " << size;

            for ( int j = 0; j < size; j ++ ) {
                QVariantMap each = index.at(j).toMap() ;

                QString title = each["title"].toString();
                qDebug() << "title: " << title;

                QString des = each["des"].toString();
                qDebug() << "des: " << des;
            }

            d->forecast.clear();

            foreach (const QVariant &k, item["weather_data"].toList()) {
                QVariantMap each = k.toMap();

                QString date = each["date"].toString();
                qDebug() << "date: " << date << " length: " << date.length();
                date = date.left(2);
                qDebug() << "new date: " << date;

                QString dayPictureUrl = each["dayPictureUrl"].toString();
                qDebug() << "dayPictureUrl: " << dayPictureUrl;

                QString nightPictureUrl = each["nightPictureUrl"].toString();
                qDebug() << "nightPictureUrl: " << nightPictureUrl;

                QString weather = each["weather"].toString();
                qDebug() << "weather: " << weather;

                QString wind = each["wind"].toString();
                qDebug() << "wind: " << wind;

                QString temperature = each["temperature"].toString();
                qDebug() << "temperature: " << temperature;

                // Now let's fill in the weather data
                WeatherData *forecastEntry = new WeatherData();

                forecastEntry->setDate(date);
                forecastEntry->setDayPictureUrl(dayPictureUrl);
                forecastEntry->setNightPictureUrl(nightPictureUrl);
                forecastEntry->setWeather(weather);
                forecastEntry->setWind(wind);
                forecastEntry->setTemp(temperature);

                d->forecast.append(forecastEntry);
            }

        }

        if (!(d->ready)) {
            d->ready = true;
            emit readyChanged();
        }

        emit weatherChanged();
    }

    networkReply->deleteLater();
}
为了能够使得我们的AppModel能被我们的QML正确地使用,我们必须要对它进行注册:
main.cpp
#include <QGuiApplication>
#include <QQmlApplicationEngine>
#include <QQuickView>

#include "appmodel.h"
#include "weatherdata.h"

int main(int argc, char *argv[])
{
    QGuiApplication app(argc, argv);

    qmlRegisterType<WeatherData>("WeatherInfo", 1, 0, "WeatherData");
    qmlRegisterType<AppModel>("WeatherInfo", 1, 0, "AppModel");

    QQuickView view;
    view.setSource(QUrl(QStringLiteral("qrc:///Main.qml")));
    view.setResizeMode(QQuickView::SizeRootObjectToView);
    view.show();
    return app.exec();
}
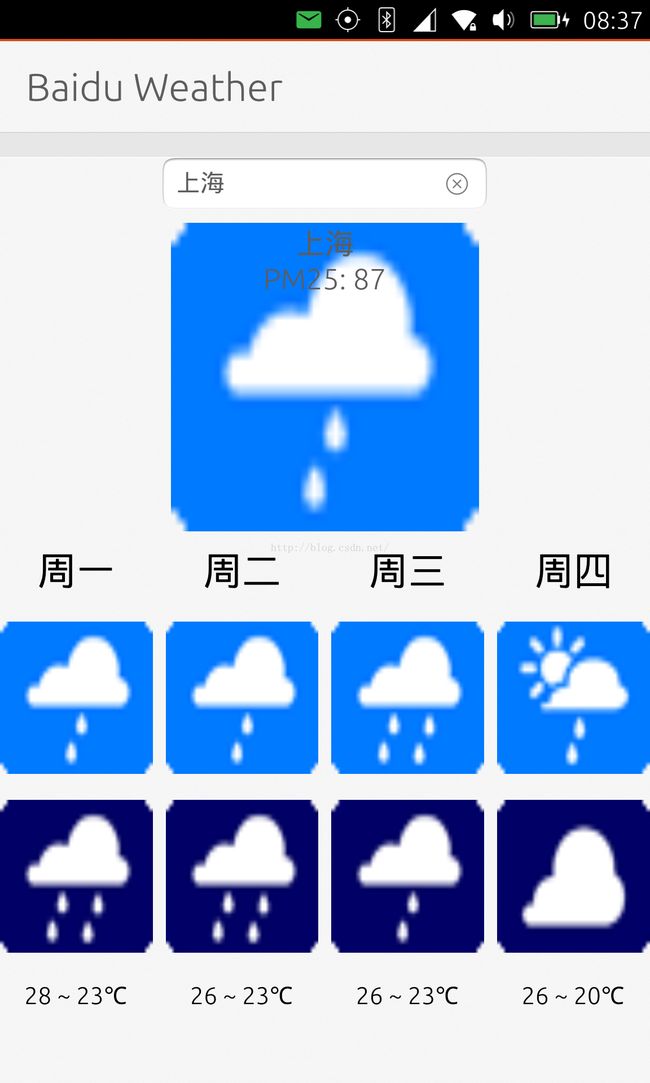
相比较我们的AppModel来说,QML UI设计较为直接.我们直接来展示怎么实现的:
Main.qml
import QtQuick 2.0
import Ubuntu.Components 1.1
import WeatherInfo 1.0

/*!
    \brief MainView with a Label and Button elements.
*/

MainView {
    // objectName for functional testing purposes (autopilot-qt5)
    objectName: "mainView"

    // Note! applicationName needs to match the "name" field of the click manifest
    applicationName: "baiduweather.liu-xiao-guo"

    /*
     This property enables the application to change orientation
     when the device is rotated. The default is false.
    */
    //automaticOrientation: true

    // Removes the old toolbar and enables new features of the new header.
    useDeprecatedToolbar: false

    width: units.gu(60)
    height: units.gu(85)

    AppModel {
        id: mymodel
        onReadyChanged: {
            console.log("ready is changed!");
            console.log("city: " + city)
            //            console.log("forecast[0]: " + forecast[0].dayPictureUrl);

            if (mymodel.ready) {
                page.state = "ready"
                input.text = mymodel.city
                //                listview.model = mymodel.forecast;
            } else {
                page.state = "loading"
            }
        }
    }

    Page {
        id: page    // We cannot name it window.
        title: i18n.tr("Baidu Weather")

        Column {
            anchors.fill: parent
            spacing: units.gu(1)

            TextField {
                id: input
                anchors.horizontalCenter: parent.horizontalCenter

                onAccepted: {
                    mymodel.city = text;
                }

                onTextChanged: {
                    mymodel.city = text;
                }
            }

            Image {
                id: image
                height: parent.height/3
                width: height
                anchors.horizontalCenter: parent.horizontalCenter
                source: {
                    if ( !mymodel.ready )
                        return ""

                    var date = new Date();
                    var n = date.getHours();
                    if ( n >= 7 && n < 18 ) {
                        return mymodel.forecast[0].dayPictureUrl;
                    }
                    else {
                        return mymodel.forecast[0].nightPictureUrl;
                    }
                }

                Label {
                    id: city
                    anchors.horizontalCenter: parent.horizontalCenter
                    text: mymodel.city
                    fontSize: "large"
                }

                Label {
                    anchors.horizontalCenter: parent.horizontalCenter
                    anchors.top:city.bottom
                    anchors.bottomMargin: units.gu(1)
                    text: "PM25: " + mymodel.pm25;
                    fontSize: "large"
                }
            }

            Row {
                id: firstrow
                spacing: units.gu(1)
                width: parent.width
                anchors.horizontalCenter: parent.horizontalCenter

                Repeater {
                    model: mymodel.forecast
                    width: page.width
                    anchors.horizontalCenter: parent.horizontalCenter

                    Column {
                        spacing: units.gu(2)

                        Text {
                            anchors.horizontalCenter: parent.horizontalCenter
                            text: date
                            font.pixelSize: units.gu(3)
                        }

                        Image {
                            anchors.horizontalCenter: parent.horizontalCenter
                            width: (page.width - firstrow.spacing*3 ) /4
                            height: width
                            source: dayPictureUrl
                        }

                        Image {
                            anchors.horizontalCenter: parent.horizontalCenter
                            width: (page.width - firstrow.spacing*3) /4
                            height: width
                            source: nightPictureUrl
                        }

                        Text {
                            anchors.horizontalCenter: parent.horizontalCenter
                            text: mymodel.forecast[index].temp
                        }
                    }
                }
            }
        }
    }
}
在上面的设计中,我们使用了:
 Repeater {
              model: mymodel.forecast
     ....
 }
来把我们的数据进行展示.当然,我们也可以选择ListView或其它的形式来完成.


