devexpress SchedulerControl 的schedulerControl_CustomDrawAppointment
前面分析了Appointment的绘制过程.devexpress 相对封闭。所以,如果想要改变其行为,CustomDraw,是常用方法。
就SchedulerControl来说,有几个类是核心:
Appointment
View
BasePainter
但是这些类不能被继承,也不能被外部模块访问到。
分析过后,开始研究如何解决所面对的问题。
需求是把Appointment分成段。这个段不是Appointment,因为Appointment具有本意,是一个最基本粒度。
而分段的需求,并不是把Appointment切成多个Appointment,而是另一个层面的业务,用于统计Appointment中,多少时间在干什么。
这么说吧,比如说,我们去听课,不可能一直都不走神(这样的学生也有啊,他们一直不走神,但也一直不思考),我们想统计下,一节课,多少时间,在听课,多少时间,要走神。
那么需要大量的数据作为统计的输入。
但这些与上课没关系,你走神了,学费还是得照交。
为达到这个目的,经过几天的坚苦分析,唯一简单的办法就是利用schedulerControl_CustomDrawAppointment事件。
首先,去devExpress网站,找了许多这方面的例子——这是选择这些类库的根本原因——不论这些类库有多么不好,但是许多人的智慧的结晶,代表了一个团队、
不论你自己的想法有多么先进,IQ有多高,一个人也只能是什么也做不出来。
这一找,还是有许多收获。这里列出一部分。
一些示例
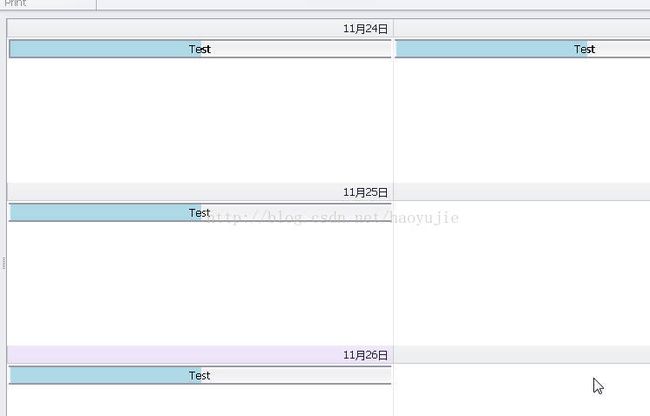
这个例子,描述如何在跨过多天的情况下,画出不同的颜色。
https://www1.devexpress.com/Support/Center/Question/Details/Q496368
        private void schedulerControl_CustomDrawAppointment(object sender, DevExpress.XtraScheduler.CustomDrawObjectEventArgs e)
        {
            SchedulerViewType svt = this.schedulerControl.ActiveViewType;
            AppointmentViewInfoCollection appointmentViewInfos = null;
            switch (svt)
            {
                case SchedulerViewType.Day:
                    appointmentViewInfos = this.schedulerControl.DayView.ViewInfo.AppointmentViewInfos;
                    break;
                case SchedulerViewType.Month:
                    appointmentViewInfos = this.schedulerControl.MonthView.ViewInfo.AppointmentViewInfos;
                    break;
                case SchedulerViewType.Week:
                    appointmentViewInfos = this.schedulerControl.WeekView.ViewInfo.AppointmentViewInfos;
                    break;
                case SchedulerViewType.WorkWeek:
                    appointmentViewInfos = this.schedulerControl.WorkWeekView.ViewInfo.AppointmentViewInfos;
                    break;
                default:
                    return;
            }

            Debug.Assert(appointmentViewInfos.Count > 0);

            // WeekView for example will have multiple AppointmentViewInfos. For this naive example, attempt to paint the first half of the first one only.
            // Note: avi.AppointmentInterval is the entire span, whereas avi.Interval will be the current interval under the weekly views.

            AppointmentViewInfo avi = appointmentViewInfos[0];
            if (avi.Appointment.Subject.StartsWith("Test")) // Custom paint only appts starting with "Test"
            {
                e.DrawDefault();
                Rectangle r = e.Bounds;

                // Try to get width of the appointment border so we can draw inside it.
                Pen borderPen = avi.Appearance.GetBorderPen(e.Cache);
                int borderWidth = (int)borderPen.Width * 2;  // Seems necessary for different skins to double this, but don't know why.

                Rectangle firstHalf = new Rectangle(r.Left + borderWidth, r.Top + borderWidth, r.Width / 2, r.Height - 2 * borderWidth);
                e.Cache.FillRectangle(Color.LightBlue, firstHalf);

                // Attempt to redraw the subject text, since half will be overwritten. Many problems with this approach though!
                StringFormat strFormat = new StringFormat();
                strFormat.Alignment = StringAlignment.Center;
                strFormat.LineAlignment = StringAlignment.Center;
                e.Cache.DrawString(avi.Appointment.Subject, avi.Appearance.Font, new SolidBrush(Color.Black), r, strFormat);
                e.Handled = true;
            }


        }
如何绘制状态和前景
这是在我看来,最能解决目前我所对面的问题的
https://www.devexpress.com/Support/Center/Question/Details/T148200
 private void schedulerControl1_CustomDrawAppointment(object sender, CustomDrawObjectEventArgs e) {
            AppointmentViewInfo av = e.ObjectInfo as AppointmentViewInfo;
            av.Appearance.Font = new Font("Tahoma", 10);

            Color boundsColor = Color.Black;

            int statusDelta = 0;
            for(int i = 0; i < av.StatusItems.Count; i++) {
                AppointmentViewInfoStatusItem statusItem = av.StatusItems[i] as AppointmentViewInfoStatusItem;
                e.Cache.FillRectangle(statusItem.BackgroundViewInfo.Brush, statusItem.BackgroundViewInfo.Bounds);
                e.Cache.FillRectangle(statusItem.ForegroundViewInfo.Brush, statusItem.ForegroundViewInfo.Bounds);
                e.Cache.DrawRectangle(new Pen(statusItem.ForegroundViewInfo.BorderColor), statusItem.BackgroundViewInfo.Bounds);
                e.Cache.DrawRectangle(new Pen(statusItem.ForegroundViewInfo.BorderColor), statusItem.ForegroundViewInfo.Bounds);
                statusDelta = Math.Max(statusDelta, statusItem.Bounds.Width);

                boundsColor = statusItem.ForegroundViewInfo.BorderColor;
            }

            Rectangle r = e.Bounds;
            r.X += statusDelta;
            r.Y += 5;

            Font subjFont = new Font("Tahoma", 15);
            e.Cache.DrawString(av.Appointment.Subject.Trim(), subjFont, new SolidBrush(Color.Blue), r, StringFormat.GenericDefault);
            SizeF subjSize = e.Graphics.MeasureString(av.Appointment.Subject.Trim(), subjFont);
            int lineNumber = (int)Math.Floor(subjSize.Width / r.Width) + 1;

            Rectangle loc = r;
            loc.Y += (int)Math.Round(subjSize.Height * lineNumber);

            e.Cache.Graphics.DrawLine(e.Cache.GetPen(boundsColor), new Point(loc.Location.X + statusDelta, loc.Location.Y), new Point(loc.Location.X + loc.Width - (statusDelta * 2), loc.Location.Y));
            e.Cache.DrawString(av.Appointment.Location.Trim(), new Font("Tahoma", 10), new SolidBrush(Color.Salmon), loc, StringFormat.GenericTypographic);

            Rectangle dec = loc;
            SizeF locSize = e.Graphics.MeasureString(av.Appointment.Location.Trim(), new Font("Tahoma", 10));
            int lineLocNumber = ((int)Math.Floor(locSize.Width / loc.Width) + 1);

            dec.Y += (int)Math.Round(locSize.Height * lineLocNumber);
            e.Cache.DrawString(av.Appointment.Description.Trim(), new Font("Tahoma", 10), new SolidBrush(Color.Red), dec, StringFormat.GenericTypographic);
            e.Handled = true;
        }
其它的
这位码农遇到了与我遇到的相似的问题
https://www.devexpress.com/Support/Center/Question/Details/Q255397
这位码农提交的代码,看起来有些内容。还没来得及研究。因为目前我的任务,信息已够用了。有时间再分析吧。
 private void schedulerControl1_CustomDrawAppointmentBackground(object sender, CustomDrawObjectEventArgs e) {
            var info = (AppointmentViewInfo)e.ObjectInfo;
            e.DrawDefault();
            switch (info.Appointment.Subject ) {
                case "Wrong":
                    // InnerBounds reflects the whole Appointment drawing rectangle.
                    // Unfortunately it introduces a 1px wide white border.
                    e.Graphics.FillRectangle(Brushes.Lavender, info.InnerBounds);
                    break;
                case "Right":
                    Rectangle bounds = Rectangle.Empty;
                    Rectangle statusItemBounds = Rectangle.Empty;
                    var statusItem = info.StatusItems.FirstOrDefault() as AppointmentViewInfoStatusItem;
                    if (statusItem != null)
                        statusItemBounds = statusItem.Bounds;

                    // Calulating the drawing area by substracting the top, left, right and bottom
                    // borders from e.ObjectInfo.Bounds
                    bounds = info.Bounds;
                    bounds.Y += info.TopBorderBounds.Height;
                    bounds.X += info.LeftBorderBounds.Width + statusItemBounds.Width;
                    Size size = bounds.Size;
                    size.Height -= (info.TopBorderBounds.Height + info.BottomBorderBounds.Height);
                    size.Width -= (info.LeftBorderBounds.Width + info.RightBorderBounds.Width + statusItemBounds.Width);
                    bounds.Size = size;

                    if (statusItem != null) {
                        // To get the Y position and the height of the area that is drawn by the time status item,
                        // we have to access the private ForegroundViewInfo property and read its
                        // Y position and height in order to adjust our drawing rectangle to it.
                        var prop = statusItem.GetType().GetProperty("ForegroundViewInfo", BindingFlags.NonPublic | BindingFlags.Instance);
                        AppointmentStatusViewInfo statusForeGroundInfo = (AppointmentStatusViewInfo)prop.GetValue(statusItem, null);
                        bounds.Y = Math.Max(bounds.Y, statusForeGroundInfo.Bounds.Y);
                        bounds.Height = Math.Min(bounds.Height, statusForeGroundInfo.Bounds.Height);
                    }

                    e.Graphics.FillRectangle(Brushes.Lavender, bounds);
                    break;
                default:
                    break;
            }

            e.Handled = true;
https://www.devexpress.com/Support/Center/Question/Details/Q452874
https://www.devexpress.com/Support/Center/Question/Details/B148889
自己的一段代码
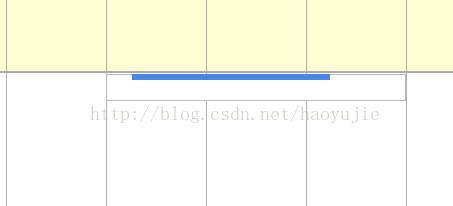
自绘制Top Status 线
private void schedulerControl_CustomDrawAppointment(object sender, CustomDrawObjectEventArgs e)
{
AppointmentViewInfo av = e.ObjectInfo as AppointmentViewInfo;
av.Appearance.Font = new Font("Tahoma", 10);
Color boundsColor = Color.Black;
//int statusDelta = 0;
for (int i = 0; i < av.StatusItems.Count; i++)
{
AppointmentViewInfoStatusItem statusItem = av.StatusItems[i] as AppointmentViewInfoStatusItem;
ViewInfoItem curitem = av.Items[i] as ViewInfoItem;
e.Cache.FillRectangle(statusItem.ForegroundViewInfo.Brush, statusItem.ForegroundViewInfo.Bounds);
标红的点,就是一直要找的。

