图文来教你在eclipse下用gradle 来打包Android
gradle其他好处就不多说,在android应用发布的时候,如果要统计多个渠道,gradle 批量打包的好处就显示出来了;下面介绍图文来介绍
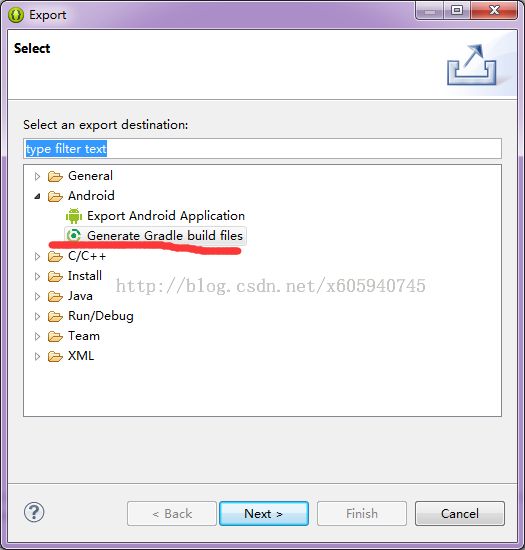
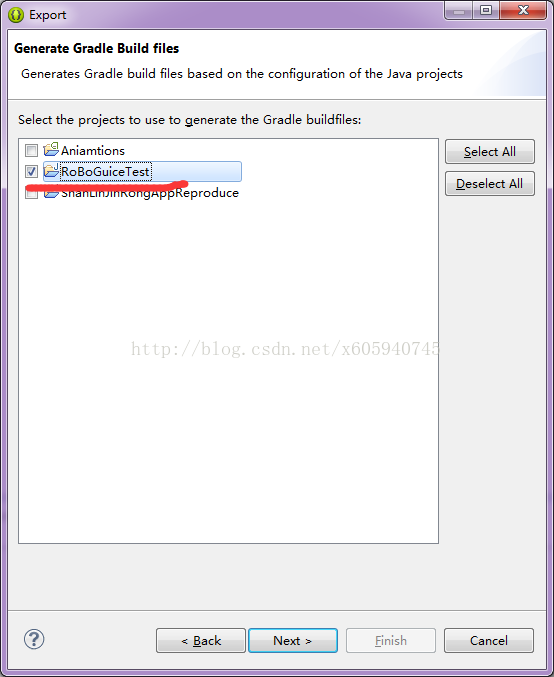
按eclipse的导出时 选择Android;如下图 然后按下面一步一步往下点
-
欢迎加入QQ交流3群:317874559
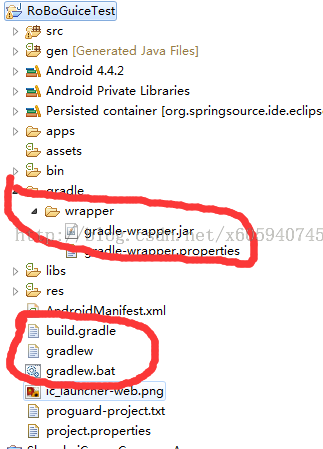
点击完成之后 工程里面就生成了如下的几个文件;也就是gradle的配置文件
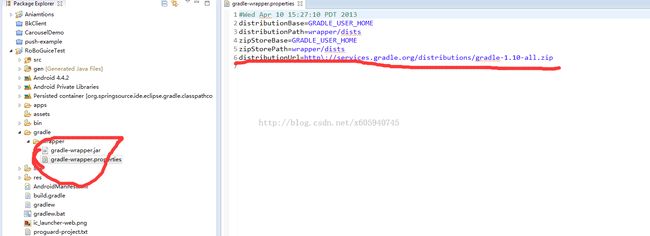
打开gradle-wrapper.properties这个文件;可以看到distributionUrl这个地址;而这个地址就是gradle的下载地址;在浏览器打开下载 如下图:
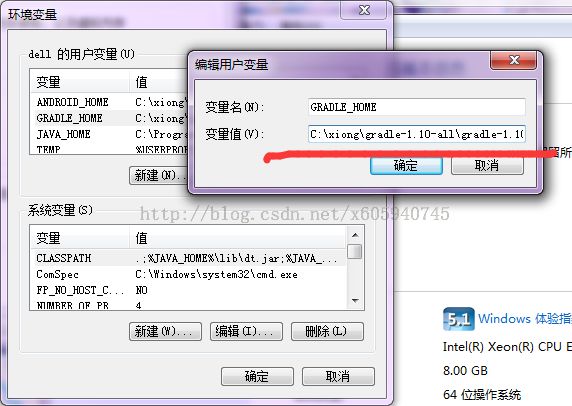
将下载的文件押解出来;然后需要设置系统环境变量;需要设置变量名:GRADLE_HOME变量值为:C:\xiong\gradle-1.10-all\gradle-1.10(也就是你下载的Gradle文件的根目录)然后设置path;在后面加上C:\xiong\gradle-1.10-all\gradle-1.10\bin 如下图
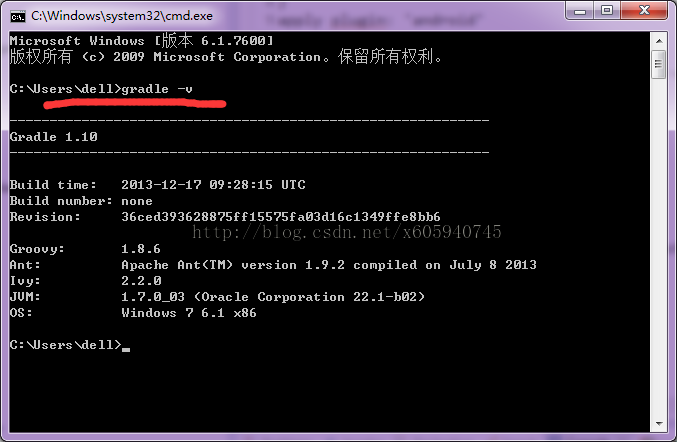
然后运行在cmd中运行gradle -v来判断是否设置成功 如下图
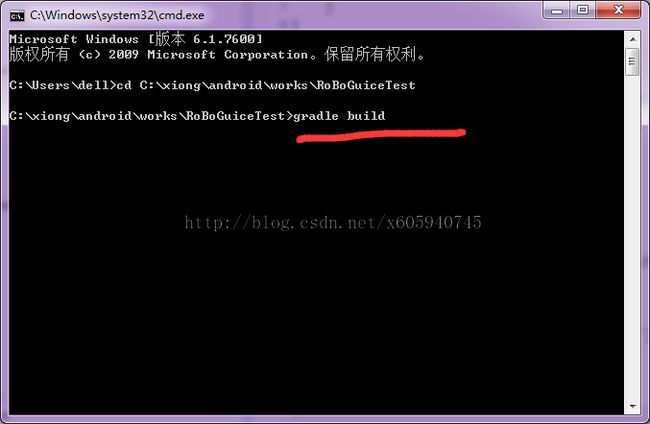
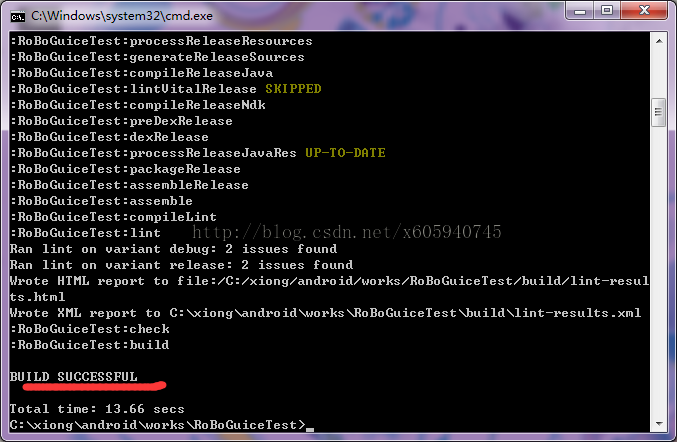
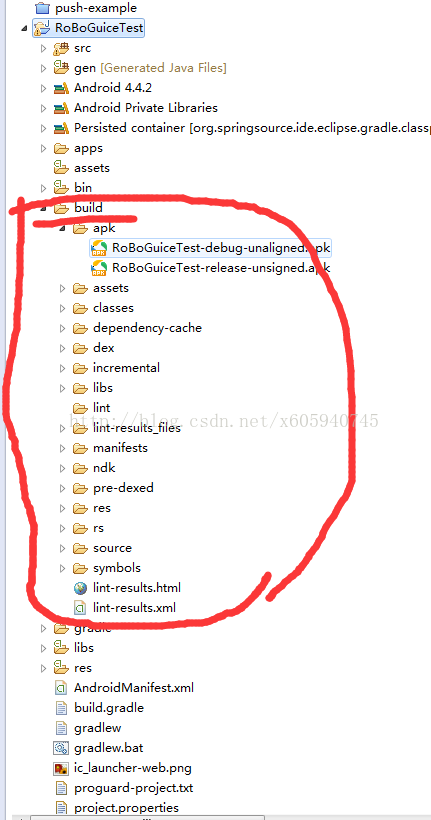
确定安装成功之后就基本可以运行gradle命令来打包了;将cmd命令定位到工程的根目录,然后运行gradle bulid
如下图
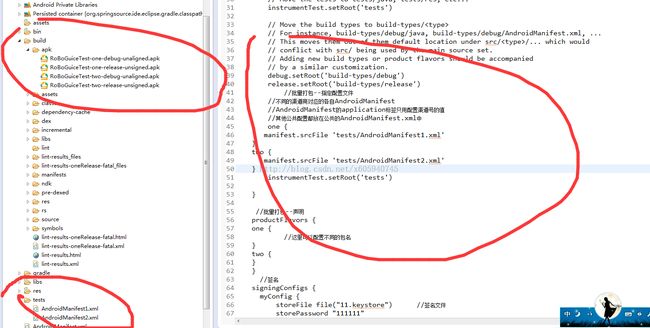
如果需要批量打包;则在build.gradle进行配置
原始eclipse生成的文件内容如下
buildscript {
    repositories {
        mavenCentral()
    }
    dependencies {
        classpath 'com.android.tools.build:gradle:0.8.+'
    }
}
apply plugin: 'android'

dependencies {
    compile fileTree(dir: 'libs', include: '*.jar')
}

android {
    compileSdkVersion 19
    buildToolsVersion "19.0.3"

    sourceSets {
        main {
            manifest.srcFile 'AndroidManifest.xml'
            java.srcDirs = ['src']
            resources.srcDirs = ['src']
            aidl.srcDirs = ['src']
            renderscript.srcDirs = ['src']
            res.srcDirs = ['res']
            assets.srcDirs = ['assets']
        }

        // Move the tests to tests/java, tests/res, etc...
        instrumentTest.setRoot('tests')

        // Move the build types to build-types/<type>
        // For instance, build-types/debug/java, build-types/debug/AndroidManifest.xml, ...
        // This moves them out of them default location under src/<type>/... which would
        // conflict with src/ being used by the main source set.
        // Adding new build types or product flavors should be accompanied
        // by a similar customization.
        debug.setRoot('build-types/debug')
        release.setRoot('build-types/release')
    }
}
只要在如上代码中添加就可以 比如
buildscript {
    repositories {
        mavenCentral()
    }
    dependencies {
        classpath 'com.android.tools.build:gradle:0.8.+'
    }
}
apply plugin: 'android'

dependencies {
    compile fileTree(dir: 'libs', include: '*.jar')
}

android {
    compileSdkVersion 19
    buildToolsVersion "19.0.3"

    sourceSets {
        main {
            manifest.srcFile 'AndroidManifest.xml'
            java.srcDirs = ['src']
            resources.srcDirs = ['src']
            aidl.srcDirs = ['src']
            renderscript.srcDirs = ['src']
            res.srcDirs = ['res']
            assets.srcDirs = ['assets']
        }

        // Move the tests to tests/java, tests/res, etc...
        instrumentTest.setRoot('tests')

        // Move the build types to build-types/<type>
        // For instance, build-types/debug/java, build-types/debug/AndroidManifest.xml, ...
        // This moves them out of them default location under src/<type>/... which would
        // conflict with src/ being used by the main source set.
        // Adding new build types or product flavors should be accompanied
        // by a similar customization.
        debug.setRoot('build-types/debug')
        release.setRoot('build-types/release')
            //批量打包--指定配置文件
        //不同的渠道商对应的各自AndroidManifest
        //AndroidManifest的application标签只用配置渠道号的值
        //其他公共配置都放在公共的AndroidManifest.xml中
        one {
       manifest.srcFile 'tests/AndroidManifest1.xml'
    }
    two {
       manifest.srcFile 'tests/AndroidManifest2.xml'
    }
        instrumentTest.setRoot('tests')

    }

     //批量打包--声明
    productFlavors {
    one {
            //这里可以配置不同的包名
    }
    two {
    }
    }
      //签名
    signingConfigs {
      myConfig {
          storeFile file("11.keystore")      //签名文件
          storePassword "111111"
          keyAlias "111111"
          keyPassword "111111"  //签名密码
      }
    }
}
如下图
demo下载
转载请注明出处:http://blog.csdn.net/x605940745
