Xfire封装对象和List型对象
现在学习需要,学习了WebServices,实用了框架是Xfire,可能最新的是CXF和axis2,但是着手的项目是Xfire的框架,没办法,今天学习了如何对对象进行封装和调用。
对对象的封装参考了http://blog.csdn.net/daryl715/article/details/1704981下的一篇博文,但调用的时候着实自己修改了下。
1...............................首先创建Service端,前面的文章也详细的介绍了Xfire如何创建服务器端,大家可以参考下
先看看服务器端结构图吧
1.0..........................User.java
- package com.ListBinding;
- public class User {
- private String username;
- private String password;
- public User(){
- }
- public User(String username,String password){
- this.username=username;
- this.password=password;
- }
- public String getPassword() {
- return password;
- }
- public void setPassword(String password) {
- this.password = password;
- }
- public String getUsername() {
- return username;
- }
- public void setUsername(String username) {
- this.username = username;
- }
- }
1.1..............................IHelloWorldService.java
- package com.ListBinding;
- import java.util.List;
- public interface IHelloWorldService {
- public User HelloWorld(User user); //传入和返回自定义类型
- public List HelloWorldList(); //返回集合类型
- }
1.2.........................HelloWorldServiceImpl.java
- package com.ListBinding;
- import java.util.ArrayList;
- import java.util.List;
- public class HelloWorldServiceImpl implements IHelloWorldService {
- public User HelloWorld(User user) {
- if(user.getUsername().equals("gaoxiang")){
- return new User("welcome gaoxiang","1234");
- }
- else{
- return new User("wrong name","1234");
- }
- }
- public List HelloWorldList() {
- List a=new ArrayList();
- User u1=new User("1","1");
- User u2=new User("2","2");
- User u3=new User("3","3");
- a.add(u1);
- a.add(u2);
- a.add(u3);
- return a;
- }
- }
1.3............................实用默认的绑定方式ageis,所以必须要在相同目录下创建IHelloWorldService.aegis.xml文件,切记接口名称和这了的前面名称必须相同
- <?xml version="1.0" encoding="UTF-8"?>
- <mappings>
- <mapping>
- <method name="HelloWorld">
- <parameter index="0" componentType="com.ListBinding.User"/>
- </method>
- <method name="HelloWorld">
- <return-type componentType="com.ListBinding.User"/>
- </method>
- <method name="HelloWorldList">
- <return-type componentType="com.ListBinding.User"/> <!-- 定义返回集合类型中元素的type -->
- </method>
- </mapping>
- </mappings>
1.4.........................在Service.xml中进行配置
- <?xml version="1.0" encoding="UTF-8"?>
- <beans xmlns="http://xfire.codehaus.org/config/1.0">
- <service>
- <name>HelloService</name>
- <serviceClass>com.ListBinding.IHelloWorldService</serviceClass>
- <implementationClass>com.ListBinding.HelloWorldServiceImpl
- </implementationClass>
- <style>wrapped</style>
- <use>literal</use>
- <scope>application</scope>
- </service>
- </beans>
1.5........................配置好进行发布
在如下地址进行查看http://localhost:8080/ServicesBinding/services/HelloService?wsdl发布后的wsdl文件
当然也可以现在MyEclipse中的Web Services Explorer中进行测试,我的测试结果图如下:
好了 服务器端我们完成了,下面就来开发客户端了,来体验一下我们的发布成果,呵呵
2.....................................客户端我分别实用Eclipse和MyEclipse进行了开发,来一起看看吧。
首先Eclipse进行调用服务接口。
2..1................................首先新建一个Java工程,这里我没有用Web工程,其实结果都是一样的,
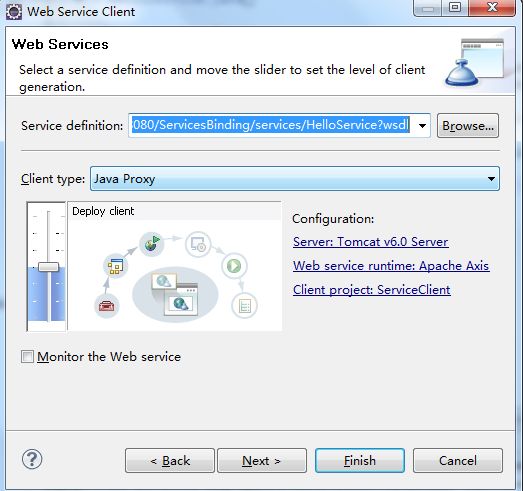
然后右击src木了,新建一个Web Service client 如下图
2.2...........................点击next之后,会让你输入服务端口地址,如下所示()也就是WSDL的地址:
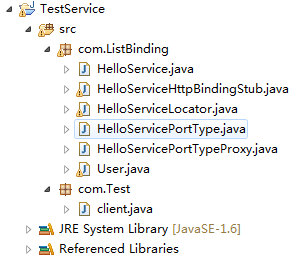
2.3...........................................完成之后直接点击Finish就行了,这样我们计引用了服务端口,系统能够回自动帮我们创建文件如下:
这是客户端工程结构图,其中Test包是自己创建的,系统自动创建的是ListBinding包。
2.4....................................下面我们编写客户端测试代码:
client.java
- package com.Test;
- import java.rmi.RemoteException;
- import com.ListBinding.HelloServicePortTypeProxy;
- import com.ListBinding.User;
- public class client {
- public static void main(String[] args) throws RemoteException {
- HelloServicePortTypeProxy client = new HelloServicePortTypeProxy();
- User[] user = client.helloWorldList();
- System.out.println(user[2].getUsername());
- User info = new User();
- info.setUsername("gaoxiang");
- info.setPassword("123");
- User sa = client.helloWorld(info);
- System.out.println(sa.getUsername());
- }
- }
2.5...............................运行客户端代码,控制台显示结果如下所示:
Eclipse客户端测试成功。
3...................................下面看看用MyEclipse进行客户端测试
3.1................................同样首先创建一个ServicesBindingClient工程
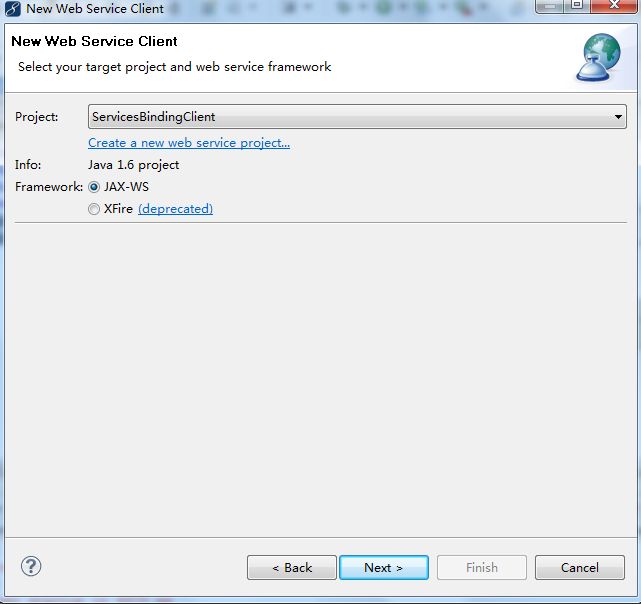
3.2...............................在src右击创建web Service client 客户端(和前面相同)
在这里选择JAX-WS创建:
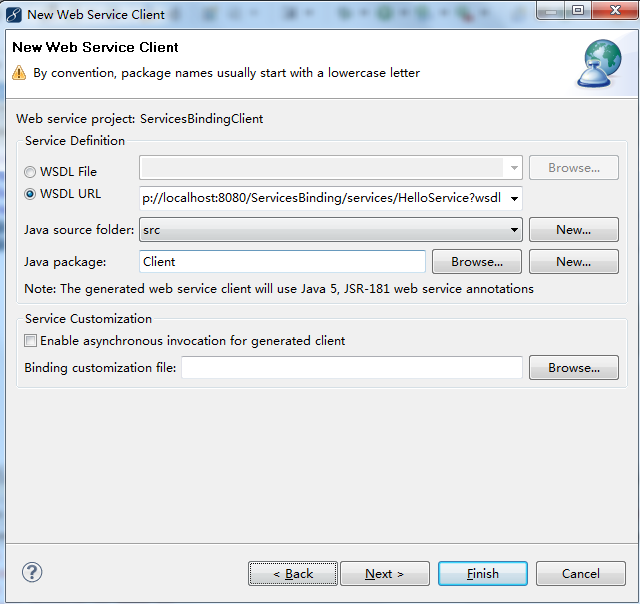
3.3...............................................下一步之后输入WSDL地址和新建一个包名,如下所示:
3.4............................................Finish,工程结构图如下所示:
3.5...........................................同样TestClient使我们自己创建的测试包
test.java如下所示:
- package TestClient;
- import java.util.List;
- import Client.ArrayOfUser;
- import Client.HelloService;
- import Client.HelloServicePortType;
- import Client.User;
- public class test {
- public static void main(String[] args) {
- HelloService service = new HelloService();
- HelloServicePortType client =service.getHelloServiceHttpPort();
- ArrayOfUser user = client.helloWorldList();
- List<User> users = user.getUser();
- System.out.println(users.size());
- User newuser = users.get(0);
- User sa = client.helloWorld(newuser);
- System.out.println(sa.getUsername().getValue());
- }
- }
xfireclient:使用myeclipse自动生成 客户端,由于生成pojo的属性 都是 jaxbelement类型的,所以取得值需要 getValue()
package zs;


public class TestMain {
	public static void main(String[] args){
		xfireTestClient client = new xfireTestClient();
		xfireTestPortType d = client.getxfireTestHttpPort();
		System.out.println(d.example("dasdasdas"));
		Employee e = d.test("fasdf");
		System.out.println(e.getName().getValue());
	}
}
或者手动更改pojo
原自动生成pojo:
package zs;

import javax.xml.bind.JAXBElement;
import javax.xml.bind.annotation.XmlAccessType;
import javax.xml.bind.annotation.XmlAccessorType;
import javax.xml.bind.annotation.XmlElementRef;
import javax.xml.bind.annotation.XmlType;


/**
 * <p>Java class for Employee complex type.
 *
 * <p>The following schema fragment specifies the expected content contained within this class.
 *
 * <pre>
 * <complexType name="Employee">
 *   <complexContent>
 *     <restriction base="{http://www.w3.org/2001/XMLSchema}anyType">
 *       <sequence>
 *         <element name="name" type="{http://www.w3.org/2001/XMLSchema}string" minOccurs="0"/>
 *       </sequence>
 *     </restriction>
 *   </complexContent>
 * </complexType>
 * </pre>
 *
 *
 */
@XmlAccessorType(XmlAccessType.FIELD)
@XmlType(name = "Employee", propOrder = {
    "name"
})
public class Employee {

    @XmlElementRef(name = "name", namespace = "http://zs", type = JAXBElement.class)
    protected JAXBElement<String> name;

    /**
     * Gets the value of the name property.
     *
     * @return
     *     possible object is
     *     {@link JAXBElement }{@code <}{@link String }{@code >}
     *
     */
    public JAXBElement<String> getName() {
        return name;
    }

    /**
     * Sets the value of the name property.
     *
     * @param value
     *     allowed object is
     *     {@link JAXBElement }{@code <}{@link String }{@code >}
     *
     */
    public void setName(JAXBElement<String> value) {
        this.name = ((JAXBElement<String> ) value);
    }

}
更改为:即可直接获取
package zs;

import javax.xml.bind.JAXBElement;
import javax.xml.bind.annotation.XmlAccessType;
import javax.xml.bind.annotation.XmlAccessorType;
import javax.xml.bind.annotation.XmlElement;
import javax.xml.bind.annotation.XmlElementRef;
import javax.xml.bind.annotation.XmlType;

/**
 * <p>
 * Java class for Employee complex type.
 *
 * <p>
 * The following schema fragment specifies the expected content contained within
 * this class.
 *
 * <pre>
 * <complexType name="Employee">
 *   <complexContent>
 *     <restriction base="{http://www.w3.org/2001/XMLSchema}anyType">
 *       <sequence>
 *         <element name="name" type="{http://www.w3.org/2001/XMLSchema}string" minOccurs="0"/>
 *       </sequence>
 *     </restriction>
 *   </complexContent>
 * </complexType>
 * </pre>
 *
 *
 */
@XmlAccessorType(XmlAccessType.FIELD)
@XmlType(name = "Employee", propOrder = { "name" })
public class Employee {

	@XmlElement(name = "name", namespace = "http://zs", type = String.class)
	protected String name;

	public String getName() {
		return name;
	}

	public void setName(String name) {
		this.name = name;
	}

	/**
	 * Gets the value of the name property.
	 *
	 * @return possible object is {@link JAXBElement }{@code <}{@link String }
	 *         {@code >}
	 *
	 */


}
3.6......................................运行我们的测试,测试结果如下所示:
4......................................至此我们测试完成,得到成果...............完成对象和List的封装。


