xcode 免证书真机调试
|
看了不少文章关于免99D真机调试的,最终总结一贴可行性方案。 首先iphone设备已越狱(没有开发者帐号的前题下,没有越狱的iphone是没有任何读写权限的)。 破解过程:
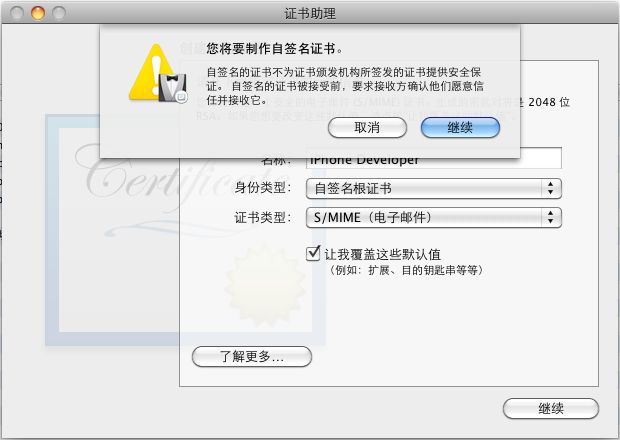
(一)制作证书
1. 打开 Finder->实用工具 -> 钥匙串访问
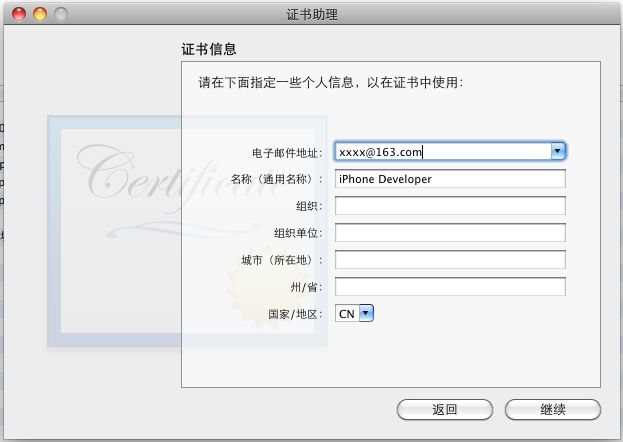
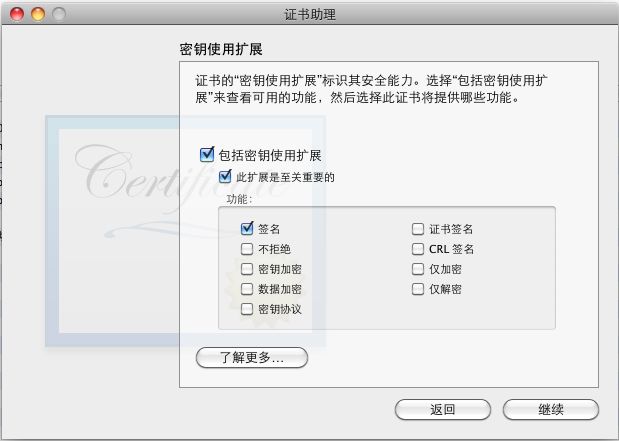
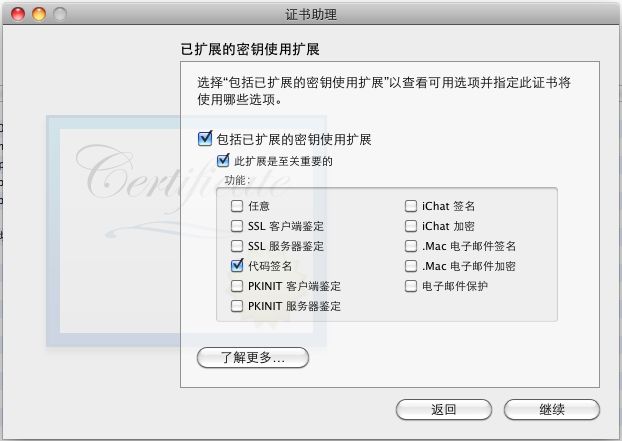
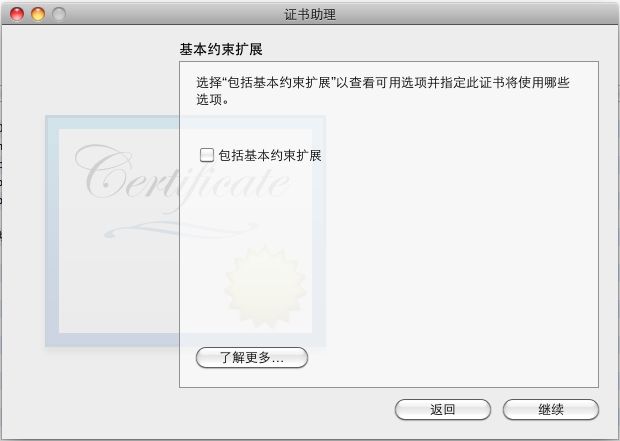
2. 单击 “钥匙串访问”选择 “证书” 再选择 “创建证书”过程如下图:
3.证书名称填写:“iPhone Developer” 严格填写这个名字,不要随便填写,然后点击“创建”。(如图)
1.修改 xcode SDKsettings.plist文件。
找到 “ /Developer/Platforms/iPhoneOS.platform/Developer/SDKs/iPhoneOS4.3.sdk ”下得 SDKSettings.plist 文件,修改“Default Properties ”项下面得 “CODE_SIGNING_REQUIRED ”得值为:NO。
修改过程中会遇到 系统提示你没有修改此文件得权限,会给你复制一个副本修改得权利。那么选择创建副本修改,创建目标位置到“桌面”。现在它可以允许你修改副本。再在副本中选择修改“Default Properties ”项下面得 “CODE_SIGNING_REQUIRED ”得值为:NO。
修改好了副本 ,将副本拖拽到 “ /Developer/Platforms/iPhoneOS.platform/Developer/SDKs/iPhoneOS4.3.sdk ”下 替换原来得 SDKSettings.plist 文件。这个时候会提示你是否修改替换, 选择 “是”,然后输入自己得密码。修改成功。
2.破解xcode
关闭xcode状态下:
打开 Finder -> 实用工具 -> 终端 。
1)在终端中粘贴i下面得代码:
2.在联网状态下 ,继续在终端上粘贴下面得代码
3.修改”/Developer/Platforms/iPhoneOS.platform/Info.plist”文件
增加两项:
4.替换“/Developer/Platforms/iPhoneOS.platform/Info.plist”文件,做如下替换(用文本编辑器打开):
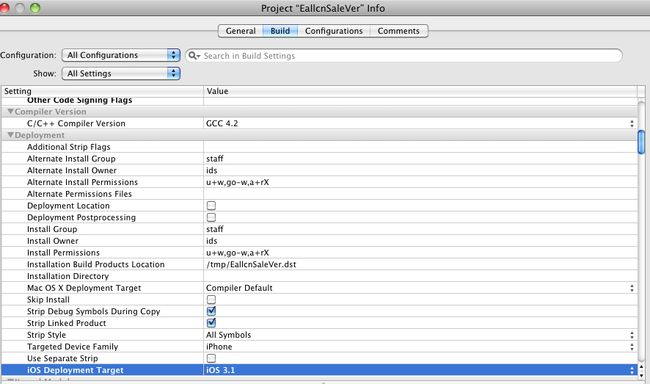
5.下面就是去xcode下面修改自己得工程属性 了
打开xcode,打开自己得工程。
看到下面得步骤修改下工程属性就可以了。
1.点击 项目图标,找到“Build Settings” 找到 “Code Sign Identity”
按照下面得方式设置一下就可以 了。
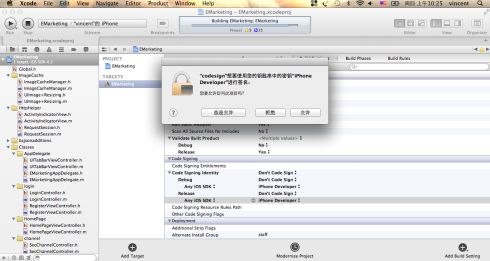
1 Code Sign error: a valid provisioning profile matching the application's Identifier 'com.yourcompany.xxxx' could not be found 打开Xcode,打开你的项目,Project->>Edit Project Setting,选择”Build”页面,Configurations和Show都选择All,找到Code Signing Identity项,删除其子项,并将”Code Signing Identity”赋值为”iPhone Developer”(其实是个选项) 然后找到你项目的xxx-Info.plist文件,添加”SignerIdentity”项,其值为”Apple iPhone OS Application Signing”.保存。
Xcode真机调试: 你的程序会自动下载到你的iPhone中,可以进行真机调试了 Xcode破解完成,或者更准确的讲,是配置完成! 打包ipa: 需要制作成ipa安装包,方便安装在iPad或iPhone上。 第一步,新建一个文件夹,名字任意。找一个不大于500*500的jpg图片,改名为:iTunesArtwork,注意不能有后缀名。 第二步,建立一个文件夹,名为:Payload,把刚才编译的BargainSale.app拷贝到这个文件夹里面。 第三部,修改app里面的Info.plist文件,windows下可以用Pledit.exe编辑,在<dict></dict>节点里面加入: <key>SignerIdentity</key> <string>Apple iPhone OS Application Signing</string> 然后选中Payload和iTunesArtwork,右键生产压缩zip文件,比如:BargainSale.zip,把后缀名改为ipa就可以了。现在可以双击BargainSale.ipa文件,看看可以加入到iTunes了。
#!/usr/bin/env pythonimport sysimport structif len(sys.argv) != 3: print "Usage: %s appname dest_file.xcent" % sys.argv[0] sys.exit(-1) APPNAME = sys.argv[1]DEST = sys.argv[2] if not DEST.endswith('.xml') and not DEST.endswith('.xcent'): print "Dest must be .xml (for ldid) or .xcent (for codesign)" sys.exit(-1) entitlements = """<?xml version="1.0" encoding="UTF-8"?> <!DOCTYPE plist PUBLIC "-//Apple//DTD PLIST 1.0//EN" "http://www.apple.com/DTDs/PropertyList-1.0.dtd"> <plist version="1.0"><dict> <key>application-identifier</key> <string>%s</string> <key>get-task-allow</key> <true/></dict></plist>""" % APPNAMEf = open(DEST,'w') if DEST.endswith('.xcent'): f.write("\xfa\xde\x71\x71") f.write(struct.pack('>L', len(entitlements) + 8))f.write(entitlements) f.close() |