Xcode HeaderDoc 教程(2)
Code Snippets,让一切变得更简单:
这真的很容易,不是吗?但还能更简单一些吗?
本站曾经介绍过 code snippets,请看这里。
Code snippets 在 Xcode 中扮演着无名英雄的角色。一个snippet 是一个可以重用的代码块(存储在 snippet 库中)。Snippets 甚至可以包含一些需要你去填充的占位符。这意味着什么?你可以用 snipppet来为你进行文档化。这真是个不错的注意。
在 MathAPI.h 中,在原有的注释上面加入以下内容:
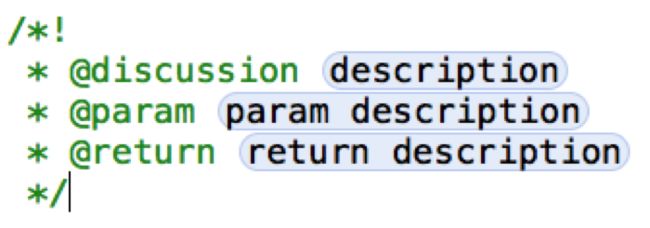
/*! * @discussion <#description#> * @param <#param description#> * @return <#return description#> */ |
注意,当你粘贴上述代码时,“<# #>”之间的内容会变成一个token,你可以通过 tab 键在 token 之间来回切换。这就像你编写代码时使用的自动完成功能。
接下来我们使用一个小技巧。打开 Utilities 面板中的 CodeSnippets Library 检查器窗口,选中这段注释块,将它拖到 Code Snippet Library 窗口中(从某个 token 例如<#description#>开始拖):
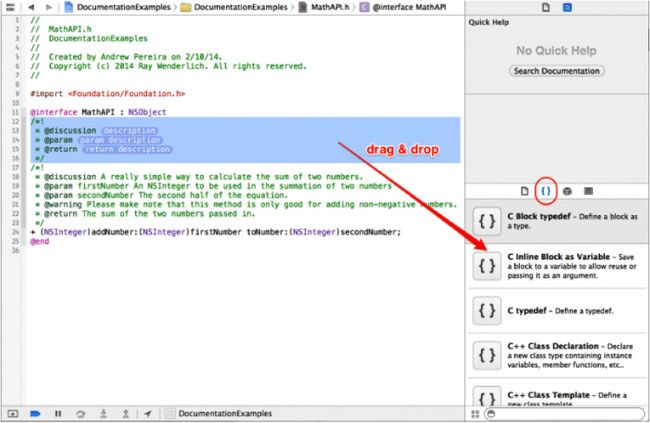
将弹出一个窗口让你输入 snippet 的某些信息,并以此来创建一个自动完成快捷方式。你可以在其中编写代码。按照如下形式填写:
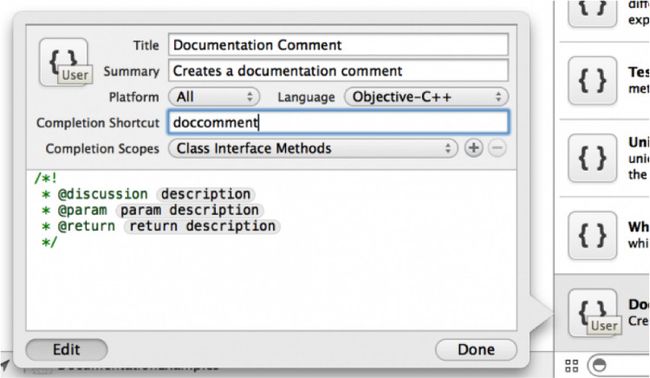
随时可以编辑 snippet 的代码或快捷方式。你可以编辑 snippet也可以重新创建新的 snippet。要编辑 snippet,点击 Code Snippet Library 中的 snippet,然后点 Edit 按钮。
要想让你的 snippet 生效,首先删除原有注释,然后将鼠标放到addNumber:toNumber: 方法的 + 号前面,输入doccomment,然后回车,你的 snippet 将自动出现。通过 Tab 键在3个 token 间移动,并填充它们。最终完成的文档化结果如下:
/*! * @discussion A really simple way to calculate the sum of two numbers. * @param firstNumber An NSInteger to be used in the summation of two numbers. * @param secondNumber The second half of the equation. * @warning Please make note that this method is only good for adding non-negative numbers. * @return The sum of the two numbers passed in. */ |
当然,第2个 @param 标签和 @warning 标签需要你手动书写,但snippet 还是节省了不少的时间。
你可以继续这样做。看,文档化什么的都是菜!
Typedefs的文档化
打开 Car.h,在 class 之前还有一些东西要文档化。有一个NS_ENUM,即 typedef enum,一个块,几个属性,一个空方法。先别气馁,这很容易,分分钟的事情。
还记得 @typedef 标签吗?这个顶级标签稍微特殊一点。它可以对typedef enum 或者 typedef struct 之类的东东进行注释。 根据你注释的对象的不同,它会包含与定义的类型相关的二级标签。
以 enum 为例,它会包含 @constant 标签,用于每个常量(对于struct,则会是 @field 标签)。
找到 enum OldCarType。它包含两个常量,是用于古典汽车的。在typedef 声明之上,将原来的注释替换为:
/*! * @typedef OldCarType * @brief A list of older car types. * @constant OldCarTypeModelT A cool old car. * @constant OldCarTypeModelA A sophisticated old car. */ typedef enum { OldCarTypeModelT, OldCarTypeModelA } OldCarType; |
编译,然后在 OldCarType 上使用alt+左键。你会看到 @brief 标签的内容出现了。现在,在 OldCarTypeModelA 上 alt+左键。看到你的注释了吗?悲剧发生了。
别担心,你仍然可以找回想要的东西——我们必须要正确的东西放在正确的位置上。在 enum 中添加如下注释:
But fear not, you canstill get your information where you need it - we've got the trusty tripleforward slash in our tool belt. Add the comments to the enum like you see here:
typedef enum { /// A cool, old car. OldCarTypeModelT, /// A sophisticated older car. OldCarTypeModelA } OldCarType; |
编译,alt+左键,就能看到你的注释了。
在这个类中只有一个 NS_ENUM,因此接下来有你自己进行文档化。常量已经注释了,你只要对整个NS_ENUM 进行一个总体的注释就可以了。
/*! * @typedefCarType
* @brief Alist of newer car types.
* @constantCarTypeHatchback Hatchbacks are fun, but small.
* @constantCarTypeSedan Sedans should have enough room to put your kids, and your golfclubs
* @constantCarTypeEstate Estate cars should hold your kids, groceries, sport equipment,etc.
* @constantCarTypeSport Sport cars should be fast, fun, and hard on the back.
*/
注意:这个enum 是通过宏来声明的,悲催的 Xcode 不能完全支持和 typedef enum 一样的文档特性,虽然NS_ENUM 实际上是声明 enums 的推荐的方法。也许这一点将来会改变,但目前还没有,只能徒呼奈何。
现在来文档化 CarType 属性。
/// Indicates the kind of car as enumerated in the "CarType" NS_ENUM @property (nonatomic, assign) CarType carType; |
编译,在 carType 变量名上 alt+左键。
仍然是 Car.h,继续文档化 typedef block。见下:
/*! * @brief A block that makes the car drive. * @param distance The distance is equal to a distance driven when the block is ready to execute. It could be miles, or kilometers, but not both. Just pick one and stick with it. ;] */ typedef void(^driveCompletion)(CGFloat distance); |
typedef block 的文档化和之前的并无多少不同,它包含了:
- 一个 @brief 标签,简单说明了一下这个块的作用。
- 一个 @param 标签,说明调用块时需要传递的参数。
添加格式化代码到文档中
有时,对于程序员来说,告诉他怎样使用一个方法会更好。
例如,Car 类的 driveCarWithComplete: 方法。
这个方法以块作为参数,因为块对于新手来说一般比较困难,因此最好是告诉程序员如何使用这个方法。
这需要使用 @code 标签。在 driveCarWithCompletion方法声明之前添加如下内容:
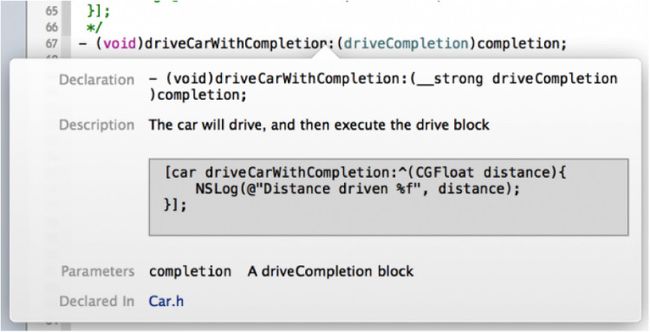
/*! * @brief The car will drive, and then execute the drive block * @param completion A driveCompletion block * @code [car driveCarWithCompletion:^(CGFloat distance){ NSLog(@"Distance driven %f", distance); }]; */ |
编译,在方法名上使用alt+左键。如下图所示。
检查文档
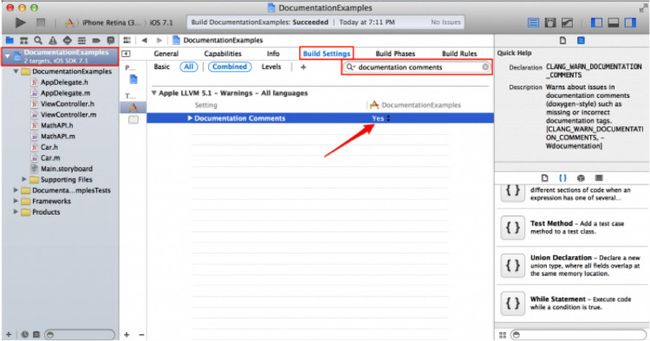
你学会了如何添加注释,如果 Xcode 能帮你检查你的工作,就像Xcode会自动检查代码中的语法错误,那岂不是更好?有一个好消息,Clang 有一个标志,叫做“CLANG_WARN_DOCUMENTATION_COMMENTS”,可以用于检查 HeaderDoc 格式的注释。
打开 DocumentationExamples的项目设置,点击 Build Settings,找到 DocumentationComments, 将值设置为 YES。
