Ubunto 安装Apache服务器
使用Ubunto安装可以使用源代码编译模式安装也可以使用apt命令或apt图形软件包安装
编译模式:
1. 首先要下载安装依赖包,比如apr,apr-util,apache等
2. tar解压包
3. ./configure配置,指定安装位置
4. make编译
5. sudo make install 安装
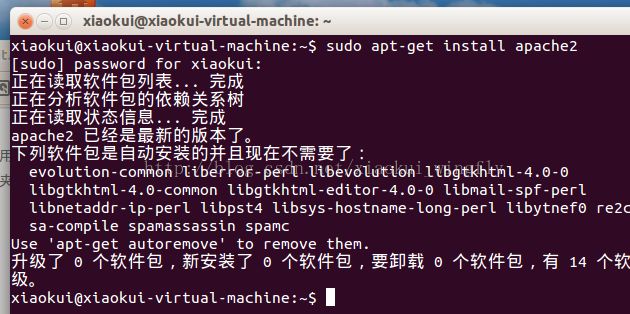
详情请参考百度。我这里就使用apt命令模式安装了,在终端输入:sudo apt-get install apache2 回车输入密码即可安装,我这里已经安装过了
使用编译模式可以指定安装目录,比如安装在/usr/local/apache2中,apt-get使用默认安装路径
默认安装完成后会启用apache2服务,服务的端口号默认为80,如下测试,默认页面指定/usr/www/html/index.html页面
可以在页面中加入自己的html进行测试如下图加入自己的html
启动、停止、重启命令
Apache服务器的控制脚本是apache2ctl,通过这个脚本传递参数控制Apache服务器的启动和关闭(需要root权限),常用的3个参数是start、stop、restart,
使用这条命令启动:sudo apache2ctl start
如果系统提示找不到apache2ctl命令,那么很可能是apache2ctl脚本所在的目录没有被加入到搜索路径中,使用绝对路径来运行这条命令,例如,把Apache安装在/usr/local/apache2目录下,使用下面这条命令启动Apache服务器
sudo /usr/local/apache2/bin/apache2ctl start
如果不确定Apache安装在哪儿,可以使用whereis命令找到它。
// Apache
//Task: Start Apache 2 Server /启动apache服务
# /etc/init.d/apache2 start
//or
$ sudo /etc/init.d/apache2 start
//Task: Restart Apache 2 Server /重启apache服务
# /etc/init.d/apache2 restart
//or
$ sudo /etc/init.d/apache2 restart
//Task: Stop Apache 2 Server /停止apache服务
# /etc/init.d/apache2 stop
//or
$ sudo /etc/init.d/apache2 stop

// Mysql
/etc/init.d/mysql start
/etc/init.d/mysql stop
/etc/init.d/mysql restart
以上是手动启动,可以让其进行设置Apache在系统引导时自动启动,不同的Liunx发行版有时候会有所不同,一下是Ubunto的设置
在rc目录下建立一个链接并指向/etc/init.d/httpd文件,运行命令:sudo ln -s /etc/init.d/httpd /etc/rc.5/S91apache2,这样每次进入运行级5的时候都会启动Apache服务器


