Butterknife使用详解
开章简介
Hi,大家好 今天将为大家带来有关Android第三方框架ButterKnife的详细讲解。
ButterKnife介绍
ButterKnife是出自于JakeWharton的手,相信对安卓开发的人员来说,这个名字真的可以说是我们耳熟能详的了,那么对于刚刚接触Android的朋友,尤其刚刚接触ButterKnife的朋友可能不算太了解。(那么今后出去混,一定可要说认识喽)
Field and method binding for Android views which uses annotation processing to generate boilerplate code for you.
Eliminate findViewById calls by using @BindView on fields.
Group multiple views in a list or array. Operate on all of them at once with actions, setters, or properties.
Eliminate anonymous inner-classes for listeners by annotating methods with @OnClick and others.
Eliminate resource lookups by using resource annotations on fields.
class ExampleActivity extends Activity {
@BindView(R.id.user) EditText username;
@BindView(R.id.pass) EditText password;@BindString(R.string.login_error) String loginErrorMessage;
@OnClick(R.id.submit) void submit() {
// TODO call server…
}@Override public void onCreate(Bundle savedInstanceState) {
super.onCreate(savedInstanceState);
setContentView(R.layout.simple_activity);
ButterKnife.bind(this);
// TODO Use fields…
}
}
For documentation and additional information see the website.Remember: A butter knife is like a dagger only infinitely less sharp.
Download
Add this to you project-level build.gradle:
buildscript {
repositories {
mavenCentral()
}
dependencies {
classpath ‘com.neenbedankt.gradle.plugins:android-apt:1.8’
}
}
Add this to your module-level build.gradle:apply plugin: ‘android-apt’
android {
…
}dependencies {
compile ‘com.jakewharton:butterknife:8.0.1’
apt ‘com.jakewharton:butterknife-compiler:8.0.1’
}
Make sure the line apply plugin … is placed somewhere at the top of the file.Snapshots of the development version are available in Sonatype’s snapshots repository.
License
Copyright 2013 Jake Wharton
Licensed under the Apache License, Version 2.0 (the “License”);
you may not use this file except in compliance with the License.
You may obtain a copy of the License athttp://www.apache.org/licenses/LICENSE-2.0
Unless required by applicable law or agreed to in writing, software
distributed under the License is distributed on an “AS IS” BASIS,
WITHOUT WARRANTIES OR CONDITIONS OF ANY KIND, either express or implied.
See the License for the specific language governing permissions and
limitations under the License.
以上是引用来自github这里英文简单的介绍了如何在AndroidStudio中引用依赖包,并且简单的介绍了一下使用的方法,对于英文好的朋友这些都是很简单的,但是对于那些英语不好的朋友,就显得有一些不友善了,毕竟我们是大中华。但这丝毫不能阻止我们对工具的渴求,那么接下来我将讲解黄油刀ButterKnife的详细介绍。
ButterKnife所用到的Java技术
在介绍前,需要大家了解一下黄油刀所用到的java知识基础。这里用到的技术为java的元注解,当然我还没有发有关于元注解的博文,因此这里的介绍就引用了竹子-博客,要深入了解第三方技术,请先进入了解,元注解机制。
Java标准Annotation
@Deprecated 相当于Javadoc的@deprecated,被@Deprecated标注的对象class, method等被注明为不推荐使用。主要用于javac等编译工具。
@Override 注明对象method重载了父类的方法。javac等编译工具编译时会根据此Annotation判断重载方法是否正确。
@SuppressWarnings 告诉javac等编译器忽略所指定的特定的警告信息。
@Target 被定义的annotation可以附加在那些对象上。
@Retention annotation的作用期间
@Retention 可以设置为RetentionPolicy类型的值。那么其值为
| RetentionPolicy的值 | 说明 |
|---|---|
| RetentionPolicy.CLASS | annotation信息将被编译器编译时保存在class文件中,但执行时不会在VM装载。也就是说不能在执行时动态取得annotation信息。未设置@Retention时这将是默认设置值。 |
| RetentionPolicy.RUNTIME | annotation信息将被编译器编译时保存在class文件中,执行时也会被VM装载。 |
| RetentionPolicy.SOURCE | annotation信息将被编译器编译时舍弃掉。 |
@Target表明Annotation可以附加在哪种JAVA元素之上,可以设置为java.lang.annotation.ElementType数组类型的值。
| ElementType值 | 说明 |
|---|---|
| ElementType.ANNOTATION_TYPE | 应用于其他注解的元注解 |
| ElementType.CONSTRUCTOR | 构造函数 |
| ElementType.FIELD | 字段 |
| ElementType.LOCAL_VARIABLE | 方法中的本地变量 |
| ElementType.METHOD | 方法 |
| ElementType.PACKAGE | 包 |
| ElementType.PARAMETER | 方法的参数 |
| ElementType.TYPE | 类,接口或者枚举声明 |
当然如果Java Annotation 不支持自定义注解的话,那我们还学习这个有什么用呢!这么好用的东西怎么可能不支持自定义呢。接下来看Annotation是如何自定义的
Annotation是一种特殊的interface。所以可以在annotation里定义方法,属性;也可以让某个类从annotation继承(implements)。
先看代码:
MyAnnotation.java

public @interface MyAnnotation{
    public String value();
    public String[] Values();
    int number() default 0;
}
MyAnnotation具有一个返回String的value方法,返回String[]的Values 方法;还有一个返回int 的number方法。其中number方法具有默认值0。
使用例:
TestMyAnnotation.java

class TestMyAnnotation3{
    @MyAnnotation3(value = "call testMethod1 ", Values={"1 ", "2 "}, number = 1)
    public void testMethod1() {

    }

    @MyAnnotation3(value = "call testMethod2 ", Values={"1 ", "2 "})
    public void testMethod2() {

    }
}
number具有默认值,所以标注时可以不为其赋值。其余方法则必须通过上面介绍的方法赋值。multiValues返回一个String[]数组,所以可以通过Values={“1”, “2”}为其赋值。
看到这里应该对元注解有一定理解了,那么就让我们开始介绍本篇的主角ButterKnife。
ButterKnife拆解
- 要想充分的理解黄油刀的逻辑思路,我们必须去啃源码,从源码中理解其工作的原理和使用的范围,以及这个第三方提供的方法有哪些。这些都是从读源码中获得的,相信看源码对你的编程技术以及逻辑上的严谨性有很大的帮助。
- 首先我们从ButterKnife中提供的案例来透析第三方的逻辑。Let`s go。在开始之前还是倡议大家从github上下载源码并建议大家结合代码跟着我一起浏览,这样效果会更加出色。
- 首先我们先看一下ButterKnife源码中给我们的例子,通过例子我们来从反面解析其工作原理和使用的方法。这也是我们最快理解源码的渠道(当然这里方法不止一个,找到适合自己的比任何人灌输给你的都好。)
- 那么就先让我们从例子的源码开始
  public class SimpleActivity extends Activity {
  private static final ButterKnife.Action<View> ALPHA_FADE = new ButterKnife.Action<View>() {
    @Override public void apply(@NonNull View view, int index) {
      AlphaAnimation alphaAnimation = new AlphaAnimation(0, 1);
      alphaAnimation.setFillBefore(true);
      alphaAnimation.setDuration(500);
      alphaAnimation.setStartOffset(index * 100);
      view.startAnimation(alphaAnimation);
    }
  };

  @BindView(R.id.title) TextView title; //BindView是提
              //供绑定视图的元素,无需我们在findviewbyid()
  @BindView(R.id.subtitle) TextView subtitle;
  @BindView(R.id.hello) Button hello;
  @BindView(R.id.list_of_things) ListView listOfThings;
  @BindView(R.id.footer) TextView footer;

  @BindViews({ R.id.title, R.id.subtitle, R.id.hello }) List<View> headerViews;

  private SimpleAdapter adapter;

  @OnClick(R.id.hello) void sayHello() {
    Toast.makeText(this, "Hello, views!", LENGTH_SHORT).show();
    ButterKnife.apply(headerViews, ALPHA_FADE);
  }

  @OnLongClick(R.id.hello) boolean sayGetOffMe() {
    Toast.makeText(this, "Let go of me!", LENGTH_SHORT).show();
    return true;
  }

  @OnItemClick(R.id.list_of_things) void onItemClick(int position) {
    Toast.makeText(this, "You clicked: " + adapter.getItem(position), LENGTH_SHORT).show();
  }

  @Override protected void onCreate(Bundle savedInstanceState) {
    super.onCreate(savedInstanceState);
    setContentView(R.layout.simple_activity);
    ButterKnife.bind(this);

    // Contrived code to use the bound fields.
    title.setText("Butter Knife");
    subtitle.setText("Field and method binding for Android views.");
    footer.setText("by Jake Wharton");
    hello.setText("Say Hello");

    adapter = new SimpleAdapter(this);
    listOfThings.setAdapter(adapter);
  }
}接下来我们一次点击进入我们感兴趣的注解,首先我们点击@BindView来看看源码是如何定义的这个接口。
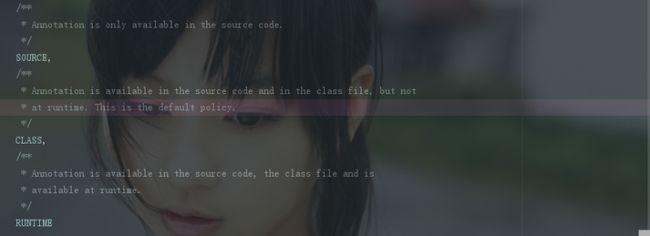
这里我们看到了接口底层的定义,可以看到这个是自定义的注解,
让我们看看这个接口注解所表示的含义。
//自动添加到域中
* type.
* <pre><code>
* {@literal @}BindView(R.id.title) TextView title;//这是提供给我
* //们使用的方法格式。
* </code></pre>
*/
```
其次我们来看看接口头部的注解含义:`@Retention(CLASS) @Target(FIELD)`这些属性值上面已经讲解了所以不再描述。
在图片中我们注意到了`@IdRes` 我们点进去查看源码,
从图片中我们可以清楚的看到这个接口中定义的注解,根据注解的类型就可以清晰知道这个接口是实现什么功能。
当然这个元注解 是实现Target规定的类型当作一个指定id的资源引用。是不是自定义起来也很简单呢,看示例源码感觉代码简介工作量突然减少了呢!那就快快加入元注解队列吧。
---------
* 接下来介绍butterknife的使用方法。(这里需要注意在Fragment的和adapter中需要多家一个root view参数)Fragegment使用时记得同时继承onDestroyView,并在其中将ButterKnife.reset
```
public class FancyFragment extends Fragment {
@InjectView(R.id.button1) Button button1;
@InjectView(R.id.button2) Button button2;
@Override View onCreateView(LayoutInflater inflater, ViewGroup container, Bundle savedInstanceState) {
View view = inflater.inflate(R.layout.fancy_fragment, container, false);
ButterKnife.inject(this, view);
// TODO Use "injected" views...
return view;
}
}
@Override void onDestroyView() {
super.onDestroyView();
ButterKnife.reset(this);
}还可以实例化控件数组,注解多一个s,也就是 InjectViews
@InjectViews({ R.id.first_name, R.id.middle_name, R.id.last_name }) List<EditText> nameViews;推荐大家使用的快速注解AS插件
首先看看如何在Android Studio上安装该插件,直接看图:
安装好后需要restart你的Android Studio。
在使用此插件前,需要已经导入了butterknife的jar(或者在build.gradle中已经加入:compile ‘com.jakewharton:butterknife:7.0.0 ’ )
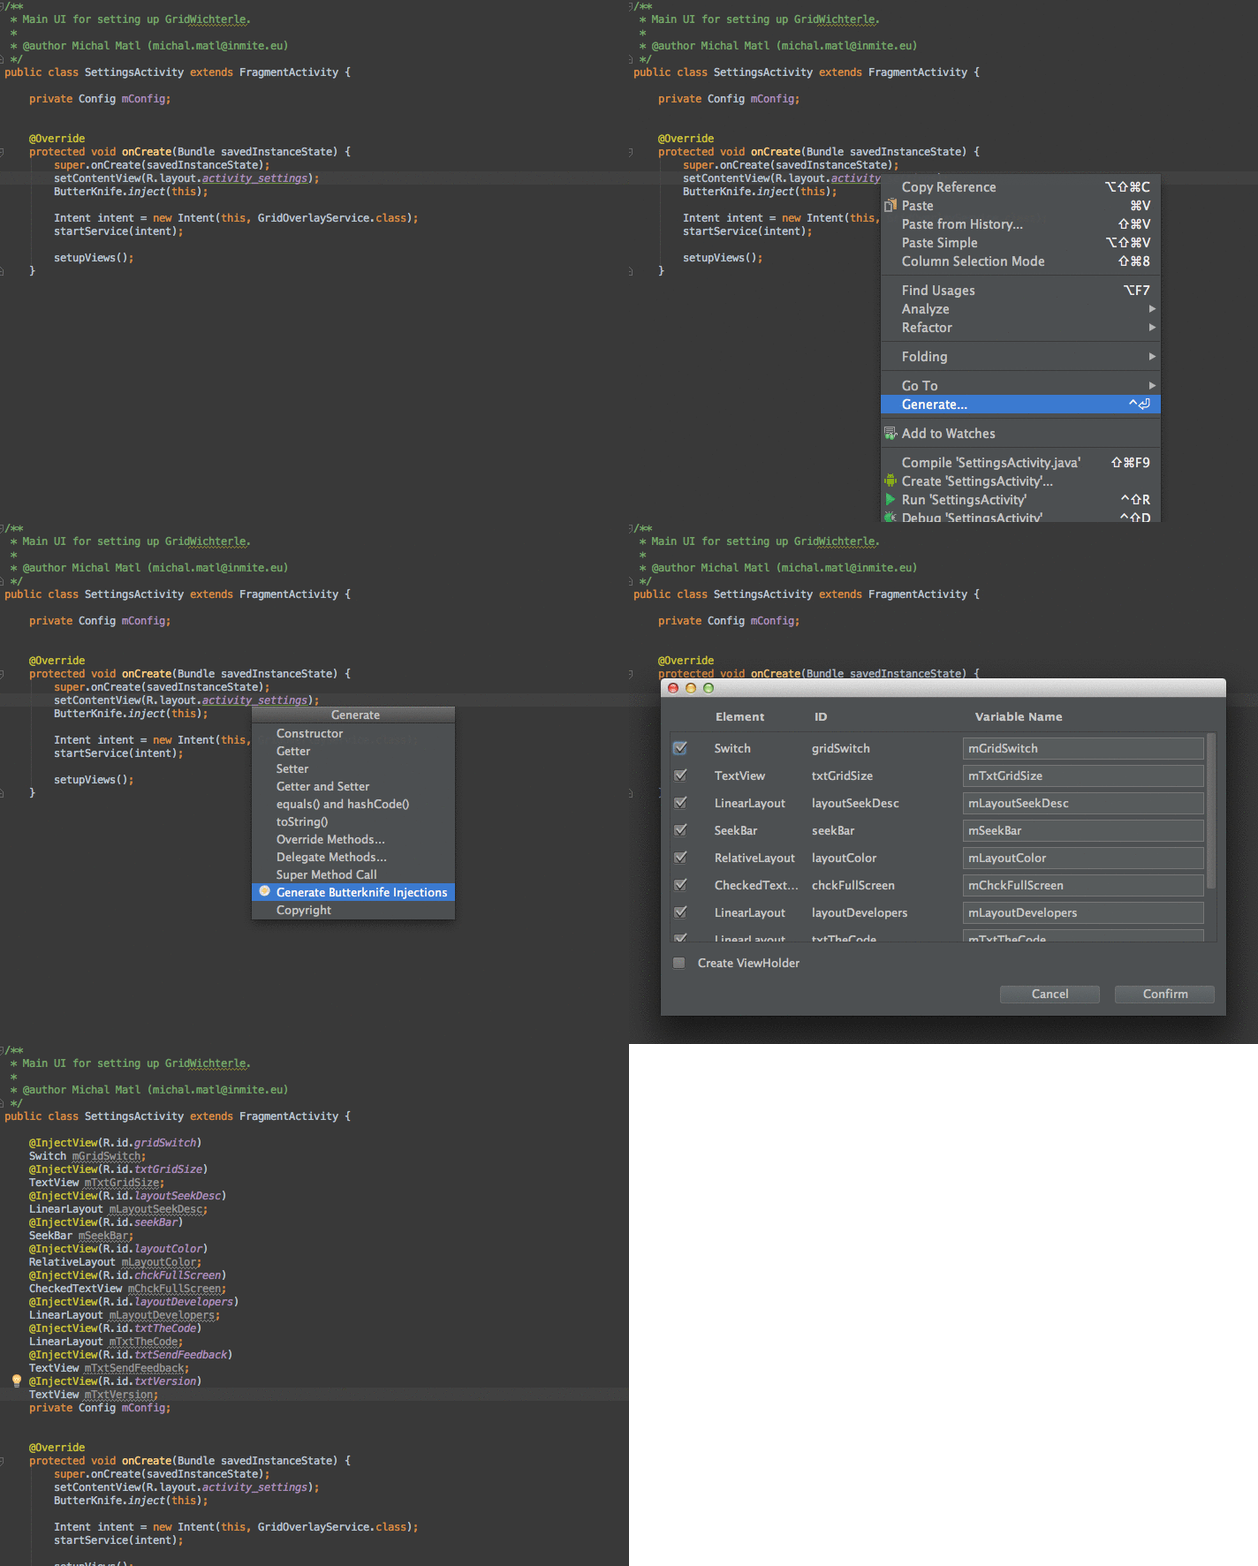
随后,在你需要导入注解的Activity或者Fragment或者ViewHolder的layout资源代码上,右击,选择 Generate 然后 Generate ButterKnife Injections,这时候生成类似于下列的选择框:
Element为view的类型,ID为layout中资源的id名字,Variable Name即为你在代码中引用出来的变量名,点击Confirm后即可。

