Calabash-ios framework的安装过程
Manual setup with Xcode
参考这篇文章
https://github.com/calabash/calabash-ios
主要是按照这个的步骤一步一步来的,如果你对Xcode熟悉,这些都不在话下,如果不熟,请教下开发,文档的xcode版本过低,很多页面跟实际还是有些不同。
http://www.moncefbelyamani.com/ios-automated-testing-with-calabash-cucumber-ruby/
1. 装Ruby的环境和跑用例我就不讲了。
大概:
cd path-to-my-ios-project
gem install calabash-cucumber
calabash-ios setup
calabash-ios gen
cucumber
例子很简单,但是你要做自己的项目,就需要定位元素吧。
如果你按照Android的方法,
calabash-ios console
start_test_server_in_background
出错信息会告诉你环境不行,framework没装之类的错误。
怎么办,看哥哥细细道来:
步骤1:
Install the calabash-cucumber gem
$ gem install calabash-cucumber
步骤2:
在targets下把项目Duplicate一个,主要用来测试
under TARGETS, and select Duplicate. Or, simply click on newsyc and press ⌘D. If you get a Duplicate iPhone Target prompt, click on the Duplicate Only button.
然后改名,如:newsyc-calabash
1,需要在targets里面改名
2,需要在Manage Schemes里面改名
3,需要在Build Settings里面改名
步骤2:
1. 下载一个calabash.framework, 按照这个文档,源文件已经被删除。
幸好还有git的文档,
用这个命令下载:
calabash-ios download
然后把这个文件拖到xcode项目里面。
2. 加CFNetwork.framework
在复制的那个项目中,click on Build Phases, expand Link Binary with Libraries, click on +, click on CFNetwork.framework, and click on Add
3. 配置Other Linker Flags
选中你复制的项目,Click on Build Settings, click on All (if it’s not already selected), then search for other linker, click on the Other Linker Flags row, then click once under Yes to enable edit mode,
and copy and paste the following: -force_load "$(SRCROOT)/calabash.framework/calabash" -lstdc++. Click anywhere outside of the text field to save your changes.
You should end up with something like this (note that what appears after -force_load will be different for you since that is the path to your project on your computer).
3. 开测
在测得过程中,打开console output
首先看下元素能否定位了:
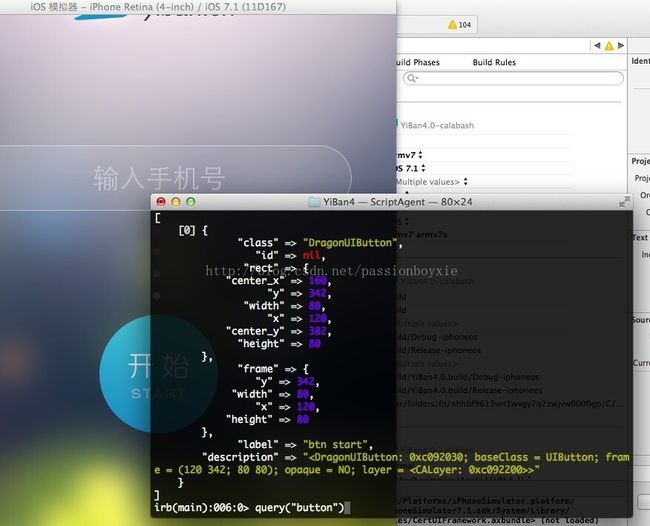
再写case啥的已经不在话下了。
OK,搞定,先回家,明天可以大搞了。