IOS SWIFT---使用UICollectionView
上一篇我们完成了第一个用swift写的ios小程序,今天我们拓展一下那个程序,使用UICollectionView。
UICollectionView类似android中的gridview可以实现九宫格的效果。
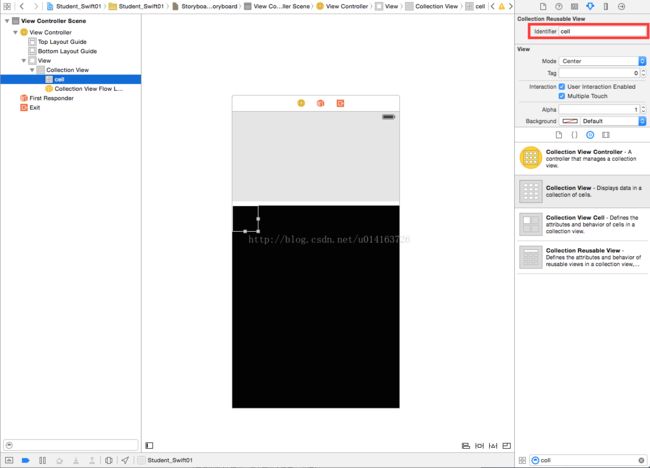
首先我们还是打开我们的故事版main.storyboard拖拽一个Collection View
默认是带一个Collection View Cell ,相当于我们的九宫格里面的子view,我们可以往cell里面拖拽控件,这些cell需要有一个标识符"Indentifier",我们这里的标识符就叫cell
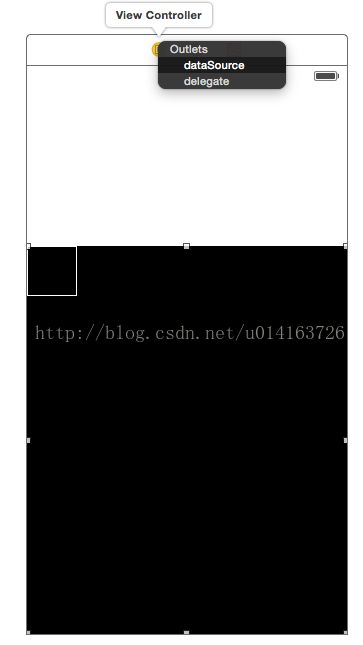
同时我们需要把控制器和视图链接
- 提示框里面显示"Outlets"里面有fataSource和delegate
- 数据源和委托属性与当前的视图控制器关联
- 程序运行时,会在相关控制器中寻找相关方法
我们新建一个控制器继承
UICollectionViewCell
import UIKit

class CountCollectionViewCell: UICollectionViewCell {

    @IBOutlet weak var label: UILabel!
    var mUtil = Util()

    override init(frame:CGRect) {
        super.init(frame: frame)
    }
    required init(coder aDecoder: NSCoder) {
        super.init(coder: aDecoder)
    }

    func setViewLabel(index:NSIndexPath){
        self.label.text=mUtil.getCharacter(index)
    }

}
required修饰符可以看看这篇博客http://blog.csdn.net/yongyinmg/article/details/39673345
同时我们也可以看到swift定义函数的方式为 func 方法名 (方法参数) -> 返回值
接下来我们看看我们的ViewControll具体做了什么
import UIKit

class ViewController: UIViewController,UICollectionViewDataSource,UICollectionViewDelegate {

    @IBOutlet weak var textField: UITextField!

    @IBOutlet weak var mCollectionView: UICollectionView!
    var cell:CountCollectionViewCell? = nil
    var mUtil = Util()

    //当控制器的视图类加载完成时调用
    override func viewDidLoad() {
        super.viewDidLoad()
        // Do any additional setup after loading the view, typically from a nib.
    }

    //当系统触发内存警告时调用
    override func didReceiveMemoryWarning() {
        super.didReceiveMemoryWarning()
        // Dispose of any resources that can be recreated.
    }

    //cell个数
    func collectionView(collectionView: UICollectionView, numberOfItemsInSection section: Int) -> Int{
        return 15;
    }

    //相当于android中的getview
    func collectionView(collectionView: UICollectionView, cellForItemAtIndexPath indexPath: NSIndexPath) -> UICollectionViewCell{
         cell = collectionView.dequeueReusableCellWithReuseIdentifier("cell", forIndexPath: indexPath) as CountCollectionViewCell
        cell!.setViewLabel(indexPath)
        return cell!
    }

    //具体点击的哪个cell
    func collectionView(collectionView: UICollectionView, didSelectItemAtIndexPath indexPath: NSIndexPath) {
            textField.text = mUtil.getCharacter(indexPath)

    }


}
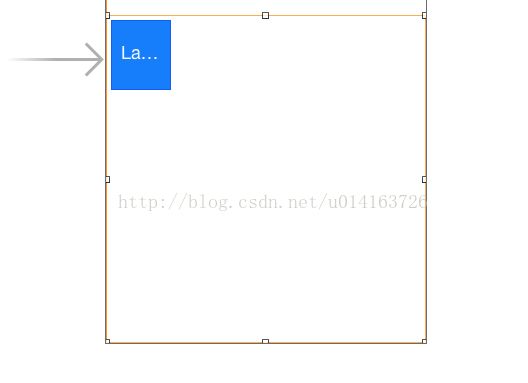
最重要的就是相当于android中的getview方法,我们把我们的cell回调给上层得以在界面中显示出来,接下来看看效果


