Android实战:CoolWeather酷欧天气(加强版数据接口)代码详解(下)
-----------------------------------该文章代码已停更,可参考浩比天气(更新于2019/6/25)-----------------------------------
接上篇文章(http://blog.csdn.net/MaybeForever/article/details/78497806)继续,完整文件请从我的GitHub中下载。
目录(下)
文章目录
- 目录(下)
##四、显示天气信息
1、定义GSON实体类
首先详细分析一下和风天气返回的数据,如下图所示:

除了status之外,其余的五个内部又包含具体的内容,因此将basic、aqi、now、suggestion、daily_forecast这五个部分定义成5个实体类。在gson包下建立Basic类、AQI类、Now类、Suggestion类、Forecast类。
Basic类:
public class Basic {

    @SerializedName("city")
    public String cityName;//城市名

    @SerializedName("id")
    public String weatherId;//城市对应的天气的id

    @SerializedName("lat")
    public String cityLat;//城市的经度

    @SerializedName("lon")
    public String cityLon;//城市的纬度

    public Update update;

    public class Update{

        @SerializedName("loc")
        public String updateTime;//接口更新时间

    }

}
AQI类:
public class AQI {

    public AQICITY city;

    public class AQICITY{

        public String aqi;//空气质量指数

        public String co;//一氧化碳指数

        public String no2;//二氧化氮指数

        public String o3;//臭氧指数

        public String pm10;//PM10指数

        public String pm25;//PM2.5指数

        public String qlty;//空气质量(优/良/轻度污染/中度污染/重度污染/严重污染)

        public String so2;//二氧化硫指数
    }
}
Forecast类:
public class Forecast {

    public Astro astro;

    public class Astro{

        public String mr;//月升时间

        public String ms;//月落时间

        public String sr;//日升时间

        public String ss;//日落时间

    }

    @SerializedName("cond")
    public More more;
    public class More{

        @SerializedName("txt_d")
        public String info;//白天天气状况描述

        @SerializedName("txt_n")
        public String night_info;//晚间天气状况描述
    }

    public String date;//预报日期

    public String pcpn;//降水量

    public String pop;//降水概率

    public String pres;//大气压强

    public String uv;//紫外线强度指数

    public String vis;//能见度

    public String hum;//相对湿度

    @SerializedName("tmp")
    public Temperature temperature;
    public class Temperature{

        public String max;//最高温度

        public String min;//最低温度

    }

    public Wind wind;
    public class Wind{

        public String dir;//风向

        public String sc;//风力

        public String spd;//风速
    }

}
Now类:
public class Now {

    @SerializedName("cond")
    public More more;

    public class More{

        @SerializedName("txt")
        public String info;//天气信息

    }

    public String fl;//体感温度

    public String hum;//相对湿度

    public String pcpn;//降水量

    public String pres;//大气压强

    @SerializedName("tmp")
    public String temperature;//温度

    public String vis;//能见度

    public WIND wind;

    public class WIND{

        public String dir;//风向

        public String sc;//风力

        public String spd;//风速

    }
}
Suggestion类:
    public Air air;//空气质量指数

    public class Air{

        @SerializedName("txt")
        public String info;

    }

    @SerializedName("comf")
    public Comfort comfort;//舒适度指数

    public class Comfort{

        @SerializedName("txt")
        public String info;

    }

    @SerializedName("cw")
    public CarWash carWash;//洗车指数

    public class CarWash{

        @SerializedName("txt")
        public String info;
    }

    public Drsg drsg;//穿衣指数

    public class Drsg{

        @SerializedName("txt")
        public String info;
    }

    public Flu flu;//感冒指数

    public class Flu{

        @SerializedName("txt")
        public String info;
    }

    public Sport sport;//运动指数

    public class Sport{

        @SerializedName("txt")
        public String info;
    }

    public Trav trav;//旅游指数

    public class Trav{

        @SerializedName("txt")
        public String info;
    }

    public Uv uv;//紫外线指数

    public class Uv{

        @SerializedName("txt")
        public String info;
    }
}
在创建五个实体类的过程中,我们使用了@SerializedName() 来命名JSON中的一些字段,由于JSON中的一些字段不适合直接用来使用,因为不好理解,所以可以使用@SerializedName()的方式 ,将JSON字段写在里面,然后在下面一行写上自己需要用的命名(可随意写,只要自己理解就可以)。至此,basic、aqi、now、suggestion、daily_forecast对应的实体类已经创建好,接下来还需要再创建一个总的实体类来引用刚刚创建的各个实体类。在gson包下新建一个Weather类,代码如下:
public class Weather {
    /**
     * Weather类作为总的实例类来引用以上各个实体类
     */

    public String status;

    public Basic basic;

    public AQI aqi;

    public Now now;

    public Suggestion suggestion;

    @SerializedName("daily_forecast")
    public List forecastList;
}
在Weather类中,对Basic、AQI、Now、Suggestion、Forecast类进行了引用,由于daily_forecast包含的是一个数组,因此使用List集合来引用Forecast类。此外,除了天气信息数据还会包含一项status数据,成功获取天气数据的时候会返回ok,失败时会返回具体原因。
2、编写天气界面
首先创建一个用于显示天气信息的活动。右击com.coolweather.android包->New->Activity->Empty Activity,创建一个Weather Activity,并将布局名指定成activity_weather.xml。由于所有的天气信息在同一界面上显示会让代码很混乱,所以将界面的不同部分写在不同的布局文件里,再通过引入布局的方式集成到activity_weather.xml中。右击res/layout->New->Layout resource file,新建一个title.xml作为头布局,代码如下所示:
title.xml使用了百分比布局的方法,然后新建now.xml作为当前天气信息的布局,代码如下所示:
now.xml使用了相对布局和线性布局的方法,然后新建forecast.xml作为未来几天天气信息的布局,代码如下所示:
forecast.xml使用了线性布局,还再需要定义一个未来天气的子项布局,创建forecast_item.xml文件,代码如下所示:
forecast_item.xml使用线性布局,然后新建aqi.xml作为空气质量信息的布局,代码如下所示:
aqi.xml使用了相对布局和线性布局,然后新建suggestion.xml作为生活建议信息的布局,代码如下所示:
suggestion.xml使用了线性布局,接下来将已编好的每部分布局文件引入到activity_weather.xml当中,代码如下所示:
antivity_weather.xml使用帧布局的布局方式。至此,天气界面就编写完成了。
3、将天气显示到界面上
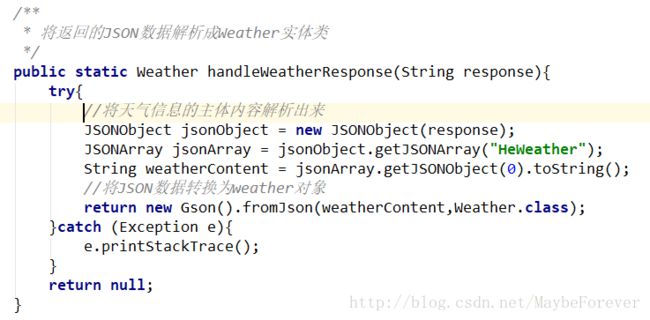
首先在Utility类中添加一个用于解析天气JSON数据的方法,如下图所示:
接下来的工作是再活动中请求天气数据,以及将数据展示到界面上。修改WeatherActivity代码(之前创建了WeatherActivity,会生成activity_weatehr.xml布局文件和WeatherActivity.java文件)。如下所示:
 public class WeatherActivity extends AppCompatActivity {

    public DrawerLayout drawerLayout;

    private Button navButton;

    public SwipeRefreshLayout swipeRefresh;

    private String mWeatherId;

    private ScrollView weatherLayout;//滚动视图对象

    private TextView titleCity;//基本信息--城市名

    private TextView titleUpdateTime;//基本信息--更新时间

    private TextView titleLat;//基本信息--经度

    private TextView titleLon;//基本信息--纬度

    private TextView weatherInfoText;//实时天气信息--天气信息

    private TextView flText;//实时天气信息--体感温度

    private TextView humText;//实时天气信息--相对湿度

    private TextView pcpnText;//实时天气信息--降水量

    private TextView presText;//实时天气信息--大气压强

    private TextView degreeText;//实时天气信息--温度

    private TextView visText;//实时天气信息--能见度

    private TextView dirText;//实时天气信息--风向

    private TextView scText;//实时天气信息--风力

    private TextView spdText;//实时天气信息--风速

    private LinearLayout forecastLayout;//线性布局对象--预报天气

    private TextView aqiText;//空气质量--空气质量指数

    private TextView coText;//空气质量--一氧化碳指数

    private TextView no2Text;//空气质量--二氧化氮指数

    private TextView o3Text;//空气质量--臭氧指数

    private TextView pm10Text;//空气质量--PM10指数

    private TextView pm25Text;//空气质量--PM2.5指数

    private TextView qltyText;//空气质量--空气质量水平

    private TextView so2Text;//空气质量--二氧化硫指数

    private TextView airText;//生活建议--空气质量指数

    private TextView comfortText;//生活建议--舒适度指数

    private TextView carWashText;//生活建议--洗车指数

    private TextView drsgText;//生活建议--穿衣指数

    private TextView fluText;//生活建议--感冒指数

    private TextView sportText;//生活建议--运动指数

    private TextView travText;//生活建议--旅游指数

    private TextView uvText;//生活建议--紫外线指数

    private ImageView bingPicImg;//背景图片

    @Override
    protected void onCreate(Bundle savedInstanceState) {
        super.onCreate(savedInstanceState);
        //版本控制(当系统版本大于等于21,也就是5.0以上系统时才会执行后面的代码)
        if(Build.VERSION.SDK_INT >= 21){
            View decorView = getWindow().getDecorView();
            decorView.setSystemUiVisibility(View.SYSTEM_UI_FLAG_LAYOUT_FULLSCREEN | View.SYSTEM_UI_FLAG_LAYOUT_STABLE);
            getWindow().setStatusBarColor(Color.TRANSPARENT);
        }
        setContentView(R.layout.activity_weather);

        //初始化各控件
        bingPicImg = (ImageView)findViewById(R.id.bing_pic_img);//背景图片
        weatherLayout = (ScrollView) findViewById(R.id.weather_layout);//滚动视图对象
        titleCity = (TextView) findViewById(R.id.title_city);//基本信息--城市
        titleUpdateTime = (TextView) findViewById(R.id.title_update_time);//基本信息--更新时间
        titleLat = (TextView) findViewById(R.id.lat_text);//基本信息--经度
        titleLon = (TextView) findViewById(R.id.lon_text);//基本信息--纬度
        weatherInfoText = (TextView) findViewById(R.id.weather_info_text);//实时天气信息--天气信息
        flText = (TextView) findViewById(R.id.fl_text) ;//实时天气信息--体感温度
        humText = (TextView) findViewById(R.id.hum_text);//实时天气信息--相对湿度
        pcpnText = (TextView) findViewById(R.id.pcpn_text);//实时天气信息--降水量
        presText = (TextView) findViewById(R.id.pres_text); //实时天气信息--大气压强
        degreeText = (TextView) findViewById(R.id.degree_text);//实时天气信息--温度
        visText = (TextView) findViewById(R.id.vis_text);//实时天气信息--能见度
        dirText = (TextView) findViewById(R.id.dir_text);//实时天气信息--风向
        scText = (TextView) findViewById(R.id.sc_text);//实时天气信息--风力
        spdText = (TextView) findViewById(R.id.spd_text); //实时天气信息--风速
        forecastLayout = (LinearLayout) findViewById(R.id.forecast_layout);//线性布局对象--预报天气
        aqiText = (TextView) findViewById(R.id.aqi_text);//空气质量--空气质量指数
        coText = (TextView) findViewById(R.id.co_text);//空气质量--一氧化碳指数
        no2Text = (TextView) findViewById(R.id.no2_text);//空气质量--二氧化氮指数
        o3Text = (TextView) findViewById(R.id.o3_text);//空气质量--臭氧指数
        pm10Text = (TextView) findViewById(R.id.pm10_text); //空气质量--PM10指数
        pm25Text = (TextView) findViewById(R.id.pm25_text);//空气质量--PM2.5指数
        qltyText = (TextView) findViewById(R.id.qlty_text);//空气质量--空气质量水平
        so2Text = (TextView) findViewById(R.id.so2_text); //空气质量--二氧化硫指数
        airText = (TextView) findViewById(R.id.air_text); //生活建议--空气质量指数
        comfortText = (TextView) findViewById(R.id.comfort_text);//生活建议--舒适度指数
        carWashText = (TextView) findViewById(R.id.car_wash_text);//生活建议--洗车指数
        drsgText = (TextView) findViewById(R.id.drsg_text);//生活建议--穿衣指数
        fluText = (TextView) findViewById(R.id.flu_text); //生活建议--感冒指数
        sportText = (TextView) findViewById(R.id.sport_text);//生活建议--运动指数
        travText = (TextView) findViewById(R.id.trav_text);//生活建议--旅游指数
        uvText = (TextView) findViewById(R.id.uv_text);//生活建议--紫外线指数
        drawerLayout = (DrawerLayout) findViewById(R.id.drawer_layout);//DrawerLayout实例
        navButton = (Button) findViewById(R.id.nav_button);//Button实例

        swipeRefresh = (SwipeRefreshLayout) findViewById(R.id.swipe_refresh);//获取SwipeRefreshLayout的实例
        swipeRefresh.setColorSchemeResources(R.color.colorPrimary);//调用setColorSchemeResources()方法来设置下拉刷新进度条的颜色
        SharedPreferences prefs = PreferenceManager.getDefaultSharedPreferences(this);
        String weatherString = prefs.getString("weather", null);
        if(weatherString != null){
            //有缓存时直接解析天气数据
            Weather weather = Utility.handleWeatherResponse(weatherString);
            mWeatherId = weather.basic.weatherId;
            showWeatherInfo(weather);
        }else{
            //无缓存时去服务器查询天气
            mWeatherId = getIntent().getStringExtra("weather_id");
            //在请求数据的时候将ScrollView()隐藏
            weatherLayout.setVisibility(View.INVISIBLE);
            //从服务器请求天气数据
            requestWeather(mWeatherId);
        }
        //设置下拉刷新监听器
        swipeRefresh.setOnRefreshListener(new SwipeRefreshLayout.OnRefreshListener(){
            @Override
            public void onRefresh() {
                requestWeather(mWeatherId);//请求天气信息
            }
        });
        String bingPic = prefs.getString("bing_pic",null);
        if(bingPic != null){
            //如果有缓存数据就直接使用Glide来加载这张图片
            Glide.with(this).load(bingPic).into(bingPicImg);
        }else{
            //如果没有缓存数据就调用loadBingPic()方法去请求今日的必应背景图
            loadBingPic();//加载每日一图
        }
        //请求新选择城市的天气信息
        navButton.setOnClickListener(new View.OnClickListener(){
            @Override
            public void onClick(View v) {
                drawerLayout.openDrawer(GravityCompat.START);
            }
        });
    }

    /**
     * 根据天气ID请求城市天气信息
     */
    public void requestWeather(final String weatherId){
        //组装接口地址
        String weatherUrl = "http://guolin.tech/api/weather?cityid=" + weatherId + "&key=8518f3bef50144e39994370699b08d5e";
        //向组装好的地址发送请求,服务器会将相应城市的天气信息以JSON()格式返回
        HttpUtil.sendOkHttpRequest(weatherUrl, new Callback() {
            @Override
            public void onResponse(Call call, Response response) throws IOException {
                final String responseText = response.body().string();
                //将返回的JSON数据转换成Weather对象
                final Weather weather = Utility.handleWeatherResponse(responseText);
                //将当前线程切换到主线程
                runOnUiThread(new Runnable() {
                    @Override
                    public void run() {
                        if(weather != null && "ok".equals(weather.status)){//请求天气成功
                            //将返回的数据缓存到SharedPreferences当中
                            SharedPreferences.Editor editor = PreferenceManager.getDefaultSharedPreferences(WeatherActivity.this).edit();
                            editor.putString("weather", responseText);
                            editor.apply();
                            mWeatherId = weather.basic.weatherId;
                            //调用showWeatherInfo()方法进行内容显示
                            showWeatherInfo(weather);
                        }else{
                            Toast.makeText(WeatherActivity.this,"获取天气信息失败",Toast.LENGTH_SHORT).show();
                        }
                        swipeRefresh.setRefreshing(false);//刷新事件结束,将进度条隐藏起来
                    }
                });
                //每次请求天气信息的时候也会刷新背景图片
                loadBingPic();
            }

            @Override
            public void onFailure(Call call, IOException e) {
                e.printStackTrace();
                runOnUiThread(new Runnable() {
                    @Override
                    public void run() {
                        Toast.makeText(WeatherActivity.this,"获取天气信息失败",Toast.LENGTH_SHORT).show();
                        swipeRefresh.setRefreshing(false);//刷新事件结束,将进度条隐藏起来
                    }
                });
            }
        });
        loadBingPic();//加载每日一图
    }

    /**
     * 加载必应每日一图
     */
    private void loadBingPic(){
        String requestBingPic = "http://guolin.tech/api/bing_pic";
        //调用HttpUtil.sendOkHttpRequest()方法获取必应背景图的链接
        HttpUtil.sendOkHttpRequest(requestBingPic, new Callback() {
            @Override
            public void onFailure(Call call, IOException e) {
                e.printStackTrace();
            }

            @Override
            public void onResponse(Call call, Response response) throws IOException {
                final String bingPic = response.body().string();
                //将链接缓存到SharedPreferences当中
                SharedPreferences.Editor editor = PreferenceManager.getDefaultSharedPreferences(WeatherActivity.this).edit();
                editor.putString("bing_pic",bingPic);
                editor.apply();
                //将线程切换到主线程
                runOnUiThread(new Runnable() {
                    @Override
                    public void run() {
                        //使用Glide来加载图片
                        Glide.with(WeatherActivity.this).load(bingPic).into(bingPicImg);
                    }
                });
            }
        });
    }


    /**
     * 处理并展示Weather实体类中的数据
     */
    private void showWeatherInfo(Weather weather){
        String cityName = weather.basic.cityName;
        String updateTime = "更新时间:"+weather.basic.update.updateTime.split(" ")[1];
        String lat = "经度:"+weather.basic.cityLat;
        String lon = "纬度:"+weather.basic.cityLon;
        titleCity.setText(cityName);
        titleUpdateTime.setText(updateTime);
        titleLat.setText(lat);
        titleLon.setText(lon);
        String weatherInfo = weather.now.more.info;
        String flInfo = weather.now.fl + "℃";
        String humInfo = weather.now.hum;
        String pcpnInfo = weather.now.pcpn + "mm";
        String presInfo = weather.now.pres + "Pa";
        String degree = weather.now.temperature + "℃";
        String visInfo = weather.now.vis;
        String dirInfo = weather.now.wind.dir;
        String scInfo = weather.now.wind.sc;
        String spdInfo = weather.now.wind.spd + "m/s";
        weatherInfoText.setText(weatherInfo);
        flText.setText(flInfo);
        humText.setText(humInfo);
        pcpnText.setText(pcpnInfo);
        presText.setText(presInfo);
        degreeText.setText(degree);
        visText.setText(visInfo);
        dirText.setText(dirInfo);
        scText.setText(scInfo);
        spdText.setText(spdInfo);
        forecastLayout.removeAllViews();
        for(Forecast forecast : weather.forecastList){
            View view = LayoutInflater.from(this).inflate(R.layout.forecast_item,forecastLayout,false);
            TextView dateText = (TextView)view.findViewById(R.id.date_text);
            TextView infoText = (TextView)view.findViewById(R.id.info_text);
            TextView maxText = (TextView)view.findViewById(R.id.max_text);
            TextView minText = (TextView)view.findViewById(R.id.min_text);
            TextView dirText = (TextView)view.findViewById(R.id.dir_text);
            TextView scText = (TextView)view.findViewById(R.id.sc_text);
            dateText.setText(forecast.date);
            infoText.setText(forecast.more.info);
            maxText.setText(forecast.temperature.max);
            minText.setText(forecast.temperature.min);
            dirText.setText(forecast.wind.dir);
            scText.setText(forecast.wind.sc);
            forecastLayout.addView(view);
        }

        if(weather.aqi != null){
            aqiText.setText(weather.aqi.city.aqi);
            coText.setText(weather.aqi.city.co);
            no2Text.setText(weather.aqi.city.no2);
            o3Text.setText(weather.aqi.city.o3);
            pm10Text.setText(weather.aqi.city.pm10);
            pm25Text.setText(weather.aqi.city.pm25);
            qltyText.setText(weather.aqi.city.qlty);
            so2Text.setText(weather.aqi.city.so2);
        }

        String air = "空气质量:"+weather.suggestion.air.info;
        String comfort = "舒适度:"+weather.suggestion.comfort.info;
        String carWash = "洗车指数:"+weather.suggestion.carWash.info;
        String drsg = "穿衣指数:"+weather.suggestion.drsg.info;
        String flu = "感冒指数:"+weather.suggestion.flu.info;
        String sport = "运动建议:"+weather.suggestion.sport.info;
        String trav = "旅游指数:"+weather.suggestion.trav.info;
        String uv = "紫外线指数:"+weather.suggestion.uv.info;
        airText.setText(air);
        comfortText.setText(comfort);
        carWashText.setText(carWash);
        drsgText.setText(drsg);
        fluText.setText(flu);
        sportText.setText(sport);
        travText.setText(trav);
        uvText.setText(uv);
        //在设置完所有数据后,再将ScrollView设为可见
        weatherLayout.setVisibility(View.VISIBLE);
        //激活AutoUpdateService这个服务,只要选中了某个城市并成功更新天气之后,
        // AutoUpdateService就会一直在后台运行,并保证每8个小时更新一次天气
        Intent intent = new Intent(this, AutoUpdateService.class);
        startService(intent);
    }

}
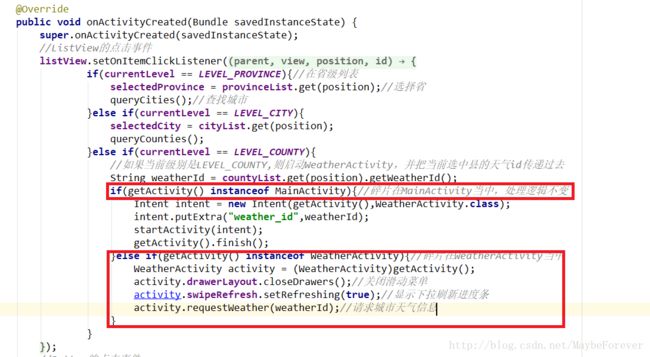
这个活动的详细分析在代码注释里已给出,接下来就是从省市县列表的界面跳转到天气界面,修改ChooseAreaFragment中的代码,如下所示:
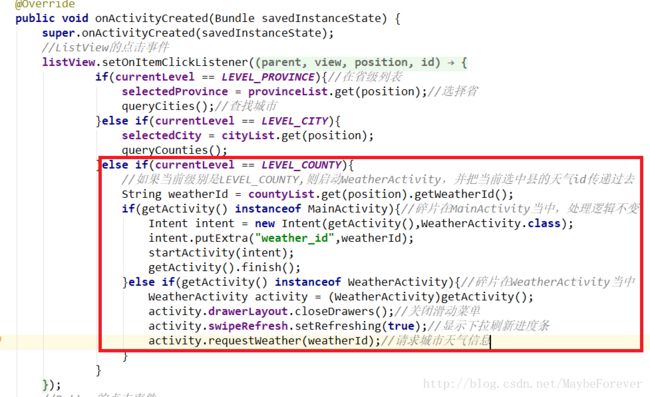
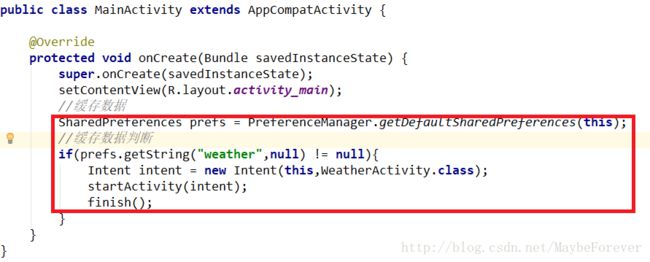
另外,还需要在MainActivity中加入一个缓存数据判断,修改MainActivity中的代码,如下所示:
4、获取必应每日一图
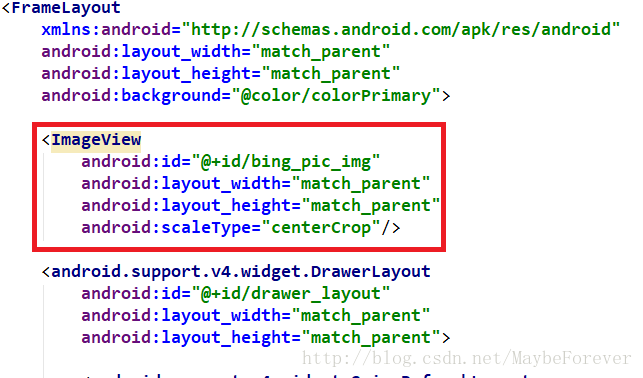
使用郭霖大神准备的每日一图接口:http://guolin.tech/api/bing_pic ,访问这个接口,服务器就会返回今日的必应背景图链接,然后我们再使用Glide去加载这张图片。首先修改activity_weather.xml中的代码。如下所示:
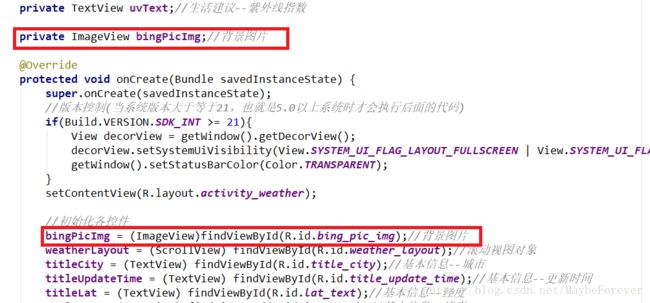
接着修改WeatherActivity中的代码,如下所示:
 /**
     * 加载必应每日一图
     */
    private void loadBingPic(){
        String requestBingPic = "http://guolin.tech/api/bing_pic";
        //调用HttpUtil.sendOkHttpRequest()方法获取必应背景图的链接
        HttpUtil.sendOkHttpRequest(requestBingPic, new Callback() {
            @Override
            public void onFailure(Call call, IOException e) {
                e.printStackTrace();
            }

            @Override
            public void onResponse(Call call, Response response) throws IOException {
                final String bingPic = response.body().string();
                //将链接缓存到SharedPreferences当中
                SharedPreferences.Editor editor = PreferenceManager.getDefaultSharedPreferences(WeatherActivity.this).edit();
                editor.putString("bing_pic",bingPic);
                editor.apply();
                //将线程切换到主线程
                runOnUiThread(new Runnable() {
                    @Override
                    public void run() {
                        //使用Glide来加载图片
                        Glide.with(WeatherActivity.this).load(bingPic).into(bingPicImg);
                    }
                });
            }
        });
    }
再添加版本控制的代码,如下图所示:
##五、手动更新天气和切换城市
1、手动更新天气
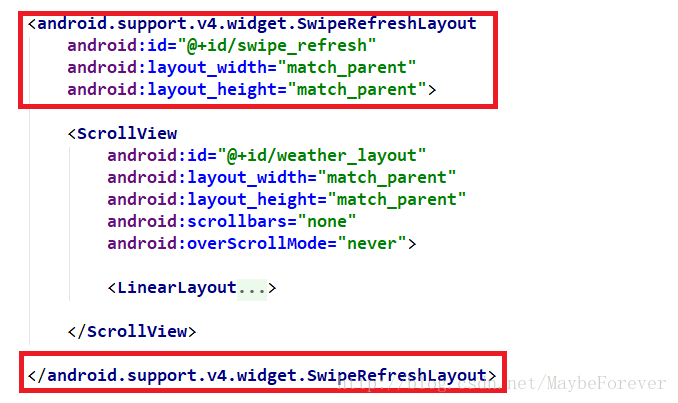
采用下拉刷新的方式更新事件,首先修改activity_weather.xml中的代码,如下图:
然后修改WeatherActivity中的代码,加入更新天气的处理逻辑:
2、切换城市
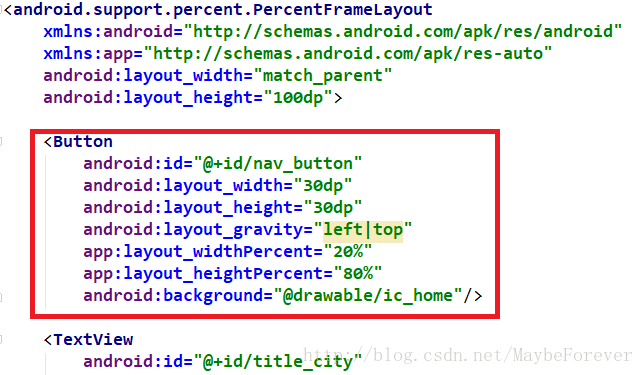
将天气的布局引入碎片,再将碎片放入滑动菜单,在正常情况下,它不占据主界面的任何空间,想要切换城市的时候只需要通过滑动的方式将菜单显示出来就可以了。此外,我们在头布局添加一个切换城市的按钮。修改title.xml中的代码,如下所示:
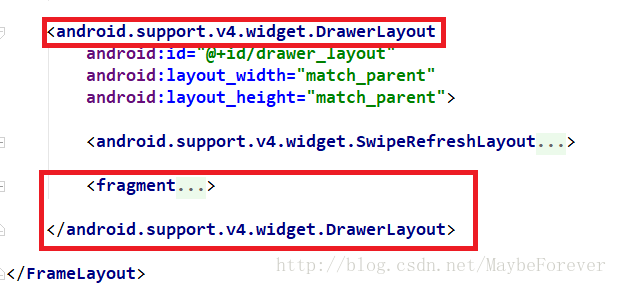
接着修改activity_weather.xml布局来加入滑动菜单功能,如下所示:
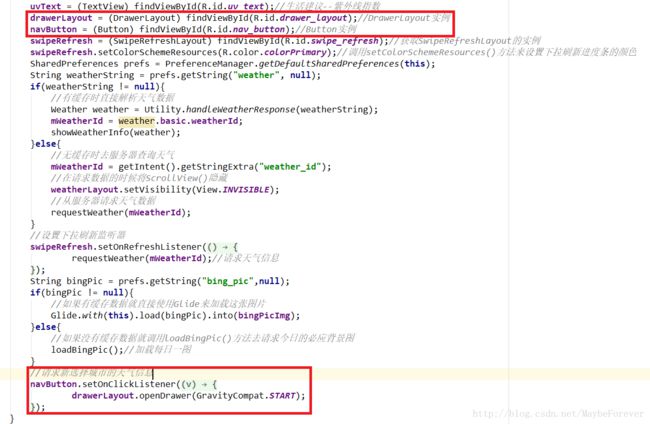
接下来需要在WeatherActivity中加入滑动菜单的逻辑处理,修改WeatherActivity中的代码。如下所示:
打开滑动菜单后需要根据选择的不同状态来进行不同的逻辑,修改ChooseAreaFragment中的代码,如下所示:
这样就把切换城市的功能全部完成了。
##六、后台自动更新天气
首先在service包下新建一个服务,右击com.coolweather.android.service->New->Service->Service,创建一个AutoUpdateService,并将Exported和Enable这两个属性都选中,然后修改AutoUpdateService中的代码,如下所示:
public class AutoUpdateService extends Service {

    @Override
    public IBinder onBind(Intent intent) {
       return null;
    }

    @Override
    public int onStartCommand(Intent intent, int flags, int startId) {
        updateWeather();
        updateBingPic();
        AlarmManager manager = (AlarmManager) getSystemService(ALARM_SERVICE);
        int anHour = 8 * 60 * 60 * 1000;//8小时的毫秒数
        long triggerAtTime = SystemClock.elapsedRealtime() + anHour;
        Intent i = new Intent(this, AutoUpdateService.class);
        PendingIntent pi = PendingIntent.getService(this,0,i,0);
        manager.cancel(pi);
        manager.set(AlarmManager.ELAPSED_REALTIME_WAKEUP,triggerAtTime,pi);
        return super.onStartCommand(intent,flags,startId);
    }

    /**
     * 更新天气信息
     */
    private void updateWeather(){
        //将更新后的数据存储在SharedPreferences文件中,打开WeatherActivity的时候会优先从SharedPreferences缓存中读取数据
        SharedPreferences prefs = PreferenceManager.getDefaultSharedPreferences(this);
        String weatherString = prefs.getString("weather",null);
        if(weatherString != null){
            //有缓存时直接解析天气数据
            Weather weather = Utility.handleWeatherResponse(weatherString);
            String weatherId = weather.basic.weatherId;
            String weatherUrl = "http://guolin.tech/api/weather?cityid=?"+weatherId+"&key=8518f3bef50144e39994370699b08d5e";
            HttpUtil.sendOkHttpRequest(weatherUrl, new Callback() {
                @Override
                public void onFailure(Call call, IOException e) {
                    e.printStackTrace();
                }

                @Override
                public void onResponse(Call call, Response response) throws IOException {
                    String responseText = response.body().string();
                    Weather weather = Utility.handleWeatherResponse(responseText);
                    if(weather != null && "ok".equals(weather.status)){
                        SharedPreferences.Editor editor = PreferenceManager.getDefaultSharedPreferences(AutoUpdateService.this).edit();
                        editor.putString("weather",responseText);
                        editor.apply();
                    }
                }
            });
        }
    }

    /**
     * 更新必应每日一图
     */
    private void updateBingPic(){
        String requestBingPic = "Http://guolin.tech/api/bing_pic";
        HttpUtil.sendOkHttpRequest(requestBingPic, new Callback() {
            @Override
            public void onFailure(Call call, IOException e) {
                e.printStackTrace();
            }

            @Override
            public void onResponse(Call call, Response response) throws IOException {
                String bingPic = response.body().string();
                SharedPreferences.Editor editor = PreferenceManager.getDefaultSharedPreferences(AutoUpdateService.this).edit();
                editor.putString("bing_pic",bingPic);
                editor.apply();
            }
        });
    }
}
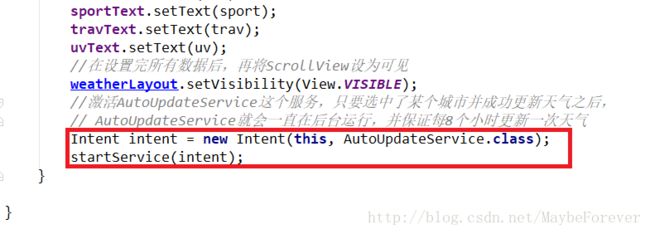
然后激活这段代码,修改WeatherActivity中的代码,如下所示:
##七、修改图标和名称
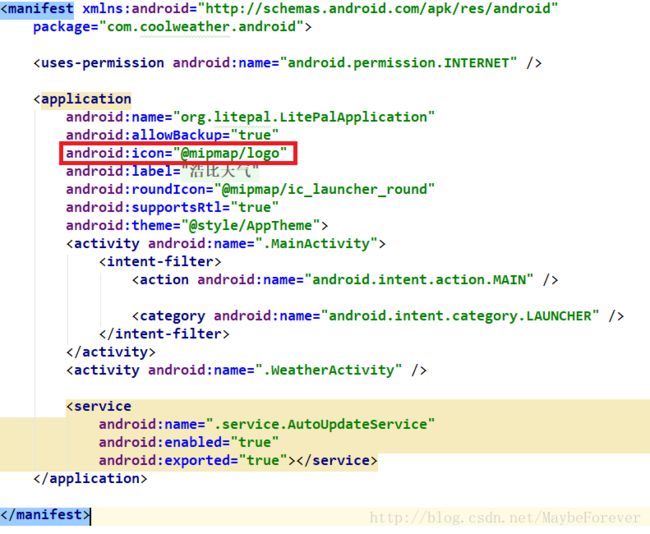
自己准备好一张图片来作为软件图标,将这张图片命名为logo.png,放入所有以mipmap开头的目录下,然后修改AndroidManifest.xml中的代码,如下所示:
接下来修改程序名称。打开res/values/sring.xml文件,如下:
