Centos7 编译 Tensorflow GPU版本
编译的环境 :
py36, git 2.14.3, NVIDIA-SMI 418.40.04, Driver Version: 418.40.04, CUDA Version: 10.1, libprotoc 3.9.1
LSB Version: :core-4.1-amd64:core-4.1-noarch
Distributor ID: CentOS
Description: CentOS Linux release 7.4.1708 (Core)
Release: 7.4.1708
Codename: Core
由于本人的GPU驱动编译TF1.14.0前已经安装,本帖少了一步GPU的驱动安装
编译的步骤见下:
1. 安装GPU的驱动,最终 nvidia-smi 能执行
2. protoc buff 编译安装,自行clone最新,编译
3.bazel编译安装,TF1.14.0的bazel不得高于0.25,参见本人TF CPU贴。https://blog.csdn.net/banana1006034246/article/details/99649029
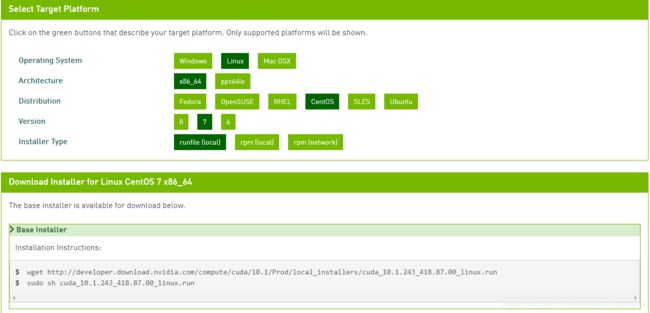
4.安装 cuda,其下载地址 https://developer.nvidia.com/cuda-downloads 选择你操作系统相关的包,会有提示你安装方法,本人采用runfile安装,过程没什么。安装后设置环境变量,使用 nvcc -V 验证
export CUDA_10_1=/usr/local/cuda-10.1/bin
export LD_LIBRARY_PATH=/usr/local/cuda-10.1/lib64:$LD_LIBRARY_PATH

export PATH=$CUDA_10_1:$PYHOME:$GITHOME:$BAZELHOME:$PATH
Please make sure that
 -   PATH includes /usr/local/cuda-10.1/bin
 -   LD_LIBRARY_PATH includes /usr/local/cuda-10.1/lib64, or, add /usr/local/cuda-10.1/lib64 to /etc/ld.so.conf and run ldconfig as root
To uninstall the CUDA Toolkit, run cuda-uninstaller in /usr/local/cuda-10.1/bin
5.安装NCCL,下载地址https://developer.nvidia.com/nccl/nccl-download,安装方法参考官方文档https://docs.nvidia.com/deeplearning/sdk/nccl-install-guide/index.html

6.安装cudnn,此步下载需要登陆,可使用Google 账户登陆。选择和cuda对应版本的cudnn,编译方法https://docs.nvidia.com/deeplearning/sdk/cudnn-install/index.html
下载地址https://developer.nvidia.com/rdp/cudnn-download 
7. TF1.14.0编译:下载1.14.0的tar包,本人未使用 clone master分支代码,master分支尚不是1.14.0。解压,进入,执行./configure进行配置,除了 是否使用cuda,其余具体情况具体修改, Tensorrt建议选 no ,否则你得编译安装 它, 下载地址https://developer.nvidia.com/nvidia-tensorrt-5x-download ,本人试过,遗憾没编译安装上,最终选了 no。具体如下:
Please specify the location of python. [Default is /usr/bin/python]: /usr/bin/python3
Found possible Python library paths:
  /usr/local/lib64/python3.6/site-packages
  /usr/lib/python3.6/site-packages
  /usr/lib64/python3.6/site-packages
  /usr/local/lib/python3.6/site-packages
Please input the desired Python library path to use.  Default is [/usr/local/lib64/python3.6/site-packages]
Do you wish to build TensorFlow with XLA JIT support? [Y/n]: y
XLA JIT support will be enabled for TensorFlow.
Do you wish to build TensorFlow with OpenCL SYCL support? [y/N]: n
No OpenCL SYCL support will be enabled for TensorFlow.
Do you wish to build TensorFlow with ROCm support? [y/N]: n
No ROCm support will be enabled for TensorFlow.
Do you wish to build TensorFlow with CUDA support? [y/N]: y
CUDA support will be enabled for TensorFlow.
Please specify the CUDA SDK version you want to use. [Leave empty to default to CUDA 10.0]: 10.1
Please specify the location where CUDA 10.1 toolkit is installed. Refer to README.md for more details. [Default is /usr/local/cuda]: /usr/local/cuda-10.1
Please specify the cuDNN version you want to use. [Leave empty to default to cuDNN 7]: 7.6
Please specify the location where cuDNN 7 library is installed. Refer to README.md for more details. [Default is /usr/local/cuda-10.1]:
Do you wish to build TensorFlow with TensorRT support? [y/N]: n
No TensorRT support will be enabled for TensorFlow.
Please specify the locally installed NCCL version you want to use. [Default is to use https://github.com/nvidia/nccl]: 2.4.8
Please specify the location where NCCL 2 library is installed. Refer to README.md for more details. [Default is /usr/local/cuda-10.1]:/usr/lib64
NCCL found at /usr/lib64/libnccl.so.2
Assuming NCCL header path is /usr/lib64/../include/nccl.h
Please specify a list of comma-separated Cuda compute capabilities you want to build with.
You can find the compute capability of your device at: https://developer.nvidia.com/cuda-gpus.
Please note that each additional compute capability significantly increases your build time and binary size. [Default is: 3.5,7.0]:
Do you want to use clang as CUDA compiler? [y/N]: n
nvcc will be used as CUDA compiler.
Please specify which gcc should be used by nvcc as the host compiler. [Default is /usr/bin/gcc]:
Do you wish to build TensorFlow with MPI support? [y/N]: n
No MPI support will be enabled for TensorFlow.
Please specify optimization flags to use during compilation when bazel option "--config=opt" is specified [Default is -march=native -Wno-sign-compare]:
Would you like to interactively configure ./WORKSPACE for Android builds? [y/N]: n
Not configuring the WORKSPACE for Android builds.
#编译
bazel build --config=opt --config=cuda --verbose_failures //tensorflow/tools/pip_package:build_pip_package
#打包whl
bazel-bin/tensorflow/tools/pip_package/build_pip_package /tmp/tensorflow_pkg_gpu
期间,你一定会越到各种问题,我遇到的大致有
Could not find any nvcc matching version '10.1' in any subdirectory
ln -s /usr/lib/x86_64-linux-gnu/libcublas.so.10.1 /usr/local/cuda-10.1/lib64/libcublas.so.10.1
ImportError: No module named builtins
pip install future
No library found under: /usr/local/cuda/lib64/libcublas.so.10
ln -s /usr/lib64/libcublas.so.10 /usr/local/cuda/lib64/libcublas.so.10
C++ compilation of rule '//tensorflow/lite/python/interpreter_wrapper:python_utils' failed (Exit 1): crosstool_wrapper_driver_is_not_gcc failed
export PYTHON_INCLUDE_PATH=/path/to/py
C++ compilation of rule '@protobuf_archive//:python/google/protobuf/internal/_api_implementation.so' failed (Exit 1): crosstool_wrapper_driver_is_not_gcc failed
这是使用python2.7编译出现的错,折腾许久我最终换python3.6编译,没再出现这个问题,我认为是TF1.14.0对python2.7支持的一个bug
Python.h:No such file or directory
yum install python-dev
Encountered error while reading extension file 'cuda/build_defs.bzl': no such package '@local_config_cuda//cuda'
TF 1.13.2最高支持 cuda10,请使用 1.14.0
验证:
pip install tensorflow-1.14.0-cp36-cp36m-linux_x86_64.whl
python3 -c 'import tensorflow as tf; print(tf.__version__)'
如果还不放心,可用下面py测试,tf.device这儿,首次执行如果报错,修改成提示的设备
import datetime
import tensorflow as tf

print('gpuversion')
# Creates a graph.(gpu version)
starttime2 = datetime.datetime.now()
#running
with tf.device('/job:localhost/replica:0/task:0/device:XLA_GPU:0'):
  a = tf.constant([1.0, 2.0, 3.0, 4.0, 5.0, 6.0, 1.0, 2.0, 3.0, 4.0, 5.0, 6.0, 1.0, 2.0, 3.0, 4.0, 5.0, 6.0, 1.0, 2.0, 3.0, 4.0, 5.0, 6.0, 1.0, 2.0, 3.0, 4.0, 5.0, 6.0, 1.0, 2.0, 3.0, 4.0, 5.0, 6.0,1.0, 2.0, 3.0, 4.0, 5.0, 6.0, 1.0, 2.0, 3.0, 4.0, 5.0, 6.0, 1.0, 2.0, 3.0, 4.0, 5.0, 6.0], shape=[6, 9], name='a')
  b = tf.constant([1.0, 2.0, 3.0, 4.0, 5.0, 6.0, 1.0, 2.0, 3.0, 4.0, 5.0, 6.0, 1.0, 2.0, 3.0, 4.0, 5.0, 6.0, 1.0, 2.0, 3.0, 4.0, 5.0, 6.0, 1.0, 2.0, 3.0, 4.0, 5.0, 6.0, 1.0, 2.0, 3.0, 4.0, 5.0, 6.0,1.0, 2.0, 3.0, 4.0, 5.0, 6.0, 1.0, 2.0, 3.0, 4.0, 5.0, 6.0, 1.0, 2.0, 3.0, 4.0, 5.0, 6.0], shape=[9, 6], name='b')
  c = tf.matmul(a, b)
  c = tf.matmul(c,a)
  c = tf.matmul(c,b)
# Creates a session with log_device_placement set to True.
sess2 = tf.Session(config=tf.ConfigProto(log_device_placement=True))
# Runs the op.
for i in range(59999):
    sess2.run(c)
print(sess2.run(c))
sess2.close()
endtime2 = datetime.datetime.now()
time2 = (endtime2 - starttime2).microseconds
print('time2:',time2)
参考文献
https://blog.csdn.net/jinxiaonian11/article/details/89048302
https://github.com/tensorflow/tensorflow/issues/13481
https://github.com/hyperopt/hyperopt/issues/273
https://blog.csdn.net/a145127/article/details/88763599
https://www.cnblogs.com/RainLa/p/10664199.html
https://cloud.tencent.com/developer/article/1435005