Atlas系列-Apache Atlas 独立部署和HA
用编译集成的hbase和sorl部署的apache atlas请参见之前的文章:Atlas系列-编译部署
此次介绍的是 集成以独立部署好的 kakfa,solr,hbase的部署方式
本次部署包含一下六部分:
- apache atlas 独立部署编译
- solr集群部署,集成到apache atlas
- 集成已有HBase集群,集成已有kafka集群
- apache atlas的HA
- hive hook 部署
- hive 元数据导入
部署环境
- hadoop环境:cdh-5.9.0
- kafka版本:0.10.2+kafka2.2.0
- apache-atlas版本:1.0.0
- solr版本:5.5.1
- apache atlas部署路径:/opt/apache-atlas
- solr 部署路径:/opt/solr
- ATLAS_HOME=/opt/apache-atlas/apache-atlas-1.0.0
- SOLR_HOME=/opt/solr/solr-5.5.1
apache atlas 独立部署编译
准备工作参见:Atlas系列-编译部署
编译apache atlas 不包含嵌入组件:
mvn clean -DskipTests package -Pdist编译后好得到如下的包:
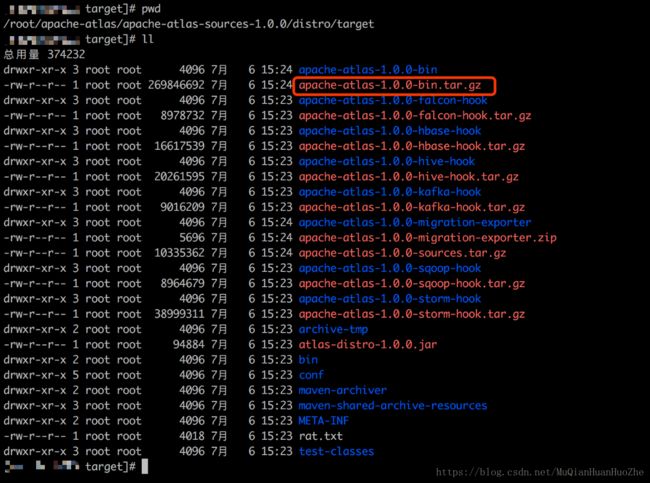
我们部署时候要用的包:apache-atlas-1.0.0-bin.tar.gz
solr集群部署,集成到apache atlas
solr集群部署
下载solr部署包
wget http://archive.apache.org/dist/lucene/solr/5.5.1/solr-5.5.1.tgz解压solr部署包
tar -zxvf solr-5.5.1.tgz修改solr配置
修改 solr.in.sh 配置文件,位于:$SOLR_HOME/bin/
配置solr zookeeper路径:ZK_HOST=”cdh003:2181,cdh005:2181,cdh006:2181/solr”
cdh003:2181,cdh005:2181,cdh006:2181为已有的zookeeper集群

配置solr 端口:SOLR_PORT=9838

配置zookeeper
在zookeeper新建/solr 目录:create /solr “solr”
拷贝solr到要安装的机器
scp -r /opt/solr/solr-5.5.1 root@cdh005:/opt/solr
scp -r /opt/solr/solr-5.5.1 root@cdh006:/opt/solr
启动solr
分别进入cdh005和cdh006的目录:/opt/solr/solr-5.5.1
启动命令:bash $SOLR_HOME/bin/solr start
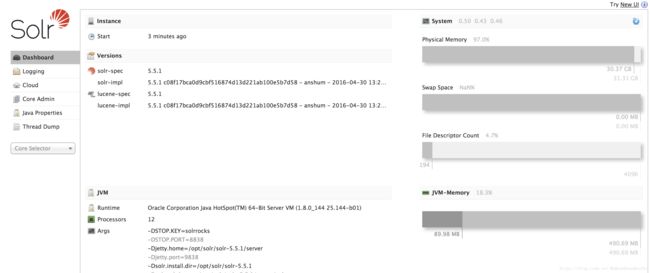
启动成功后显示如下

可登录对应的solrweb控制台:http://cdh005:9838/solr/#/
看到如下界面,恭喜你solr-cloude 部署成功。
备注:solr常用命令
启动:bash $SOLR_HOME/bin/solr start
停止:bash $SOLR_HOME/bin/solr stop
重启:bash $SOLR_HOME/bin/solr restart
更多命令可输入 bash $SOLR_HOME/bin/solr 获取
集成到apache atlas
配置文件拷贝:
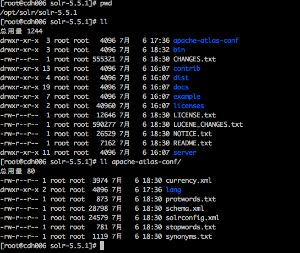
apache atlas 配置的solr文件夹拷贝到solr各个节点,并重命名为:apache-atlas-conf
apache atlas 配置的solr文件夹如图:
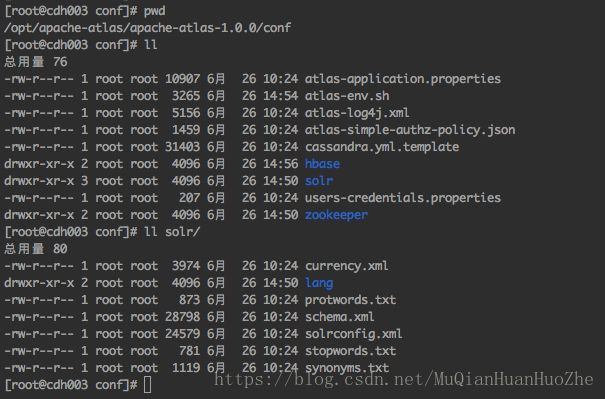
solr节点的文件夹如图:
创建collection:
bash $SOLR_HOME/bin/solr create -c vertex_index -d $SOLR_HOME/apache-atlas-conf -shards 2 -replicationFactor 2
bash $SOLR_HOME/bin/solr create -c edge_index -d $SOLR_HOME/apache-atlas-conf -shards 2 -replicationFactor 2
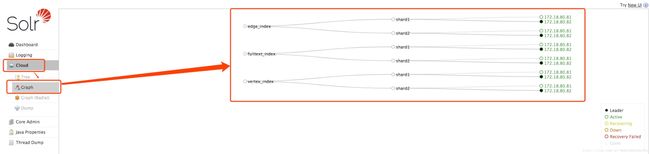
bash $SOLR_HOME/bin/solr create -c fulltext_index -d $SOLR_HOME/apache-atlas-conf -shards 2 -replicationFactor 2验证创建collection成功:
登录solrweb控制台:http://cdh006:9838/solr/#/~cloud 看到如下图显示:
apache atlas 集成独立solr集群
修改atlas-application.properties solr 相关配置
配置文件位于:$ATLAS_HOME/conf/atlas-application.properties
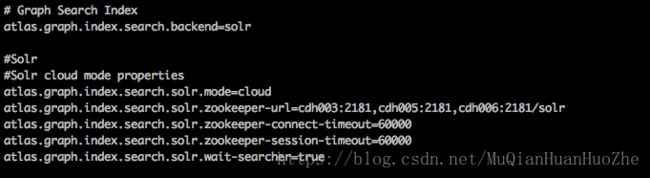
# Graph Search Index
atlas.graph.index.search.backend=solr
#Solr
#Solr cloud mode properties
atlas.graph.index.search.solr.mode=cloud
atlas.graph.index.search.solr.zookeeper-url=cdh003:2181,cdh005:2181,cdh006:2181/solr
atlas.graph.index.search.solr.zookeeper-connect-timeout=60000
atlas.graph.index.search.solr.zookeeper-session-timeout=60000
atlas.graph.index.search.solr.wait-searcher=true
如图
集成已有HBase集群,集成已有kafka集群
修改atlas-application.properties 相关配置
配置文件位于:$ATLAS_HOME/conf/atlas-application.properties
集成已有HBase集群
添加如下配置:
#Hbase
#For standalone mode , specify localhost
#for distributed mode, specify zookeeper quorum here
atlas.graph.storage.hostname=cdh003,cdh005,cdh006
atlas.graph.storage.hbase.regions-per-server=1
atlas.graph.storage.lock.wait-time=10000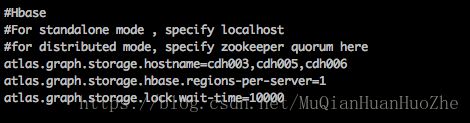
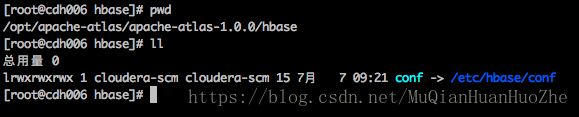
在$ATLAS_HOME/hbase目录下新建软连: ln -s /etc/hbase/conf conf
集成已有kafka集群
添加如下配置:
atlas.kafka.auto.commit.enable=true
atlas.kafka.bootstrap.servers=cdh003:9092,cdh006:9092
atlas.kafka.zookeeper.connect=cdh003:2181/kafka,cdh005:2181/kafka,cdh006:2181/kafka
atlas.kafka.hook.group.id=atlas
atlas.kafka.zookeeper.connection.timeout.ms=30000
atlas.kafka.zookeeper.session.timeout.ms=60000
atlas.kafka.zookeeper.sync.time.ms=20

atlas.notification.create.topics=true
atlas.notification.replicas=2
atlas.notification.topics=ATLAS_HOOK,ATLAS_ENTITIES
atlas.notification.log.failed.messages=true
atlas.notification.consumer.retry.interval=500
atlas.notification.hook.retry.interval=1000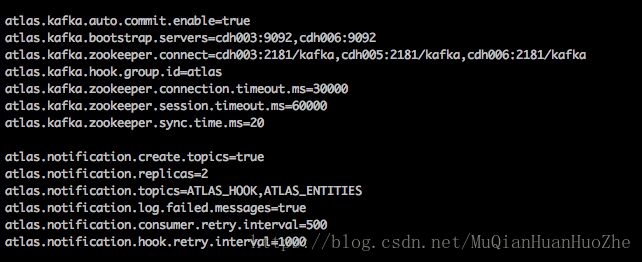
到这里,
- apache atlas 独立部署编译
- solr集群部署,集成到apache atlas
- 集成已有HBase集群,集成已有kafka集群
可启动apache atlas 查看是否配置正确,若启动不成功,可在目录:$ATALS_HOME/logs 查看日志。
apache atlas的HA
修改atlas-application.properties 相关配置
配置文件位于:$ATLAS_HOME/conf/atlas-application.properties
apache atlas的server端分别部署在 :cdh005,cdh006 上
在zookeeper上新建/apache_atlas节点: create /apache_atlas “apache_atlas”
添加如下配置
######### High Availability Configuration ########
atlas.server.ha.enabled=true
#### Enabled the configs below as per need if HA is enabled #####
atlas.server.ids=id1,id2
atlas.server.address.id1=cdh005:21000
atlas.server.address.id2=cdh006:21000
atlas.server.ha.zookeeper.connect=cdh003:2181,cdh005:2181,cdh006:2181
atlas.server.ha.zookeeper.zkroot=/apache_atlas
atlas.server.ha.zookeeper.retry.sleeptime.ms=1000
atlas.server.ha.zookeeper.num.retries=3
atlas.server.ha.zookeeper.session.timeout.ms=20000
atlas.client.ha.retries=4
atlas.client.ha.sleep.interval.ms=5000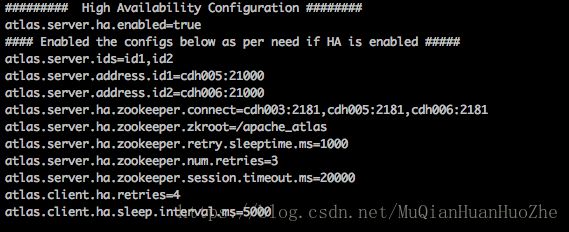
分别启动cdh005和cdh006的 apache atlas ,验证是否配置成功。
hive hook 部署
修改atlas-application.properties 相关配置
配置文件位于:$ATLAS_HOME/conf/atlas-application.properties
添加如下配置:
######### Hive Hook Configs #######
atlas.hook.hive.synchronous=false
atlas.hook.hive.numRetries=3
atlas.hook.hive.queueSize=10000
atlas.cluster.name=primary
将atlas-application.properties配置文件加入到atlas-plugin-classloader-1.0.0.jar中
命令:
zip -u /opt/apache-atlas/apache-atlas-1.0.0/hook/hive/atlas-plugin-classloader-1.0.0.jar /opt/apache-atlas/apache-atlas-1.0.0/conf/atlas-application.properties备注:这个配置不能参照官网,将配置文件考到hive的conf中。参考官网的做法一直读取不到atlas-application.properties配置文件,看了源码发现是在classpath读取的这个配置文件,所以将它压到jar里面
将apache atlas的安装目录拷贝到所有有hiveserver2的服务器中
部署路径为:ATLAS_HOME=/opt/apache-atlas/apache-atlas-1.0.0
在cm中修改hiveserver2的配置


重启服务hiveserver2服务,完工。
hive 元数据导入
只要在初始化的时候导入一次以前即可,后期的变更hive hook 会自动采集。在cdh005中,修改atlas-application.properties 相关配置,配置文件位于:$ATLAS_HOME/conf/atlas-application.properties
######### Server Properties #########
atlas.rest.address=http://cdh005:21000
# If enabled and set to true, this will run setup steps when the server starts
#atlas.server.run.setup.on.start=false
将atlas-application.properties 复制到 /etc/hive/conf 中
cp /opt/apache-atlas/apache-atlas-1.0.0/conf/atlas-application.properties /etc/hive/conf声明HIVE_HOME:
export HIVE_HOME="/opt/cloudera/parcels/CDH/lib/hive"执行导入脚本:
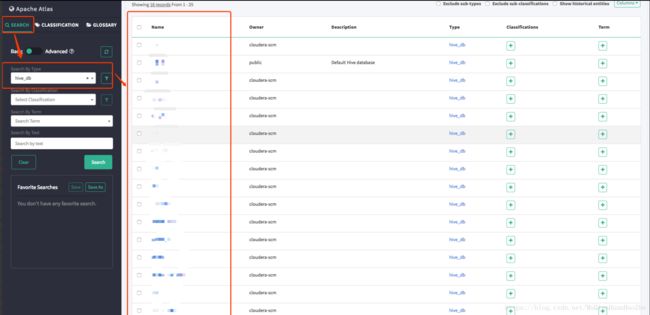
$ATLAS_HOME/bin/import-hive.sh若导入失败可在,可查看日志:
$ATALS_HOME/logs/import-hive.log 至此apache atlas 安装成功。登录http://cdh005:21000/,如下图操作可看到导入同步的hive元数据信息: