Spring3.0学习-注解模式下的Spring3+hibernate3+struts2-事务管理(xml模式和注解模式的事务注入+@Repository@Service@Transactional)
一、前言
最近一段时间学习了《Spring 实战(第3版)》的第5、6章,对Spring直接操作数据库有了一定的认识。由于书中前4章例子相对比较完整,学习起来还算顺利,第5、6章内容不是很多,但是涉及的技术迭代范围较广,例子也不是很完全,知识学习期间走了一些弯路,不过还好,总算是通过各种途径找到了最终想学的东西——注解模式下的Spring+Hibernate的基本使用,在完成Spring和hibernate的结合后,本文将加入struts2,这样一个SSH的小例子就算完成了。
事实上,当我完成文章涉及的例子的时候,最深刻的感悟是,Spring起到了统领的作用,然后是bean,自动扫描或者声明,注入,事务管理,中间插件。
对于初次接触Spring的可以先看一下几篇文章
Spring 3.0 学习-环境搭建和三种形式访问
Spring 3.0 学习-DI 依赖注入_创建Spring 配置-使用一个或多个XML 文件作为配置文件,使用自动注入(byName),在代码中使用注解代替自动注入,使用自动扫描代替xml中bean
Spring3.0 学习-AOP面向切面编程_Spring AOP的XML配置模式
Spring3.0 学习-AOP面向切面编程_Spring AOP的注解模式即Aspectj模式
二、Spring3+Hibernate3注解模式下的结合
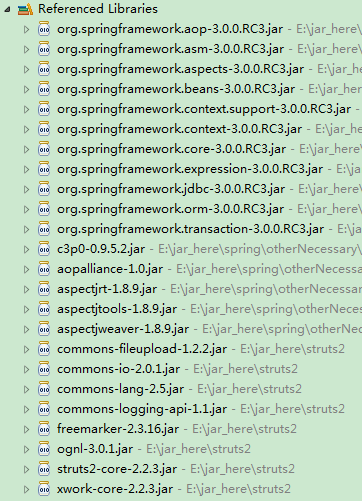
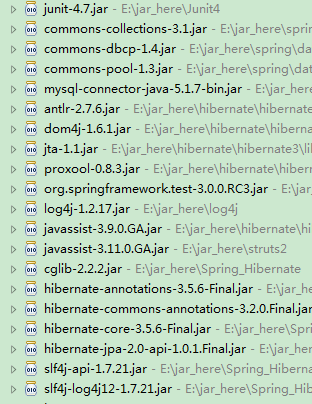
1、相关jar包。
如果jar包缺失或者版本不兼容,开发过程会变得十分纠结,所以务必注意版本问题;
这里我把我自己用到的jar包贴出来,struts2、Spring3是从官网下载的,hibernate3是通过maven一点一点“凑出来的”,还有mysql的驱动jar包,此外,本文使用的jdk1.7版本。
![]()
2、数据源配置
我使用的是mysql数据库,数据库名称为 test,由于使用了hibernate自动建表,而且表只有两个字段,所以这里不再多说表结构。
3、sessionFactory配置
含义可以参考文章 http://www.cnblogs.com/lihaoyang/p/4853712.html
				${hibernate.dialect}
				${hibernate.show_sql}
				${hibernate.format_sql}
				 ${hibernate.hbm2ddl.auto}
4、Spring具有较为完善的异常表达体系
将异常转化为Spring的表达方式,其实就一句配置文件
5、transactionManager配置
事务管理器配置
6、tx配置。通过切面将事务管理器织入到指定“接口的实现”
可以看介绍 http://wcp88888888.iteye.com/blog/1279603
6.1 xml配置
这里注意
6.2注解模式
Spring配置文件部分比较简单
@Transactional(readOnly=false,isolation=Isolation.DEFAULT)7、代码结构
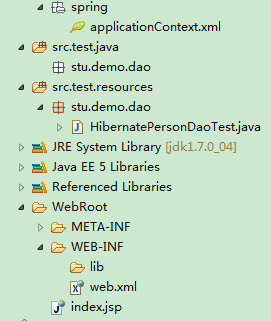
本文代码结构包含,Dao接口类,Dao实现类(需注解@Repository),Service接口类,Service实现类(需注解@Service以及6.2注解模式下的@Transactional,调用Dao接口),Model类,Spring配置文件(自动注入,切面设置,bean声明,异常转化等),常量文件(数据库驱动等)和测试jave类。
Person.java为实体类,本例演示保存实体对象到mysql数据库。

8、代码
Mode类:Person.java
package stu.demo.model;

import javax.persistence.Column;
import javax.persistence.Entity;
import javax.persistence.Id;
import javax.persistence.Table;

@Entity(name="PERSON")
@Table(name="PERSON")
public class Person {
	private String username;
	private String password;

	@Id
	@Column(name="USERNAME",unique=true,nullable=false)
	public String getUsername() {
		return username;
	}
	public void setUsername(String username) {
		this.username = username;
	}

	@Column(name="PASSWORD")
	public String getPassword() {
		return password;
	}
	public void setPassword(String password) {
		this.password = password;
	}


}
Dao接口类:PersonDao.java
package stu.demo.dao;

import stu.demo.model.Person;

public interface PersonDao {
	//使用当前session完成数据库的相关操作
	public void addPerson(Person person);
}
Dao接口类:Person2Dao.java
package stu.demo.dao;

import stu.demo.model.Person;

public interface Person2Dao {
	public void addPerson(Person person);
}
Dao接口实现类:PersonDaoImpl.java
package stu.demo.daoImpl;

import org.hibernate.SessionFactory;
import org.hibernate.classic.Session;
import org.springframework.beans.factory.annotation.Autowired;
import org.springframework.stereotype.Repository;
import stu.demo.dao.PersonDao;
import stu.demo.model.Person;

@Repository
public class PersonDaoImpl implements PersonDao {
	private SessionFactory sessionFactory;

	@Autowired
	public PersonDaoImpl(SessionFactory sessionFactory) {
		// TODO Auto-generated constructor stub
		this.sessionFactory=sessionFactory;
	}

	//获取当前session
	private Session currentSession(){
		return sessionFactory.getCurrentSession();
	}

	//使用当前session完成数据库的相关操作
	public void addPerson(Person person){
		currentSession().save(person);
	}

}
Dao接口实现类:Person2DaoImpl.java
package stu.demo.daoImpl;

import org.hibernate.SessionFactory;
import org.hibernate.classic.Session;
import org.springframework.beans.factory.annotation.Autowired;
import org.springframework.stereotype.Repository;

import stu.demo.dao.Person2Dao;
import stu.demo.model.Person;

@Repository
public class Person2DaoImpl implements Person2Dao {
	private SessionFactory sessionFactory;

	@Autowired
	public Person2DaoImpl(SessionFactory sessionFactory){
		this.sessionFactory=sessionFactory;
	}

	public Session currentSession(){
		return sessionFactory.getCurrentSession();
	}

	/**
	 * 保存新用户
	 */
	public void addPerson(Person person) {
		// TODO Auto-generated method stub
		currentSession().save(person);
	}

}
Service接口类:PersonService.java
package stu.demo.service;

import stu.demo.model.Person;

public interface PersonService {
	public void addPerson(Person person);

}
Service接口类:Person2Service.java
package stu.demo.service;

import stu.demo.model.Person;

public interface Person2Service {
	public void addPerson(Person person);

}
service接口实现类:PersonServiceImpl.java
package stu.demo.serviceImpl;

import org.springframework.beans.factory.annotation.Autowired;
import org.springframework.stereotype.Service;
import stu.demo.dao.PersonDao;
import stu.demo.model.Person;
import stu.demo.service.PersonService;

@Service
public class PersonServiceImpl  implements PersonService {

	@Autowired
	private PersonDao personDao;

	public void addPerson(Person person) {
		// TODO Auto-generated method stub
		personDao.addPerson(person);

	}

}
service接口实现类:Person2ServiceImpl.java
package stu.demo.serviceImpl;

import org.springframework.beans.factory.annotation.Autowired;
import org.springframework.stereotype.Service;
import org.springframework.transaction.annotation.Isolation;
import org.springframework.transaction.annotation.Transactional;

import stu.demo.dao.Person2Dao;
import stu.demo.model.Person;
import stu.demo.service.Person2Service;

@Service
@Transactional(readOnly=false,isolation=Isolation.DEFAULT)
public class Person2ServiceImpl implements Person2Service {
	@Autowired
	private Person2Dao person2dao;

	public void addPerson(Person person) {
		// TODO Auto-generated method stub
		person2dao.addPerson(person);
	}

}
常量配置
jdbc.properties
#jdbc settings
jdbc.driverClassName=com.mysql.jdbc.Driver
jdbc.url=jdbc:mysql://localhost:3306/test
jdbc.username=root
jdbc.password=root
jdbc.initialSize=5
jdbc.maxActive=10

#hibernate settings
hibernate.dialect=org.hibernate.dialect.MySQLDialect
hibernate.show_sql=false
hibernate.format_sql=false
hibernate.hbm2ddl.auto=update
常量配置
application.properties
内容为空
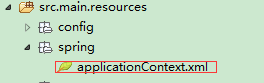
Spring 配置文件
applicationContext.xml
				classpath:config/application.properties

				classpath:config/jdbc.properties


				${hibernate.dialect}
				${hibernate.show_sql}
				${hibernate.format_sql}
				 ${hibernate.hbm2ddl.auto}
测试类:HibernatePersonDaoTest.java
package stu.demo.dao;
import java.text.SimpleDateFormat;
import java.util.Date;
import org.junit.Test;
import org.junit.runner.RunWith;
import org.springframework.beans.factory.annotation.Autowired;
import org.springframework.test.annotation.DirtiesContext;
import org.springframework.test.context.ContextConfiguration;
import org.springframework.test.context.junit4.SpringJUnit4ClassRunner;
import org.springframework.test.context.transaction.TransactionConfiguration;
import stu.demo.model.Person;
import stu.demo.service.Person2Service;
import stu.demo.service.PersonService;
@DirtiesContext
@RunWith(SpringJUnit4ClassRunner.class)
@ContextConfiguration(locations={"classpath:spring/applicationContext.xml"})
@TransactionConfiguration(transactionManager = "defaultTransactionManager",defaultRollback=false)//事务管理
public class HibernatePersonDaoTest {
@Autowired
private PersonService personService;
@Autowired
private Person2Service person2Service;
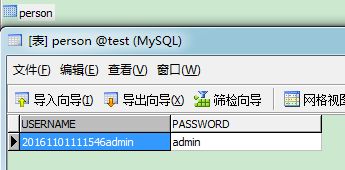
/**
* 测试类运行结果:
看mysql数据库:

三、增加Struts2
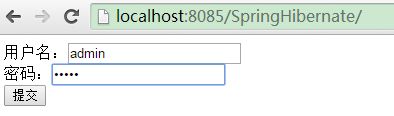
接下来,我们将加入struts2的必要的代码,实现一个SSH为框架的web应用,仅仅保存新用户然后在另一个页面显示用户的名字。
我们需要新加入一个jar包用户在spring中使用struts2
struts2-spring-plugin-2.2.3.1.jar
然后依次是controller类,也就是常说的action类,并且在Spring的配置文件中声明这个类为bean,或者使用“ 接着是struts.xml配置文件,有意思的是,在声明 配置文件中的名字,如果是自动注册的话,就是类名的“非限定类名”,比如类名为PersonAction,其非限定类名就是personAction。 Spring中@Repository用于声明数据访问组件,这里用于声明Dao类的实现,@Service用于声明业务层的组件,@Controller用于声明控制层组件,@Componen是 三者的泛化,可以应用于任何层,在扫描时告诉Spring本标注类时一个bean。 Spring中@Autowired是注入,等同于byType;@Resource也是注入,等同于byName。 web.xml index.jsp PersonAction.java ,此类需(@Controller标注且在Spring配置文件设置自动扫描),或者(直接声明为bean) 这里使用了父子文件结构 struts.xml 注意其中对class的两个注释 applicationContext.xml 这个文件已经写到了web.xml中,在web项目启动的时候,会自动加载 ' 启动服务器: 访问http://localhost:8085/SpringHibernate/ (http://localhost:8085/SpringHibernate/) 点击提交 再看数据库的表,在项目启动时,自动建表,提交后,数据库增加一条数据 完整的ssh代码请查看 https://github.com/Bestcxy/SSH-ajax-axis2-maven-log4j-redis 如果你还没有加入github 请先阅读 http://blog.csdn.net/bestcxx/article/details/63687217 junit 测试方法可以控制回滚需继承 public class TClassServiceTest extends AbstractTransactionalJUnit4SpringContextTests{
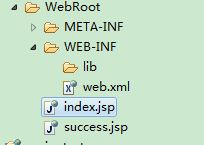
增加的两个jsp页面
<%@ page language="java" import="java.util.*" pageEncoding="UTF-8"%>
<%@ taglib uri="/struts-tags" prefix="s" %>
<%
String path = request.getContextPath();
String basePath = request.getScheme()+"://"+request.getServerName()+":"+request.getServerPort()+path+"/";
%>
success.jsp
<%@ page language="java" import="java.util.*" pageEncoding="UTF-8"%>
<%@ taglib uri="/struts-tags" prefix="s" %>
<%
String path = request.getContextPath();
String basePath = request.getScheme()+"://"+request.getServerName()+":"+request.getServerPort()+path+"/";
%>
用户名:${person.username}
控制类/action类
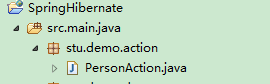
package stu.demo.action;
import java.text.SimpleDateFormat;
import java.util.Date;
import java.util.Map;
import org.springframework.beans.factory.annotation.Autowired;
import org.springframework.beans.factory.annotation.Qualifier;
import org.springframework.stereotype.Controller;
import stu.demo.model.Person;
import stu.demo.service.PersonService;
import com.opensymphony.xwork2.ActionContext;
import com.opensymphony.xwork2.ActionSupport;
import com.opensymphony.xwork2.ModelDriven;
@SuppressWarnings("serial")
@Controller
public class PersonAction extends ActionSupport implements ModelDriven
struts2的配置文件,struts.xml
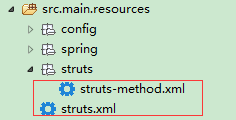
struts-method.xml
最后是Spring配置文件,其实相比上面的配置只是多了一个控制器类的bean声明/自动扫描声明,但是多了一些注释

后期使用maven实现的ssh的例子
2017年06月12日补充