grub2设置
grub2修改启动顺序
方法一:
- 查看所有的entry
gsl@linux-13kr:/boot/grub2> sudo awk -F \' '$1=="menuentry " {print i++ " : " $2}' /boot/grub2/grub.cfg
0 : openSUSE Leap 42.3
1 : Windows 10 (loader) (on /dev/nvme0n1p1)
2 : Ubuntu 16.04.4 LTS (16.04) (on /dev/nvme0n1p2)
和实际情况还是有出入的,可能表达式写的有问题
- 查看当前default的entry
[root@dpdk grub2]# grub2-editenv list
saved_entry=CentOS Linux (3.10.0-693.11.1.el7.x86_64) 7 (Core)- 修改为指定的entry
[root@dpdk grub2]# grub2-set-default 2
[root@dpdk grub2]# grub2-editenv list
saved_entry=2
方法二:
打开/etc/default/grub文件,这里有一些默认的配置:
这个是opensuse的文件。
# If you change this file, run 'grub2-mkconfig -o /boot/grub2/grub.cfg' afterwards to update
# /boot/grub2/grub.cfg.

# Uncomment to set your own custom distributor. If you leave it unset or empty, the default
# policy is to determine the value from /etc/os-release
GRUB_DISTRIBUTOR=
GRUB_DEFAULT=saved
GRUB_HIDDEN_TIMEOUT=0
GRUB_HIDDEN_TIMEOUT_QUIET=true
GRUB_TIMEOUT=8
GRUB_CMDLINE_LINUX_DEFAULT="resume=/dev/disk/by-uuid/7355b565-e5b0-4ac2-b089-dfc23a1f5189 splash=silent quiet showopts resume=/dev/disk/by-uuid/7355b565-e5b0-4ac2-b089-dfc23a1f5189 splash=silent quiet showopts resume=/dev/nvme0n1p5 splash=silent quiet showopts"
GRUB_CMDLINE_LINUX=""

# Uncomment to automatically save last booted menu entry in GRUB2 environment

# variable `saved_entry'
# GRUB_SAVEDEFAULT="true"
#Uncomment to enable BadRAM filtering, modify to suit your needs

# This works with Linux (no patch required) and with any kernel that obtains
# the memory map information from GRUB (GNU Mach, kernel of FreeBSD ...)
# GRUB_BADRAM="0x01234567,0xfefefefe,0x89abcdef,0xefefefef"
#Uncomment to disable graphical terminal (grub-pc only)

GRUB_TERMINAL="gfxterm"
# The resolution used on graphical terminal
#note that you can use only modes which your graphic card supports via VBE

# you can see them in real GRUB with the command `vbeinfo'
GRUB_GFXMODE="auto"
# Uncomment if you don't want GRUB to pass "root=UUID=xxx" parameter to Linux
# GRUB_DISABLE_LINUX_UUID=true
#Uncomment to disable generation of recovery mode menu entries

# GRUB_DISABLE_LINUX_RECOVERY="true"
#Uncomment to get a beep at grub start

# GRUB_INIT_TUNE="480 440 1"
GRUB_BACKGROUND=/boot/grub2/themes/openSUSE/background.png
GRUB_THEME=/boot/grub2/themes/openSUSE/theme.txt
SUSE_BTRFS_SNAPSHOT_BOOTING="true"
GRUB_DISABLE_OS_PROBER="false"
GRUB_ENABLE_CRYPTODISK="n"
GRUB_CMDLINE_XEN_DEFAULT="vga=gfx-1024x768x16 vga=gfx-1024x768x16 vga=gfx-1024x768x16"
第一项GRUB_DEFAULT就是用来修改默认启动项目的。
saved是当前系统,或者从0开始的数字。
0,表示第一项,依次类推。
只要将它的值修改为需要的启动项对应的值即可。
之后运行
update-grub 更新Grub即可生效:
修改启动时的显示分辨率
同样是修改/etc/default/grub文件,里面有一项是GRUB_GFXMODE,模式是注释掉的。
将它打开并修改成合适的分辨率,比如1920x1080即可。
注意两个数字中间的其实是字母的‘x’。
之后还是需要运行update-grub来使设置生效
修改根据UUID来确定root设备的方式
目前Ubuntu的最新版本(比如16.04)默认会通过UUID来确定root对应的设备,比如如下的配置(部分):
### BEGIN /etc/grub.d/10_linux ###
menuentry 'openSUSE Leap 42.3'  --class opensuse --class gnu-linux --class gnu --class os $menuentry_id_option 'gnulinux-simple-181ce7da-36d1-40b8-a548-f35f0547637d' {
    load_video
    set gfxpayload=keep
    insmod gzio
    insmod part_msdos
    insmod btrfs
    set root='hd0,msdos4'
    if [ x$feature_platform_search_hint = xy ]; then
      search --no-floppy --fs-uuid --set=root --hint='hd0,msdos4'  181ce7da-36d1-40b8-a548-f35f0547637d
    else
      search --no-floppy --fs-uuid --set=root 181ce7da-36d1-40b8-a548-f35f0547637d
    fi
    echo    '载入 Linux 4.4.114-42-default ...'
    linux   /boot/vmlinuz-4.4.114-42-default root=UUID=181ce7da-36d1-40b8-a548-f35f0547637d  ${extra_cmdline} resume=/dev/disk/by-uuid/7355b565-e5b0-4ac2-b089-dfc23a1f5189 splash=silent quiet showopts resume=/dev/disk/by-uuid/7355b565-e5b0-4ac2-b089-dfc23a1f5189 splash=silent quiet showopts resume=/dev/nvme0n1p5 splash=silent quiet showopts
    echo    '载入初始化内存盘...'
    initrd  /boot/initrd-4.4.114-42-default
}
submenu 'Advanced options for openSUSE Leap 42.3' --hotkey=1 $menuentry_id_option 'gnulinux-advanced-181ce7da-36d1-40b8-a548-f35f0547637d' {
这会导致一个问题,就是你想通过镜像复制转移系统的时候出现root无法mount的问题,因为UUID对应不同的硬盘/U盘都是唯一。
为了避免这种情况,可以在/etc/default/grub文件中找到如下的配置:
# Uncomment if you don't want GRUB to pass "root=UUID=xxx" parameter to Linux
# GRUB_DISABLE_LINUX_UUID=true
将这个配置打开,然后运行update-grub,这样修改之后,root就会是/dev/sdx这样的形式。
当然这样的坏处是如果有多个硬盘设备,可能这里的root就是指向了错误的设备。
不过这个是其它问题了。
重建grub2启动项
重新安装了 Windows,可是启动时却找不到 Ubuntu 的启动项了
可以使用如下两种方法之一,修复 Ubuntu 的启动:
无法进入系统,grub损坏:
使用 LiveCD/LiveUSB 或者硬盘安装的方法,进入一个 live 环境,挂载上原来的根分区,比如挂载为 /mnt/temp,运行命令: 创建 /mnt/temp:
sudo mkdir /mnt/temp查看分区情况
sudo fdisk -l挂载原来的根目录:(假设/ 在/dev/sda5,具体以查到情况为准)
sudo mount /dev/sda5 /mnt/temp如果是单独分的 /boot (以 sda6 为例),则挂载它,如没有则跳过此步:
sudo mount /dev/sda6 /mnt/temp/boot挂载系统目录:-B 和–bind作用一样,即绑定两个目录一致
for i in /dev /dev/pts /proc /sys; do sudo mount -B $i /mnt/temp$i; donechroot 进入原系统:(chroot是改变根目录)
sudo chroot /mnt/temp重新安装 Grub2 到 MBR 并更新启动项:
如果grub.cfg损坏,首先生成 /boot/grub2/grub.cfg:(如果没问题,这一项可以不做)
grub2-mkconfig -o /boot/grub2/grub.cfg以下需要做
grub-install /dev/sda
update-grub
其实对于主引导记录来说就,它并不是存放于/dev/sda3,也不是/dev/sda1,更加不是/dev/sda4上,而是有一个单独的小空间给他,所以这里只用写/dev/sda就可以了,而不用写/dev/sda3或者/dev/sda1了
update-grub会搜索所有接入的磁盘中的系统,然后放入MBR中
重新安装 GRUB 到 MBR, 并更新 GRUB,
退出环境:
exit还原系统目录:
for i in /dev/pts /dev /proc /sys / ; do sudo umount /mnt/temp$i ; done可以进入windows,无法进入linux:
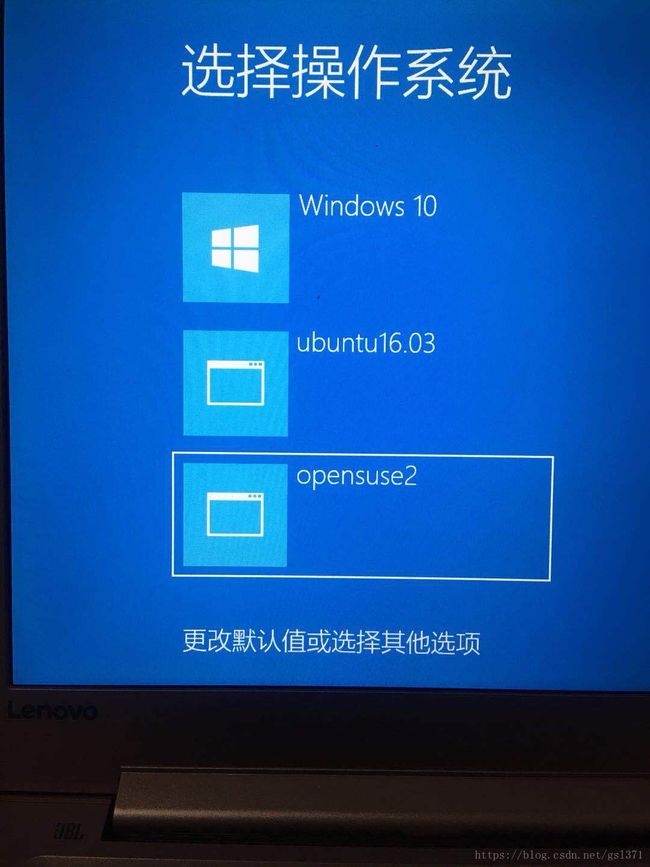
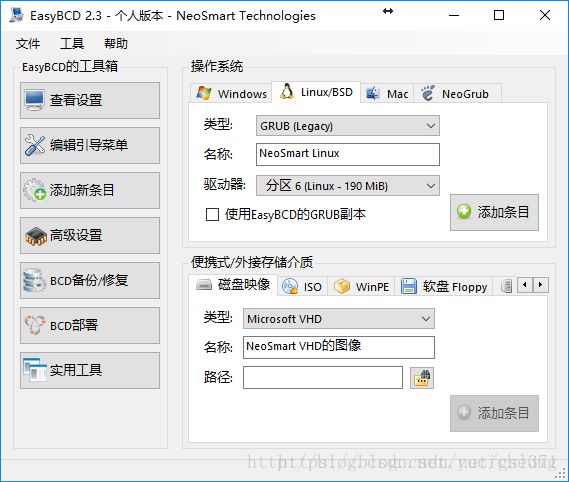
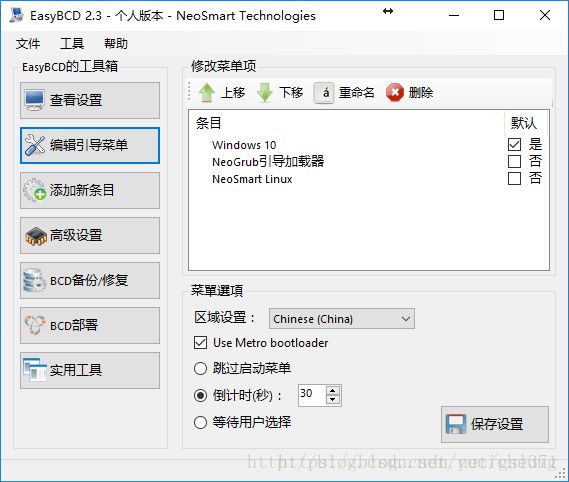
如果还可已进入windows系统,可以下载easybcd这个软件,来添加其他操作系统的启动菜单,这个方法比较傻瓜,操作也简单,效果如下:

添加启动菜单,正确选择系统所在的分区,和原引导类型。

添加后的编辑查看,注意保存后才有效。

如果不想使用多系统启动,用这个软件删除启动项即可。
可以进入linux,无法进入windows:
如果可以进linux系统,进不了Windows系统,则更简单,只需进入linux系统,运行方法一中最后提到的一个命令即可。
update-grub或
update-grub2可以进入linux,但不能搜索到所有的启动项
通过上一个命令更新grub配置后,人然搜索不到其他安装过的系统,可以把找不到的系统的分区挂载起来,然后执行update-grub,即可发现启动项,或者把无法引导的系统的/boot/grub/grub.cfg中的引导该系统的条目拷贝到,当前引导系统分区中的/etc/grub.d/40_custom中。再执行update-grub.