微信小程序------登录
接触微信小程序,一个多月了,总体来说还是比较简单的,能用到的方法和组件,接口等微信都给提供。而且不用处理那个恶心的兼容问题,但小程序还有许多坑,下面就提一下排坑之路。
小程序登录:
我的登录思路,wx.login -> 拿到code -> 用code做参数请求后台,返回openId -> 拿到openId获取用户的用户名和头像在后台做注册,返回一个用户的唯一标识accessToken -> 在其他页面就可以拿accessToken去请求数据渲染页面。
wx.login({
      success: res => {
        //console.log(res.code)
        //发送 res.code 到后台换取 openId, sessionKey, unionId
        if(res.code){
              wx.request({
                url: getApp().globalData.server+"user/getOpenId.htm",
                method: 'POST',
                header : {
                  'content-type': 'application/x-www-form-urlencoded'
                },
                data:{code:res.code},
                success: function(res) {
                  var openid = res.data.data.openId
                  that.globalData.openId = openid
                  wx.setStorage({
                    key: "openId",
                    data: openid
                  })
                }
              })
            }
      }
    })
// 获取用户信息
    wx.getSetting({
      success: res => {
        if (res.authSetting['scope.userInfo']) {
          // 已经授权,可以直接调用 getUserInfo 获取头像昵称,不会弹框
          wx.getUserInfo({
            success: res => {
              // 可以将 res 发送给后台解码出 unionId
              this.globalData.userInfo = res.userInfo
              //console.log(res)
              // 由于 getUserInfo 是网络请求,可能会在 Page.onLoad 之后才返回
              // 所以此处加入 callback 以防止这种情况
              if (this.userInfoReadyCallback) {
                this.userInfoReadyCallback(res)
              }
              wx.getStorage({
                key: 'openId',
                success: function (res) {
                  var openId = res.data
                  wx.getUserInfo({
                    success: function (res) {
                      wx.request({
                        url: getApp().globalData.server+"user/wechatLogin.htm",
                        method: 'POST',
                        header: {
                          'content-type': 'application/x-www-form-urlencoded'
                        },
                        data: { openid: openId, nickName: res.userInfo.nickName, avatarUrl: res.userInfo.avatarUrl },
                        success: function (res) {
                          wx.setStorage({
                            key: "accessToken",
                            data: res.data.data.accessToken
                          })
                        }
                      })
                    },
                    fail: function () {
                      wx.redirectTo({
                        url: '../login/login'
                      })
                    }
                  })
                }
              })
            }
          })
        }
      }
    })
因为用户可能首次进入会有拒绝访问用户信息,这就增加了另一种可能性,而且做开发的时候wx.getUserInfo开发版不会弹窗,测试的时候就非常困难,就在index里面做了守卫,如果到用户注册过的话,就直接到首页,如果用户拒绝了获取用户信息,就直接跳到登录页面,里面有按钮可以直接在次获取弹窗。
wx.getStorage({
      key: 'accessToken',
      success: function (res) {
        that.getUserDataFn();
      },
      fail: function () {
        wx.redirectTo({
          url: '../login/login'
        })
      }
    })
(注意)一些小程序并不是一进入就让授权登录,就像一些商城,可以让你浏览,如果你购买的话,才需要授权用户信息
小程序不会自动弹出授权登录,需要通过按钮才能触发
登录思路 需要用户信息的地方判断是否登录,没有登录的话跳去登录页
var userInfo = wx.getStorageSync('user_info').data;
    if (!userInfo) {
      wx.redirectTo({
        url: "/pages/login/login?id=1"
      });
    }
在需要用户信息的地方判断缓存里面是否有用户信息,没有的话就跳去登录,可以根据传的参数区别是从那个页面跳过去的可以授权之后在次返回这个页面。
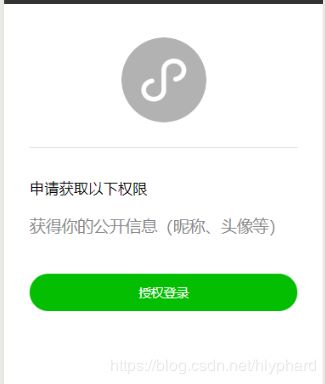
这是一个单独的登录页,图片可以放一个自己小程序的头像,点击授权登录,弹出授权登录弹窗
 getUserInfo: function (t) {//弹出授权信息
    var that = this;
    wx.login({
      success: function (o) {
        var n = o.code;
        wx.request({
          url: 'url',
          method: "POST",
          data: {
            code: n,//code必传
            encryptedData: t.detail.encryptedData,//看后台需求,传什么
            iv: t.detail.iv,//看后台需求,传什么
            headimgurl: t.detail.userInfo.avatarUrl,//看后台需求,传什么
            nickname: t.detail.userInfo.nickName//看后台需求,传什么
          },
          success: function (e) {
            console.log('e', e)
            if (200 == e.statusCode) {
              wx.setStorageSync("access_token", e.data.access_token), wx.setStorageSync("user_info", e.data); //存入缓存

               // 判断从那个页面点进来,授权成功后返回那个页面
              if (that.data.back == 1) {
                wx.switchTab({
                  url: "/pages/home/home"
                });
              }
              else if (that.data.back == 'mine') {
                wx.switchTab({
                  url: "/pages/mine/mine"
                });
              } else if (that.data.back == 2){
                wx.switchTab({
                  url: "/pages/index/index"
                });
              }
            }
          },
          complete: function () {
            wx.hideLoading();
          }
        });
      },
      fail: function (e) {

      }
    });
  }
注意:button有默认的边框去不掉可以用
.login-btn:after {
    border: none;
}
