Android插件化框架--360RePlugin基本使用
文章目录
- 360RePlugin简介
- 一、先看效果图
- 二、代码实现:
- 1.主程序开发:项目的Gradle的dependencies中添加:
- 2.app模块下的build.gradle中的dependencies中添加:
- 3.app模块下的build.gradle中的android{}之后添加:
- 4.自己的Application类中添加:
- 5.插件开发:新建一个项目,5.1步、5.2步和前面的1、2步类似,只是host换成了plugin:
- 5.1.项目的Gradle的dependencies中添加:
- 5.2.app模块下的build.gradle中的dependencies中添加:
- 5.3第3步.app模块下的build.gradle中的android{}之后添加:
- 6.主程序和插件互相调用Activity
- 6.1主程序调用插件中的Activity:
- 6.2插件调用主程序中的Activity:
- 7.将插件程序生成jar并加入主程序:
- 大功告成,源码已上传:
360RePlugin简介
360RePlugin是360公司推出的插件化框架
360RePlugin的Github地址为:https://github.com/Qihoo360/RePlugin
360RePlugin的官方API文档地址为:https://github.com/Qihoo360/RePlugin/wiki
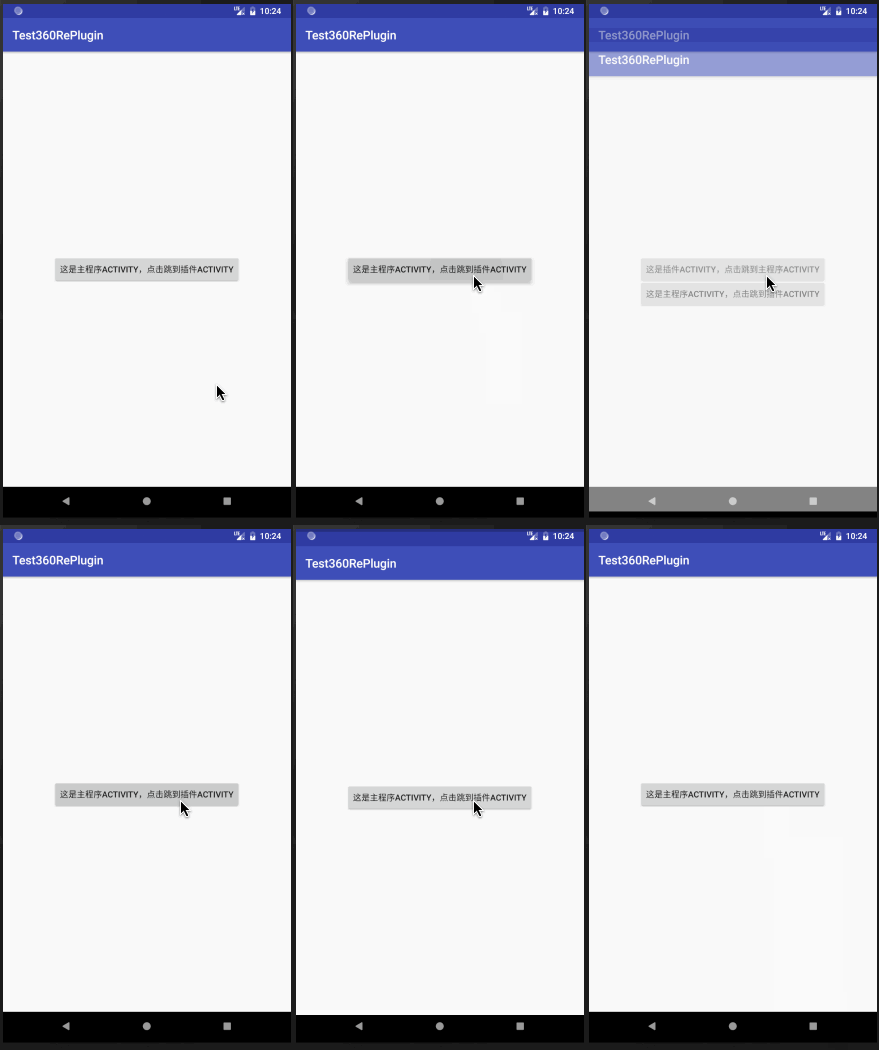
一、先看效果图
二、代码实现:
1.主程序开发:项目的Gradle的dependencies中添加:
classpath 'com.qihoo360.replugin:replugin-host-gradle:2.2.4'
2.app模块下的build.gradle中的dependencies中添加:
implementation 'com.qihoo360.replugin:replugin-host-lib:2.2.4'
3.app模块下的build.gradle中的android{}之后添加:
apply plugin: 'replugin-host-gradle'
repluginHostConfig {
    useAppCompat = true
}
useAppCompat = true表示应用需要支持AppCompat
4.自己的Application类中添加:
@Override
protected void attachBaseContext(Context base) {
    super.attachBaseContext(base);
    RePlugin.App.attachBaseContext(this);
}

@Override
public void onCreate() {
    super.onCreate();
    RePlugin.App.onCreate();
}
如果app模块下的build.gradle中的minSdkVersion <= 14还需要添加以下几行,minSdkVersion > 14的就不用添加了:
@Override
public void onLowMemory() {
    super.onLowMemory();
    RePlugin.App.onLowMemory();
}

@Override
public void onTrimMemory(int level) {
    super.onTrimMemory(level);
    RePlugin.App.onTrimMemory(level);
}

@Override
public void onConfigurationChanged(Configuration config) {
    super.onConfigurationChanged(config);
    RePlugin.App.onConfigurationChanged(config);
}
如果是新建的MyApplication,不要忘了在Manifest中配置Application
<application
    android:name=".MyApplication"
    ...>
5.插件开发:新建一个项目,5.1步、5.2步和前面的1、2步类似,只是host换成了plugin:
5.1.项目的Gradle的dependencies中添加:
classpath 'com.qihoo360.replugin:replugin-plugin-gradle:2.2.4'
5.2.app模块下的build.gradle中的dependencies中添加:
implementation 'com.qihoo360.replugin:replugin-plugin-lib:2.2.4'
5.3第3步.app模块下的build.gradle中的android{}之后添加:
apply plugin: 'replugin-plugin-gradle'
这样就可以像开发普通app一样开发插件了。
6.主程序和插件互相调用Activity
6.1主程序调用插件中的Activity:
Intent intent = RePlugin.createIntent("host", "com.sample.testhost.MainActivity");
RePlugin.startActivity(MainActivity.this,intent);
finish();
RePlugin.createIntent(String pluginName , String cls)中的第一个参数是插件名字,第二个参数是插件的Activity,这个Activity需要带上插件的完整包名
6.2插件调用主程序中的Activity:
Intent intent = new Intent();
intent.setComponent(new ComponentName("com.sample.test360replugin", "com.sample.test360replugin.MainActivity"));
startActivity(intent);
finish();
ComponentName(String pkg , String cls)中的第一个参数是主程序的包名,第二个参数是主程序的Activity,这个Activity需要带上主程序的完整包名
7.将插件程序生成jar并加入主程序:
在Android Studio中点击build -> Build APK(s),将插件程序打包出来
将生成的app-debug.apk重命名为host.jar,这个host就是插件名字,6.1中用的就是这个名字,可以自己命名,只要保证使用的时候与之对应即可。将此jar放在主程序的assets/plugins文件夹中
大功告成,源码已上传:
https://github.com/wkxjc/Study360RePlugin
