Android进阶系列:八、自定义View之音频抖动动效
自定义动画效果——音频抖动效果
绘制一个矩形:
想要绘制一个矩形,继承View,并重写onDraw方法即可。复杂一点还可以重写onMeasure方法和onLayout方法进行大小测量和位置测量。但本文不打算写那么复杂的view,故只需要重写一个onDraw方法即可:
private RectF rectF = new RectF();//绘制矩形
    private float lineWidth = 50;
    private Paint paint = new Paint();

    @Override
    protected void onDraw(Canvas canvas) {
        super.onDraw(canvas);
        //设置颜色
        paint.setColor(context.getColor(R.color.colorPrimary));
        //填充内部
        paint.setStyle(Paint.Style.FILL);
        //设置抗锯齿
        paint.setAntiAlias(true);
        //绘制矩形的四边
        int widthCentre = getWidth() / 2;
        int heightCentre = getHeight() / 2;
        rectF.left = widthCentre - lineWidth / 2;
        rectF.right = widthCentre + lineWidth / 2;
        rectF.top = heightCentre - lineWidth * 2;
        rectF.bottom = heightCentre + lineWidth * 2;
        //绘制圆角矩形,rx:x方向上的圆角半径。ry:y方向上的圆角半径。
        canvas.drawRoundRect(rectF, 6, 6, paint);
    }
1.我们需要初始化一个RectF来绘制矩形,这个类通过一个边的来绘制矩形。并初始化一个画笔,和矩形的宽度。
2.在onDraw方法中,设置画笔paint,包括颜色,填充方式,是否抗拒性。还有更多的设置,读者可以自行查阅API
3.获取该View的实际宽高的一半,然后设置矩形的四边,熟悉Android的view的绘制都知道,view的宽为right - left,高度为bottom - top。所以让right比left多一个lineWidth即可让矩形的宽为lineWidth,bottom比top多4lineWidth即可让高读为4lineWidth,并利用实际宽高的一半,把矩形绘制在view的中央。
4.在画布上使用drawRoundRect方法绘制一个圆角的矩形
5.然后在xml文件中引用这个view就可以使用了:
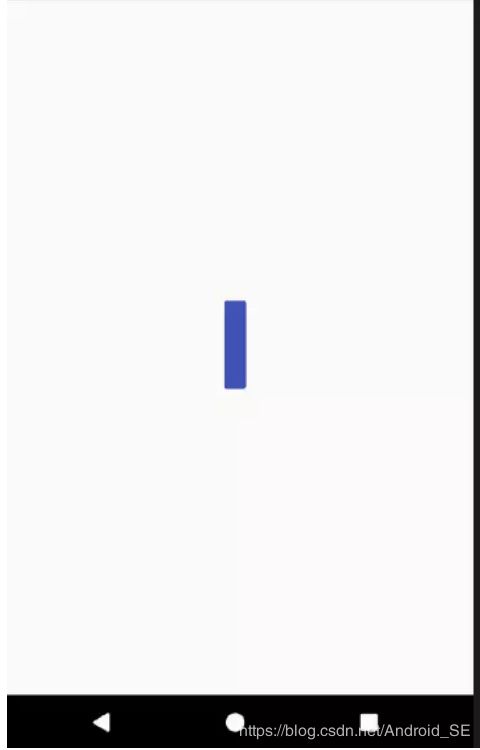
这样就可以在view中绘制一个矩形,如图所示:
绘制多个矩形
现在我们可以绘制多个矩形在画布上。直接采用for循环是不行的,这样会让矩形重叠在一起,导致只显示一个矩形,所以应该控制让矩形错开显示,我们可以让矩形之间间隔一个lineWidth。如图所示:
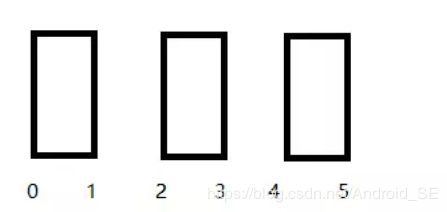
我们以第一个矩形的左边为参照,标为0,则其右边为1,第二个矩形的左边为2,右边为3,以此类推,它们的距离都是lineWidth。所以我们可以得出:
- 第一个矩形的左边是0,第二个矩形的左边是2,第三个左边是4,以此类推是一个2(n-1)的等差数列
- 第一个矩形的右边是1,第二个矩形的右边是3,第三个右边是5,以此类推是一个2n-1的等差数列
所以我们可以这样写:
for (int i = 1; i <= 4; i++) {
            rectF.left = widthCentre - lineWidth / 2 + 2 * (i - 1) * lineWidth;
            rectF.right = widthCentre + lineWidth / 2 + (2 * i - 1) * lineWidth;
            rectF.top = heightCentre - lineWidth * 2;
            rectF.bottom = heightCentre + lineWidth * 2;
            //绘制圆角矩形,rx:x方向上的圆角半径。ry:y方向上的圆角半径。
            canvas.drawRoundRect(rectF, 6, 6, paint);
        }
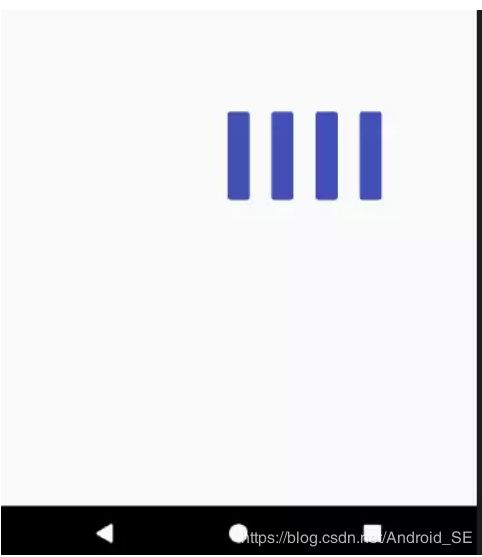
当然注意要在循环里绘制圆角矩形,因为绘制多个矩形,当然要有一个绘制一个,不然放到循坏外只能绘制最后一个。效果如图:
绘制矩形抖动
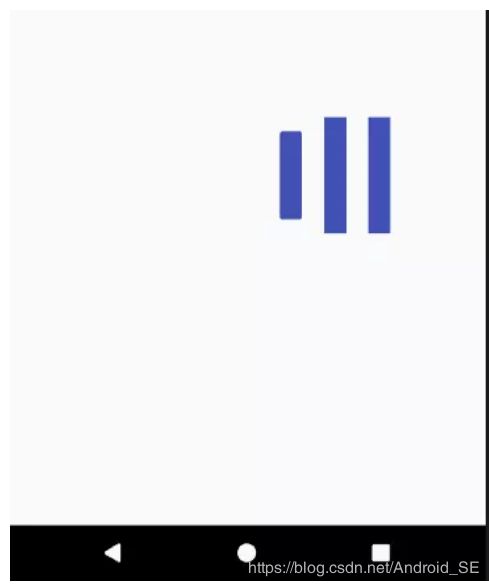
我们要绘制音频抖动的效果,矩形的高度肯定不能一样,而是要根据声音的大小来显示,这里我们没有声音,简单模拟一下给高度乘上for循环里的i效果如图:
至此我们已经知道了如何绘制多个矩形,并控制不同的高度,那我们要如何动态的控制高度呢?比如我们点击开始录音的时候,就会动态的传入声音的大小,这个分贝值控制着矩形的抖动。要实现这个动态的效果,我们需要不断的设置分贝,并不断的刷新。所以我们可以开启一个线程,不断设置音量的分贝,并不断的刷新。为了让矩形抖动有错落感,就需要让每个矩形抖动的值不一样,所以我们设置一个list存储音量值,并依次改变里面的值即可
private static final int MIN_WAVE_HEIGHT = 2;//矩形线最小高
    private static final int MAX_WAVE_HEIGHT = 12;//矩形线最大高
    private static final int[] DEFAULT_WAVE_HEIGHT = {2, 2, 2, 2};
    private static final int UPDATE_INTERVAL_TIME = 100;//100ms更新一次
    private LinkedList mWaveList = new LinkedList<>();
    private float maxDb;

    private void resetView(List list, int[] array) {
        list.clear();
        for (int anArray : array) {
            list.add(anArray);
        }
    }

    private synchronized void refreshElement() {
        Random random = new Random();
        maxDb = random.nextInt(5) + 2;
        int waveH = MIN_WAVE_HEIGHT + Math.round(maxDb * (MAX_WAVE_HEIGHT - MIN_WAVE_HEIGHT));
        mWaveList.add(0, waveH);
        mWaveList.removeLast();
    }

    public boolean isStart = false;

    private class LineJitterTask implements Runnable {
        @Override
        public void run() {
            while (isStart) {
                refreshElement();
                try {
                    Thread.sleep(updateSpeed);
                } catch (Exception e) {
                    e.printStackTrace();
                }
                postInvalidate();
            }
        }
    }

    public synchronized void startRecord() {
        isStart = true;
        executorService.execute(task);
    }

    public synchronized void stopRecord() {
        isStart = false;
        mWaveList.clear();
        resetView(mWaveList, DEFAULT_WAVE_HEIGHT);
        postInvalidate();
    }
1.为了控制矩形抖动的范围,我们需要设置一个最大值和最小值。
2.并利用数组设置矩形的默认值,因为有四个矩形,所以数组大小为4
3.定义一个分贝值,控制矩形的高度
4.重置View的时候把默认的数组传进去,就可以达到View的重置,比如View的初始化,和停止录音的时候
5.刷新元素方法,用于不停的刷新矩阵的高度,让矩阵抖起来。这里用随机数模拟声音大小,传给数组,每次都添加到第一个,然后每次都移除最后一个,这样能让矩阵按顺序抖动。
6.在线程中调用这个刷新矩阵的方法,当开始录音的时候,在while中刷新矩阵,并睡眠100ms,这样就实现了没100ms刷新一次view,开始录音的时候设置isStart为true。
7.在停止录音的时候设置isStart为false,并初始化矩形为原始高度。由于在线程中刷新View,应该使用postInvalidate()方法。
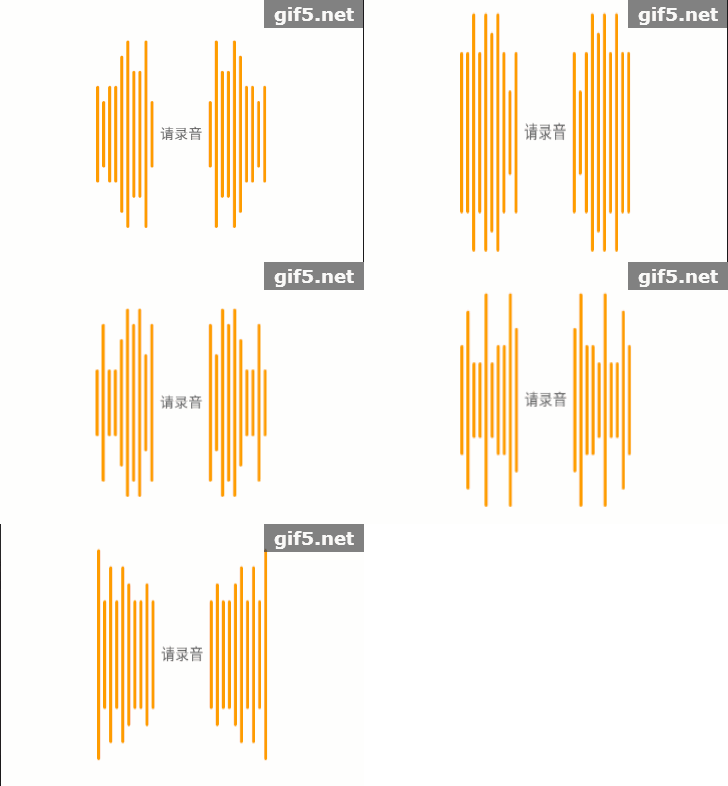
至此这个逻辑已经实现了,稍微润色一下即可实现录音时的音频抖动
效果如图:
完整代码:
/**
 * 语音录制的动画效果
 */
public class LineWaveVoiceView extends View {
    private static final String DEFAULT_TEXT = " 请录音 ";
    private static final int LINE_WIDTH = 9;//默认矩形波纹的宽度,9像素, 原则上从layout的attr获得
    private Paint paint = new Paint();
    private Runnable task;
    private ExecutorService executorService = Executors.newCachedThreadPool();
    private RectF rectRight = new RectF();//右边波纹矩形的数据,10个矩形复用一个rectF
    private RectF rectLeft = new RectF();//左边波纹矩形的数据
    private String text = DEFAULT_TEXT;
    private int updateSpeed;
    private int lineColor;
    private int textColor;
    private float lineWidth;
    private float textSize;


    public LineWaveVoiceView(Context context) {
        super(context);
    }

    public LineWaveVoiceView(Context context, AttributeSet attrs) {
        this(context, attrs, 0);
    }

    public LineWaveVoiceView(Context context, AttributeSet attrs, int defStyleAttr) {
        super(context, attrs, defStyleAttr);
        initView(attrs, context);
        resetView(mWaveList, DEFAULT_WAVE_HEIGHT);
        task = new LineJitterTask();
    }

    private void initView(AttributeSet attrs, Context context) {
        //获取布局属性里的值
        TypedArray mTypedArray = context.obtainStyledAttributes(attrs, R.styleable.LineWaveVoiceView);
        lineColor = mTypedArray.getColor(R.styleable.LineWaveVoiceView_voiceLineColor, context.getColor(R.color.defaultLineColor));
        lineWidth = mTypedArray.getDimension(R.styleable.LineWaveVoiceView_voiceLineWidth, LINE_WIDTH);
        textSize = mTypedArray.getDimension(R.styleable.LineWaveVoiceView_voiceTextSize, 42);
        textColor = mTypedArray.getColor(R.styleable.LineWaveVoiceView_voiceTextColor, context.getColor(R.color.defaultTextColor));
        updateSpeed = mTypedArray.getColor(R.styleable.LineWaveVoiceView_updateSpeed, UPDATE_INTERVAL_TIME);
        mTypedArray.recycle();
    }

    @Override
    protected void onDraw(Canvas canvas) {
        super.onDraw(canvas);
        //获取实际宽高的一半
        int widthCentre = getWidth() / 2;
        int heightCentre = getHeight() / 2;
        paint.setStrokeWidth(0);
        paint.setColor(textColor);
        paint.setTextSize(textSize);
        float textWidth = paint.measureText(text);
        canvas.drawText(text, widthCentre - textWidth / 2, heightCentre - (paint.ascent() + paint.descent()) / 2, paint);

        //设置颜色
        paint.setColor(lineColor);
        //填充内部
        paint.setStyle(Paint.Style.FILL);
        //设置抗锯齿
        paint.setAntiAlias(true);
        for (int i = 0; i < 10; i++) {
            rectRight.left = widthCentre + textWidth / 2 + (1 + 2 * i) * lineWidth;
            rectRight.top = heightCentre - lineWidth * mWaveList.get(i) / 2;
            rectRight.right = widthCentre + textWidth / 2 + (2 + 2 * i) * lineWidth;
            rectRight.bottom = heightCentre + lineWidth * mWaveList.get(i) / 2;

            //左边矩形
            rectLeft.left = widthCentre - textWidth / 2 - (2 + 2 * i) * lineWidth;
            rectLeft.top = heightCentre - mWaveList.get(i) * lineWidth / 2;
            rectLeft.right = widthCentre - textWidth / 2 - (1 + 2 * i) * lineWidth;
            rectLeft.bottom = heightCentre + mWaveList.get(i) * lineWidth / 2;

            canvas.drawRoundRect(rectRight, 6, 6, paint);
            canvas.drawRoundRect(rectLeft, 6, 6, paint);
        }
    }

    private static final int MIN_WAVE_HEIGHT = 2;//矩形线最小高
    private static final int MAX_WAVE_HEIGHT = 12;//矩形线最大高
    private static final int[] DEFAULT_WAVE_HEIGHT = {2,2, 2, 2,2, 2, 2, 2,2,2};
    private static final int UPDATE_INTERVAL_TIME = 100;//100ms更新一次
    private LinkedList mWaveList = new LinkedList<>();
    private float maxDb;

    private void resetView(List list, int[] array) {
        list.clear();
        for (int anArray : array) {
            list.add(anArray);
        }
    }

    private synchronized void refreshElement() {
        Random random = new Random();
        maxDb = random.nextInt(5) + 2;
        int waveH = MIN_WAVE_HEIGHT + Math.round(maxDb * (MAX_WAVE_HEIGHT - MIN_WAVE_HEIGHT));
        mWaveList.add(0, waveH);
        mWaveList.removeLast();
    }

    public boolean isStart = false;

    private class LineJitterTask implements Runnable {
        @Override
        public void run() {
            while (isStart) {
                refreshElement();
                try {
                    Thread.sleep(updateSpeed);
                } catch (Exception e) {
                    e.printStackTrace();
                }
                postInvalidate();
            }
        }
    }

    public synchronized void startRecord() {
        isStart = true;
        executorService.execute(task);
    }

    public synchronized void stopRecord() {
        isStart = false;
        mWaveList.clear();
        resetView(mWaveList, DEFAULT_WAVE_HEIGHT);
        postInvalidate();
    }


    public synchronized void setText(String text) {
        this.text = text;
        postInvalidate();
    }

    public void setUpdateSpeed(int updateSpeed) {
        this.updateSpeed = updateSpeed;
    }